How to Sharpen Miter Saw Blade: 8 Steps That Work [DIY]
Imagine yourself amid a woodworking project, the scent of freshly cut wood filling the air as you meticulously craft each piece. But suddenly, you notice something off. Your miter saw blade seems dull, its once sharp teeth struggling to make clean cuts. Don’t despair; there is a solution that will bring your blade back to life.
Remove the blade from the saw by loosening the arbor bolt with a wrench. Then, use a marker or pencil to mark the teeth of the blade so that you know which ones you have already filed.
Begin filing the first tooth on the blade, using smooth, even strokes with the file. And repeat this process for each tooth, making sure to file at the same angle as the original tooth.
Here, we will assist you with sharpening your miter saw blade, ensuring that it performs at its best. You will recognize the signs of a dull blade, discover techniques to make your blades last longer, and even find out if it’s possible to sharpen a saw blade more than once.
How Do You Sharpen Your Miter Saw Blade?
When sharpening a miter saw blade, the process is relatively simple. Here is the guide that you should follow:
Tools You Will Need
You will need a few tools to sharpen your miter saw blade:
- A workbench with mounted clamps: This provides stability and security while working on the blade.
- A small diamond file: This tool is perfect for honing the teeth of the blade, ensuring a clean and precise cut.
- A crayon: This marks the teeth of the blade, making it easier to track your progress and ensure that each tooth is sharpened evenly.
With these tools, you can confidently sharpen your miter saw blade, prolonging its lifespan and improving cutting performance. Let’s see the steps:
- Step 1: Remove the blade from the saw
- Step 2: Mark the teeth of the blade
- Step 3: File the first tooth on the blade
- Step 4: Repeat for each tooth
- Step 5: Sharpen the other side
- Step 6: Final inspection
- Step 7: Reattach the blade
- Step 8: Test the blade
Now it’s time to sharpen the blade.
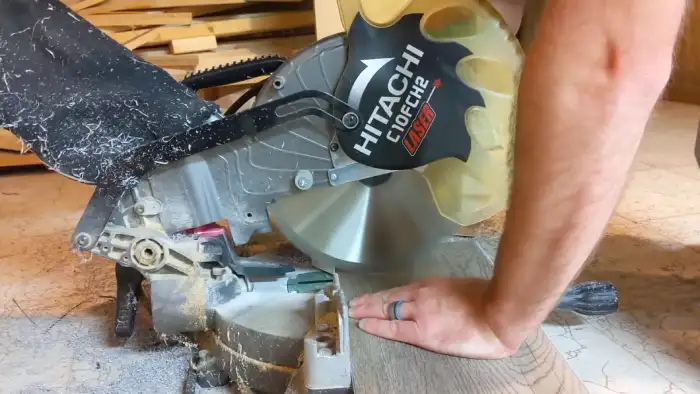
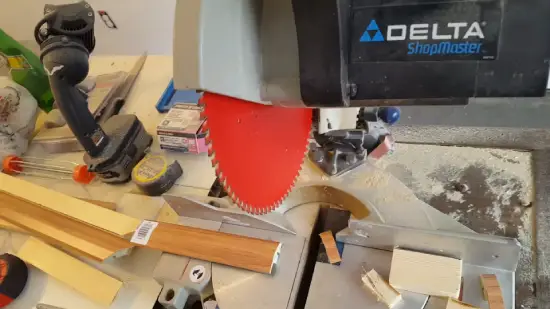
Step 1: Remove the Blade from the Saw
Before you can begin enhancing the cutting power of your miter saw, it’s crucial to carefully detach the blade from its housing. This step is essential for your safety and to ensure that you have proper access to the blade for sharpening.
Start by unplugging the saw and placing it on a stable workbench to remove the blade. Next, locate the blade lock button or lever near the blade housing. Press or engage the lock to prevent the blade from rotating. Using a wrench or socket, loosen the bolt or nut that secures the blade to the arbor.
Once the bolt or nut is loose, carefully lift the blade off the arbor and set it aside on the workbench. Make sure to secure the blade with clamps to prevent any accidental movement or damage. With the blade now removed, you’re ready to sharpen it to restore its cutting effectiveness.
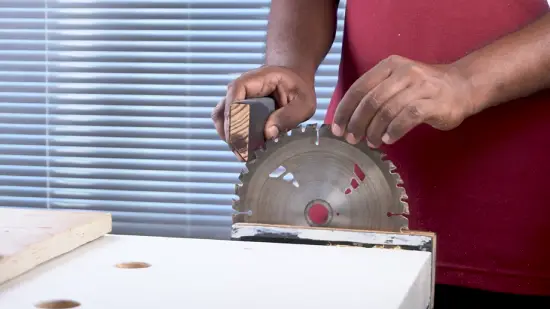
Step 2: Mark the Teeth of the Blade
Once you’ve detached the blade, it’s time to mark one of the teeth using a crayon to keep track of your starting position and avoid sharpening the same tooth twice. This simple step will save you time and ensure you properly sharpen each tooth of the miter saw blade.
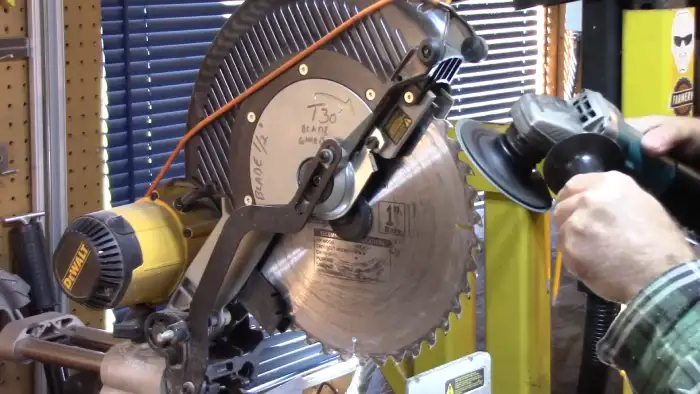
Step 3: File the First Tooth on the Blade
To file the first tooth on the blade and enhance cutting efficiency, follow these steps:
- Delicately maneuver the small diamond file along the edge of the first marked tooth. Ensure the file remains in contact with the flat part of the metal.
- Position the file at the bottom front edge of the tooth and smoothly move it upward and forward.
- Keep the face of the file pressed against the flat part of the metal throughout the motion.
- Repeat this process for the top flat part of the tooth.
- Take caution not to touch the point of the tooth to avoid any injuries.
Step 4: Repeat for Each Tooth
As you continue the process, go through each tooth individually, gently working your way around the blade, refining and perfecting the cutting edge. Remember to avoid touching the points or corners of the blade as you sharpen. Here are the steps to follow:
- File each tooth one by one, following the same process described in Step 3.
- Work your way around the blade until you reach the first marked tooth again.
- Use gentle, steady strokes to remove burrs or imperfections on each tooth.
- Ensure that each tooth is filed evenly and has a sharp cutting edge.
Step 5: Sharpen the Other Side
When you finish one side, don’t forget to reposition the blade on the clamps and tackle the other side to ensure a razor-sharp cutting edge on every tooth. To sharpen the other side of the miter saw blade, follow these steps:
| Step | Description |
| 1 | Turn the blade over so that the dull side is facing up. |
| 2 | Position the blade back onto the clamps, ensuring it is securely placed. |
| 3 | Use the same sharpening technique as before, applying steady pressure and moving the file or sharpening tool in a smooth, consistent motion along each tooth. |
Step 6: Final Inspection
After completing the sharpening process, it is crucial to examine the blade for any remaining imperfections or irregularities thoroughly.
Inspect the blade closely to ensure that all teeth have been sharpened evenly. Look for any missed spots or inconsistencies in the sharpening. Pay attention to the edges of the teeth and the overall smoothness of the blade.
Use proper lighting and magnification if necessary to see any small flaws. Check for any signs of damage or wear that may require further attention. Take your time during this final inspection, as any overlooked imperfections can affect the performance of the miter saw blade.
Step 7: Reattach the Blade
Once you’re satisfied with the blade’s sharpness, it’s time to reattach it to your miter saw. Follow these steps to ensure a proper reattachment:
- Carefully slide the blade onto the arbor, ensuring that the teeth face the right way.
- Tighten the arbor nut securely, but be cautious not to overtighten it.
- Use the manufacturer-provided tools or a wrench to hold the arbor while tightening the nut.
- Double-check that the blade is aligned properly and centered on the arbor.
Step 8: Test the Blade
Now it’s time to see the blade in action and ensure it’s ready to tackle your woodworking projects with precision and ease.
After reattaching the blade, take a piece of scrap material and make a test cut. Watch closely as the blade cuts through the wood, paying attention to the accuracy and smoothness of the cut.
If you notice any wobbling, vibrations, or uneven cuts, it may indicate that the blade needs further adjustment or sharpening.
Additionally, listen for any unusual sounds, such as loud buzzing or grinding noises, which could signal a problem with the blade.
How Do You Know If Your Miter Saw Blade Is Dull?
When your miter saw blade is dull, you will notice five common signs:
- Cuts take more effort
- Cuts are less clean
- Burn marks on wood
- Visible signs of dullness
- Increased tear-out
No 01: Cuts Take More Effort
Despite having a dull blade, cutting through materials with a miter saw suddenly feels like trying to slice through a block of solid steel. The cuts take more effort, and the saw struggles to smoothly glide through the material.
As the blade loses its sharpness, the friction between it and the material increases, resulting in a slower and more labor-intensive cutting process. You may apply additional pressure to the saw, trying to force it through the material. This increased effort can lead to a less accurate and rougher cut.
No 02: Cuts Are Less Clean
A dull blade results in cuts that have rough, splintered, or ragged edges on the material being cut. When your miter saw blade is no longer sharp, you’ll notice a decrease in the cleanliness of your cuts.
Instead of clean and precise edges, you’ll see frayed or uneven surfaces on the material. This can be frustrating, especially if you’re working on a project that requires smooth finishes.
Dull blades tend to tear through the material rather than cut cleanly, causing splinters and rough edges. Not only does this affect the overall appearance of your work, but it can also affect the functionality of the piece you’re building.
No 03: Burn Marks on Wood
One telltale sign of a dull blade that needs sharpening is the appearance of burn marks on the wood surface. These unsightly marks indicate that the blade is not cutting smoothly and is generating excessive heat. This can be attributed to a dull blade, which causes friction during cuts.
No 04: Visible Signs of Dullness
Visual inspection is one of the easiest ways to determine if your miter saw blade is dull. Take a close look at the teeth of the blade and check for any chips or signs of wear. A dull blade may have teeth that are chipped or worn out, which can affect the quality of your cuts.
Additionally, a dull blade may appear significantly worn compared to a new blade. Look for any signs of discoloration or unevenness on the blade’s surface. These visible signs of dullness can indicate that it’s time to sharpen or replace your miter saw blade.
No 05: Increased Tear-out
Tear-out becomes more pronounced and the wood fibers splinter when using a dull blade, resulting in a rough and jagged cut. The increased tear-out is a visible sign of blade dullness and is a common issue faced by those using miter saws.
When the blade is dull, it struggles to cleanly slice through the wood fibers, causing them to tear and splinter. This compromises the cut’s quality and precision and creates a jagged surface that requires additional sanding and finishing.
To remedy all of these five problems, you’ll need to sharpen and maintain the miter saw blade.
How can I make my miter saw blades last longer?

To extend the lifespan of your miter saw blades, you can take a few key steps.
First and foremost, it’s important to keep your blades dry and away from excess humidity. This will prevent rust and corrosion, degrading the blade’s performance and durability.
Another important factor is using the appropriate saw blade for the task. Different blades are designed for different materials and cutting techniques. By using the appropriate blade, you’ll get better results and reduce wear and tear on the blade itself.
When your blades are not in use, hanging them using the center hole is a good idea. This will help prevent any damage if they were left lying around.
Lastly, regular cleaning is essential for maintaining the sharpness of your blades. Using a nylon brush and solvent, you can remove any built-up debris affecting the blade’s cutting ability.
Can you sharpen a saw blade more than once?
Maintaining a quality carbide blade is like nurturing a delicate flower. It can typically withstand multiple sharpenings before requiring replacement.
Fortunately, you can indeed sharpen a saw blade more than once. A quality carbide blade can generally be sharpened three to four times, depending on the level of wear and tear.
However, it is important to note that each sharpening will remove a small amount of the blade material. This will eventually reduce its overall lifespan. Therefore, keeping track of the number of times you sharpen your blade to ensure you do not exceed its recommended limit is crucial.
Is sharpening a saw blade expensive if done professionally?
While the price of sharpening a saw blade can vary, you should consider its overall benefits. The price is determined by factors such as the quality of the saw blade, the material used for the teeth, and the density of teeth per inch (TPI).
On average, sharpening a saw blade can cost between 25 and 50 cents per tooth. Although this may seem expensive, it is a worthwhile investment as a sharp blade ensures precise and efficient cuts.
Additionally, regularly maintaining your saw blade can extend its lifespan and save money in the long run. So, don’t hesitate to sharpen your saw blade and enhance the performance of your miter saw.
Sharpen Your Miter Saw Blade and Slash Through Wood Like Butter
Sharpening your miter saw blade is crucial to ensure precise and efficient cuts. By following the proper techniques and using the right tools, you can extend the lifespan of your blade and save on replacement costs.
Remember, just like a sharp blade is a symbol of precision and accuracy, a dull blade can be a symbol of wasted time and subpar results. So, take the time to sharpen your blade and elevate your woodworking skills to new heights.