How to Cut Vinyl Siding With Miter Saw: 7 Steps From Experts
Cutting vinyl siding accurately and cleanly is essential for achieving a superior result in your home improvement projects. While various tools can cut vinyl siding, a power miter saw is versatile and efficient.
Initially, you must prepare your workspace by ensuring it is clean and free of any debris that could interfere with the cutting process. Next, measure and prepare the vinyl siding by marking and securing the desired cut length.
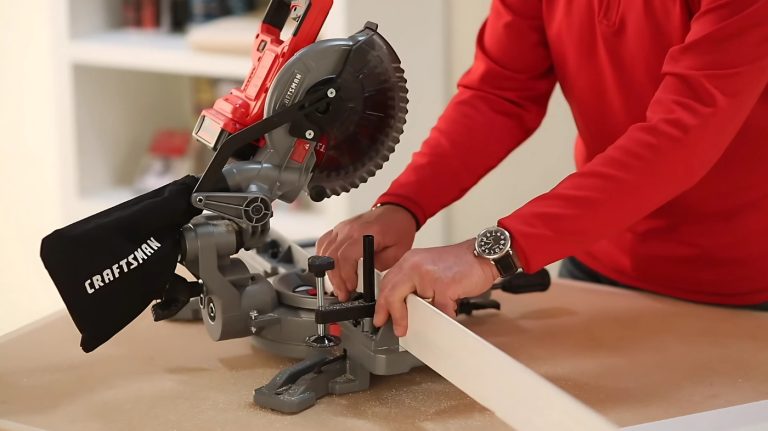
Then, set up your miter saw by adjusting the blade angle and depth to ensure an accurate cut. Once everything is ready, position the siding carefully against the saw fence and make a slow and steady cut to achieve a clean and professional finish.
This article discusses the steps for cutting vinyl siding with a miter saw like a pro. With our expert tips and tricks, you’ll be able to achieve clean, smooth cuts every time.
How Do You Cut Vinyl Siding with a Miter Saw?
When cutting vinyl siding with a miter saw, there are several important steps to follow for a successful and precise cut. Here are the steps you need to take:
- Step 01: Prepare the workspace
- Step 02: Prepare and measure the vinyl siding
- Step 03: Set miter saw
- Step 04: Position the siding
- Step 05: Slow and steady cut
- Step 06: Inspect and adjust
- Step 07: Repeat if necessary
Let’s take a closer look at each of these steps to ensure you have the best results when cutting vinyl siding with a miter saw.
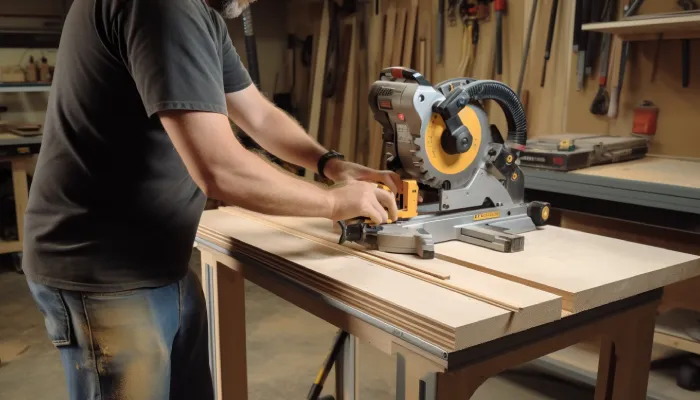
Step 01: Prepare the Workspace
Set up your miter saw on a stable surface, ensuring it’s securely anchored. Wear safety goggles and gloves to protect your eyes and hands from debris and sharp edges. If you’re working in an enclosed space, consider wearing hearing protection to reduce noise exposure.
Step 02: Prepare and Measure the Vinyl Siding
To accurately prepare and measure the vinyl siding, start by using a measuring tape to determine the necessary length. Measure from the top of the wall to the bottom, ensuring that you account for any necessary overlap.
It’s important to be precise in your measurements to avoid any gaps or unevenness in the siding installation. Once you have the length, mark the desired cut location on the siding panel using a pencil or marker. This will serve as your guide when cutting the siding.
Remember to cut the vinyl siding at temperatures of at least 40°F to ensure clean and accurate cuts. Taking the time to properly measure and mark the siding will result in your project’s professional and seamless finish.
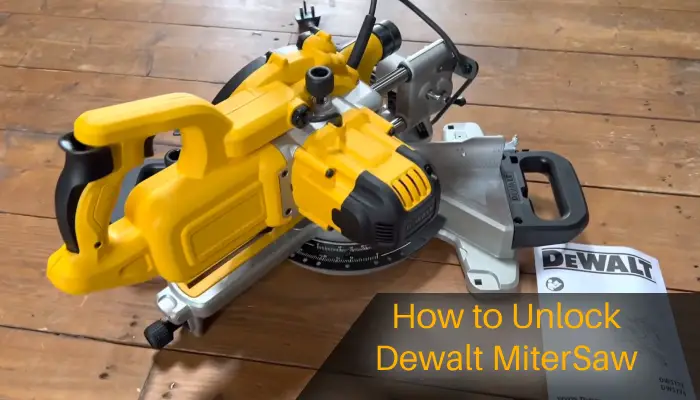
Step 03: Set Miter Saw
When adjusting the miter saw’s angle settings, ensure you’re working in a well-ventilated area with the recommended temperature range. This step is crucial to ensure safety and accuracy in your cuts.
Here are five key tips to help you set up your miter saw effectively:
- Start by checking the angle indicator on the miter saw and adjusting it to zero degrees.
- Use the locking mechanism to secure the saw’s angle setting in place.
- Test the accuracy of the angle by making a test cut on a scrap piece of material.
- If the angle needs adjustment, refer to the miter saw’s manual for specific instructions on how to make precise adjustments.
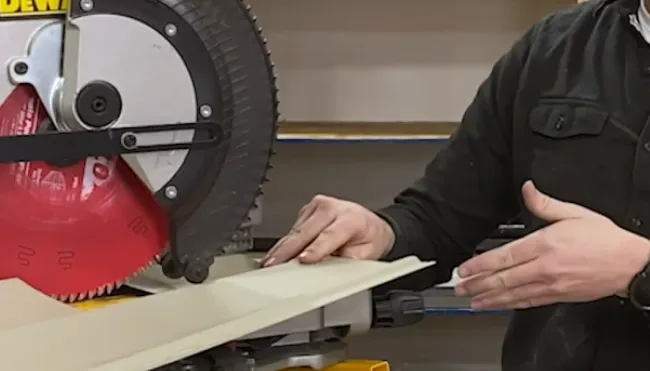
Step 04: Position the Siding
Once you’ve aligned the marked cut line with the saw blade, ensure the vinyl siding panel faces up on the miter saw’s work surface.
This step is crucial to ensure accurate and clean cuts. Positioning the siding face up lets you easily see the marked cut line and align it precisely with the saw blade. This will help you create clean and straight edges on your vinyl siding panels.
Additionally, make sure to double-check the temperature before cutting. Vinyl siding is best cut when the temperature is within the recommended range, which will prevent any cracking or damage to the material.
Step 05: Slow and Steady Cut
Now that you have positioned the vinyl siding, it’s time to make the cut. Remember to take it slowly and steadily to ensure a precise cut. Cutting too quickly can cause the vinyl material to overheat or chip, compromising the overall appearance of the siding.
Here are some tips to help you achieve a successful cut:
- Lower the miter saw’s blade onto the vinyl siding with gentle and even pressure.
- Maintain a steady pace, allowing the blade to smoothly glide through the material.
- Be cautious and work deliberately to ensure your safety.
- Verify that the temperature remains at or above 40°F, ideally closer to 50°F, to prevent any issues with the vinyl’s flexibility.
- Take breaks if needed, especially for longer cuts, to prevent fatigue and maintain accuracy.
Step 06: Inspect and Adjust
After making the cut, carefully examine the edge for any imperfections or irregularities and sand if necessary to achieve a smooth finish. This step is critical for ensuring the quality of your vinyl siding cuts.
Use your fingers to feel for any rough spots or unevenness along the edge. If you notice any imperfections, take fine-grit sandpaper and gently sand the cut edge until it becomes smooth. Be sure to maintain a steady hand and apply even pressure while sanding to avoid creating additional irregularities.
Once you have achieved a smooth finish, visually inspect the edge again to ensure it meets your desired standard. Taking the time to inspect and adjust the cut edge will result in a professional-looking final product.
Step 07: Repeat if Necessary
If there are more cuts that need to be made with the same angle or length, continue the process and make sure each cut aligns accurately with the marked lines. This step is crucial to ensure that your vinyl siding has clean and precise cuts.
Here are some important tips to keep in mind as you repeat the cutting process:
- Use a sharp blade: A dull blade can result in jagged cuts and may damage the vinyl siding.
- Secure the material: Make sure the vinyl siding is securely clamped or held in place to prevent it from moving during the cutting process.
- Double-check measurements: Measure twice to ensure accuracy before making any additional cuts.
- Maintain a steady pace: Take your time and maintain a consistent speed while cutting to avoid any mistakes or accidents.
- Monitor the temperature: Continuously monitor the temperature of the blade to ensure it stays within the recommended range for cutting vinyl siding.
Why Should You Cut Vinyl Siding with a Power Miter Saw
When cutting vinyl siding, using a power miter saw offers several advantages. Most ones are given below:
- Precision and accuracy
- Clean edges
- Efficiency
- Angle flexibility
- Ease of use
- Time saving
- Consistency
- Reduced material waste
- Flexibility for various cuts
- Professional finish
Here is the explanation of all these above advantages.
No 01: Precision and Accuracy
To achieve precise and accurate cuts when using a miter saw for vinyl siding, securely clamp the material before operating the saw. This step is crucial in preventing the material from shifting or moving during cutting, ensuring that your cuts are clean and straight.
No 02: Clean Edges
As mentioned earlier, miter saws equipped with fine-toothed blades are ideal for this task. The sharp teeth on these blades ensure a clean and smooth cut, minimizing the risk of splintering or tearing the vinyl siding. This results in a professional-looking finish that will enhance the overall appearance of your project.
Clean edges also make it easier to install the siding, as they fit together seamlessly without any gaps or unevenness.
No 03: Efficiency
Using a miter saw with a fine-toothed blade ensures a swift and efficient cutting process for vinyl siding. Miter saws allow for efficient and swift cutting. Their design and blade characteristics reduce the likelihood of chipping, melting, or distorting the vinyl material, which can occur with other cutting methods.
No 04: Angle Flexibility
The flexibility of a miter saw allows for precise cuts at various angles, making it ideal for projects that require intricate or custom angles. When cutting vinyl siding, having the ability to adjust the miter saw to the exact angle needed is essential for achieving accurate and professional-looking cuts.
Vinyl siding often requires cuts at angles other than the standard 90 degrees, such as when fitting pieces around corners or gables. Miter saws allow you to easily set the desired angle and make clean, precise cuts every time.
No 05: Ease of Use
You’ll find it extremely simple to operate and navigate a miter saw, making it a breeze to achieve precise cuts. Here are five reasons why miter saws are incredibly user-friendly:
- Intuitive controls: Miter saws have straightforward controls that allow you to adjust the angle and easily make precise cuts.
- Clear cutting guides: Most miter saws come with clear cutting guides that help you align your material accurately for a perfect cut every time.
- Safety features: Miter saws are equipped with safety features like blade guards and safety switches, ensuring your protection while operating the tool.
- Quick setup: Setting up a miter saw is quick and hassle-free, allowing you to start cutting in no time.
- Versatility: Miter saws can handle a wide range of materials, including wood, plastic, and metal, making them suitable for various projects.
No 06: Time Saving
With its accurate and efficient cutting capabilities, a miter saw can save you valuable time during larger projects involving multiple pieces of vinyl siding.
- The precise cuts made by a miter saw ensure that each piece of siding fits perfectly, eliminating the need for time-consuming adjustments or re-cuts.
- The saw’s ability to make angled cuts also allows for seamless transitions between siding pieces, further saving time.
- Its powerful motor and sharp blade effortlessly slice through the vinyl material, reducing cutting time significantly.
No 07: Consistency
When using a miter saw, ensuring all your vinyl siding pieces are the same length and angle for a cohesive final appearance is important. Consistency is key when it comes to cutting vinyl siding with a miter saw. Here are five reasons why:
- Precise Measurements: With a miter saw, you can easily set the exact length and angle for each piece of vinyl siding, ensuring uniformity throughout your project.
- Professional Look: Consistent lengths and angles create a polished and professional appearance for your vinyl siding installation.
- Ease of Installation: When all the pieces are the same length and angle, they fit together seamlessly, making installation a breeze.
No 08: Reduced Material Waste
Minimizing material waste is crucial for saving money and resources during your vinyl siding project. One effective way to achieve this is by using a miter saw to make accurate cuts.
By utilizing this tool, you can optimize the use of your vinyl siding panels and reduce unnecessary waste. A miter saw allows you to make precise angled cuts, ensuring that each piece of siding fits perfectly together.
This saves you money by minimizing the amount of material needed and reduces the environmental impact by conserving resources. With a miter saw you can confidently cut your vinyl siding with ease and efficiency, knowing that you are minimizing waste and maximizing the value of your project.
No 09: Flexibility for Various Cuts
To achieve the flexibility you need for a wide range of cuts, try utilizing a miter saw that can handle both straight and angled cuts, making it suitable for any vinyl siding design or installation project. With a miter saw you can easily adjust the angle and achieve precise cuts, ensuring a seamless fit for your vinyl siding.
No 10: Professional Finish
If you want to achieve a professional finish for your project, utilizing a miter saw can greatly enhance the value and appearance of the property.
With a miter saw you can easily make clean, precise cuts that result in seamless joints and edges. The saw’s angled blade and adjustable fence allow you to create the perfect angles for corners, gables, and other architectural features.
This level of detail and craftsmanship will improve your project’s overall look and increase its value and curb appeal.
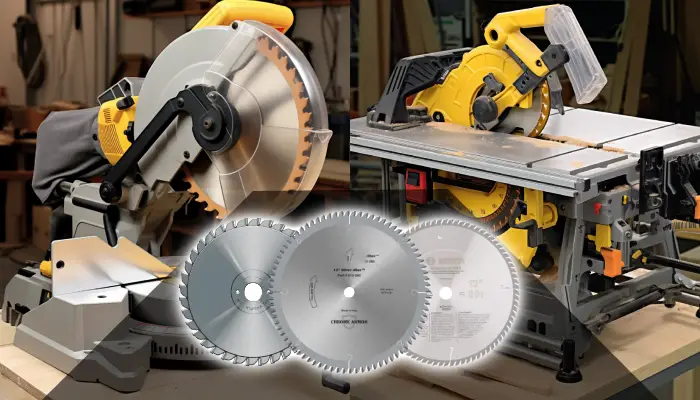
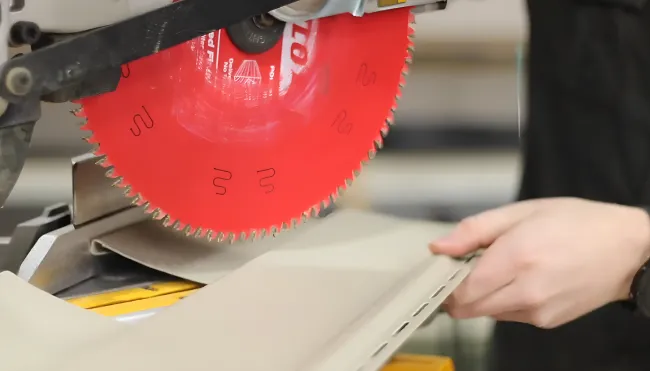
Do you need a different blade to cut vinyl with a miter saw

You’ll need a different blade to cut vinyl siding with a miter saw. Vinyl is a unique material that requires a blade specifically designed to handle its properties. Here are five reasons why a different blade is necessary:
- Precision: A vinyl-specific blade ensures clean, accurate cuts that won’t damage the siding.
- Reduced Friction: The blade’s design minimizes friction, preventing the vinyl from melting or warping.
- Smooth Edges: With a specialized blade, you’ll achieve smooth edges that enhance the overall appearance of the siding.
- Longer Lifespan: Using the correct blade will prolong the life of your miter saw by preventing excessive wear and tear.
- Safety: A vinyl-specific blade reduces the risk of accidents, providing a safer cutting experience.
Is a miter saw suitable for all vinyl siding cuts?
While miter saws are excellent for precise cuts and angles, they may be optional for simple, straight cuts.
Utility knives or tin snips can get the job done just fine for shorter vertical cuts or basic horizontal cuts. These tools are often more convenient and easier to use for smaller, straightforward cuts.
However, a miter saw can be a valuable tool if you’re working on more complex cuts or angles. It allows for accurate and clean cuts, ensuring your vinyl siding project has a professional finish.
Revolutionize Your Vinyl Siding Project with the Power of a Miter Saw
Cutting vinyl siding with a miter saw is a convenient and efficient method. Using a power miter saw can achieve precise and clean cuts, saving you time and effort.
Using the appropriate blade designed for cutting vinyl is crucial to ensure a smooth and professional finish. You also need to know the type of cut you need to make, as well as how the saw should be set up. With that in mind, a miter saw is an excellent tool for any vinyl siding project.
Remember, while a miter saw is suitable for many vinyl siding cuts, it is essential to consider the complexity and angles of the cuts needed for your specific project.