Can a 10 Inch Miter Saw Cut a 4×4: 8 Considering Factors
When you have a 10-inch miter saw and need to cut through a robust 4×4 lumber, the question of whether your miter saw is up to the task naturally arises. You can cut through a 4×4 using the 10-inch miter saw. But, it does come with its own set of limitations and challenges that you need to be aware of.
It requires proper preparation and technique, blade guard adjustment, and using a sliding dual bevel miter saw to achieve a clean cut in one pass. Also, you have to take into account other things.
We will discuss all the factors you should consider when cutting a 4×4 with a 10-inch miter saw. Also, we’ll demonstrate to you how to cut a 4×4 with a 10-inch miter saw.
So, prepare to embrace the power of a 10-inch miter saw as it fearlessly faces the challenge of cutting a 4×4.
What to Consider When You Want to Cut a 4×4 With 10 Inch Miter Saw?

Consider several points when cutting 4x4s with a 10-inch miter saw. The following is a quick overview:
- Power and Speed
- Blade Guard Adjustment
- Cutting Angle Adjustments
- Blade Sharpness and Quality
- Material Stability and Support
- Proper Calibration
- Motor Overload Risks
- Potential Kickback Risks
Let’s know the aspects in detail.
1. Power and Speed
To tackle cutting larger and denser materials like 4x4s, you’ll want to make sure your 10-inch miter saw has sufficient power and speed to handle the job without straining the motor.
The smaller motor and lower speed of a 10-inch saw may make it struggle with cutting through these materials, potentially leading to overheating and premature wear. You should avoid overworking the motor, as this can result in decreased performance and even damage to the saw.
When choosing a 10-inch miter saw, look for one with a high-powered motor and a higher speed rating. This will ensure that it has the strength and velocity to effortlessly cut through 4x4s and other similar materials, providing efficient and accurate results.
2. Blade Guard Adjustment
Ensure you’ve got your blade guard set right so you don’t get any finger injuries. Adjusting the blade guard is an essential step in ensuring your safety while operating a miter saw.
The purpose of the blade guard is to cover the cutting blade, providing a protective barrier for your hands and fingers. By properly adjusting the blade guard, you can minimize the risk of accidents and injuries.
Start by ensuring that the guard fully covers the blade when it’s in its resting position. It should move smoothly and effortlessly as you raise and lower the blade. Additionally, check that the guard locks securely in place once it’s fully retracted.
3. Cutting Angle Adjustments
Adjusting the cutting angle of your miter saw is essential to achieving optimal results. By setting the angle to 45 degrees, you can ensure a clean and accurate cut every time.
By having a clear understanding of the cutting angles and their corresponding cuts, you can confidently adjust your miter saw to achieve the desired outcome. So, grab your saw, make the necessary adjustments, and get ready to achieve those clean and precise cuts you’ve always wanted.
4. Blade Sharpness and Quality
A dull blade can lead to rough and uneven cuts, affecting the quality of your work. When cutting 4x4s, it’s crucial to use a sharp, high-quality blade designed specifically for this task. A dull or low-quality blade may result in ragged edges, splintering, and inaccurate cuts, which can affect the overall appearance of your project.
By investing in a sharp, high-quality blade designed for cutting 4x4s, you can ensure smooth and accurate cuts every time. This will save you time and effort and enhance the quality and precision of your work.
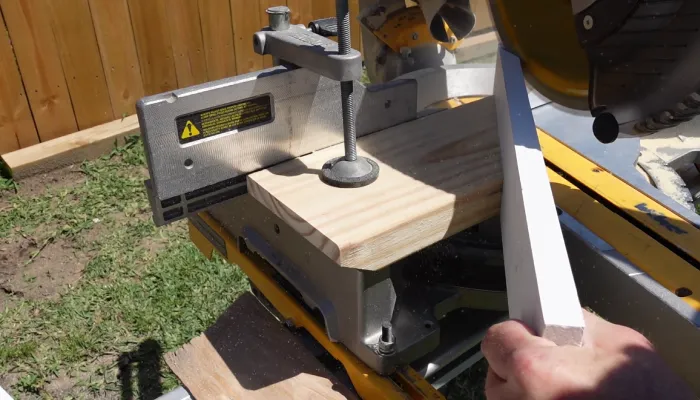
5. Material Stability and Support
Ensuring stable and well-supported 4×4 lumber is crucial to prevent the risk of binding or kickback when cutting. To achieve this, follow these important steps:
- Secure with clamps: Attach clamps to hold the 4×4 lumber in place firmly. This will prevent any movement or shifting during the cutting process.
- Use a sawhorse: Place the 4×4 lumber on a sturdy sawhorse for additional stability. This will provide a solid base and support, minimizing the chances of the saw binding or kicking back.
- Inspect for stability: Before making any cuts, visually inspect the 4×4 lumber for any defects or weaknesses. Look for knots, cracks, or warping that could compromise stability. If any issues are found, consider using a different piece of lumber.
6. Proper Calibration
To properly calibrate your saw, ensure the cutting angle is accurately measured. Start by checking the alignment of the blade with the miter gauge and bevel scale.
Use a reliable angle measuring tool to verify the accuracy of these measurements. Adjust any discrepancies by loosening the necessary components and making precise adjustments. Once you’ve made the necessary corrections, securely tighten all the components.
Additionally, it’s important to check and recalibrate your saw to maintain its accuracy regularly.
7. Motor Overload Risks

When attempting to force the blade through dense materials like 4x4s, the motor can easily become overwhelmed, causing it to overheat and potentially burn out. To help you fully comprehend the risks involved, here are five key points to consider:
- Overloading the motor can lead to frequent repairs or even the need for a complete motor replacement.
- The blade can get stuck, resulting in a loss of control and potential injury.
- Excessive strain on the motor can cause it to overheat, reducing its overall lifespan.
- Cutting through thick and dense materials requires extra caution to prevent motor overload.
- Using the saw within its limits is crucial to avoid any unnecessary damage or hazards.
Remember, by understanding these risks and using the saw properly, you can ensure a longer lifespan for your 10-inch miter saw and minimize the need for repairs or replacements.
8. Potential Kickback Risks
Be aware of the potential danger of kickback when cutting through dense materials like 4x4s with your miter saw, as it can cause the blade to recoil toward you and result in serious injury.
Kickback occurs when the cut material binds or twists, suddenly causing the saw blade to jerk back towards the operator. This can happen when cutting 4x4s due to their size and density.
To prevent kickbacks, it’s important to follow proper safety precautions. Ensure the material is securely clamped and supported, allowing for a stable and controlled cut. Always maintain a firm grip on the saw and keep your body positioned to the side of the blade, away from the potential path of kickback.
Additionally, using a blade with a high tooth count and a lower feed rate can help reduce the risk of kickback.
How to Cut a 4×4 With a 10-Inch Miter Saw?
When cutting a 4×4 with a 10-inch miter saw, there are several key steps you need to follow.
Step 1: Setup the Miter Saw
When cutting a 4×4 with a 10-inch miter saw, the first step is finding a sturdy work surface or table on which to position your saw. This surface should be stable and not prone to movement during the cutting process.
Once you have found a suitable work surface, securely attach the miter saw to it according to the manufacturer’s instructions.
Also, ensure that the power cord of the saw is plugged into a grounded electrical outlet. Check that the power switch is in the “Off” position before turning on the saw.
Before proceeding with cutting, familiarize yourself with the safety features of the saw, such as blade guards and safety locks, and ensure that they are in proper working condition. This will help prevent any accidents or injuries while cutting.
Step 2: Measure and Mark the Cut-Line
Accurate measurement and marking of the cut line on all four sides of the 4×4 is necessary to obtain precision while cutting.
To do this, use a measuring tape and a pencil to mark the desired cut line. Double-check your measurements’ accuracy and ensure they are aligned on all sides of the 4×4. This step is crucial to achieving a straight and accurate cut.
Step 3: Adjust the Saw
After measuring and marking the cut line, configure the miter saw for a 90-degree straight cut. Most miter saws have detents or stops at common angles, so set it to the 90-degree position. This will enable you to achieve a clean, straight cut on your 4×4 with your miter saw.
Step 4: Position the Wood
Once you have adjusted the miter saw, the next step is to position the 4×4 on the miter saw’s table.
Start by placing the 4×4 securely against the fence, ensuring it’s flush and snugly pressed against it. This will help prevent any movement during the cutting process.
Next, position the wood at the appropriate angle for the desired cut. Utilize the saw’s miter gauge to adjust the angle, ensuring it’s set precisely for the desired outcome.
You can make your cut once the wood is securely positioned and the desired angle is set.
Always wear appropriate safety gear and maintain a firm grip on the wood throughout the cutting process to ensure optimal results.
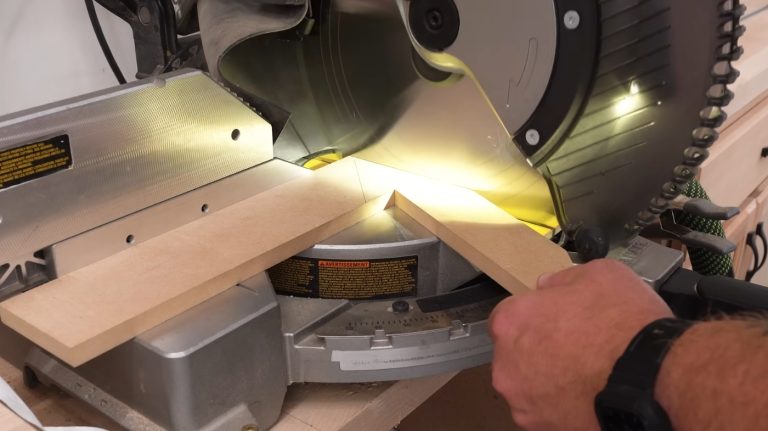
Step 5: Make the Cut
With everything in place, it’s time to cut your 4×4. Begin by lowering the blade of your miter saw slowly and steadily, allowing it to cut through the wood.
Applying firm but controlled pressure will ensure a clean and accurate cut. Avoid forcing the saw through the wood as this could cause unevenness in the cut.
Once the blade has gone through the 4×4, raise it back up to its initial position, making sure the blade comes to a complete stop before you remove the cut piece or adjust the wood.
Can a 10-inch sliding miter saw cut 2×12?

A 10-inch sliding miter saw can effortlessly handle slicing through a hefty 2×12. With its larger blades, this saw provides the necessary power and capacity to tackle such a formidable task. The 10-inch blade allows crosscutting stock up to a 2×12, making it an ideal tool for professional contractors and DIY enthusiasts.
The vertical capacity of a 10-inch sliding miter saw is also sufficient to cut common trim sizes, whether standing up or nested.
This versatility enables you to achieve precise and accurate cuts, ensuring that your projects are completed to perfection. Additionally, the saw’s sliding feature allows you to glide the blade through the material effortlessly, minimizing the effort required and enhancing efficiency.
When faced with the challenge of slicing through a 2×12, a 10-inch sliding miter saw rises to the occasion, providing you with the necessary power and precision.
Its ability to handle such a substantial piece of lumber showcases its durability and reliability. Whether you’re working on a construction project or a woodworking endeavor, this saw is a dependable tool that’ll help you achieve exceptional results.
How many teeth are best for a miter saw blade?
Generally, a good trim blade for a miter saw should have 80 or more teeth. Blades with a high number of teeth work best when cutting across the grain, providing clean and sharp miter cuts.
These teeth create smaller and more numerous cuts, ensuring a smooth and precise finish. Additionally, a higher number of teeth results in reduced chip-out, preventing splinters and cracks in the material being cut.
However, blades with more teeth can also cause more friction, leading to slower cuts and potentially overworking the saw. The ideal number of teeth for a miter saw blade may depend on the type of material being cut and the specific application.
Cut a 4×4 With a 10 Inch Miter With the Right Technique
While there are limitations and challenges involved, it is indeed possible to achieve clean and accurate cuts with the right preparation and technique.
By considering various factors such as power and speed, blade guard adjustment, cutting angle adjustments, blade sharpness and quality, material stability and support, proper calibration, motor overload risks, and potential kickback risks, you can ensure a successful cutting experience.
Proper adjustment of the blade guard is crucial for safety, ensuring it covers the blade and moves smoothly during operation. Adjusting the cutting angle to 45 degrees and using a high-quality blade specifically designed for cutting 4x4s will result in clean and precise cuts.