How to Remove Vinyl Flooring: Step-by-Step DIY Guide
Start by clearing your workspace and gathering protective gear along with essential tools like a utility knife, pry bar, and heat gun.
Focus on edges or lifted corners to begin prying, scoring the vinyl into manageable strips for easier removal.
Use heat to soften adhesive before scraping, and consider solvents for stubborn glue.
Advanced tools can speed up the process and help protect your subfloor.
Follow these steps closely to guarantee a clean, damage-free surface; further guidance will enhance your technique and efficiency.
Key Takeaways
- Clear the workspace, wear protective gloves, and gather essential tools like a utility knife, scraper, heat gun, and pry bar before starting.
- Start removal at edges or lifted corners, working inward to avoid damaging the subfloor or adhesive bond.
- Score vinyl into manageable strips using a sharp utility knife and straight guides for easier lifting.
- Use heat guns to soften adhesive and pry bars or floor scrapers to lift vinyl gently without gouging the subfloor.
- Clean residual adhesive with solvents, scrapers, or power tools, then sand and patch the subfloor for new flooring installation.
Clear Your Space and Collect Essential Vinyl Removal Tools?

Before you begin removing vinyl flooring, clear out all furniture and remove any baseboards to create an unobstructed workspace. This step guarantees safety and allows full access to the floor surface.
Clear furniture and remove baseboards first to ensure a safe, unobstructed workspace for vinyl flooring removal.
Next, gather essential tools: a utility knife for scoring vinyl and adhesive, a floor scraper for lifting tiles and removing glue, and a heat gun to soften stubborn adhesive.
Include a pry bar or putty knife to pry up edges without damaging the subfloor, plus a chisel and hammer to tackle particularly tenacious spots. Don’t forget protective gloves to guard your hands throughout the process.
Organizing these tools and clearing the area beforehand streamlines the removal, reduces damage risk, and prepares you for efficient, systematic vinyl flooring extraction.
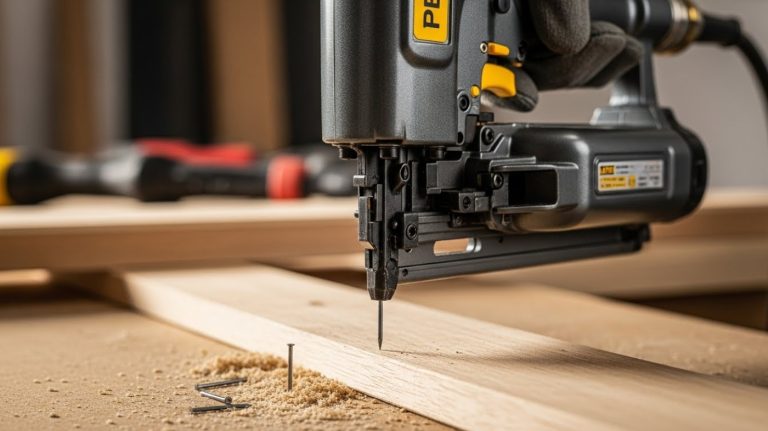
For best results, maintain steady pressure and use proper cutting or scraping techniques to minimize damage, similar to chip-free cutting methods used in other surface removals.
Choose the Best Starting Point to Remove Vinyl Flooring
When choosing the best starting point to remove vinyl flooring, focus on edges or seams where the material naturally loosens.
Begin by inspecting perimeter areas and transition points, as these spots often allow easier access to pry tools beneath the vinyl.
Avoid starting in the middle of the floor, where adhesive bond is strongest.
Look for any lifted corners or damaged sections to exploit as initial leverage points.
Test these areas by gently inserting a putty knife or pry bar to confirm they’ll give way without excessive force.
Selecting a starting point with minimal adhesive resistance reduces labor and prevents damage to the subfloor.
Prioritize access to these natural break points to streamline removal and prepare the floor efficiently for subsequent cutting and lifting steps.
Using the correct cutting technique during removal helps prevent damage to both the vinyl and the subfloor.
Score and Cut Vinyl Flooring Into Strips
You’ll kick things off by scoring the vinyl flooring into 12-inch strips. Grab a sharp utility knife for this—it’s key to make sure you cut deep enough to get through the vinyl but not so deep that you damage the subfloor underneath.
Now, here’s a little tip: start cutting those narrow strips from the perimeter and work your way inward. This approach makes it much easier to manage the sections you’re removing.
Plus, using precise scoring and cutting techniques gives you better control over the whole process, helping to avoid any unnecessary damage along the way.
For cleaner and more precise cuts, consider using a miter saw equipped with a blade with high TPI designed for vinyl flooring.
Scoring Techniques
Start by scoring the vinyl flooring into manageable 12-inch strips using a sharp utility knife. This precise scoring helps you create sections that are easier to handle during removal.
Follow these steps for effective scoring:
- Position the blade firmly and apply consistent pressure to cut through the vinyl surface without damaging the subfloor beneath.
- Score along straight lines, using a chalk line or ruler to maintain accuracy.
- Make several passes with the knife if needed, deepening the cut gradually rather than forcing a single pass.
- Work systematically from one corner, progressing across the room to ensure all vinyl is segmented into uniform strips.
This technique minimizes damage and prepares the flooring for efficient lifting and removal. For best results, ensure your blade is sharp and use steady pressure to avoid surface damage during scoring.
Cutting Methods
After scoring the vinyl into manageable strips, proceed to cut along these lines to separate the flooring into sections. Use a sharp utility knife to cut through the vinyl, applying steady pressure without damaging the subfloor.
Cutting into 12-inch strips helps create manageable sections for removal. For sheet vinyl, consider an oscillating multi-tool to ease the process. Work from the perimeter inward, cutting narrow strips progressively.
It is important to wear proper safety gear during cutting to protect yourself from dust and debris.
| Tool | Purpose | Tip |
|---|---|---|
| Utility Knife | Cuts vinyl, adhesive | Replace blade often |
| Oscillating Tool | Cuts sheet vinyl | Use vibration blade |
| Pry Bar | Pries up edges | Start at seams or corners |
| Heat Gun | Softens adhesive | Use before scraping residue |
Pry Up Vinyl Edges and Lift Sheets Carefully
Sure! Here’s a more conversational version of the text:
—
To start, grab a pry bar or a putty knife. You’ll want to carefully lift the vinyl edges, making sure not to damage the subfloor underneath.
Just apply steady, gentle pressure as you work your way in from the edges.
If you hit a snag and the vinyl doesn’t want to budge, don’t force it! Instead, try softening the adhesive with a little heat before you continue.
That should help things along. Be sure to inspect the subfloor for level, cleanliness, dryness, and stability before installing new flooring.
Tools For Edge Lifting
When you pry up vinyl edges, selecting the right tools guarantees you lift sheets without damaging the subfloor or the material beneath. Using precise instruments lets you work efficiently while preserving the integrity of underlying surfaces.
Here are four essential tools for edge lifting:
- Pry Bar or Putty Knife: Insert under vinyl edges to apply controlled leverage, gently separating the sheet from the adhesive.
- Utility Knife: Score and cut vinyl close to edges to create manageable lifting sections and reduce stress on the material.
- Floor Scraper: After initial prying, use to lift stubborn tiles or sheets and remove residual adhesive.
- Heat Gun: Soften adhesive near edges, easing the prying process and minimizing vinyl damage.
Employ these tools carefully to prepare vinyl sheets for removal without compromising the subfloor. Using a stable work surface is essential to ensure safety and efficiency during the removal process.
Techniques For Gentle Removal
Mastering the techniques for gentle removal guarantees you pry up vinyl edges and lift sheets without damaging the subfloor or tearing the material.
Begin by inserting a putty knife or pry bar carefully under the vinyl edges. Apply steady, gentle pressure to lift the sheets evenly, working slowly from the edges inward.
Avoid forcing the vinyl, which can cause tears or subfloor damage. For stubborn areas, use a heat gun to soften the adhesive, allowing the vinyl to lift smoothly.
Cut the vinyl into manageable strips with a utility knife before lifting to reduce resistance. Always pull the sheets gently in the direction of least adhesive resistance.
This precise approach secures intact vinyl removal and preserves the integrity of the subfloor for subsequent work.
Using the correct tools and techniques ensures minimal damage and a more efficient removal process.
Use Heat and Scraping to Remove Sticky Vinyl Glue
Apply a heat gun carefully to soften the sticky vinyl adhesive, making it easier to scrape off. Hold the heat gun about 6 inches from the surface, moving it steadily to avoid damaging the subfloor.
Once the adhesive softens, use a floor scraper to lift the residue. Follow these steps:
- Heat a small section of adhesive evenly until it becomes tacky.
- Insert the floor scraper at a shallow angle to avoid gouging.
- Scrape the softened glue with firm, controlled strokes.
- Repeat heating and scraping in manageable sections until clean.
This process reduces manual effort and prevents damage. Always wear protective gloves and work in a well-ventilated area to avoid heat and dust hazards.
Avoid overheating, which can release harmful fumes or warp the subfloor. Additionally, ensure the workspace is well-ventilated and use protective gear to safeguard your health during removal.
Apply Solvents and Tools to Remove Stubborn Adhesive
Although heat and scraping remove most vinyl adhesive, some stubborn spots require solvents and specialized tools for complete removal.
Start by testing a small area with a commercially available adhesive stripper to make certain it won’t damage your subfloor.
Begin by applying adhesive stripper to a small section to ensure it won’t harm your subfloor.
Apply the solvent evenly and allow it to penetrate the glue for the recommended time.
Use a floor scraper or putty knife to carefully lift softened adhesive without gouging the surface below.
For particularly tenacious spots, employ a chisel and hammer to chip away residue, taking care to maintain control and avoid damaging the subfloor.
Always wear protective gloves and ensure proper ventilation when using chemical solvents.
This method efficiently dissolves resistant glue, preparing the floor for the next phase of vinyl removal.
For enhanced safety and efficiency when handling tools during the removal process, it is important to adhere to safety equipment and best practices.
Use Advanced Tools for Faster Vinyl Removal
To speed up vinyl flooring removal, you can bring in advanced tools designed for efficiency and thoroughness. These tools minimize manual labor and accelerate the process while protecting the subfloor. Before starting, test your tools on a small area to avoid damage.
Consider these options:
- Rent a power scraper to lift vinyl and adhesive quickly with minimal effort.
- Use an oscillating multi-tool equipped with a vibration blade for precise cutting and edge removal.
- Employ a WOLFF Lupo machine, specialized in removing residue thoroughly and evenly.
- Test power tools first to guarantee compatibility with your floor type and adhesive.
Using these advanced tools helps you complete the project faster and with better results than basic hand tools alone.
Clean and Smooth the Subfloor After Vinyl Removal
Thoroughly clean the subfloor once the vinyl and adhesive are removed to guarantee a smooth, debris-free surface for your next flooring installation.
Begin by sweeping or vacuuming all dust, dirt, and loose particles. Inspect the surface for any remaining adhesive residue; apply a solvent or adhesive stripper to stubborn spots, then scrape with a floor scraper.
Start by removing dust and debris, then tackle adhesive residue with solvent and scraping for a clean surface.
For uneven areas, use a drum sander or hand sander to level the subfloor. Address gouges or holes by filling them with a suitable floor patch compound, allowing it to dry completely.
Finally, wipe the entire surface with a damp cloth to remove any sanding dust. Ensuring a clean, smooth subfloor prevents installation issues and extends the lifespan of your new flooring.
Frequently Asked Questions
Can Vinyl Flooring Be Removed Without Damaging the Subfloor?
Yes, you can remove vinyl flooring without damaging the subfloor by working carefully.
Start by cutting the vinyl into manageable strips and gently prying them up with a putty knife or pry bar.
Use a heat gun to soften adhesive and avoid excessive force.
Scrape off glue residue using a floor scraper and solvents if needed.
Taking your time and using proper tools helps protect the subfloor while efficiently removing the vinyl.
How Do I Dispose of Vinyl Flooring Responsibly?
You absolutely must avoid tossing vinyl flooring into regular trash. It’s an environmental disaster waiting to happen.
Instead, cut it into manageable pieces and contact your local recycling center to see if they accept vinyl. If not, find a hazardous waste facility or building material recycling program.
Wrap scraps securely to prevent contamination. Never burn vinyl, as toxic fumes will result. Responsible disposal protects both your community and the planet.
Is It Safe to Remove Vinyl Flooring Myself?
Yes, it’s generally safe to remove vinyl flooring yourself if you take proper precautions.
You should wear protective gloves and a mask, especially if the vinyl might contain asbestos or lead-based adhesives.
Use appropriate tools like a utility knife, scraper, and heat gun carefully to avoid damaging the subfloor or injuring yourself.
If you suspect hazardous materials, consider professional removal to guarantee safety and compliance with regulations.
Can I Reuse Vinyl Flooring After Removal?
You can reuse vinyl flooring after removal, but its condition depends on how carefully you lift it.
Use a utility knife to cut manageable sections and pry edges gently with a putty knife or pry bar to avoid tearing.
Avoid damaging the vinyl or subfloor. Keep adhesive residue minimal by softening glue with a heat gun.
If the vinyl remains intact and clean, you can reinstall it, but damaged pieces may require replacement.
How Long Does Vinyl Flooring Removal Typically Take?
Removing vinyl flooring is like peeling layers from an onion. Each strip demands careful attention.
Typically, you’ll spend several hours to a full day on a 200-square-foot room. The process varies with adhesive stubbornness and tools used.
Using heat guns and scrapers speeds things up, while manual prying slows it down. Preparation and adhesive removal can add significant time, so plan accordingly for a precise, thorough job.
Removing Vinyl Flooring Is Easier with the Right Tools and Preparation
Removing vinyl flooring may seem intimidating, but remember, “measure twice, cut once.” By clearing your space and using the right tools, you’ll avoid unnecessary damage.
Patiently score and lift the vinyl to make the process smoother. Applying heat, solvents, and advanced tools efficiently tackles stubborn adhesive.
Finally, thoroughly clean and smooth the subfloor to guarantee a flawless finish. Following these precise steps will save time and effort, ensuring your flooring removal is both effective and professional.