How to Make Cabinet Doors From Plywood: Step-by-Step
To make cabinet doors from plywood, start by measuring your cabinet openings carefully. Use the smallest width and height with clearance.
Choose smooth A-grade plywood at 3/4 inch thickness for durability. Plan your cuts on a 48×96-inch sheet to reduce waste.
Use a fine-toothed blade to cut clean edges. Then, assemble frames with precise grooves and snug joinery.
Finish by applying edge banding, sanding smoothly, and installing hinges and hardware for a perfect fit and function. You’ll find step-by-step details to guide you through each phase.
Key Takeaways
- Measure cabinet openings accurately and subtract 1/8 inch from width for clearance before cutting plywood for door panels.
- Select A-grade plywood with 3/4-inch thickness for visible door faces to ensure smooth, durable surfaces.
- Use a fine-toothed saw blade with 60–80 teeth to cut plywood cleanly and minimize veneer tear-out.
- Cut grooves about 3/8 inch deep and 1/4 inch wide on stiles and rails for panel insertion and secure joinery.
- Apply matching thickness edge banding with heat-activated glue, then sand edges smoothly for a professional finish.
Measure and Plan Cabinet Door Dimensions

Begin by accurately measuring the cabinet opening width and height.
Then subtract 1/8 inch from the width to guarantee proper clearance for the door.
Use a reliable tape measure and record dimensions to the nearest 1/16 inch.
Measure at the top, middle, and bottom of the opening to identify any inconsistencies.
Use the smallest width and height for your door size to ensure it fits smoothly.
Plan your door layout with these measurements in mind, keeping in mind the plywood sheet size of 48 by 96 inches.
Account for any edge banding thickness if you plan to apply it later.
This ensures your final door dimensions accommodate it precisely.
This detailed planning prevents material waste and guarantees a snug, functional fit.
It is also important to select plywood with consistent thickness and high dimensional stability to ensure the doors maintain their shape over time.
Choose the Right Plywood Grade and Thickness
When selecting plywood for your cabinet doors, focus on the grade and thickness for durability and appearance. Choose an A-grade plywood if the door faces will remain visible, as it offers a smooth, knot-free surface ideal for finishing.
For less visible areas, B-grade plywood can suffice, but avoid C or D grades since their rough texture and defects undermine aesthetics. Opt for 3/4-inch thickness to ensure structural integrity and reduce warping.
Thinner sheets like 1/2-inch may work for smaller doors but can flex over time. Match edge banding thickness to your plywood layers, typically 1/4 or 1/2 inch, to maintain seamless edges.
Selecting the right plywood grade and thickness upfront saves you time and effort, delivering professional-quality cabinet doors that last. To further enhance your project, consider applying oil-based finishes that penetrate deeply and protect the wood while highlighting its natural grain.
Prepare Your Plywood Sheet and Layout Cuts
First off, you’ll want to choose a plywood grade that fits your door’s finish needs. Usually, grades A or B work best if you’re looking for smooth surfaces.
Once you’ve got your plywood, it’s time to lay out your cuts. Take a good look at that 48×96 inch sheet and plan your cuts carefully. You want to make the most of your material and keep waste to a minimum.
As you start cutting, try to tackle the longest pieces first. This helps ensure you keep those edges straight and your dimensions accurate. Happy cutting!
Be sure to measure your opening precisely and use the smallest width and height dimensions to guide your cuts for a perfect fit with shed openings.
Choosing Plywood Grade
Although selecting the right plywood grade may seem straightforward, it directly influences your cabinet doors’ appearance and durability. For visible cabinet doors, choose A-grade plywood for its smooth, knot-free surface, ideal for staining or painting.
B-grade plywood works if minor imperfections are acceptable and the door will be painted. Avoid C and D grades on visible surfaces due to roughness and voids. Standard sheets measure 48 by 96 inches, so plan cuts accordingly.
Thickness also matters: 3/4 inch provides structural integrity and stability, while 1/2 inch suits lightweight doors. Edge banding should match plywood thickness, commonly 1/4 or 1/2 inch, to align with panel layers neatly.
Selecting a blade with 60 to 80 teeth helps minimize tear-out during cross-grain cuts, preserving edge quality. Using a bandsaw with adjustable blade guides can further enhance cutting precision and edge smoothness.
Efficient Cut Layout
Lay out your cabinet door pieces carefully on the 48 by 96-inch plywood sheet to maximize material use and minimize waste.
Begin by squaring edges at 1/4 to 1/2 inch from the board perimeter to guarantee accurate cuts. Prioritize cross-cutting the longest sections first to maintain straight reference edges.
Arrange pieces to fit efficiently, accounting for blade kerf and edge banding overlap. Use a clear layout diagram to avoid errors.
Position door components to reduce scrap and optimize grain direction. Account for 1/8 inch clearance from cabinet openings in door dimensions.
Leave consistent spacing between cuts for clean blade entry and exit. Plan rip cuts after cross cuts for measured widths matching final door size.
Mark cut lines precisely to prevent material loss and guarantee square corners.
Ensure your workspace is clear of obstructions and obstacles to prioritize safety during cutting.
Pick Saw Blades That Prevent Tear-Out
If you’re looking to reduce tear-out when cutting plywood, especially across the grain, aim for a saw blade with 60 to 80 teeth. This tooth count really helps in achieving smooth edges and minimizing splintering on surfaces that will be visible.
And hey, don’t forget to take your time! Cutting slowly and steadily will help you maintain those clean lines, especially when you’re working on your cabinet doors. Trust me, it makes a huge difference!
Using a blade with an ultra-thin kerf can also reduce waste and improve cutting efficiency.
Teeth Count Importance
Choosing the right saw blade teeth count plays a critical role in preventing tear-out when cutting plywood for cabinet doors. A blade with too few teeth can cause rough edges and splintering. A higher tooth count guarantees cleaner cuts and smoother surfaces. For plywood, aim for blades with 60 to 80 teeth to achieve optimal outcomes.
Keep these points in mind:
Higher tooth count reduces chip-out on plywood’s veneer layers. Finer teeth create less vibration, improving cut accuracy. Blades designed for cross-cutting generally have more teeth. Avoid blades with fewer than 60 teeth for plywood panel cuts. Maintain blade sharpness to complement teeth count effectiveness.
Choosing the correct blade teeth count means less sanding and a professional finish on your cabinet doors. Blades with more teeth also produce a narrower kerf, resulting in less material waste and cleaner cuts.
Cross-Grain Cutting Tips
A saw blade with the right tooth count sets the foundation for clean cuts. When cutting across the grain of plywood, additional care is needed to prevent tear-out.
Choose blades with 60 to 80 teeth, designed for fine cross-cutting. Use a zero-clearance insert on your saw to support the plywood surface and reduce splintering. Scoring the cut line with a utility knife before cutting also helps.
| Blade Type | Tooth Count | Best Use |
|---|---|---|
| Crosscut | 60-80 | Smooth edges, minimal tear-out |
| Combination | 40-50 | General purpose cutting |
| Fine Finish | 80+ | Ultra-smooth finish |
| Plywood Blade | 80 | Veneer protection |
Using blades with an ultra-thin kerf can further reduce material waste and improve cut quality when working with plywood.
Following these tips guarantees clean, precise edges on your cabinet doors.
Cut and Square Cabinet Door Panels Precisely
Before cutting, make certain your plywood sheet is properly squared by measuring and marking 1/4 to 1/2 inch from the edges to create accurate reference lines. This step guarantees your cuts align perfectly for precise cabinet door panels.
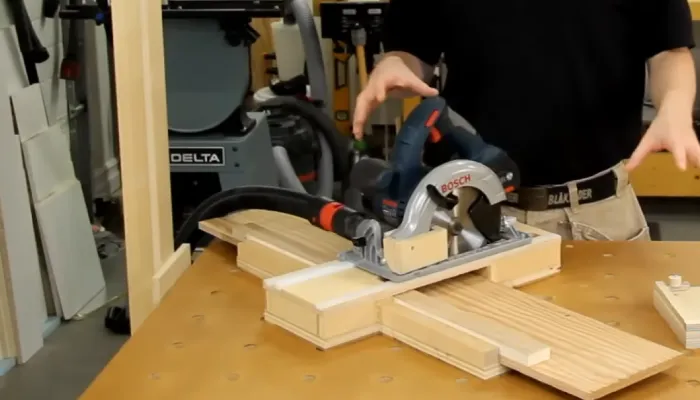
Use a reliable straightedge or T-square to extend these guide lines fully across the sheet. When ready, cut along these lines with a fine-toothed blade to reduce tear-out.
Keep these points in mind:
- Verify plywood thickness matches your door specifications.
- Cross-cut longest pieces first to maintain straight edges.
- Use clamps to secure plywood firmly during cuts.
- Check blade sharpness for clean, smooth cuts.
- Measure twice before each cut to avoid costly mistakes.
Following this method guarantees square, accurately sized panels for your cabinet doors. To increase cutting safety and accuracy, consider using a featherboard to maintain consistent contact and prevent kickback during the cutting process.
Cut Grooves and Join Frame and Panel Pieces
Now that you’ve cut and squared your cabinet door panels accurately, it’s time to cut the grooves that will house the panels within the frame.
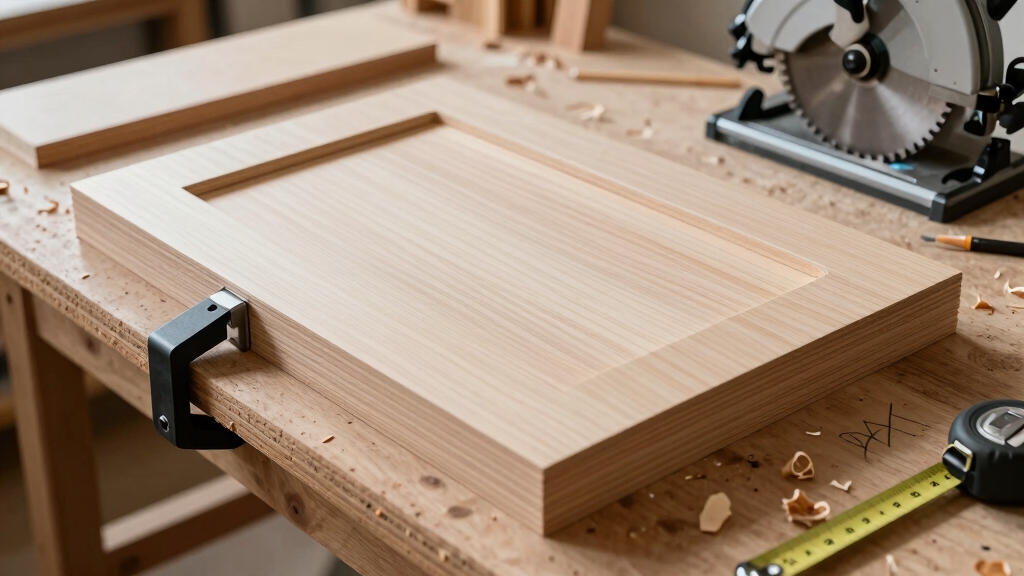
Set your table saw blade height to create grooves about 3/8 inch deep and 1/4 inch wide along the inside edges of the stiles and rails.
Adjust your table saw blade to cut 3/8 inch deep, 1/4 inch wide grooves on stile and rail edges.
Use a dado blade or make multiple passes with a standard blade, assuring consistent width and depth.
Maintain a steady fence position for straight, clean grooves.
Next, dry-fit the panels into these grooves to check for a snug fit without forcing.
Confirm that the tenon lengths on the rails match the groove width exactly to guarantee tight joints.
This precision prevents gaps and ensures structural integrity before moving on to assembly.
Make multiple shallow passes with push sticks or feather boards for safety and cleaner cuts, avoiding tear-out or chip buildup.
Assemble and Glue Cabinet Door Frames
Sure! Here’s a more conversational version of the text:
Before you start gluing, it’s a good idea to dry fit the tenons first. This way, you can make sure everything lines up perfectly with the frame pieces. When you do apply the glue, just focus on the tenons to keep any excess squeeze-out to a minimum.
Once you’ve got everything assembled, clamp those joints firmly. It’s important to maintain that pressure for at least four hours, so you can ensure a really strong bond. Trust me, it’ll be worth it!
Tenon Glue Application
Apply glue carefully to the tenons rather than spreading it across the entire groove surface to guarantee a strong, clean joint.
Focus on applying a thin, even layer on the tenon faces to avoid excess squeeze-out and weak spots.
Use a small brush or glue bottle tip for precise control. Make sure the glue covers all contact surfaces of the tenon for maximum adhesion.
Keep these tips in mind:
Avoid applying glue inside the groove beyond the tenon area to prevent messy joints.
Work quickly but thoroughly before the glue starts to set.
Wipe off any excess glue immediately with a damp cloth. Check tenons for full glue coverage before assembly.
Use clamps to maintain pressure and alignment during curing.
This method makes certain strong, neat cabinet door frames ready for final assembly.
Dry Fitting Alignment
Although you’ve carefully cut and prepared each component, dry fitting the cabinet door frame is essential to make certain all joints align perfectly before gluing.
Begin by assembling the rails and stiles without glue, ensuring tenons fit snugly into grooves without gaps or looseness.
Check that corners sit flush and square using a carpenter’s square.
Pay close attention to any misalignments or uneven edges, as these will affect the final door’s fit and appearance.
Confirm that dowel or pocket hole placements don’t interfere with assembly.
Adjust any tight or loose joints by light sanding or trimming as needed.
This precise dry fit prevents surprises during gluing, ensuring a seamless, strong frame.
Only once everything fits flawlessly should you proceed to apply glue and clamp.
Clamp Pressure Duration
Secure the glued cabinet door frame firmly with clamps to guarantee tight joints and proper adhesion.
Applying consistent clamp pressure prevents gaps and ensures the glue bonds effectively.
Hold the clamps in place for at least four hours; this duration allows the adhesive to cure sufficiently for strength and stability.
Avoid removing clamps prematurely, as this can weaken the joint and cause misalignment.
Keep these points in mind when clamping:
- Use even pressure across all joints to prevent warping.
- Check alignment before tightening clamps fully.
- Avoid overtightening, which can squeeze out glue and weaken joints.
- Maintain clamp pressure until the glue sets, typically four hours minimum.
- After unclamping, handle frames carefully to preserve joint integrity.
Following these steps guarantees durable, well-assembled cabinet door frames.
Add Edge Banding and Sand for Smooth Finish
When adding edge banding, start by choosing a thickness that matches your plywood’s layers, typically 1/4 inch or 1/2 inch, to guarantee a seamless fit.
Apply heat-activated glue on the banding’s back and press it firmly onto the door edges using an iron or edge bander.
Allow the glue to cool completely before trimming excess banding flush with the panel surface using a sharp utility knife or edge trimmer.
Next, sand the edges starting with medium-grit sandpaper to remove any glue residue and unevenness.
Follow with fine-grit sandpaper to achieve a smooth, consistent finish.
Be sure to sand gently along the grain to avoid scratches.
This careful preparation secures your cabinet doors have clean, professional-looking edges ready for finishing.
Apply Oil, Stain, or Paint Finishes
Since your cabinet doors are sanded smooth and free of dust, you can begin applying oil, stain, or paint finishes to protect and enhance the wood’s appearance.
Start by wiping the surface with a damp cloth to remove any remaining sanding residue. When applying oil, use a clean brush to spread it thinly and evenly.
Begin by wiping down with a damp cloth, then apply oil thinly and evenly using a clean brush.
Allow about four hours to dry between coats. For stains and paints, apply uniform layers to avoid blotches.
Always work in a well-ventilated area and follow manufacturer instructions for drying times.
- Remove all dust and debris before finishing
- Apply thin, even coats for consistent coverage
- Allow sufficient drying time between coats
- Sand lightly between coats if necessary for smoothness
- Use proper ventilation to guarantee safety and curing
Install Hinges and Hardware for Perfect Alignment
Although the cabinet doors are fully finished, you’ll want to carefully install hinges and hardware to guarantee perfect alignment and smooth operation.
Start by positioning hinge plates about 4 inches from the cabinet edge, assuring they’re level. Use the hinge screws to fine-tune the door reveal, adjusting gaps evenly.
Mount knobs or pulls centered vertically on the door height for ergonomic access. Confirm all screws are tight but avoid overtightening to prevent damage.
| Precision | Smooth Operation | Visual Appeal |
|---|---|---|
| Exact hinge placement | Effortless door swing | Balanced hardware positioning |
| Fine reveal adjustment | Consistent gap spacing | Clean, flush fittings |
| Secure screw fastening | No binding or rubbing | Ergonomic knob alignment |
This attention to detail assures your doors function flawlessly and look professionally finished.
Frequently Asked Questions
How Do I Repair Damaged Plywood Edges Before Starting the Project?
You should first clean the damaged edges by sanding away splinters and loose fibers.
Next, fill any gaps or chips with a wood filler that matches your plywood’s color.
Let it dry completely, then sand smooth to blend with the panel.
If the damage is deep, consider applying a thin layer of epoxy for extra strength.
Properly repairing edges guarantees clean cuts and a professional finish throughout your project.
What Safety Gear Should I Wear When Cutting and Sanding Plywood?
Want to protect yourself while cutting and sanding plywood? You should wear safety glasses to shield your eyes from dust and debris.
A dust mask or respirator is essential to avoid inhaling fine particles. Hearing protection guards against loud saw noise.
Gloves protect your hands from splinters and sharp edges, and long sleeves reduce skin exposure.
Don’t forget proper footwear for stability and to prevent injuries. Safety first always!
Can I Use Plywood Cabinet Doors in High-Humidity Areas?
You can use plywood cabinet doors in high-humidity areas, but you’ll need to choose marine-grade or exterior plywood with waterproof glue to resist moisture.
Make sure to seal all edges with a durable finish like oil-based varnish or polyurethane to prevent swelling.
Proper ventilation and humidity control in the space will also help.
Avoid using standard plywood, as it can delaminate or warp quickly when exposed to constant moisture.
How Do I Prevent Warping of Plywood Doors Over Time?
To prevent plywood doors from warping, you need to seal all surfaces, including edges, with a quality finish like oil or varnish.
Keep moisture out by ensuring proper ventilation in your space. Use thicker plywood (3/4 inch) for better stability and apply edge banding to protect layers.
Also, clamp doors tightly during glue-up to avoid stress. Regularly check for water exposure and wipe spills immediately to maintain door flatness over time.
What Are Common Troubleshooting Tips for Misaligned Cabinet Doors?
Think of misaligned cabinet doors like crooked picture frames. They throw off the whole look.
To fix this, start by checking hinge screws. Tighten or loosen them to adjust the reveal.
Use a level to make certain the door sits straight. If gaps persist, shim behind hinges or sand edges slightly.
Finally, confirm that your cabinet box is square. Sometimes the root cause lies there, not the door itself.
Turn Plywood Into Beautiful, Functional Cabinet Doors
Crafting your cabinet doors from plywood is like building a sturdy bridge. Each precise cut and careful finish connects function with beauty.
By measuring accurately, choosing quality materials, and assembling with care, you create more than doors; you create gateways to organized spaces.
Treat each step as a link in the chain, ensuring smooth operation and lasting durability.
With patience and attention, your handiwork will stand strong, welcoming both utility and style into your home.