How to Cut Large Angles on Miter Saw? Easy DIY Guide
To cut large angles on a miter saw, first calculate the desired angle by subtracting from 45 degrees if it’s over that limit. Use a jig for angles beyond standard settings, and always check your measurements with a protractor.
Set up your saw on a stable surface, secure your workpiece with clamps, and ensure proper calibration for precision. Remember to follow safety protocols. There’s more to explore for achieving perfect cuts in your woodworking projects.
Key Takeaways
- Use a jig to extend the cutting range for angles beyond 45 degrees, ensuring accuracy and stability.
- For angles like 60 degrees, set the miter gauge to 30 degrees by subtracting from 45 degrees.
- Always clamp your workpiece securely to prevent movement and ensure a precise cut.
- Regularly calibrate your miter saw to maintain accurate gauge settings and improve cutting precision.
- Test your jig with scrap wood before cutting final pieces to confirm the accuracy of your setup.
Understanding Miter Cuts and Bevel Cuts
Miter and bevel cuts are essential techniques in woodworking, each serving distinct purposes. Miter cuts are angled cuts across the face of a board, primarily used to create joints at specific angles, like those in picture frames or molding projects.
You’ll typically set the miter saw up to 45 degrees for these cuts, ensuring precision by cutting slightly under the desired angle for tight joints.
Proper cut angle for miter joints at non-90° angles ensures flush meeting of pieces. Calibrating the miter saw correctly is crucial for achieving the desired angles.
On the other hand, bevel cuts angle through the thickness of the board, vital for tasks like crown molding. These require tilting the saw head, with similar angle limitations.
How to Calculate Angles Greater Than 45 Degrees?
To cut angles greater than 45 degrees on a miter saw, you’ll need to get a bit creative, as most standard miter saws are limited to 45° in either direction. Here’s how to do it:
Subtracting for Angle Adjustment
To calculate angles greater than 45 degrees on your miter saw, you’ll need to understand that the saw’s settings refer to the complementary angle.
For instance, if you want to achieve a 30-degree cut on your board, set the saw to 60 degrees (90 – 30). This method simplifies your adjustments by allowing you to subtract the desired angle from 90. Always double-check your angle using a protractor or angle finder for accuracy before making a cut.
Remember, typical miter saws often max out around 45 to 55 degrees, so verify your saw can handle the required angle. Sliding miter saws allow for greater cutting capacity which is especially useful when dealing with large angles.
Example Angle Calculations
While cutting large angles on a miter saw may seem intimidating, understanding a few key calculations can simplify the process.
For instance, if you need a 30° cut on your board, you’ll set the saw to 60° since 180° minus 30° equals 60°. If your saw can’t reach 60°, consider using a jig or a sacrificial board to support the cut. Additionally, using a guide board can enhance alignment and stability during the cutting process.
You might also flip the board and make multiple cuts to achieve the desired angle. Utilize trigonometric principles to determine the precise angle needed if the cut exceeds your saw’s limits. Setting the miter saw to 45 degrees for the initial cut can greatly improve your accuracy and ensure a cleaner result.
Setting Miter Gauge Properly
Although standard miter saws typically limit angle cuts to 45 degrees, you can successfully set the miter gauge for larger angles by employing a few straightforward techniques.
Start by subtracting your desired angle from 90 degrees, then set your gauge accordingly. You can also use bevel cuts or reposition the workpiece to facilitate larger angles. Here’s a quick reference table for common angles:
| Angle Needed | Miter Angle Setting | Adjustment Type |
|---|---|---|
| 60° | 30° | Subtract from 90° |
| 75° | 15° | Subtract from 90° |
| 90° | 0° | Special jig required |
Utilizing a protractor or digital angle finder will enhance accuracy, ensuring your cuts meet project specifications. Remember to double-check settings before cutting.
Accurate cuts are essential for quality work, so take your time during the setup process. Additionally, proper tool selection can greatly influence the effectiveness of your cuts and overall project success.
Setting Up Your Miter Saw for Large Angle Cuts
Setting up your miter saw for large angle cuts requires careful adjustments to secure precision and stability.
First, create a jig to extend the angle capability beyond 45 degrees. Set the saw to the required angle minus 45 degrees; for instance, for a 60-degree cut, adjust to 15 degrees.
Miter angles are essential for precise cuts, especially when working with larger angles. Additionally, ensure that the miter gauge is properly aligned to maintain accuracy during your cuts.
Ensure the board is securely clamped and supported, particularly for bevel cuts, by standing it upright. Align the board with the back plate for accurate cuts.
Utilize the miter gauge to set angles, and fine-tune as necessary for custom settings. Always double-check that both ends of the board are supported before making your cut to achieve the best results.
Safety Precautions for Large Angle Cutting
When you’re cutting large angles on a miter saw, safety should always come first. Here’s what to do to stay protected while getting accurate, clean results:
Protective Gear Essentials
To ensure your safety while cutting large angles with a miter saw, wearing the right protective gear is essential. Here’s a quick overview of the must-have equipment:
| Protective Gear | Purpose |
|---|---|
| Eye Protection | Prevents eye injuries from flying debris |
| Ear Protection | Protects against loud saw noise |
| Hand Protection | Prevents cuts and abrasions while handling |
| Respiratory Protection | Avoids inhaling harmful sawdust particles |
Additionally, wear long-sleeved shirts and closed-toe shoes to shield your body from debris. Always remember to tie back loose clothing and hair to prevent entanglement.
Stable Board Support
Stable board support is critical for safe and accurate large-angle cuts with a miter saw.
To ensure stability and prevent movement, follow these essential practices:
- Use a Sacrificial Board: Opt for a flat, stable board, like a pine 2×6, as a base to support your workpiece. A crosscut sled can also enhance stability for larger workpieces.
- Secure with Clamps: Attach clamps firmly to hold the board in place, avoiding interference with the saw blade.
- Align with the Fence: Make certain the board is perfectly aligned with the miter saw fence to prevent shifting during cutting. Additionally, using a flat board that allows for angles beyond the saw’s limit will enable you to achieve more complex cuts safely.
Types of Cuts You Can Make With a Miter Saw
A miter saw is an essential tool for achieving various types of cuts in woodworking projects. You can make crosscuts for straight cuts across the grain, miter cuts for angled edges to join pieces, and bevel cuts to create sloped edges through the board’s thickness.
For more complex tasks, compound cuts combine both miter and bevel angles, ideal for crown molding and intricate trim work. Most miter saws include adjustments for common angles like 45 degrees, and you should take advantage of built-in gauges for precise settings.
Additionally, understanding the cutting capacity of different miter saw types can help you choose the right tool for your specific project needs. Remember to support the board properly and guarantee the blade is at full speed before making any cuts to achieve the best results.
Creating a Jig for Large Angles
Creating a jig for large angles can greatly enhance your miter saw’s versatility, enabling you to tackle projects that demand precise cuts beyond the standard 45 degrees.
A well-designed jig improves accuracy, safety, and efficiency during cutting. Here are three essential components for creating an effective jig:
Enhance your miter saw’s capabilities by creating a jig for precise cuts beyond 45 degrees.
- Base Material: Use stable plywood or MDF, ideally ½ inch thick, for durability. High-tooth count blades can also improve the quality of the cuts made with your jig.
- Clamping System: Incorporate adjustable clamps to secure your workpiece firmly.
- Measuring Tools: Utilize a square or protractor to guarantee precise angle measurements. An acute angle jig is specifically designed for cutting trim or molding at angles greater than standard miter saw limits.
Using the Scrap Board Method for Extended Angles
Often, woodworkers encounter projects requiring angles that exceed the standard capacity of their miter saws, typically limited to 45 degrees.
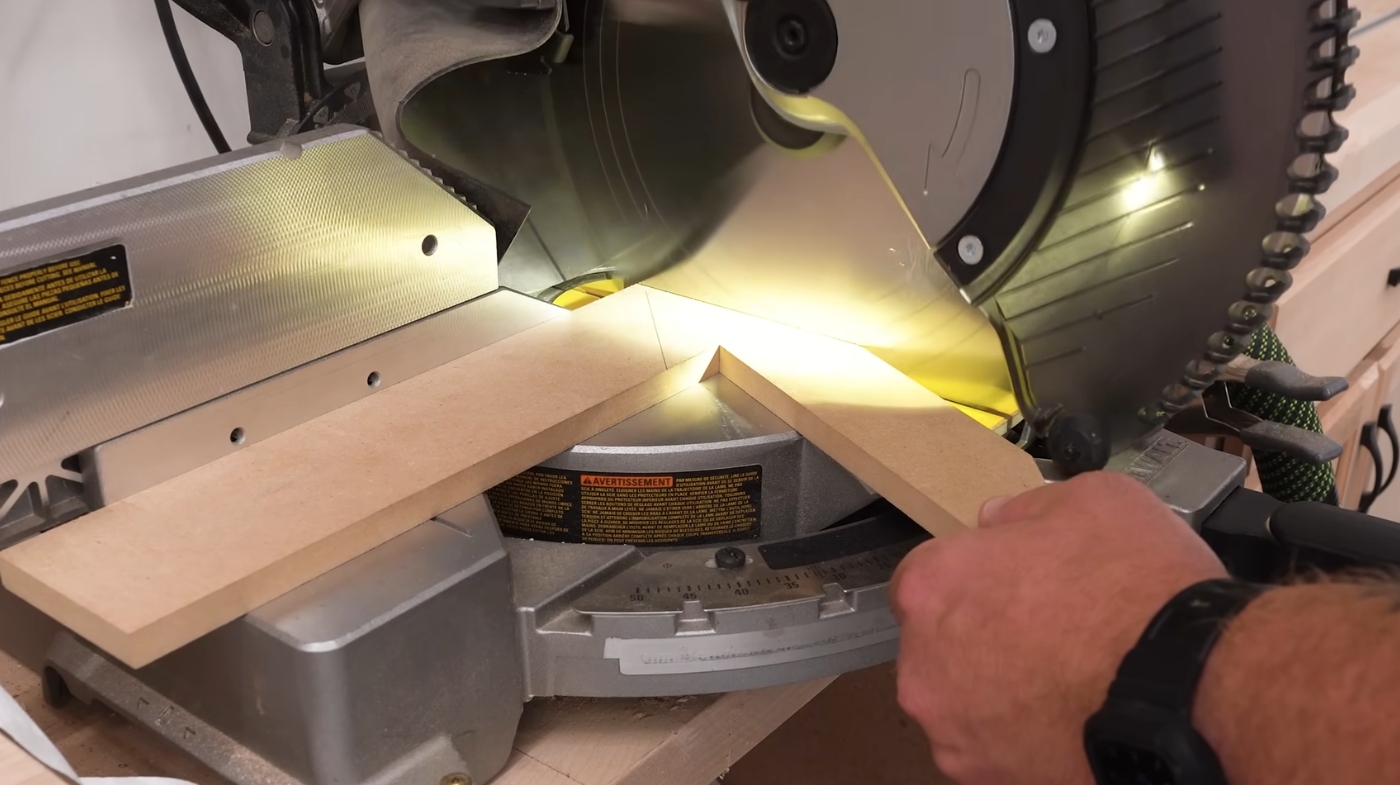
The scrap board method effectively addresses this limitation, enabling you to cut angles between 45 and 90 degrees. Start by attaching a scrap board to your miter saw table using a hot glue gun.
Set the saw to 45 degrees for the first cut, then adjust it to 45 degrees in the opposite direction for the second cut. This creates a new zero-degree setting. To achieve specific angles, calculate the difference from 45 degrees.
For example, for a 60-degree cut, set the saw to 15 degrees. This method is versatile and ideal for various woodworking projects requiring custom angles that enhance project flexibility.
Additionally, using a miter saw allows for angled cuts that improve the precision of your work, making it a valuable tool in any woodworker’s arsenal.
Tips for Precision in Large Angle Cuts
Achieving precision in large angle cuts requires careful attention to detail and a solid understanding of your miter saw’s capabilities.
To guarantee accurate results, follow these tips:
- Use a Jig: Create or use a jig to extend your miter saw’s cutting range, allowing for angles beyond the standard 45 degrees.
- Proper Angle Calculation: For angles greater than 45 degrees, subtract 45 from your desired angle when setting the miter gauge. For instance, for a 60-degree cut, set it to 15 degrees. Additionally, consider using compound miter cuts to achieve more complex angles effectively.
- Secure Your Workpiece: Always clamp the board firmly to prevent any movement during the cut, assuring stability and accuracy.
Common Mistakes to Avoid When Cutting Angles
When cutting angles, it’s important to recognize common mistakes that can compromise precision and lead to wasted materials.
First, verify your miter saw gauge aligns correctly; inaccurate gauge alignment can skew your cuts. Small inaccuracies compound, especially in multiple cuts, so check measurements with test pieces.
Regularly calibrate your saw to maintain accuracy and avoid misunderstanding gauge markings that might mislead you. Always check that the fence is parallel to the blade, and confirm your workpiece is firmly secured with clamps.
Don’t confuse miter and bevel cuts, and remember to account for stock thickness and grain direction. Finally, maintain your equipment and use the right blade to enhance cutting accuracy and efficiency, as a quality blade can significantly improve the precision of your cuts.
DIY Projects That Require Large Angle Cuts
Large angle cuts can greatly enhance your DIY projects, offering both functionality and aesthetic appeal.
Many projects require these cuts to achieve a professional look and maximize utility. Here are three types of projects where large angle cuts are essential:
- Modern Furniture Design: Complex angles improve both form and function in contemporary pieces.
- Artistic Wood Decorations: Unique shapes created through large angles add visual interest to your decor.
- Shelf and Cabinet Cornering: Seamless cornering in shelving and cabinetry enhances both stability and appearance. Utilizing a jig can further ensure accuracy during these cuts.
To tackle these projects effectively, consider using jigs to extend your miter saw’s capabilities, guarantee precise alignment, and always prioritize safety during cuts.
Frequently Asked Questions
Can I Use a Miter Saw for Large Angle Cuts in Metal?
You can’t effectively use a miter saw for large angle cuts in metal. Miter saws are primarily designed for wood, and their blades aren’t suited for metal cutting.
Attempting to cut metal can lead to poor results and potential damage to the saw. For large angle cuts in metal, consider using specialized equipment like metal cutting saws or circular saws with appropriate blades, ensuring you maintain precision and safety throughout the process.
What Is the Best Blade Type for Large Angle Cuts?
For large angle cuts, a carbide-tipped crosscut blade is your best choice. It offers durability and precision, especially with hardwoods or dense materials.
Opt for a 10-inch blade to balance speed and capacity. A thin-kerf blade minimizes material loss and resistance, improving efficiency.
Make certain to select a blade designed for smooth cuts, as this will enhance your overall results and guarantee cleaner edges in your projects.
How Do I Maintain My Miter Saw for Accurate Cuts?
To maintain your miter saw for accurate cuts, regularly check and adjust the calibration. Confirm the table is aligned and the blade is perpendicular.
Clean the saw to remove debris and keep the blade sharp for precision. Inspect the fence for stability and make certain it’s straight. Remember to unplug the power cord before making any adjustments.
Are There Any Specific Brands Recommended for Large Angle Cutting?
When you’re aiming for precision in cutting large angles, choosing the right saw can feel like finding a needle in a haystack.
Brands like Makita, Bosch, and Ridgid stand out for their reliable performance. The Makita LS1219L is versatile, while the Bosch GCM12SD offers dual-bevel capabilities.
If you’re on a budget, consider the Ridgid R4251, providing excellent value. Each of these models guarantees you achieve those complex cuts with accuracy and ease.
Can I Cut Large Angles on a Sliding Miter Saw?
Yes, you can cut large angles on a sliding miter saw. Most models handle angles up to 50 degrees, and some even exceed that.
To achieve precise cuts, guarantee your material is properly aligned and secured. You might want to use a sacrificial board technique for angles beyond the saw’s standard capacity.
Always check the saw settings and maintain a steady speed for clean, accurate cuts throughout your projects.
Cut Large Angles the Smart Way and Elevate Your Woodworking
To sum up, mastering large angle cuts on a miter saw is like learning to ride a bike; it takes practice, but the results are worth it. By understanding your saw’s settings and employing the right techniques, you can achieve precise cuts for your projects.
Always prioritize safety and avoid common pitfalls, and soon you’ll be confidently tackling any angle with ease. With skill and attention to detail, your woodworking can reach new heights.

