How to Resaw Without a Bandsaw: Easy Woodworking Methods
To resaw without a bandsaw, use a table saw fitted with a thin kerf, fine-tooth blade for clean cuts.
Start with a shallow, scribed starter cut to guide the blade. Then make multiple incremental passes, raising the blade 0.5 to 1 inch each time.
Keep the board securely clamped and pressed against a perfectly aligned fence. Flip it to cut both sides evenly.
Safety features like riving knives and push sticks are essential. You’ll also find hand-sawing and finishing tips valuable for precise results.
Key Takeaways
- Use a table saw with a thin kerf, fine-tooth blade for precise, clean cuts when resawing without a bandsaw.
- Make a 3/4-inch deep starter cut with a handsaw along scribed lines to guide power saw blades accurately.
- Raise the blade incrementally by 0.5 to 1 inch for multiple passes, maintaining fence alignment to ensure uniform thickness.
- Secure the board firmly with clamps and use feather boards and push sticks to stabilize and keep hands safe.
- Scribe and deepen cut lines on all edges, flip the board regularly, and plane the resawn slabs for smooth finishes.
What Is Resawing and Why Use a Table Saw?

Resawing involves slicing a thick board into thinner slabs. Using a table saw for this task offers a precise, controlled approach.
Resawing transforms thick boards into thinner slabs with precision using a controlled table saw technique.
You’ll make multiple incremental passes, raising the blade gradually instead of attempting one deep cut. This method reduces blade strain and improves cut accuracy.
Keeping the same board face against the fence guarantees consistent thickness across slabs. Flipping the board after cutting one side maintains alignment and prevents drift.
Installing a riving knife or splitter is essential to prevent the wood from pinching the blade. This enhances safety and cut quality.
Though a bandsaw is ideal, a table saw’s stability and adjustability let you achieve clean, uniform resawn boards when operated correctly. This makes it a viable alternative for precise woodworking.
Using a table saw model with thermal overload protection can safeguard your motor during the extended cutting passes required for resawing.
Choose the Right Blades and Safety Gear for Resawing
Although selecting the right blade might seem straightforward, choosing one with a thin kerf and appropriate tooth count markedly impacts cut quality and waste reduction.
When resawing without a bandsaw, your blade choice directly affects efficiency and finish.
Prioritize the following:
- Use a thin kerf blade on your table saw to minimize material loss and improve control.
- Select a blade with fine teeth for smoother cuts on hardwoods or a rough woodcutting blade for softer materials.
- For power tools like sawzalls, pick blades longer than the stock thickness to guarantee full penetration without strain.
Additionally, always equip yourself with safety gear: safety glasses, hearing protection, and push sticks to maintain control and prevent accidents.
Proper blade and gear selection keeps your work precise and secure.
Ensure that your blade’s arbor size matches your table saw to maintain safety and stability during cuts.
Set Up Your Table Saw for Resawing Without a Bandsaw
Begin by adjusting your table saw to accommodate incremental cutting. Raise the blade in controlled 0.5 to 1-inch steps for each pass.
Install a splitter or riving knife directly behind the blade to prevent wood pinching and kickback.
Select a thin kerf blade to minimize material waste and guarantee smooth cuts.
Align the fence parallel to the blade, verifying it remains perfectly square to maintain consistent board thickness.
Attach feather boards to hold the workpiece firmly against the fence. This reduces vibration and improves accuracy.
Prepare push sticks for safe handling during the cuts. Apply steady inward pressure on the board’s bottom edge while guiding it.
These precise setups optimize safety and control, essential for effective resawing without a bandsaw.
Using featherboards is crucial as they maintain consistent contact between the workpiece and fence, significantly reducing the risk of kickback during cutting.
Make Incremental Resawing Cuts on Your Table Saw
When you’re ready to make those incremental resawing cuts on your table saw, start by making multiple passes. Raise the blade about half an inch to one inch each time. This way, you can really control the depth of the cut.
Oh, and don’t forget to keep the same edge of the board pressed firmly against the fence. That’ll help you maintain consistent alignment throughout the whole process.
And here’s a tip: installing a riving knife or splitter can really boost your safety. It helps prevent the wood from pinching the blade while you’re resawing, making the whole process smoother.
Before moving or adjusting your table saw setup, always consult the owner’s manual for proper disassembly instructions to avoid damage.
Incremental Cutting Technique
Mastering incremental cutting on your table saw allows you to resaw thick stock safely and accurately without exceeding the blade’s maximum cutting height. Instead of attempting a single deep cut, you’ll raise the blade incrementally, making multiple passes to remove material progressively. This technique reduces strain on the blade and motor, minimizing tear-out and improving control.
Follow these steps for effective incremental cutting:
- Set the blade height to about 0.5 to 1 inch above the table and make your first pass.
- Raise the blade by the same increment and repeat the cut, maintaining the board firmly against the fence.
- After completing one side, flip the board and repeat the process to evenly resaw the stock.
This method guarantees precision and safety while maximizing your table saw’s capabilities. Unlike bandsaws, which have a continuous looped blade designed for larger cuts, this technique adapts the table saw for detailed resawing tasks.
Fence Alignment Importance
Although incremental cutting reduces strain on your table saw, maintaining consistent fence alignment is essential for achieving accurate resawing results.
You must make certain the fence is perfectly parallel to the blade to prevent binding or uneven cuts.
Keep the same side of the board firmly against the fence during every incremental pass to guarantee uniform thickness.
Any deviation alters the cut line, causing tapering or uneven surfaces.
After flipping the board, realign it precisely against the fence to maintain symmetry on both sides.
Use reliable fence locks and verify alignment before each pass.
Consistent fence positioning minimizes drift and improves cut quality, reducing the need for extensive cleanup.
Precision here directly impacts the accuracy and success of your incremental resawing technique.
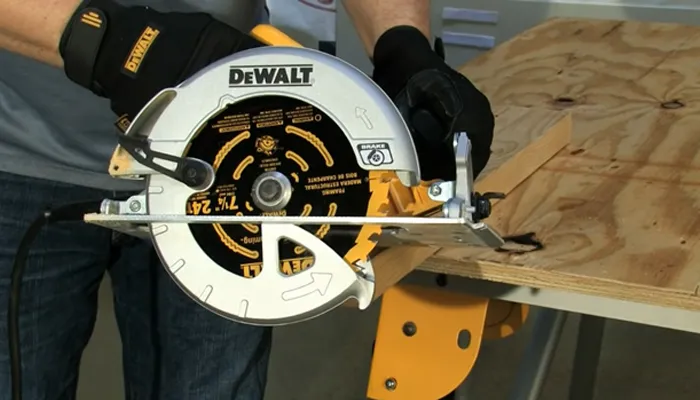
Setting the blade height to approximately 1/8 inch above the plywood surface can enhance cut quality and reduce tear-out during resawing passes, which is an important blade and cutting technique to consider.
Safety Enhancements
When making incremental resawing cuts on your table saw, enhancing safety measures is critical to prevent accidents and guarantee smooth operation.
You must control the board firmly and maintain blade stability throughout the process.
Here are key safety enhancements to follow:
- Install a riving knife or splitter to prevent the wood from pinching the blade, reducing kickback risks markedly.
- Use feather boards to hold the board steadily against the fence, ensuring consistent pressure and alignment during each incremental pass.
- Apply a push stick on top while your hand applies inward pressure from below to maintain control without exposing fingers near the blade.
Additionally, ensure that the riving knife height aligns precisely with the saw blade height for effective operation and safety.
Flip and Align Boards for Accurate Resawing
Flip the board carefully after cutting one side to maintain precise alignment with the fence for the next pass. Consistently keeping the same side against the fence prevents deviations and assures even thickness.
Use clamps or feather boards to stabilize the board during flipping. Align edges visually and measure if necessary before proceeding. This practice minimizes cumulative error and promotes straight, parallel cuts.
| Step | Key Action |
|---|---|
| 1. Initial Cut | Set fence, cut first face |
| 2. Flip Board | Rotate, maintain fence side |
| 3. Align Edges | Visually and with measuring tool |
| 4. Stabilize & Cut | Clamp, then resaw opposite face |
Accurate flipping and alignment are critical for consistent resawing without a bandsaw.
Use Hand Sawing and Scribing Techniques for Precise Cuts
To kick things off, grab your marking gauge and scribe those precise cut lines on all four edges. This is super important because it sets the stage for everything that follows.
Once you’ve got those lines down, take a knife and deepen them a bit. This will really help guide your saw blade and keep everything on track.
Now, when you start sawing, think about making incremental cuts from both sides of the board. This way, you can meet in the middle, which helps keep your alignment just right and reduces any chances of tear-out.
Oh, and don’t forget to flip the board regularly and adjust your angle as you go. This little trick will ensure you get a clean, warp-free resaw every time. Happy cutting!
Remember that maintaining accurate alignment is key to achieving precise cuts and avoiding material waste.
Scribing Accurate Cut Lines
Although scribing may seem straightforward, achieving accurate cut lines requires careful attention to detail and technique. To ensure precision, create clear, consistent reference marks that guide your saw blade exactly where needed.
Follow these steps:
- Scribe all four edges to the desired depth using a marking gauge. This establishes uniform cut lines around the board.
- Deepen those scribe marks with a sharp knife to form a clean groove. This prevents saw driftsand improves accuracy.
- Maintain consistent pressure and alignment when scribing to avoid uneven depths. Irregular grooves lead to imprecise cuts.
For enhanced results, maintain proper grip and body positioning to ensure steady control during hand sawing and scribing.
Controlled Sawing Techniques
After establishing accurate scribe lines with consistent depth and clean grooves, controlled sawing becomes the key to maintaining precision throughout the cut.
Begin by deepening the scribe marks with a sharp knife to create a guiding groove for your saw blade.
Use a fine-toothed handsaw and saw from both edges, meeting in the middle to prevent binding and guarantee accuracy.
Keep the board firmly clamped, flipping it frequently to maintain control and balance the cut on both sides.
Maintain a steady, deliberate sawing rhythm, avoiding excessive force that can deflect the blade.
Ensuring proper blade tension is crucial for achieving smooth and accurate cuts without blade deflection.
Make Starter Cuts and Use Power Saws for Resawing
When preparing to resaw thick stock without a bandsaw, making a precise starter cut is essential for guiding power saw blades accurately.
Begin by clamping your board securely in a woodvise, adding clamps before and behind to prevent movement. Use a handsaw to make a 3/4 inch deep starter cut along your scribed line. This groove will keep the reciprocating saw blade steady during resawing.
Follow these steps for efficient power saw resawing:
- Select a reciprocating saw with a blade at least 9 inches long to handle the thickness.
- Apply firm, steady downward pressure; don’t force the blade to let it cut cleanly.
- For wider boards, finish the cut with a pull saw if the power saw can’t penetrate fully.
This method guarantees straight, controlled resaw cuts without a bandsaw.
Smooth and Finish Resawn Boards Like a Pro
Consistently planing resawn boards to a uniform thickness guarantees a professional finish and precise fit in your projects.
Start by securing your board firmly to prevent movement during planing.
Begin by firmly clamping your board to ensure stability throughout the planing process.
Use a jack plane or thickness planer to remove saw marks and uneven surfaces, progressing gradually to avoid tear-out.
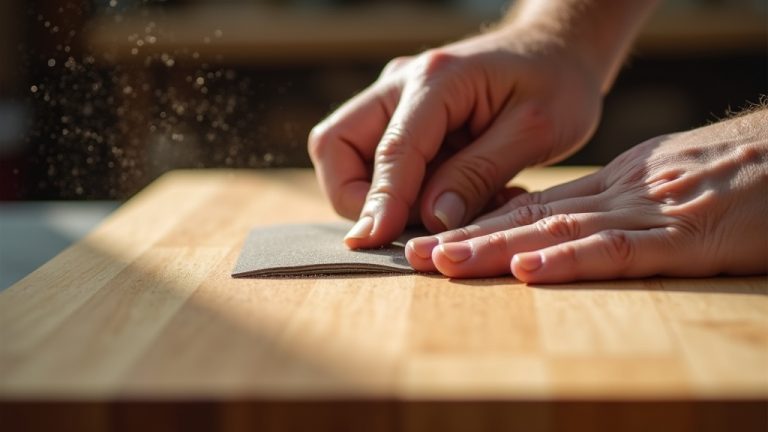
Address rough spots with light sanding, focusing on edges and end grain to assure smoothness without altering dimensions.
If available, a kerfing plane can refine stubborn areas.
Always check thickness with calipers to maintain uniformity.
For wider boards, consider cutting them into shorter lengths before finishing to reduce waste and improve control.
When precision is critical, commercial cabinet shops offer planing services for difficult species like 6/4 white oak, guaranteeing a flawless final product.
Frequently Asked Questions
Can I Resaw Thick Hardwoods Like White Oak at Home?
Yes, you can resaw thick hardwoods like white oak at home, but it requires patience and proper technique.
Use incremental cuts on a table saw, raising the blade 0.5 to 1 inch per pass. Keep the board firmly against the fence.
Flip the board after cutting one side to maintain alignment.
Clamp securely and consider a starter cut with a handsaw before power tools to prevent blade binding and guarantee accuracy.
How Do I Prevent Blade Overheating During Long Resaw Cuts?
To prevent blade overheating during long resaw cuts, maintain a steady, moderate feed rate and avoid forcing the blade through the wood.
Keep the blade speed high but advance gently to reduce friction and heat buildup.
Regularly clear sawdust from the cut to improve cooling and reduce binding.
If possible, pause periodically to let the blade cool.
Using a sharp, appropriate blade also minimizes heat generation, ensuring efficient and safe cutting.
What’s the Best Way to Clamp Boards Securely for Resawing?
Grip your board like a steady handshake: firm, unyielding, and precise.
Use a woodvise combined with clamps both in front and behind the board to prevent any movement during cutting.
This sandwiching technique keeps your workpiece rock solid, ensuring safety and accuracy.
Always double-check alignment and tighten clamps incrementally to avoid warping.
Your goal is a vibration-free, immovable setup that lets your saw flow smoothly through every pass.
When Should I Consider Commercial Resawing Services?
You should consider commercial resawing services when dealing with large, thick, or challenging hardwoods like 6/4 white oak that exceed your equipment’s capacity or precision.
If your tools can’t produce consistent thickness or smooth surfaces, or if minimizing material loss is critical, professional shops provide advanced machinery for accurate, efficient resawing.
Outsourcing also saves time and effort when you lack specialized planes or kerfing tools, ensuring ideal results for demanding projects.
How Do Feather Boards Improve Resawing Accuracy and Safety?
Feather boards grip your wood like a firm handshake, keeping it pressed consistently against the fence during resawing.
This steady pressure prevents kickback and minimizes blade drift, boosting both accuracy and safety.
By stabilizing the board, feather boards let you maintain a precise cut line without constant manual force.
This reduces fatigue and the chance of errors.
You’ll achieve cleaner, straighter cuts while protecting yourself from potential hazards.
Achieve Clean Resaw Cuts With Simple Tools
Resawing without a bandsaw might seem tricky, but with the right setup and technique, you’ll achieve clean, precise cuts every time.
Like a surgeon with a scalpel, your table saw and hand tools become extensions of your skill, enabling flawless resawing.
Focus on blade choice, incremental cuts, and careful alignment to maintain accuracy and safety.
Master these steps, and your resawn boards will meet professional standards, ready for any project you tackle.