How to Install Pvc Trim: Step-by-Step Installation Guide
Install PVC trim by selecting corrosion-resistant fasteners like stainless steel screws or galvanized nails. Fasten every 16 inches with added fasteners on wider boards.
Measure carefully, cutting clean 45-degree joints that overlap studs. Apply solvent-based adhesive before fastening.
Leave expansion gaps from 1/16 to 3/16 inch depending on temperature to prevent buckling. Seal gaps with flexible caulk and paint with 100% acrylic latex for durability.
Following these steps guarantees a stable, long-lasting installation. More detailed techniques are available to enhance your project.
Key Takeaways
- Use stainless steel screws or hot-dipped galvanized nails, fastened every 16 inches, with at least two fasteners per stud for secure PVC trim installation.
- Measure and cut trim pieces precisely with a fine-toothed blade, allowing for expansion gaps of 1/16 to 1/8 inch based on temperature.
- Apply PVC-specific solvent-based adhesive evenly to overlapping surfaces and fasten or clamp joints within 5 to 10 minutes for strong bonding.
- Position fasteners ½ inch from trim edges, ensuring penetration of at least 1.5 inches into framing for maximum holding power.
- Fill expansion and fastening gaps with flexible sealant or polyurethane to accommodate movement and prevent moisture intrusion.
Choose the Right Fasteners for PVC Trim Installation

Start by selecting the appropriate fasteners to guarantee a secure and durable PVC trim installation. Use stainless steel screws or hot-dipped galvanized nails; both resist corrosion and assure longevity.
Avoid brads, wire nails, or staples. They lack sufficient holding power for PVC trim. Fasteners must penetrate at least 1.5 inches into the framing to provide a firm grip.
Position two fasteners per framing member for standard board widths, spacing them about 16 inches apart and maintaining a ½-inch edge distance.
When using a nail gun, set air pressure between 70 and 100 psi to prevent damage to the cellular PVC. Following these precise fastening guidelines will help you achieve a stable, long-lasting trim installation without compromising the material’s integrity.
For enhanced bonding and moisture resistance in outdoor applications, consider using polyurethane adhesives in conjunction with mechanical fasteners.
Measure and Cut PVC Trim With Accurate Joints
—
First things first, when you’re measuring each trim piece, take your time. Make sure to account for those corner adjustments so everything fits snugly. It’s all about getting it right!
Now, for the corners, consider using overlapping 45-degree miter joints. This means you’ll want to cut your first board a little longer—just past the stud center—so you can secure it properly. It’s a smart move that really helps with stability.
And remember, making accurate cuts and getting those joint angles just right is key. It’ll help you avoid any gaps and ensure you achieve that professional finish you’re aiming for. Happy trimming!
Using a miter saw for these cuts can give you precise angles and smooth edges to enhance your work.
Precise Length Measurements
Measure each trim piece carefully, accounting for any corner adjustments to guarantee accurate cuts and proper fit.
Start by marking the exact length on the PVC trim, considering overlap and expansion gaps as per temperature guidelines, typically 1/16 to 1/8 inch for every 18 feet.
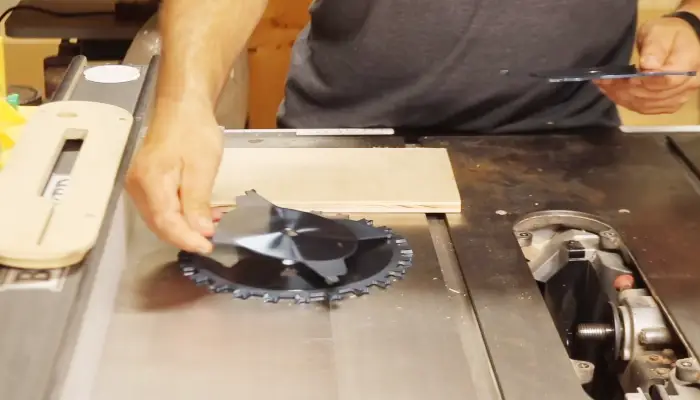
Use a fine pencil or marking tool for precise lines. When cutting, make sure your saw blade is sharp and suited for PVC to avoid rough edges.
Double-check measurements before cutting, especially for long runs where shiplap joints require consistent dimensions.
Remember, trim pieces should extend slightly past stud centers for secure fastening but remain flush where necessary.
Accurate length measurements reduce gaps and misalignments, assuring a clean, professional installation without the need for costly adjustments later.
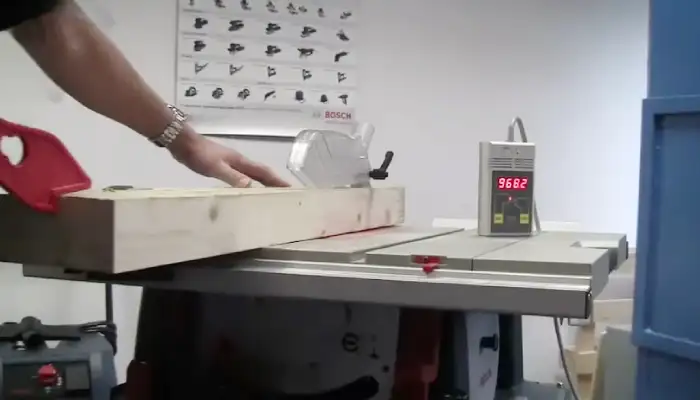
For the best results, use a circular saw equipped with a fine-toothed blade to minimize chipping and achieve clean cuts.
Corner Joint Techniques
When cutting PVC trim for corners, create overlapping 45-degree joints that guarantee a tight, secure fit.
Start by measuring so the first piece extends just past the stud center for proper overlap.
Cut each trim piece precisely at 45 degrees to avoid gaps.
Leave a small expansion gap of 1/16 to 1/8 inch, depending on temperature.
Apply solvent-based adhesive to both mating surfaces before fastening for the strongest bond.
- Measure and mark accurately before cutting.
- Cut the first trim piece to overlap the corner by half a stud.
- Use a miter saw set to 45 degrees for clean cuts.
- Apply adhesive to both joint surfaces before assembly.
- Leave temperature-appropriate expansion gaps to prevent buckling.
Using a miter saw with adjustable angles ensures precise, clean cuts for perfect corner joints.
Create Strong Corner and Overlapping Joints
To create strong corner joints, you’ll want to start by cutting overlapping 45-degree angles that extend just past the center of the stud. This little extra bit really helps with stability.
Now, don’t forget about those expansion gaps! It’s usually a good idea to leave about 1/16 to 1/8 inch of space. This way, your materials can move a bit without causing any issues.
Using a coping saw can help achieve precise cuts for clean and professional-looking joints.
Overlapping 45-Degree Joints
Cutting overlapping 45-degree joints guarantees strong, clean corners that enhance both the appearance and structural integrity of your PVC trim installation.
To achieve this, precisely measure and mark your trim pieces, ensuring one piece extends just past the stud center for a secure overlap.
Use a fine-toothed saw to make accurate 45-degree cuts, minimizing gaps.
Apply solvent-based adhesive to both joint surfaces before fastening to maximize bond strength.
Maintain a slight expansion gap to accommodate temperature fluctuations.
Cut pieces to overlap at stud centers for stability.
Use solvent-based adhesive on both joint surfaces.
Maintain a 1/16 to 1/8 inch expansion gap.
Clamp or fasten joints within 5–10 minutes of adhesive application.
Use stainless steel screws or hot-dipped galvanized nails for fastening.
For long-lasting results, ensure your fastening methods consider material durability to prevent joint failure over time.
Secure Stud Center Overlap
Make sure your PVC trim corners remain robust by securing stud center overlaps with exact measurements and fastening techniques.
Cut the first trim piece to extend just past the stud center, ensuring a solid base for the overlapping joint.
Position the second piece over this extension, creating a tight 45-degree corner joint.
Use stainless steel screws or hot-dipped galvanized nails, driving at least two fasteners per stud with a penetration depth of 1.5 inches.
Fasten every 16 inches along the edge, maintaining a ½-inch distance from the trim edge to prevent splitting.
For added strength, apply a solvent-based adhesive to both overlapping surfaces before fastening.
This method guarantees a durable, stable corner that resists shifting and maintains structural integrity over time.
In addition, maintaining a clear and stable working surface is essential to ensure safety and stability during installation.
Allow Expansion Gaps
Although securing your PVC trim corners is critical, you’ll also need to allow proper expansion gaps to accommodate temperature-induced movement.
PVC expands and contracts with temperature changes, so failing to leave gaps can cause buckling or warping.
You should measure the ambient temperature and adjust gaps accordingly for peak performance.
Leave a 1/16 inch gap at 60–80°F temperatures. Increase to 1/8 inch when below 60°F.
Use 3/16 inch spacing if temperatures drop under 40°F. Maintain tight joints above 80°F.
Fill gaps with flexible sealant or polyurethane to allow movement.
For optimal durability, choose finishes with UV protection and water resistance when applying coatings near PVC trim.
Apply Adhesives for Strong PVC Trim Bonds
When bonding PVC trim boards, applying the right adhesive guarantees strong, durable joints that hold up over time.
Use solvent-based adhesives or PVC pipe glue, such as TrimGrip™ or other approved cellular PVC bonding agents, for peak results.
Apply adhesive evenly to both surfaces within 5 to 10 minutes before fastening or clamping.
This promotes maximum adhesion and prevents premature drying.
For butt joints, spread adhesive on the back and use two fasteners per side for added strength.
When bonding PVC to wood, opt for subfloor or heavy-duty construction adhesives designed to handle different material properties.
Proper adhesive application minimizes gaps and improves joint integrity, making your trim installation stable and long-lasting under typical environmental conditions.
Additionally, choosing corrosion-resistant fasteners ensures your trim remains securely attached without rust or staining over time.
Leave Proper Expansion Gaps for Temperature Changes
Because PVC trim expands and contracts with temperature fluctuations, you need to leave proper gaps between boards to prevent buckling or warping.
The size of these expansion gaps depends on the ambient temperature during installation. By allowing for this movement, you guarantee the longevity and appearance of your trim.
Leave a 1/16 inch gap when temperatures range between 60°F and 80°F. Increase the gap to 1/8 inch if temperatures drop below 60°F. Use a 3/16 inch spacing at temperatures under 40°F.
Maintain tight joints only if working above 80°F. Fill gaps with flexible sealant or polyurethane to accommodate expansion without damage.
Follow these guidelines precisely to maintain structural integrity and aesthetic quality over time. For optimal results, consider using non-shrinking wood fillers in adjacent wood elements to prevent cracks caused by expansion and contraction.
Follow Fastening Patterns to Secure PVC Trim
Secure your PVC trim by following precise fastening patterns to guarantee stability and prevent movement over time. Position fasteners every 16 inches along both edges, maintaining a ½ inch distance from trim edges.
For boards wider than 10 inches, add an extra fastener at the center. On long runs, reduce spacing to 12 inches to minimize shifting.
| Board Width (inches) | Fastener Spacing (inches) | Fasteners per 16″ Length |
|---|---|---|
| Up to 10 | 16 | 2 (edges only) |
| 10 to 16 | 16 | 3 (edges + center) |
| Over 16 | 12 | 4 (edges + intermediate) |
| All | 0.5 from edges | Consistent |
Use stainless steel screws or hot-dipped galvanized nails for lasting hold.
Seal and Fill PVC Trim Gaps for a Clean Finish
Although PVC trim provides durability and weather resistance, properly sealing and filling gaps is essential to achieve a clean, professional finish. You’ll want to use high-quality polyurethane, urethane, or acrylic caulks designed for exterior use.
Properly sealing PVC trim with quality exterior caulks ensures a durable, clean, and professional finish.
Avoid filling joints completely to allow for natural expansion and contraction. Smooth the sealant with a wet finger or a finishing tool for a seamless look. Proper sealing prevents moisture intrusion and enhances trim longevity.
Use flexible sealant to accommodate temperature-induced movement. Leave room in joints; don’t overfill with caulk. Fill gaps between boards and around fasteners.
Smooth caulk immediately for clean edges. Select 100% acrylic latex caulk compatible with PVC trim.
Following these steps guarantees your trim remains watertight and visually flawless over time.
Paint PVC Trim for a Durable Finish
After sealing and filling gaps, applying paint helps protect your PVC trim while providing the desired aesthetic. Use 100% acrylic latex paint for peak adhesion and durability.
Before painting, make sure the surface is clean and dry. Apply a high-quality primer if necessary, especially on uncoated PVC surfaces.
Use a brush or roller for even coverage, avoiding excessive layers that can cause runs or drips. Allow each coat to dry fully before applying the next.
Typically, two coats provide sufficient coverage and protection. Paint curing can take up to 30 days; avoid pressure washing or sealing during this period to prevent damage.
Proper painting extends the lifespan of your trim and maintains its appearance against weathering and UV exposure.
Keep Your PVC Trim Looking Great: Cleaning and Maintenance
Regularly cleaning and maintaining your PVC trim guarantees it retains its appearance and functionality over time. Use mild detergent and water with a soft cloth or sponge to remove dirt and grime. Avoid abrasive cleaners that can damage the surface.
Inspect trim regularly for signs of mold or mildew and apply a diluted bleach solution if needed. Check and reseal joints as necessary to prevent water infiltration. Finally, monitor paint condition and touch up with 100% acrylic latex paint to maintain protection.
Wash trim every 6 months with gentle cleaning solutions. Remove mold with a 1:4 bleach-to-water mixture. Inspect and reseal caulking annually to prevent moisture damage. Avoid pressure washing to protect painted surfaces. Touch up paint within 30 days after installation for durability.
Frequently Asked Questions
Can PVC Trim Be Installed Over Existing Wood Trim?
Yes, you can install PVC trim over existing wood trim, but you must ensure the wood is solid, level, and free from rot or damage.
Secure the PVC trim with stainless steel screws or galvanized nails, penetrating at least 1.5 inches into framing.
Leave proper expansion gaps, especially around joints.
Use appropriate adhesives and sealants to bond and finish the trim properly, accounting for temperature-related expansion and contraction for a durable installation.
What Tools Are Essential for a DIY PVC Trim Installation?
You’ll need a miter saw for precise 45-degree cuts, essential for tight corner joints.
Use a nail gun set between 70–100 psi to drive stainless steel screws or hot-dipped galvanized nails securely, ensuring 1.5-inch penetration.
A measuring tape and pencil are indispensable for accurate length marking and gap allowances.
Finally, have a caulking gun ready to apply polyurethane sealant, which accommodates expansion gaps and finishes joints professionally.
How Long Does PVC Trim Typically Last Outdoors?
You can expect PVC trim to last 20 to 30 years outdoors when properly installed. Its durability against moisture, rot, and insects guarantees longevity. However, UV exposure might cause slight fading over time.
To maximize lifespan, maintain proper expansion gaps and use recommended fasteners. Apply high-quality acrylic latex paint with periodic touch-ups.
Regular inspection and sealing of joints will also prevent moisture infiltration, preserving the trim’s structural integrity and appearance for decades.
Is PVC Trim Environmentally Friendly or Recyclable?
PVC trim isn’t the most environmentally friendly option since it’s derived from petroleum-based plastics and can release harmful chemicals during production and disposal.
However, you can recycle PVC trim at specialized facilities, which helps reduce landfill waste.
When you choose PVC trim, consider its durability and low maintenance, which can offset environmental impacts by reducing replacement frequency.
Always check with local recyclers to make certain proper disposal and recycling options.
Can PVC Trim Be Cut Using a Standard Miter Saw?
Yes, you can cut PVC trim using a standard miter saw.
Make sure to use a fine-toothed carbide blade designed for plastics or non-ferrous materials to achieve clean, precise cuts without chipping.
Secure the trim firmly and cut at slower speeds to prevent melting or burning.
Always wear safety glasses and a dust mask, as cutting PVC generates fine dust and small particles.
Install PVC Trim the Right Way Every Time
By choosing proper fasteners, making precise cuts, and allowing expansion gaps, you make certain your PVC trim installation is durable and stable.
While some believe adhesives alone can secure trim, mechanical fastening remains essential for long-term performance.
Sealing gaps and applying suitable paint protect against moisture and UV damage.
Regular cleaning maintains appearance, confirming that a methodical approach, not shortcuts, delivers professional, lasting results.
Follow these steps closely for a reliable, clean finish every time.