How to Use Wood Filler? Step-by-Step for Perfect Repairs
Start by cleaning and sanding the damaged wood, removing dust and loose fibers. Choose a filler that suits your project: water-based for quick indoor fixes, epoxy for deep repairs.
If using two-part fillers, mix resin and hardener accurately and apply quickly before it hardens. Overfill holes slightly, smooth the surface, and let it dry fully.
Once cured, sand with the grain and finish to match your wood. To master every step, keep exploring detailed tips and tricks.
Key Takeaways
- Prepare the wood by cleaning, sanding, and removing dust to ensure proper filler adhesion.
- Mix two-part fillers precisely, following recommended resin-to-hardener ratios and apply immediately.
- Apply filler with a filling knife, overfilling slightly and smoothing edges to compensate for shrinkage.
- Allow the filler to dry or cure fully, testing firmness before sanding and finishing.
- Sand the filled area with medium to fine grit, seal with shellac if needed, and apply the final finish.
Types of Wood Filler Explained
When you need to repair wood, choosing the right filler is essential for a lasting result. Oil-based fillers offer durability and flexibility, making them ideal for exterior repairs. They require longer drying times and curing before sanding or finishing.
These fillers are typically used as putties applied after finishing, and they remain flexible without hardening, which can affect clear coat applications if not considered properly. Regular maintenance and cleaning of tools used with these fillers help preserve their effectiveness and extend usability.
Water-based fillers dry quickly, often within 30 minutes, and clean up easily with water. They’re cost-effective and best suited for indoor use or painted exteriors. Their fast drying time also reduces downtime, promoting efficient project completion.
For structural or deep repairs, two-part epoxy fillers provide strength and fast curing. However, they’re pricier and less color-varied. Proper mixing and temperature control are critical for these epoxy-based fillers to cure correctly and maintain structural integrity.
Wood putty stays flexible, perfect for minor fixes on finished surfaces but isn’t sandable or stainable. Specialty fillers, like homemade mixtures or wax sticks, serve niche purposes like matching grain or quick touch-ups.
Selecting the right type assures your repair holds up and looks professional. Additionally, understanding the importance of proper surface preparation can enhance filler adhesion and durability.
Preparing the Wood Surface for Filling
Before applying wood filler, you need to prepare the surface thoroughly to guarantee proper adhesion and a smooth finish. Start by clearing your workspace and ensuring good ventilation.
Thorough surface preparation is key for wood filler adhesion and a flawless finish.
Protect nearby furniture and floors with drop cloths, and wear gloves and safety glasses.
Next, clean the wood surface by removing dust and dirt using a brush or vacuum. Consistent surface preparation helps prevent issues caused by environmental factors that can affect adhesion.
Smooth out any splinters with sandpaper, sanding with the grain using medium grit.
Remove any old finish and wipe the surface clean with a cloth, ensuring it’s completely dry.
Inspect the wood for holes and cracks, marking areas that need filling.
Use a tack cloth to remove dust from these spots.
Choosing the right type of wood filler is essential to match the repair needs and ensure durability.
Finish by conducting a final inspection and confirming the surface is clean, dry, and smooth before applying filler.
Choosing the Right Wood Filler for Your Project
Since wood filler comes in various types designed for different needs, choosing the right one depends on your specific project requirements. You’ll want to consider the size of the repair, whether it’s indoor or outdoor, and if the filler needs to be stainable or paintable.
| Project Type | Recommended Filler | Why It Works |
|---|---|---|
| Small holes/nail holes | Water-based or putty-type | Fast drying, easy to sand |
| Large/deep repairs | Epoxy or two-part fillers | Strong, moisture-resistant |
| Exterior repairs | Solvent-based or epoxy | Durable, weather-resistant |
| Stainable repairs | Stainable wood filler | Blends seamlessly with wood tone |
Choosing materials that match the project’s requirements ensures better results, much like selecting the appropriate blade material for cutting tools to optimize performance.
Mixing Two-Part Wood Fillers Properly
When you’re mixing two-part wood fillers, it’s super important to get your measurements right. You’ll typically want a golf ball-sized amount of filler paired with a pea-sized activator. Just think of it like a recipe! Using the correct ratio is crucial to achieve the right curing time and performance.
Once you’ve got your amounts sorted, blend them together on a non-porous surface until everything is mixed in well and the color is uniform. This usually takes about two minutes. It’s all about ensuring that the filler cures properly, so don’t rush through this part!
Oh, and here’s a tip: make sure to work quickly! The pot life of your mixture is pretty short, especially when it’s warm out. So, only mix what you can apply right away. That way, you won’t end up with a hardened mess on your hands!
Remember, you can adjust the amount of activator to control the working time of the filler, using less for a quicker set and more for longer working time.
Correct Resin-to-Hardener Ratio
Although mixing two-part wood fillers might seem straightforward, getting the resin-to-hardener ratio exactly right is crucial for a strong, durable repair.
Most fillers require 2 parts resin to 1 part hardener by volume, but always check your product’s datasheet since some use a 1:1 weight ratio or other proportions.
For small batches, you can use the golf ball-to-pea size rule, but this is less precise.
Use calibrated pumps or a digital scale for accuracy, avoiding partial strokes or approximations.
Incorrect ratios cause poor curing, tackiness, or brittle filler.
Temperature and mixing surface cleanliness also affect measurement accuracy, as well as the maximum RPM of the mixing tool to ensure optimal curing.
Accurate measurement and thorough mixing are essential to ensure the filler cures properly and develops its full strength.
Stick to recommended ratios to guarantee proper chemical curing, maximum strength, and lasting adhesion in your wood repairs.
Thorough Mixing Techniques
Getting the resin-to-hardener ratio right sets the stage, but how you mix these components determines the filler’s performance and durability.
Start by placing the resin and hardener on a clean, flat, non-porous surface using separate tools to avoid contamination.
Use a rigid plastic or filling knife to smear, scrape, fold, and blend the mixture repeatedly until the color and texture are uniform with no streaks or lumps.
Periodically scrape the mixing tool and surface to incorporate any unmixed portions.
Mixing should take about 20-30 seconds to prevent premature setting.
Properly mixed filler feels smooth, pliable, and slightly warm, indicating the curing process has begun.
Always mix near the application site to minimize delay and maintain consistency.
For best results, it is important to use a ratio of approximately a golf ball to a pea of filler to hardener, though this ratio is somewhat flexible and can be adjusted depending on the job size and temperature conditions (the filler-to-hardener ratio).
Ensure your workspace has proper ventilation during mixing to maintain safety and optimal curing conditions.
Timing and Pot Life
Since two-part wood fillers cure quickly, you need to mix only as much as you can apply within their short pot life, typically just a few minutes.
Stick to the standard ratio of a golf ball-sized portion of filler with a pea-sized amount of hardener to guarantee ideal working time and curing.
Mix near your application spot to maximize usable time and avoid waste. Remember, temperature and humidity speed up curing, so work faster in warm, humid conditions. Using tools with ergonomic designs can help maintain steady control during quick application.
Apply the filler immediately after mixing because delays cause it to set prematurely. Using a filling knife for precise application helps ensure neat and effective filling.
Adjusting the hardener slightly affects curing time, but don’t stray far from recommended ratios to maintain strength.
Prepare your workspace and tools beforehand to avoid downtime. Always mix fresh batches in small amounts to keep control over timing and finish quality.
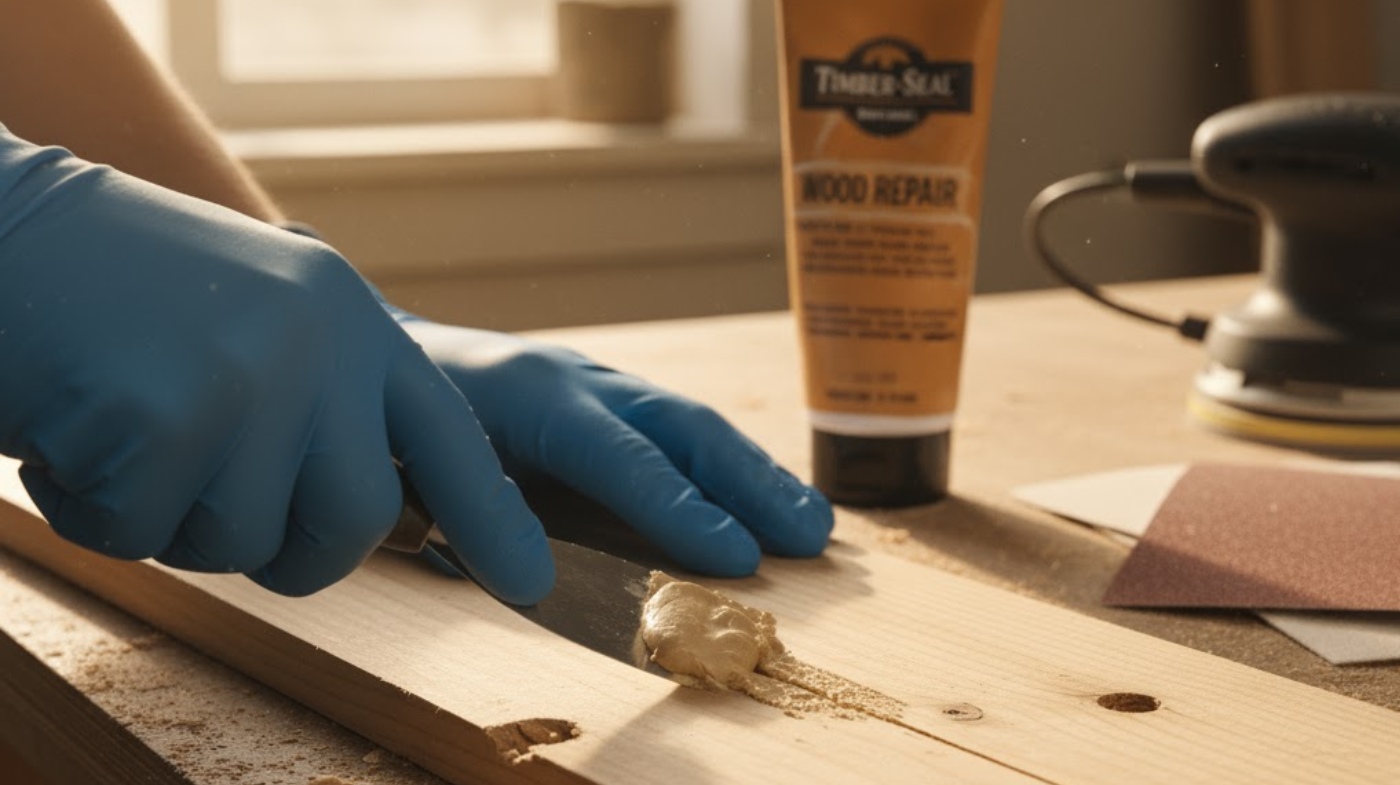
Step-by-Step Application Techniques
Before you apply wood filler, prepare the surface thoroughly to guarantee strong adhesion and a smooth finish.
Remove dust, dirt, and loose fibers using a brush or damp cloth. Lightly sand the area to create a rough texture for better grip, then clean off sanding dust. Ensure surface is free of oil or dirt by using a mild detergent if needed. Sanding in the direction of the grain can help maintain surface integrity for better filler bonding.
Start by removing dust and dirt, then lightly sand to ensure the filler adheres well.
For deep holes, insert backing material to support the filler. Choose the right filler for your project; stainable for stained wood or epoxy for durability.
Mix two-part fillers until smooth. Scoop filler onto a putty knife and press firmly into the void, slightly overfilling to compensate for shrinkage.
Smooth the surface, feathering edges to blend with surrounding wood. Remove excess filler immediately to minimize sanding.
Shape and level the filler while wet, using wet fingers or a cloth for fine smoothing before it sets.
Drying and Curing Times to Expect
Although drying times vary widely among wood fillers, understanding what to expect can help you plan your project efficiently.
Water-based fillers usually dry within a couple of hours, while solvent-based ones take longer. Proper surface preparation and sanding with the appropriate grit progression can improve adhesion and finish quality after filling.
Two-part fillers like Bondo cure quickly, in as little as 15-20 minutes, letting you sand and finish fast.
Plastic wood fillers need 2-6 hours for shallow repairs but up to 36 hours for deep fills.
Temperature, humidity, thickness, and ventilation also affect drying times, so keep your workspace well-ventilated and control conditions if possible. Optimal drying occurs in warm, dry conditions to speed up the process.
Test dryness by pressing gently on the surface; it should feel firm without indentations.
Always check if the filler changes color as it dries and follow manufacturer instructions closely to guarantee proper curing before moving on to the next step.
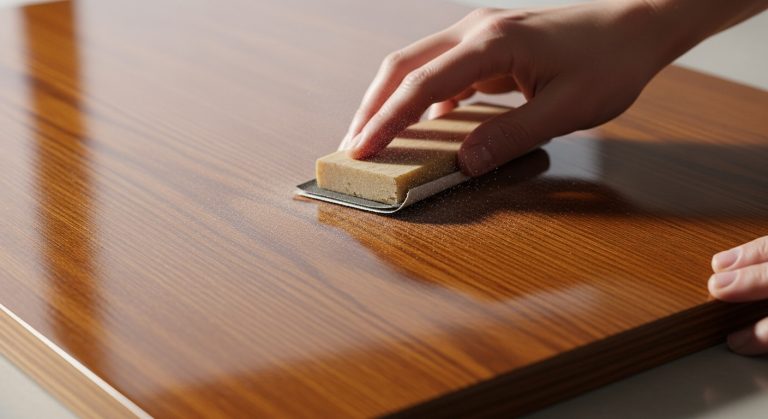
How to Sand and Finish Filled Areas?
When you’re ready to sand those filled areas, start off with some medium-grit sandpaper. Just remember to go with the wood grain! This helps avoid any scratches and ensures the filler blends in nicely.
Using a sanding block is a great idea too, as it helps keep the pressure even across the surface. This method is especially important because some fillers, like glue and sawdust mixtures, can be harder than wood and may dome when sanded. Always wear safety glasses to protect your eyes from dust and debris during sanding.
After you’ve got it all smoothed out with the medium grit, it’s time to switch to fine-grit sandpaper. This will give you that polished surface that’s perfect for finishing.
Oh, and don’t forget to clean up all that dust before you move on to painting or staining. A clean surface is key!
It might also be a good idea to use a primer. This way, you can be sure your finish will stick just right.
Sanding Techniques
When sanding filled areas, choosing the right sandpaper grit and mastering your technique are essential to achieving a smooth, professional finish. Start with coarser grit (80-120) to level the filler, then move to medium (150-180) to smooth scratches. Finish with fine grit (220+) for a polished surface.
Always sand with the wood grain to avoid visible marks. Apply even pressure to prevent gouges. Use a sanding block for flat areas and flexible pads on curves.
- Sand in the direction of the grain for a natural texture.
- Wipe dust between grits to monitor progress.
- Guarantee filler is fully dry before sanding, ideally waiting overnight drying to ensure optimal results.
- Lightly sand edges for a seamless connection.
- Wear protective gear to avoid dust inhalation and eye irritation.
Finishing Options
Before applying any finish to filled wood areas, you need to guarantee the filler is properly sealed to prevent absorption and promote even adhesion.
Use a 2-lb cut dewaxed shellac as a sealer; it works well with both water- and oil-based finishes. Sealing the filler with dewaxed shellac ensures compatibility with most finishes.
Make sure the filler is fully dry; this may take up to 72 hours, especially with waterborne fillers.
Lightly sand the filled surface smooth before sealing.
After sealing, apply your chosen topcoat; lacquers, varnishes, or water-based finishes all work if the filler is sealed correctly.
For color matching, test stains on a filled sample first since fillers rarely match wood perfectly.
Between finish coats, lightly rub with fine abrasives to ensure smoothness.
Finish with wax or polish if desired to enrich sheen and protect the surface.
Surface Preparation
Although filling the wood is a crucial step, preparing the surface properly guarantees the best adhesion and finish quality.
Start by sanding the filled area with coarse grit sandpaper to remove excess filler. Then switch to finer grit for a smooth finish blending with the wood grain.
Always sand evenly and in one direction to prevent gouges. After sanding, clean all dust thoroughly to avoid finish imperfections.
Before finishing, check for any low spots and reapply filler if needed.
- Sand with progressively finer grits
- Maintain consistent sanding pressure and direction
- Remove all dust with a vacuum or cloth
- Inspect and touch up low spots
- Test finishes on a hidden spot for compatibility
Proper prep ensures your final finish looks flawless and lasts. Using wood filler simplifies surface preparation for painting, ensuring a professional finish.
Safety Precautions When Using Wood Fillers
Since wood fillers contain chemicals that can irritate your skin, eyes, and respiratory system, you need to take specific safety precautions during use.
Always wear gloves, eye protection, and consider a mask or ensure proper ventilation. Avoid using contact lenses and keep your workspace free from ignition sources.
Store fillers tightly sealed, away from heat or flames. If exposure occurs, follow first aid steps immediately.
| Safety Aspect | Recommended Precaution | Why It Matters |
|---|---|---|
| Personal Protection | Gloves, goggles, mask | Prevents chemical contact |
| Ventilation | Work outdoors or ventilate well | Avoids inhaling harmful fumes |
| Workspace Safety | No sparks or flames | Prevents fire hazards |
| Handling | No eating/drinking; read label | Avoids ingestion or misuse |
| Emergency Response | Rinse eyes/skin, seek help | Minimizes injury severity |
Environmental Tips for Handling and Disposal
When handling and disposing of wood filler, you should take steps to minimize environmental harm by managing leftover material and waste carefully. Avoid pouring liquid filler down drains or dumping it in soil to prevent pollution. Proper disposal and recycling practices are vital for minimizing environmental impact.
Store unused filler in sealed containers to stop chemical leaks. Spread small amounts of biodegradable filler thinly on soil to allow natural breakdown. Clean your tools promptly to avoid hardened waste buildup.
Keep unused filler sealed and biodegradable filler thinly spread for safe natural decomposition.
Always follow local hazardous waste guidelines for disposal. Use fillers with low crystalline silica to reduce dust hazards. Prevent airborne dust during sanding by wearing masks and using ventilation.
Recycle cured filler through take-back programs when available. Choose eco-certified or biodegradable fillers for sustainability. Avoid outdoor incineration of synthetic fillers to prevent toxic emissions. Choosing manufacturers committed to greener solutions supports sustainability goals.
Frequently Asked Questions
Can Wood Filler Be Used Outdoors or Only for Indoor Projects?
You can definitely use wood filler outdoors, but you need to pick the right type.
Opt for epoxy or two-part fillers since they resist moisture and temperature changes well.
Avoid regular indoor fillers that can crack or deteriorate outside.
Prepare the surface properly, apply the filler evenly, and let it cure fully.
Don’t forget to seal the repair with a protective finish to boost durability against weather and UV exposure.
How Long Does Wood Filler Last Once Applied and Dried?
Think of dried wood filler like a knight standing guard, strong and steadfast, ready to protect your wood.
Once fully dried, usually between 3 to 36 hours depending on thickness, it can last for years if you seal it properly.
Moisture is the enemy, so apply paint or sealant to shield your repair.
Keep it dry and covered, and your filler will stay durable, blending in perfectly with your wood’s natural strength.
Is It Possible to Paint Over Wood Filler Without Sanding First?
You can paint over wood filler without sanding, but it’s generally not recommended for a smooth, durable finish.
Some specialty paints allow no-sanding application, but you must clean the surface thoroughly to remove dirt and oils.
For best results, lightly sand to smooth the filler, then apply primer before painting.
Skipping sanding might work for rough fixes but often leads to uneven paint and reduced adhesion.
What Tools Clean up Best After Using Epoxy Wood Filler?
You’ll love how plastic scrapers clean fresh epoxy wood filler, unlike brushes that get ruined fast if neglected.
Act quickly; wipe tools with acetone or solvent before epoxy hardens.
For cured residue, scrape off bulk first, then apply POLYCLEANER to soften it.
Use clean cloths or brushes to scrub away softened epoxy.
Can Wood Filler Be Used to Repair Furniture Legs or Structural Parts?
You can use wood filler to repair furniture legs, but choose the right type.
Standard fillers aren’t strong enough for structural parts subjected to stress. Instead, go for two-part epoxy fillers like Bondo; they create a durable bond, often stronger than wood itself.
Always prep the area, apply filler firmly, let it cure fully, then sand and finish.
For best results, combine with wood glue or mechanical reinforcement if the leg bears weight.
Ready to Try Wood Filler Yourself? Start with Small Repairs Today
Now that you know how to choose and apply wood filler correctly, you’re ready to fix any imperfections like a pro.
Did you know that over 60% of DIY wood projects involve some form of filling or repairing? Taking the time to prep, apply, and finish properly guarantees a smooth, durable result.
Always follow safety guidelines and dispose of materials responsibly to protect yourself and the environment. Your woodwork will look flawless in no time!