How to Remove Circular Saw Blade Guard: 6 DIY Steps
A circular saw is a powerful tool equipped with a blade guard, a critical safety feature designed to protect the user from the spinning blade. Yet, there are specific situations where you may need to remove the circular saw blade guard temporarily. With a little knowledge and preparation, anyone can remove the guard easily.
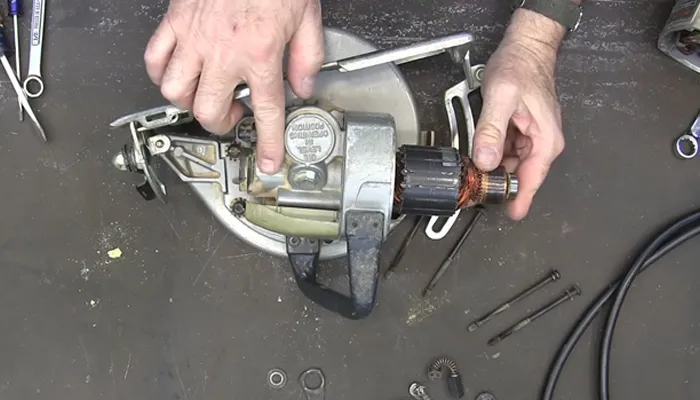
To remove a circular saw blade guard, you must loosen the guard screws using a flat-head screwdriver and pliers. The guard retaining ring should be carefully pried away from the saw’s body using a flat-head screwdriver, taking caution to avoid damage.
As part of this article, I’ll explain to you the step-by-step process to remove the guard and address any concerns you may have about safety and functionality.
How to Remove Circular Saw Blade Guard: DIY Steps
Here are my DIY instructions for removing the circular saw blade guard.
- Preparation and safety
- Gather the required tools and parts
- Locate the blade guard screws
- Follow the unscrewing rule
- Remove the guard retaining ring
- Safely remove the blade guard
Step 1: Preparation and Safety
To remove the circular saw blade guard, unplug the saw from the power source. It’s always a good idea to keep your hands safe when using power tools. Wear safety glasses to protect your eyes from debris or flying particles. Also put on work gloves to safeguard my hands from cuts or other injuries.
Step 2: Gather the Required Tools and Parts
Now, gather the required tools and parts for removing the circular saw blade guard. You’ll need:
- A flat-head screwdriver,
- Pliers,
- A wrench or socket set.
The flat-head screwdriver is essential for removing the screws that secure the saw blade guard in place. Pliers are useful for gripping and holding certain parts while performing the removal process. Also, some circular saw models may require a wrench or socket set to loosen and remove specific bolts or nuts.
Step 3: Locate the Blade Guard Screws
After gathering the tools, locate the screws holding the blade guard in place. These screws are usually located near the back of the guard or on the sides, depending on the saw type. They may be recessed or flush with the guard, so examine every possible spot.
Once identify the screws, position the screwdriver on the head of the first screw and firmly apply pressure to loosen it. Repeat this process for each screw until all is loose enough to remove.
Step 4: Follow the Unscrewing Rule
To remove the circular saw blade guard, follow the ‘righty-tighty, lefty-loosey’ rule when unscrewing the screws. This rule helps me determine which direction to turn the screws. When facing the screws, turn them counterclockwise to loosen them. By doing so, you can easily release the circular saw blade guard from its position.
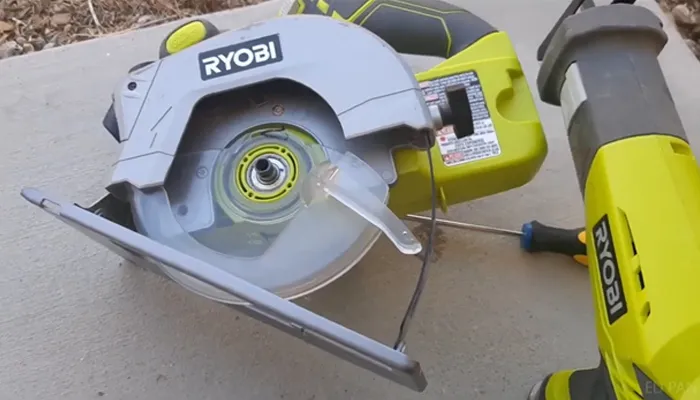
Step 5: Remove the Guard Retaining Ring

Now, remove the guard retaining ring. Carefully pry it away from the circular saw’s body using a flat-head screwdriver. Insert the screwdriver under the retaining ring and apply gentle pressure to lift it away.
It’s important to be patient and maneuver the screwdriver carefully to avoid damaging the ring or the saw. As you pry the ring, you may need to move around the circumference, applying pressure at different points to detach it fully.
Exercise caution during this step to prevent any accidents or injuries. Once the retaining ring is completely removed, the circular saw blade guard should be free to remove, allowing for blade replacement or further maintenance.
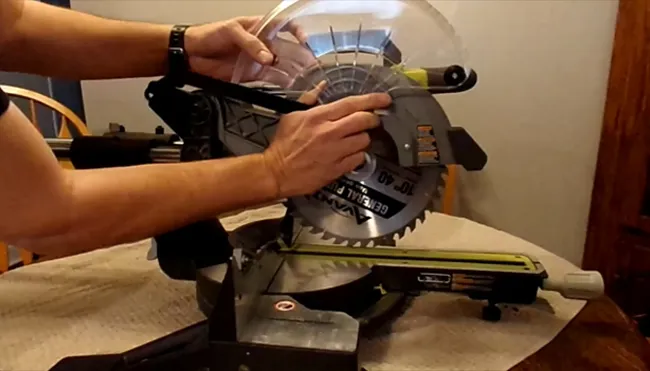
Step 6: Safely Remove the Blade Guard
Carefully lift the guard away from the circular saw using a screwdriver or pliers, ensuring not to force it. The guard should come off relatively easily since you removed the retaining ring in the previous step.
As you lift the guard, pay close attention to the orientation and order of any parts that may come off with it. This will help you easily reassemble them later. Make sure to handle the guard with care to avoid any accidental cuts or injuries.
Why and When Should You Remove a Circular Saw Blade Guard?

When considering whether to remove the circular saw blade guard, there are several factors to consider.
1. Making Precise Cuts
Removing the circular saw blade guard enhances the ability to make precise cuts by providing better visibility and control. When the blade guard is in place, it can obstruct the view, making it difficult to see the cutting line accurately. This can result in inaccurate cuts and wasted materials.
By temporarily removing the guard, a clear line of sight to the blade and the cutting area, allowing to align the blade precisely with the intended cutting line. This improved visibility ensures you can make straight, clean cuts, reducing the need for additional trimming or adjustments.
2. Making Rip Cuts
When making rip cuts, you often remove the circular saw blade guard to ensure close contact between the blade and the workpiece. Rip cuts involve cutting a piece of wood lengthwise, and having the blade guard in place can sometimes interfere with achieving a precise cut.
Removing the blade guard, you can have a clear line of sight and better control over the cut. However, note that removing the blade guard comes with increased risk. Without the guard, there’s a higher chance of accidental contact with the blade, which can result in serious injury.
3. Custom Cuts and Unique Shapes
When working with irregularly shaped workpieces, such as curved or angled cuts, the blade guard can interfere with the smooth movement of the saw. By removing the blade guard, you can maneuver the saw more freely and make precise cuts along the unique contours of the workpiece.
4. Hard-to-Reach Areas
In tight or hard-to-reach areas, you must remove the circular saw blade guard to improve maneuverability and access to the cutting area.
When working in confined spaces, such as inside cabinets or corners, the blade guard can hinder my ability to make precise cuts. Removing the guard, you can navigate the saw more easily and get closer to the material I’m cutting.
5. Crosscuts and Dado Cuts
When making crosscuts, the blade guard can sometimes get in the way of cutting the wood across the grain. Similarly, when creating dado cuts, the blade guard can obstruct the groove or channel being made. Removing the guard cuts smoothly and efficiently without any hindrance.
6. Broken Guard Replacement
A damaged or worn guard can compromise the safety of your saw, as it may not effectively protect you from the spinning blade. It’s important to remove and replace a broken guard as soon as possible to ensure your safety while using the saw.
Can I remove the guard on any circular saw?

By carefully using a wrench, you can remove the guard from any circular saw. However, note that removing the guard isn’t recommended unless necessary. The guard protects the user from potential accidents and flying debris. It serves as a safety measure to prevent injuries while operating the saw.
Removing the guard exposes the blade, increasing the risk of accidents and injuries. Therefore, it’s highly recommended to keep the guard intact and functioning properly.
Is it safe to remove the blade guard?
It is completely safe to remove the circular saw blade guard for specific cuts and requirements. There are certain situations where it may be necessary to remove the blade guard.
For example, when making plunge cuts or using specialty blades. In these cases, it’s imperative to take extra precautions. Ensure the saw is unplugged, use the proper tools, and follow the manufacturer’s instructions.
Can I use a circular saw without the blade guard for all cuts?
Although you can use a circular saw free of the blade guard, it isn’t recommended. This is because it compromises safety and increases the risk of accidents and injuries.
So, removing the guard should be done selectively and temporarily only when the specific task requires it. For example, when making plunge cuts or certain angled cuts. However, always reinstall the guard immediately after completing these tasks.
Safely Remove the Circular Saw Blade Guard for Precision Cuts
Removing the circular saw blade guard should only be done when absolutely necessary, and it should always be done with the utmost attention to safety.
Whether you’re seeking precision in your cuts, working with irregular shapes, or replacing a worn guard, knowing when to remove the guard is key. Safety should remain a top priority throughout the process, and you should follow the manufacturer’s guidelines specific to your saw model.
By doing so, you can use your circular saw effectively and safely in a wide range of cutting applications.