How to Use Paste Wax to Lubricate a Table Saw: 8 Practical Steps
Proper maintenance and lubrication of your table saw are essential to ensure its longevity and optimal performance in woodworking projects. One effective method for lubricating a table saw is by using paste wax.
Take the time to prepare the table saw by ensuring it’s clean and debris-free. The surface should be carefully sanded to remove any imperfections that could hinder the application of the wax.
Apply a thin layer of paste wax to the table saw and allow it to dry. Once dried, buff the surface with a clean cloth to bring out the shine in the wax.
Here, I will explain to you the process of using paste wax to lubricate your carpentry table saw, ensuring optimal functionality and longevity.
How to Use Paste Wax to Lubricate a Table Saw: Steps to Take

To effectively lubricate a carpentry table saw with paste wax, there are several important steps to follow. I listed the steps based on the sequence for proper application.
- Prepare your table saw
- Clean the surface
- Sand imperfections
- Remove pitch or resin
- Apply the paste wax
- Allow the wax to dry
- Buff the surface
- Reassemble and reconnect
Step 1: Prepare Your Table Saw
I recommend preparing your table saw by removing the saw blade before applying paste wax to lubricate it. This step is crucial for ensuring safety and preventing accidents during the process.
To remove the saw blade, first ensure the table saw is turned off and unplugged. Then, using a wrench or the blade removal tool provided with the saw, carefully loosen the arbor nut and remove the blade.
Step 2: Clean the Surface
After removing the saw blade, the next step is to clean the table’s surface thoroughly to ensure optimal adhesion and prevent contamination.
I suggest using a vacuum to remove most of the sawdust from the surface. This will help eliminate loose particles and make the cleaning process more effective.
Then, use brushes to clean caked-on sawdust from the trunnion assembly and gear mechanisms. Pay close attention to these areas as they tend to accumulate more debris. I think compressed air can also remove stubborn sawdust that is hard to reach with brushes.
Step 3: Sand Imperfections
To achieve a smooth and even surface on the tabletop, sand any imperfections before applying paste wax to lubricate a carpentry table saw.
Start by inspecting the tabletop for rough spots or any visible imperfections. Once identified, use sandpaper with a grit appropriate for the severity of the imperfections.
Begin sanding in a circular motion, applying even pressure to remove any bumps or unevenness. Be sure to sand in the direction of the wood grain to avoid causing any further damage. Continue sanding until the surface feels smooth to the touch and all imperfections have been eliminated.
Step 4: Remove Pitch or Resin
Pitch and resin can accumulate on the saw’s surface over time, causing friction and hindering the smooth movement of materials. To remove these substances, I advise using appropriate tools and techniques.
One effective method is to use a plastic scraper or putty knife to scrape off the pitch or resin gently. Be careful not to scratch the surface of the table saw.
After removing the bulk of the buildup, use a rag or cloth dampened with mineral spirits to clean the surface further. Ensure that all traces of pitch or resin are completely removed before proceeding to the next step of applying the paste wax.
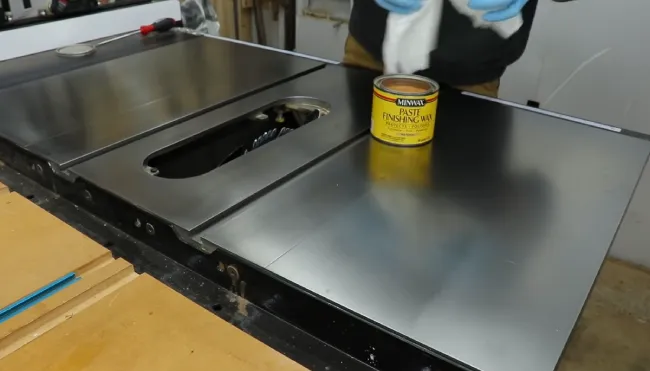
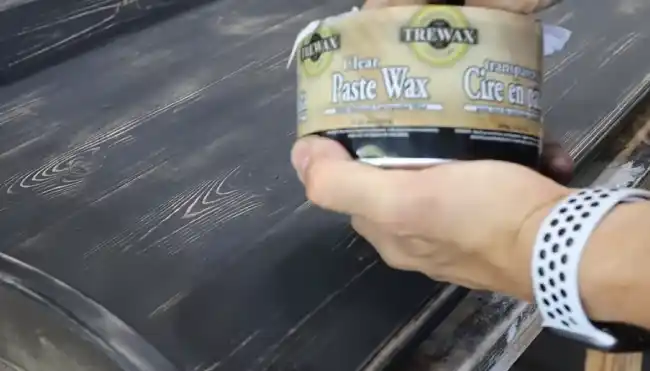
Step 5: Apply the Paste Wax
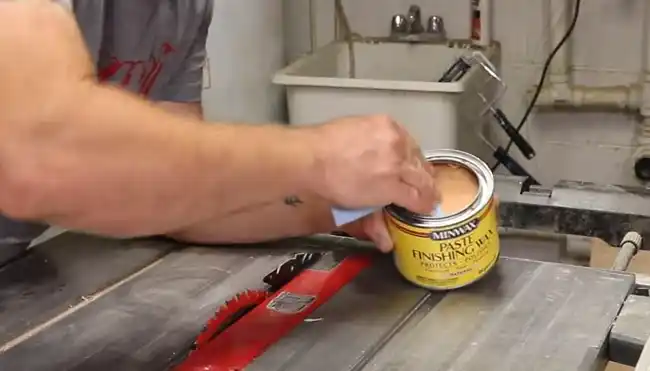
Apply a thin, even coat of paste wax using a clean, lint-free cloth to lubricate the carpentry table saw. This step is important to ensure smooth and effortless wood movement across the table saw. By applying the paste wax, it creates a protective layer that reduces friction and prevents the wood from sticking to the surface.
First, fold the cloth into a small square and dip it into the paste wax. Then, gently rub the cloth onto the tabletop, fences, rails, and the body and legs of the table saw stands. Lubrication must be applied to every part of the table saw’s surface to make the saw quieter and smoother.
Step 6: Allow the Wax to Dry
After applying the paste wax, allow it to dry for approximately 10 minutes. It will ensure that it bonds effectively with the table saw’s surface and provides optimal lubrication.
This drying time is crucial as it allows the wax to form a protective layer on the table saw, reducing friction and preventing rust or corrosion.
During the drying process, the wax reacts with the air, causing it to harden and adhere to the surface. This bond between the wax and the saw’s metal components ensures long-lasting lubrication, allowing for smooth and precise cuts.
Step 7: Buff the Surface
To buff the surface of the carpentry table saw and achieve a smooth and polished finish, use a clean cloth and apply small circular motions. In my opinion, this step is crucial in enhancing the overall appearance of the table saw and improving its performance.
By buffing the surface, any remaining wax residue will be removed, leaving behind a clean and glossy finish. The circular motions help distribute the wax evenly and ensure that all areas of the surface are properly buffed.
Step 8: Reassemble and Reconnect
To complete the lubrication process, reassembling and reconnecting the parts of the carpentry table saw is the final step.
- Start by carefully placing the saw blade back onto the arbor, ensuring that it’s aligned properly. Use the wrench to tighten the blade securely in place.
- Then, reattach any other components that were removed, such as the blade guard or rip fence, following the manufacturer’s instructions.
- Once everything is reassembled, it’s time to reconnect the power to your table saw. Locate the power cord and plug it back into a grounded electrical outlet.
- Double-check that all connections are secure before turning on the saw.
What type of paste wax should you use on a table saw?
I prefer using a silicone-free paste wax for table saws and other woodworking equipment. This type of paste wax is designed to provide optimal lubrication for the smooth operation of the table saw while also protecting the surface from rust and corrosion.
It’s also important to read the product label or description to ensure that the paste wax is suitable for use in woodworking applications.
How often should you wax your table saw?
Waxing your table saw should be done regularly to ensure optimal performance and protection. While the frequency of waxing may vary depending on usage and environmental conditions, I recommend waxing your table saw every month or two.
Regular waxing helps to reduce friction between the workpiece and the table surface, allowing for smoother and more precise cuts. Additionally, the wax creates a protective barrier on the table saw surface, preventing rust and corrosion from occurring.
Can I use car wax on my table saw?
Using car wax on your table saw isn’t recommended due to the presence of silicone oil, which can negatively affect its performance. Car waxes are designed to provide shine and water repellent for vehicles, and many contain silicone oil for these purposes.
However, when applied to a table saw, the silicone oil can transfer onto the workpiece and cause issues with adhesion, finishing, and staining.
Additionally, the presence of silicone oil can create a slippery surface on the tabletop, which can compromise the accuracy and safety of your cuts.
Instead, opt for a paste wax specifically marketed for floors and furniture, as these waxes don’t contain silicone oil and are suitable for use on woodworking machinery.
Which is better: paste wax or liquid wax?
In my opinion, paste wax is better for use on woodworking machinery.
Paste waxes are thicker and adhere to surfaces better than liquid waxes, making them more effective at protecting the surface from dust and moisture. Additionally, the buildup of paste wax can help create a smoother finish that helps reduce friction while cutting.
Liquid waxes are often easier to apply, as they come in a convenient spray or squeeze bottle, making it simple to cover large surface areas. However, they may not provide as much metal oxidation protection or create a smooth finish as paste wax.
Paste Wax is the Secret to Maintaining a Top-Performing Table Saw

Using paste wax to lubricate your carpentry table saw is a simple and effective way to ensure smooth and precise cuts. It’s important to choose the right paste wax type for your table saw and apply it regularly for optimal performance.
As long as you follow the steps outlined here, you can maintain a clean and functional table saw surface, ensuring it remains in excellent condition for years to come.
While car wax may seem like a convenient alternative, it isn’t recommended as it may not provide the same level of lubrication. Paste wax is a better choice over liquid wax for maintaining your table saw’s performance.
So, take the time to care for your table saw with the proper lubrication, and you’ll be rewarded with smoother cuts and an overall better woodworking experience.