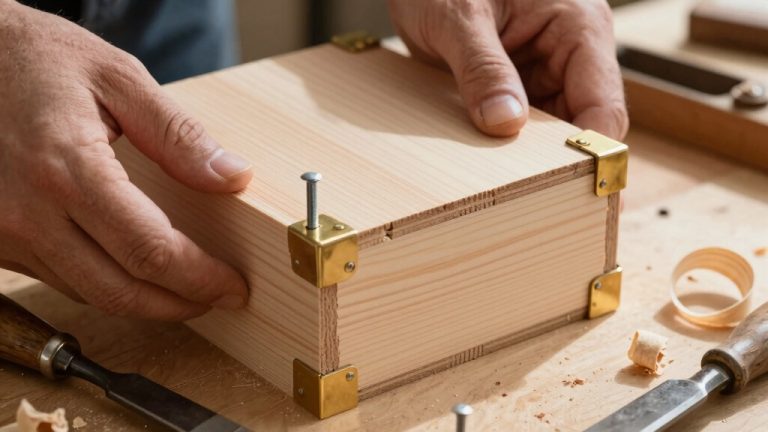
How to Make Plywood Look Good? Step-by-Step Guide to Follow
To make plywood look good, start by thoroughly cleaning and sanding the surface with fine-grit paper, following the wood grain for a smooth finish.
Fill any imperfections with matching wood filler. Then choose a finish that highlights the natural grain, like a stain or clear polyurethane.
Apply thin, even coats, sanding lightly between each layer for a polished look. Finish with careful buffing to add a subtle glow. Keep exploring to discover expert tips on perfecting every step.
Key Takeaways
- Thoroughly clean and sand plywood with progressive grits, following the wood grain for a smooth surface.
- Fill dents, holes, and voids with color-matched wood filler or epoxy for seamless repair.
- Apply a wood stain to enhance natural grain, wiping off excess to avoid blotchiness.
- Seal plywood with multiple thin coats of polyurethane or clear varnish for durability and a polished look.
- Finish edges with banding, sanding, and clear coats to improve appearance and reduce splinter risks.
Preparing the Plywood Surface for Finishing
Before you start finishing your plywood, you’ll want to prepare the surface meticulously to confirm a flawless, lasting look.
Begin by removing every speck of dust, dirt, and debris with a brush, vacuum, or air compressor. Clean edges and corners thoroughly, where finishes often wear. Proper surface preparation also helps prevent moisture damage during finishing.
Start by eliminating all dust and debris, focusing especially on edges and corners prone to wear.
Wipe the surface with a damp cloth to catch any lingering dust, then let it dry completely.
Inspect for dents, holes, or cracks, and fill imperfections with quality wood filler using a putty knife.
Once dry, sand these areas smooth and clean again to remove dust. Sanding is necessary for a good finish and using 120-180 grit sandpaper gives the best results.
Seal the porous edges with primer or epoxy to prevent moisture damage and confirm durability.
This careful prep creates a sleek, even canvas that elevates your plywood’s natural beauty and confirms your finish lasts.
Effective Sanding Techniques for Smooth Plywood
Once your plywood surface is prepped and primed, sanding becomes the key to revealing that flawless, silky finish. To master this, follow a progressive grit sequence, starting with 100-150 grit and advancing to 320 or higher for ultimate smoothness. Using the proper grit progression ensures a professional, flawless finish.
Sand evenly with the grain, using long, controlled strokes and keeping your sander flat to avoid gouges or unevenness. For delicate veneers, hand sanding offers precision without damage. It is important to avoid over-sanding to maintain the surface integrity of your plywood.
Here’s your essential sanding checklist:
- Mark the surface with pencil lines to track progress visually.
- Use a sanding block or orbital sander for consistent pressure.
- Sand between finish coats with ultra-fine grit (320–1000) to remove imperfections and enhance smoothness.
This method guarantees your plywood attains a sleek, professional-grade finish that’s both tactile and visually stunning.
Filling Imperfections and Voids in Plywood
To get that perfect plywood surface, it’s all about picking the right wood filler. You want something that matches not just the color but also the texture. Whether you go for a store-bought option or whip up a custom mix using sawdust, it’s key to get that match just right.
Using sawdust from the same wood species mixed with glue can help create a filler that absorbs stain better and blends seamlessly. When you’re ready to apply the filler, grab a putty knife and get to work. Make sure to press it firmly into each little void or imperfection.
Choosing Wood Fillers
Choosing the right wood filler is essential for transforming plywood imperfections into seamless, polished surfaces that elevate your project’s aesthetic.
To pick the perfect filler, consider these key factors:
1. Project scope: Use epoxy or two-part fillers like Bondo for large voids or structural repairs. For best results, ensure the surface is clean and dry, similar to preparing wood for strong adhesion in woodworking projects.
Opt for latex or traditional fillers for small cosmetic fixes.
2. Finish compatibility: Choose fillers that sand smoothly and accept stains or paint to blend flawlessly with your plywood’s natural grain. Many wood fillers come in water-based and solvent-based formulas, each suited for different application needs and drying times.
3. Durability needs: For moisture-exposed or high-impact areas, prioritize water-resistant, shrink-free fillers like FamoWood or epoxy for lasting strength and wear resistance.
Application Techniques
Selecting the right filler sets the stage, but how you apply it defines the final look of your plywood.
Start by sanding with medium grit and cleaning dust thoroughly. For small cracks, use a glue-sawdust mix; for large voids, epoxy-sawdust putty works best. It is important to choose the appropriate repair method based on whether the repair is non-structural or structural, as this affects the durability and finish of the repair. Proper surface preparation is essential to ensure adhesion and longevity of the repair materials.
Apply filler smoothly, let it dry fully, then sand progressively with fine grit to blend seamlessly.
| Technique | Best For | Drying Time |
|---|---|---|
| Glue + Sawdust | Small cracks | 1-2 hours |
| Epoxy + Sawdust | Large voids | 4-6 hours |
| Wood Grain Filler | Surface imperfections | 1-3 hours |
Finish with multiple sealant coats, sanding lightly between layers for a flawless, durable plywood surface. Using sealants and protective coatings helps maintain the finish and protects the plywood from moisture and wear.
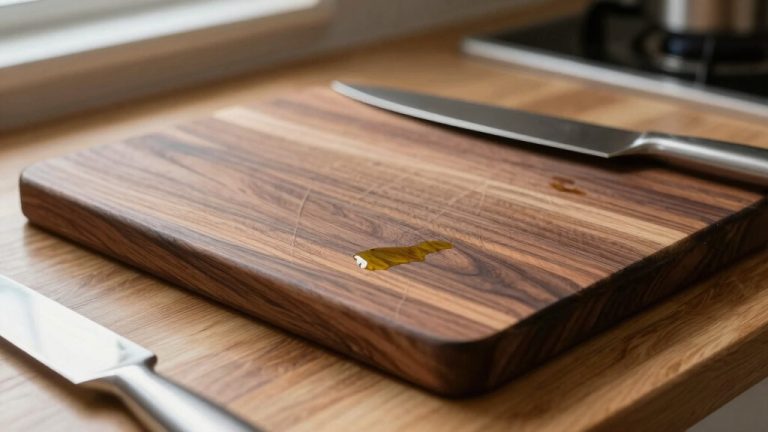
Choosing the Right Finish for Your Plywood Project
When working on your plywood project, it’s super important to match the grade of your plywood with the right finish. This way, you can really highlight its natural beauty or, if needed, hide any imperfections seamlessly. Applying a wood stain can also enhance the grain while providing protection.
You might be thinking about using clear varnish to enhance the grain, which can give your project a lovely, polished look. Or maybe you’re leaning towards paint for a bold pop of color? Both are great options!
If you’re looking for something that’s durable and protective, then polyurethane might be the way to go. Choosing the appropriate plywood grade ensures the finish adheres well and looks its best. Each finish has its own unique aesthetic and function, which is pretty cool.
Types of Wood Finishes
When aiming to enhance your plywood project’s visual appeal, understanding the variety of wood finishes available is essential. Each finish offers a distinct aesthetic and protection level, so choosing wisely elevates your piece’s character and durability.
- Oil-Based Finishes: These penetrate deeply, enriching grain and color with a warm, rich glow. They’re perfect for furniture. Expect longer drying times but enjoy lasting protection and texture emphasis.
- Water-Based Finishes: Ideal for maintaining plywood’s natural lightness, they dry quickly with low odor. Acrylic varnish and water-based polyurethane keep your project looking crisp and clean. They are also easy to clean, requiring only water and mild detergent for maintenance.
- Clear Finishes: Transparent varnishes and polyurethanes highlight grain texture while shielding against moisture and wear. They’re suitable for high-traffic areas. They may subtly darken light plywood, so test first.
Finish Compatibility Considerations
Although choosing a finish might seem straightforward, understanding compatibility can make or break your plywood’s final look and longevity.
You’ll want to match solvent types. Water-based finishes layer smoothly with their kind, as do mineral spirits-based ones.
However, mixing these causes separation and a flawed finish. Before recoating, thoroughly clean and scuff-sand the surface to guarantee new layers adhere flawlessly. Both solvent-soluble and water-soluble dirt must be addressed for optimal adhesion.
With plywood varieties, MDO demands face-priming and top-coating, favoring acrylic-latex primers and solid stains, especially outdoors.
Surface prep is fundamental. Sanding from 120 to 220 grit and filling voids creates a uniform base, avoiding absorption issues. Be cautious with wax; it rarely mixes well and can hinder adhesion if left in excess.
Protective Coating Options
Since the finish you choose defines both the look and lifespan of your plywood, selecting the right protective coating is essential.
To elevate your project’s aesthetics while ensuring durability, consider these top options:
- Hard Wax Oil – Penetrates deeply, enhancing natural grain with a matte or low-sheen finish. It’s non-toxic and UV-resistant, perfect for indoor and outdoor use, offering a softly aged elegance.
- Oil-Based Finishes – Tung or polyurethane oils enrich color and depth, creating a warm, long-lasting surface ideal for furniture. They require longer drying and periodic upkeep.
- Varnish, Lacquer & Polyurethane – Deliver glossy to satin sheens with strong water and wear resistance, suitable for kitchens and floors. Choose water-based variants for faster drying and clearer wood hues.
Multiple thin coats with proper sanding between layers can enhance grain contrast and produce a smooth, professional finish, ensuring your plywood looks stunning and stands the test of time with optimal protective coatings.
Step-by-Step Guide to Applying Stain and Sealant
To achieve a flawless stained plywood finish, start by sanding the surface gently with 180-220 grit sandpaper, always following the wood grain to prevent scratches. This also helps open the pores for even stain absorption. For plywood edges, consider using edge banding to conceal raw edges that stain differently than the top layer.
Next, apply the stain with a lint-free cloth or foam brush in long, smooth strokes along the grain. Wipe off excess promptly to avoid blotchiness. After the stain dries completely, seal the surface with thin, even coats of polyurethane or water-based finish, letting each coat cure fully.
| Step | Tool | Tip |
|---|---|---|
| Sanding | 180-220 grit sandpaper | Sand gently with the grain |
| Staining | Lint-free cloth | Wipe excess to avoid blotches |
| Sealing | Foam brush | Apply thin coats evenly |
Best Practices for Finishing Plywood Edges
After perfecting the stained and sealed plywood surfaces, your attention should turn to the edges, which often define the overall polish of the piece.
To finish edges flawlessly, follow these best practices:
- Apply Edge Banding: Use thin wood veneer with heat-activated adhesive. Position it with a slight overhang, iron on medium heat, press firmly, and let cool before trimming for a seamless, natural look. For added protection and smoothness, consider applying a high-quality paste wax to reduce friction and wear.
- Trim and Smooth: Trim excess banding with sharp tools or pliers. Refine edges using an edge trimmer or block plane. Finish by sanding progressively with fine grit to blend edges smoothly. This process not only improves appearance but also enhances safety by reducing the risk of splinters.
- Seal and Protect: After sanding, apply a clear coat or paint to seal edges. This enhances durability and gives your plywood a sleek, professional finish.
Tips for Achieving a Professional Spray Finish
To kick things off, you really want to focus on preparing your plywood just right. This means cleaning it thoroughly, sanding it down, and filling any imperfections you come across. It’s all about creating that flawless base before you even think about spraying. Proper surface preparation is essential because it protects against moisture and prevents structural damage by sealing the plywood effectively. Using a sealant with water-resistant properties can further enhance the durability of your surface.
Now, let’s talk about the spray application itself. It’s crucial to control your distance from the surface, keep a steady speed, and ensure your overlap is consistent. This will help you achieve an even, streak-free coat that looks amazing.
And don’t forget about the finishing touches! Applying multiple thin layers is key, along with allowing for adequate drying time in between. This approach will give you that sleek, professional sheen you’re aiming for. Sanding between coats is also important to ensure each layer adheres well and creates a smooth, polished finish.
Preparing Plywood Surface
Three essential steps set the stage for a flawless spray finish on plywood: thorough cleaning, precise sanding, and attentive filling.
First, cleanse the surface with mild soapy water to remove dust and grease. Then dry completely to prevent trapped moisture. Always wear safety goggles to protect eyes from debris while preparing your workspace.
Next, sand evenly, starting with medium grit (120-150) to smooth roughness. Refine with fine grit (220-320) for a silky base.
Finally, fill holes or gaps with wood filler. Sand flush once dry, and seal edges with a quality primer to guarantee uniform absorption. When spraying, it’s often recommended to spray with the grain first before applying cross grain coats for optimal finish quality. Use a vacuum or tack cloth to eliminate sanding dust without leaving residue.
Avoid oily cleaners that repel paint. Maintain a clean, dust-free workspace with stable temperature and humidity. Inspect the work area for clutter-free workspace to enhance focus and safety. This meticulous prep ensures your plywood’s beauty shines through every spray coat.
Spray Application Techniques
A flawless spray finish demands mastery of technique and careful control.
Keep your nozzle 6-8 inches from the plywood, holding it parallel for even coverage.
Use smooth, steady strokes with about 50% overlap, starting just before edges and continuing past them to avoid buildup or bare spots.
Adjust your spray pattern and air pressure to suit the project’s size and finish type, testing settings on scrap wood first.
Apply a light mist coat initially, then build up with at least three coats, allowing each to dry until tack-free. It is important to lightly sand between coats with high grit sandpaper to ensure smoothness.
Prioritize spraying edges and end grain first, as they absorb more finish.
Maintain consistent speed, control flow with half-trigger pulls, and always spray in a well-ventilated, dust-free space while wearing protective gear.
Post-Spray Finishing
Although spraying lays the foundation, achieving a flawless plywood finish depends on meticulous post-spray care.
To elevate your project’s look, focus on these essential steps:
1. Dry and Cure Properly
Let each coat dry 3-5 minutes before recoating. Wait around 30 minutes before handling. Full curing guarantees durability and prevents fingerprints or tackiness.
2. Sand and Clean Between Coats
Use fine 320-400 grit sandpaper to smooth out dust nibs and imperfections. Remove debris with a tack cloth or compressed air for a pristine surface.
3. Build Uniform Layers
Apply at least three thin coats, starting with edges and knots. Overlap passes by 50% for an even, glossy finish.
This precise, trend-savvy approach ensures your plywood will radiate professional-level elegance.
Regular cleaning prevents the buildup of resin and debris, which can affect the smoothness and durability of your finish, so maintaining clean surfaces is essential.
How to Avoid and Fix Common Finishing Problems?
When you want your plywood finish to look flawless, understanding how to prevent and correct common issues is vital.
Avoid blisters and pinholes by using slower thinners and sealing porous surfaces with appropriate primers or fillers. Also, monitor the board temperature during application to minimize blister formation.
To prevent blooming or surface cloudiness, ascertain compatibility between your finish and catalysts, and avoid wax contamination.
Stop surface cracking by applying thin, even coats and controlling moisture and drying conditions.
For even staining, use pre-stain conditioners and sand between coats to smooth raised fibers.
When texture problems arise, spray finishes or seal with shellac before priming for a sleek look.
Multiple thin coats with light sanding achieve the smooth, uniform finish that keeps plywood stylish and on-trend.
Essential Safety Measures When Finishing Plywood
Since finishing plywood involves exposure to chemicals, dust, and fumes, prioritizing safety is essential to protect your health and guarantee a flawless result.
Finishing plywood exposes you to chemicals and dust, so safety is crucial for health and a perfect finish.
You want to create a beautiful finish, not risk irritation or injury. Here are three key safety measures:
- Equip Yourself Properly: Wear safety glasses, gloves, and a respirator mask to shield your eyes, skin, and lungs from harmful dust, splashes, and fumes. Cover exposed skin with appropriate clothing.
- Maintain Ventilation: Work in well-ventilated spaces or use fans to disperse toxic vapors. Avoid finishing outdoors in extreme weather and keep flammables away from heat or sparks. Choose sealants with enhanced moisture and UV resistance to reduce the need for frequent reapplication in outdoor environments.
- Handle Materials Safely: Follow manufacturer instructions, use proper applicators, and store products securely. Dispose of oily rags properly to prevent fire risks.
Polishing and Buffing for a High-Gloss Finish
To achieve that coveted glass-like shine on your plywood, you’ll need to master a meticulous polishing and buffing routine that builds depth and clarity layer by layer.
Start by sanding with ultra-fine grits, 600 up to 12,000, wet sanding between 1000 and 2500 grit to smooth imperfections. Perfect surface preparation is critical because any milling marks or irregularities will reduce the reflective quality of the finish.
Choose lacquer or shellac finishes, applying thin coats and sanding lightly between layers.
When polishing, use a progression of compounds from rubbing to fine polishing with soft wool or foam pads on an electric polisher.
Let the tool’s orbital motion do the work, and avoid heavy pressure to prevent burns.
Finish with a swirl mark remover, then protect the surface with wax or sealant for lasting gloss.
Clean pads regularly and keep dust away to maintain a flawless, mirror-like plywood finish.
Frequently Asked Questions
Can Plywood Be Finished Without Sanding?
Yes, you can finish plywood without heavy sanding, but expect some trade-offs.
Using grain fillers and applying thin coats of epoxy or tongue oil with light, wet sanding can create a sleek surface.
Edge banding helps smooth edges without much sanding too.
However, for a flawless, durable finish, you’ll want at least minimal sanding to prevent roughness and blotches.
Skipping it entirely might leave your plywood looking uneven or less polished.
How Do I Prevent Plywood From Warping During Finishing?
Think of your plywood as a delicate canvas craving balance. To prevent warping during finishing, seal every surface evenly, including edges and the underside, to lock in moisture like a protective shield.
Acclimate your wood in its final environment, control humidity, and store it flat with weight or clamped vertically.
Prompt cutting and finishing reduce exposure risks.
These mindful steps preserve smoothness, ensuring your plywood remains a flawless, elegant foundation for your design.
What Is the Best Way to Store Plywood Before Finishing?
You should store plywood flat on a stable, level surface, elevated off the ground with pallets or blocks to avoid moisture damage.
Keep it in a dry, cool, well-ventilated indoor space, away from direct sunlight, rain, or temperature swings.
If you stack sheets, support both ends and the middle to prevent warping.
Acclimate the plywood for a few days before finishing, and avoid dust or contaminants to maintain its pristine surface.
Can I Use Oil-Based Finishes on All Plywood Types?
You can use oil-based finishes on most plywood types, but keep in mind the wood’s character.
Hardwood plywoods like oak, birch, and walnut soak up oils beautifully, enhancing grain depth and warmth.
Softwoods like pine need a conditioner first to avoid blotchy results.
Always prep your surface: dry, clean, and sanded for even absorption.
This approach guarantees your plywood reveals rich, natural elegance that’s both trendy and timeless.
How Long Should Finished Plywood Cure Before Use?
Think of your finished plywood like a fine Elizabethan tapestry. It needs time to settle.
You should let it cure at least 24 to 48 hours after the final coat to guarantee the finish hardens beautifully. For tougher adhesives or oil-based finishes, 72 hours might be best.
Keep it in a well-ventilated, temperature-controlled space.
Avoid stress and sand lightly between coats to maintain that flawless, on-trend aesthetic you’re aiming for.
Take Your Plywood Finishing Skills to the Next Level
Now that you’ve mastered the art of prepping, sanding, and finishing your plywood, you’re ready to transform it into a piece as striking as a modern art masterpiece.
Like a skilled painter bringing canvas to life, your attention to detail and choice of finish will make every grain pop.
Keep these tips close, and watch your plywood project glow with the polished elegance of a gallery-worthy creation—timeless, chic, and undeniably you.