How to Unlock Craftsman Miter Saw: 7 DIY Steps
Understanding how to unlock your Craftsman miter saw will enable you to maximize its performance. Whether you’re a seasoned craftsman or a DIY enthusiast, knowing how to unlock a miter saw is essential. But the unlocking process should be clarified and you need to follow the unlocking steps correctly.
To unlock your Craftsman miter saw, you must identify the two locks on the saw. Then clean the grooves of the locking pin and loosen the knob intended to hold the saw parts together. After that, you need to loosen the lock on the slide to allow movement.
Today, we will explain the step-by-step procedures to unlock your Craftsman miter saw, ensuring you can unleash its true capabilities. We will also address some common issues that may arise during the unlocking process and provide solutions to overcome them. So keep reading.
How to Unlock Craftsman Miter Saw: Step-by-Step Procedures
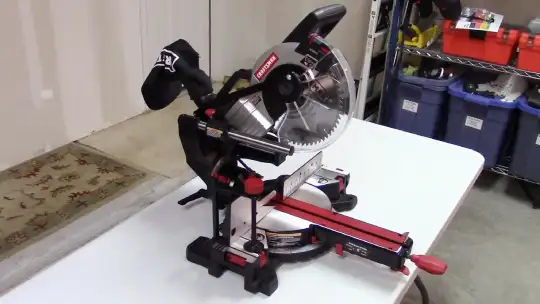
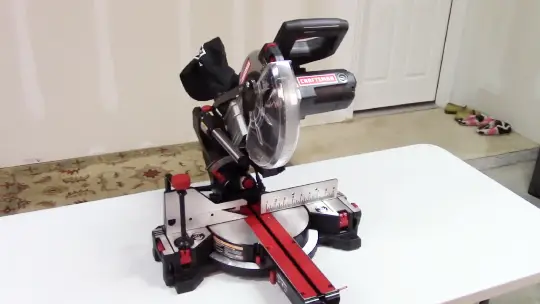
Craftsman miter saws are popular among DIYers and professional carpenters due to their durability and functionality. These saws have a locking system that secures the blade during storage and transportation.
To unlock your Craftsman miter saw, follow these step-by-step procedures.
- Step 1: Identify the Two Locks on the Saw
- Step 2: Clean the Grooves of the Locking Pin
- Step 3: Loosen the Knob Designed to Hold the Parts Together
- Step 4: Loosen the Lock on the Slide
- Step 5: Identify the Angle Locks
- Step 6: Unlock the Swivel Action of the Blade
- Step 7: Depress the Lever
Step 1: Identify the Two Locks on the Saw
First, locate the two locks on the saw that control the blade’s movements. Did you know a study found that unlocking the wrong lock can result in inaccurate cuts, leading to wasted materials and frustration for DIY enthusiasts?
To avoid this, let’s identify the two locks on the Craftsman miter saw. The first lock controls the up-and-down movement of the blade, while the second controls angled changes. To help you visualize this, refer to the table below:
| Lock | Function |
| First Lock | Controls up and down movement of the blade |
| Second Lock | Controls angled changes |
Step 2: Clean the Grooves of the Locking Pin
Before moving forward, clean the grooves of the locking pin. This will help prevent potential damage or injuries. Over time, dirt, debris, or sawdust can accumulate in the grooves, causing the pin to get stuck.
If this happens, unlocking the head of the saw can be difficult and may even damage the saw or injuries to the user. To clean the grooves, use a small brush or toothbrush to remove any buildup carefully.
Be thorough and clean all sides of the grooves. Once the grooves are clean, the locking pin should move smoothly, allowing you to unlock the head of the saw safely and efficiently.
Step 3: Loosen the Knob Designed to Hold the Parts Together
Once you’ve located the knob on the side of the saw, simply give it a gentle twist to loosen the parts and unlock the head, allowing you to proceed with your project.
This knob, specifically designed to hold the parts together, is crucial in unlocking the Craftsman miter saw. You effectively release the tension that keeps the head locked by loosening it.
Ensure you turn the knob in a counterclockwise direction, as this is the standard method for loosening it. Be careful not to apply excessive force, as this may damage the knob or other components of the saw.
Step 4: Loosen the Lock on the Slide
Loosening the lock on the slide allows for smooth and precise adjustments, unlocking a world of possibilities for your woodworking projects. Follow these steps to loosen the lock on the slide properly:
- Firmly grasp the lock knob and turn it counterclockwise to loosen it. Make sure to hold onto the saw securely while doing this.
- Once the lock knob is loosened, you can slide the saw back and forth along the rails to adjust the table to your desired angle.
- Take your time to find the perfect angle for your woodworking project. Remember, precision is key to achieving accurate cuts.
Step 5: Identify the Angle Locks
Now that you’ve loosened the lock on the slide, it’s time to move on to identifying the angle locks on your Craftsman miter saw. These angle locks play a crucial role in ensuring the accuracy and stability of your cuts.
Look towards the front of the saw, where you’ll find a knurled knob and a lever. The knurled knob is responsible for locking the swivel action of the blade. By tightening it, you secure the blade at the desired angle.
Step 6: Unlock the Swivel Action of the Blade
To adjust the angle of the blade on your miter saw, simply rotate the knurled knob, allowing the swivel action to be unlocked. This step is crucial for achieving precise cuts. The knurled knob is typically located near the base of the saw and is designed to hold the blade in place when locked securely.
By rotating the knob counterclockwise, you release the blade from its locked position, enabling it to swivel freely. This allows you to adjust the blade’s angle according to your specific cutting needs.
Once you have set the desired angle, remember to tighten the knob by rotating it clockwise to lock the blade securely.
Step 7: Depress the Lever
Press down on the lever to release the set angle lock, allowing for easy adjustment of the blade’s angle to your desired specification. This lever is located on the side of the miter saw and is designed to lock the blade at a specific angle securely. By depressing the lever, you release the lock and enable the swivel action of the blade.
Apply steady pressure to the lever to ensure a smooth release of the angle lock. Once the lock is released, you can freely adjust the angle of the blade to your desired setting.
Solutions to Common Craftsman Miter Saw Unlocking Issues
Unlocking the miter saw can sometimes be a bit confusing. You may have experienced situations where you struggle or waste precious time trying to unlock your saw. But there are solutions to these common issues.
Stuck Locking Mechanism:
If your Craftsman miter saw locking mechanism is stuck, you can easily fix it by disassembling and cleaning it to remove any dust or debris that may be contributing to the issue.
Start by unplugging the saw and ensuring that the blade is fully retracted. Use a screwdriver to remove the screws holding the cover in place. Carefully lift off the cover and locate the locking mechanism.
Jammed Moving Parts:
To fix jammed moving parts, check for any debris or buildup causing the issue. Regular cleaning and maintenance can’t prevent this problem from occurring in the first place. If there’s debris buildup, it should be cleaned out before using the saw.
Difficulty in Unlocking:
Craftsman miter saw models can possess intricate locking mechanisms that require precise unlocking procedures. Neglecting these procedures may lead to a frustrating and time-consuming unlocking process.
To avoid this, familiarize yourself with the specific model you’re working with and the appropriate unlocking techniques. By doing so, you can prevent any unnecessary complications and ensure a smooth unlocking experience.
Misalignment of the Locking Mechanism:
Addressing the misalignment of the locking mechanism can ensure accurate cuts and smooth adjustments on your miter saw. To rectify this issue, follow these steps:
- Begin by disconnecting the power source to ensure safety during the realignment process.
- Locate the locking mechanism, typically found on the front or side of the miter saw.
- Use a screwdriver or hex key to loosen the bolts, securing the locking mechanism in place.
- Gently adjust the positioning of the locking mechanism until it aligns properly with the saw’s angle indicators.
- Tighten the bolts back into place, ensuring they’re secure but not overly tightened.
- Reconnect the power source and test the miter saw by adjusting the miter and bevel angles.
- If necessary, repeat the realignment process until the locking mechanism functions smoothly.
Worn or Damaged Components:
If you’ve already checked the alignment of the locking mechanism and it seems fine, the next step is to inspect the components of your Craftsman miter saw for any signs of wear or damage.
Over time, the continuous use of the saw can cause certain components to become worn or even break. This can affect the functionality of the locking mechanism, making it difficult to unlock or lock the saw securely.
To identify any worn or damaged components, perform a thorough visual inspection of the saw’s parts. Pay close attention to the handle, locking pin, and locking lever. Look for any signs of cracks, breaks, or excessive wear.
If you notice any issues, replacing the worn or damaged components with genuine Craftsman parts is recommended to ensure proper operation of your miter saw.
How do you change the angle on a Craftsman saw?
To change the angle on your Craftsman saw, simply loosen the blade-tilt locking knob. Adjust the blade to your desired degree angle and tighten the locking knob to secure the blade, unlocking a world of precision and versatility. Here’s a step-by-step guide to help you through the process:
- Loosen the blade-tilt locking knob or handle by turning it counterclockwise.
- Turn the blade to the desired degree angle. You can refer to the angle scale on the saw for accuracy.
- Once the blade is at the desired angle, tighten the locking knob or handle by turning it clockwise. Make sure to tighten it securely to prevent any movement during operation.
- Test the angle adjustment by making a few test cuts on scrap material. If needed, you can repeat the process to fine-tune the angle.
How can I change the blade on an old Craftsman miter saw?
When changing the blade on an older Craftsman miter saw, you’ll want to remove the lock the blade is attached to using a 3/8-inch wrench. Locate the lock on the side of the saw near the blade.
It’s typically a nut or bolt that secures the blade in place. Insert the 3/8 inch wrench onto the lock and turn counterclockwise to loosen it.
Once the lock is loose, you can remove it completely. Be careful not to misplace the lock, as it’s necessary for securing the new blade. After removing the lock, you can remove the old blade by unscrewing it from the saw.
How to lock a Craftsman miter saw blade?
You need to follow specific steps to lock the blade securely. Here’s how to lock a Craftsman miter saw blade:
- Pull the knob on the side of the saw to unlock the blade.
- Press the knob firmly to lock the blade in position.
- Make sure the blade is securely locked by giving it a gentle tug.
- Double-check that the blade is properly aligned and tightened before using the saw.
Do I need to adjust a Craftsman Mitre saw blade after unlocking?
After unlocking a Craftsman miter saw blade, it may be necessary to make adjustments using a speed square to ensure proper alignment. When the blade is locked, it’s securely positioned for precise cuts. But, unlocking the blade can sometimes cause it to become misaligned, affecting the accuracy of your cuts.
Place the speed square against the blade and the saw table to check if the blade needs adjustment. Make sure the blade is at a 90-degree angle to the table by adjusting the bevel or miter scale accordingly. If the blade is not aligned, adjust the bevel or miter lock to fine-tune its position until it’s perfectly square.
Unlock Your Craftsman Miter Saw: Maximize Performance and Precision
Unlocking a Craftsman miter saw is a straightforward process that can be easily accomplished by following the step-by-step procedures outlined in this article. You can ensure optimal performance and accuracy by changing the angle and blade on your saw.
Remember to lock the blade securely after each use to prevent accidents from miter saw. While adjusting the blade may not always be necessary, ensuring the best cutting results is recommended. So, why wait? Unlock your Craftsman miter saw for maintenance and let your woodworking skills soar like a bird in flight.