Can You Sandblast Wood: Choose the Right Abrasive
Yes, you can sandblast wood effectively by choosing gentle abrasives like baking soda or walnut shells and adjusting pressure to avoid damaging the surface.
Always prepare your wood by cleaning and protecting surrounding areas. Use proper safety gear, including respirators and goggles. Opt between wet or dry blasting based on dust control needs. After blasting, clean and smooth the wood before finishing.
Understanding these details helps guarantee a clean, professional result with minimal risk.
Key Takeaways
- Yes, sandblasting wood is possible and effectively removes old paint, stains, and contaminants for restoration projects.
- Use gentle abrasive media like walnut shells or baking soda to avoid damaging softer wood surfaces.
- Adjust blasting pressure carefully to prevent surface etching or structural damage on delicate wood.
- Always wear appropriate PPE including respirators, goggles, gloves, and protective clothing during sandblasting.
- Post-blasting, clean residual media, dry the wood thoroughly, and prepare the surface before applying finishes.
Understanding the Sandblasting Process for Wood
When you begin sandblasting wood, preparing your work area is essential to protect surrounding surfaces, plants, and structures from abrasive residue and potential damage.
Cover adjacent areas with tarps or plastic sheeting to contain dust and debris effectively. Secure the environment, especially outdoors, to prevent abrasive media from spreading. Choosing the appropriate abrasive media is crucial for achieving the desired finish without damaging the wood.
Next, set up your blasting equipment by connecting the air compressor and loading the chosen abrasive media into the blast cabinet or nozzle.
Adjust the blasting pressure carefully; too high can damage softer woods or intricate carvings. Improper settings can lead to surface roughness and damage that require additional repairs.
Decide between dry or wet sandblasting setups, keeping in mind that wet blasting reduces dust and cushions the impact, which is gentler on delicate wood surfaces.
Proper setup ensures an efficient, controlled sandblasting process that preserves wood integrity.
Selecting the Right Abrasive Media
Choosing the right abrasive media is essential to achieving a clean, smooth wood surface without causing damage. For softer woods, select gentle media like baking soda, walnut shells, or corn cob. These avoid gouging and preserve the grain.
Proper choice enhances effectiveness and safety of blasting operations by matching media to surface needs. Selecting appropriate media Baking soda excels at light cleaning and paint removal, while walnut shells and corn cob offer moderate abrasiveness for finish stripping without embedding particles.
Consider the noise levels generated during blasting, especially in noise-sensitive environments. Selecting gentle abrasives like baking soda or walnut shells protects soft wood while ensuring a smooth, clean finish
Avoid hard abrasives like aluminum oxide or steel grit on soft wood; they risk etching and surface damage. Match media hardness to the wood’s Mohs scale rating, ideally 2–6.
Also, consider media shape: angular grains clean aggressively, while spherical beads polish. Organic media reduce dust and environmental impact but have limited reuse. Always prioritize media that balances effective cleaning with wood preservation for your specific project.
Preparing Wood Surfaces Before Sandblasting
Selecting the right abrasive media sets the foundation, but properly preparing the wood surface before sandblasting guarantees the process goes smoothly and produces the best results.
Start by thoroughly inspecting the wood: check for moisture, contaminants, and structural integrity. Make sure the wood is dry to avoid damage and remove any dirt, old finishes, or chemicals using appropriate cleaning methods.
Proper preparation is essential because surface preparation directly affects the quality of the final finish. Protecting the surface with personal protective equipment is crucial during preparation and sandblasting to ensure safety.
Protect surrounding areas with tarps or plastic sheets to contain dust and prevent collateral damage. Follow these steps to prepare your wood surface effectively:
- Assess and clean the wood surface by removing dirt, debris, and coatings.
- Inspect for mold, mildew, or damage, treating or repairing as needed.
- Shield adjacent surfaces and seal any openings to control dust dispersal.
This preparation ensures ideal sandblasting performance and preserves wood quality.
Equipment and Safety Gear Requirements
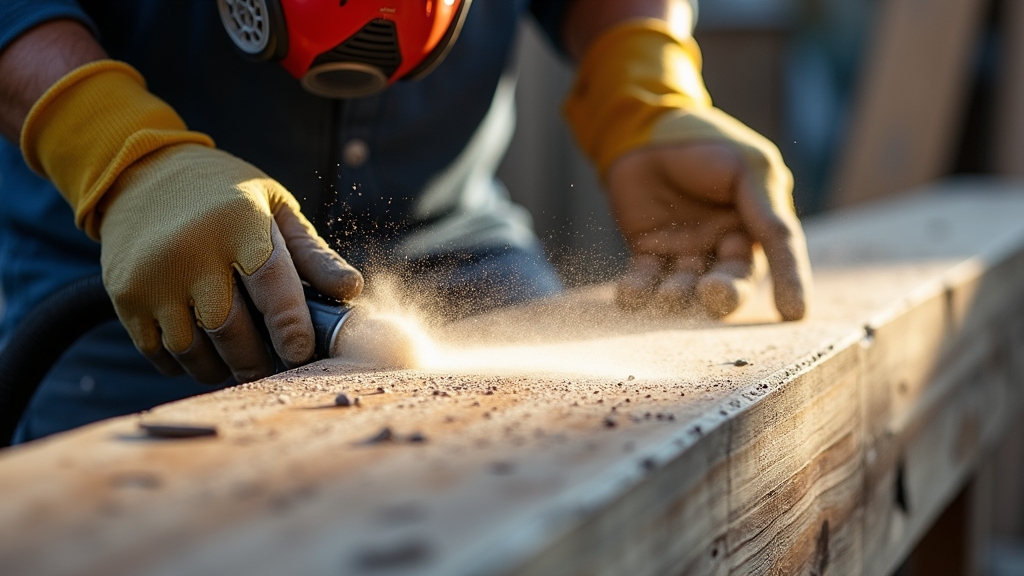
When you’re getting ready to sand, it’s super important to have the right protective gear. You’ll want to grab some gloves, safety goggles, and a respirator fitted with a HEPA filter. These will help keep your skin, eyes, and lungs safe from all that dust.
Now, let’s talk about your workspace. Make sure it’s well-ventilated. If you can, using a sandblasting cabinet is a great idea. It helps contain all that dust and debris, making the whole process cleaner and safer.
Before starting, always clear work area of any debris or obstructions to ensure safety and effectiveness. Proper ventilation and dust control are key factors in maintaining a safe environment during sandblasting.
And hey, don’t forget about hearing protection! It’s easy to overlook, but your ears need some love too.
Oh, and wearing static-resistant clothing is a smart move to keep everything safe and controlled. It’s all about creating the best environment for your project!
Essential Protective Equipment
Although sanding wood might seem straightforward, you must wear essential protective equipment to guard against hazardous dust, flying particles, and loud noise. Proper gear prevents injury and guarantees compliance with safety standards.
- Respiratory Protection: Use a NIOSH-certified supplied air respirator with a clean, filtered air supply to avoid inhaling harmful dust and contaminants. Face masks without air supply won’t protect you adequately. Regularly check hoses and cartridges to ensure optimal respirator performance.
- Eye and Face Protection: Wear a full-face blast helmet with a sealed, impact-resistant visor or tightly fitting shatterproof goggles combined with a respirator mask to shield your eyes and face from abrasive particles.
- Protective Clothing and Gloves: Don abrasion-resistant gloves (ANSI/ISEA Level 2+), full-body blast suits with elastic cuffs, and steel-toe boots to protect skin and feet from high-velocity particles and debris. Choose slip-resistant boots that fit well with coverall legs over the top for added safety.
Workspace Safety Measures
Maintaining the protective equipment you use during sanding is just as important as wearing it. Before each job, inspect your gloves, coveralls, and helmet for any tears, abrasions, or contamination. Clean and replace them as needed to guarantee effective protection.
Employers must also conduct hazard assessments to determine the appropriate PPE required for each specific task. Always wear safety glasses or goggles to protect your eyes from debris during sandblasting.
Check sandblast equipment thoroughly: verify dead-man controls on nozzles and confirm that blast pots’ safety shutdowns function properly. Document any defects immediately and report them to supervisors for prompt action.
Keep your workspace well-ventilated to prevent hazardous dust buildup and ground all equipment to avoid static electricity risks. Establish controlled blasting zones to protect others around you.
Respiratory Protection Needs
When performing sanding operations, selecting the right respiratory protection equipment is crucial to safeguard your lungs from hazardous dust and airborne contaminants.
Sandblasting wood generates fine particulate matter that can cause serious respiratory issues, including silicosis if silica is present. Using proper PPE such as full-body suits and helmets can further reduce exposure to harmful particles.
Masks with P100 filtration efficiency offer the highest particulate protection suitable for fine dust and hazardous environments. You should always use NIOSH-certified respirators designed for abrasive dust, such as P100 filters.
Follow these key guidelines for respiratory protection:
- Use supplied-air respirators (SARs) or powered air-purifying respirators (PAPRs) with helmet-integrated systems to ensure continuous, clean air supply.
- Conduct fit testing for any tight-fitting respirators to guarantee a proper seal.
- Regularly inspect and replace filters and maintain air supply quality to prevent contamination and carbon monoxide exposure.
Strict adherence to these measures ensures your respiratory safety during wood sandblasting.
Techniques for Effective Sandblasting on Wood
When you’re getting ready to sandblast wood, the first thing you’ll want to do is pick the right abrasive media. Softer options, like walnut shells or even baking soda, are great choices for delicate wood. They help you achieve that smooth finish without risking any damage to the surface.
Next up, it’s all about those pressure settings. You’ll want to adjust them based on the type of wood you’re working with and the size of your project. If you’re not careful, you might end up over-blasting or creating an uneven texture, which is definitely not what you want.
Using adjustable nozzle sizes and air pressures can help you control the media flow for the best results equipment features. Always ensure your equipment is well-maintained to prevent issues related to blade tension and installation.
Once you’re done blasting, don’t forget to give the surface a thorough cleaning. It’s super important to let it dry completely before you go ahead and apply any sealants or stains. This step won’t only protect the wood but will also enhance its overall appearance.
Choosing Abrasive Media
Although selecting the right abrasive media might seem straightforward, it requires careful consideration of your wood’s hardness, desired finish, and project scope to guarantee effective and safe sandblasting.
Start by matching media to wood type: soft abrasives like baking soda or walnut shells work best on softwoods, while hardwoods can tolerate tougher media such as aluminum oxide or glass beads.
Baking soda, for example, is the softest blasting media option, making it ideal for gentle cleaning on delicate wood surfaces. The choice of media also influences the heat resistance of the wood surface during sandblasting.
Next, consider the finish you want. Gentle media preserve grain and texture, while coarse media create deeper profiles for rougher finishes. Finally, evaluate project scale and speed; fine media clean delicately but slowly, whereas coarser options expedite material removal but risk over-profiling.
- Choose biosoluble, non-toxic abrasives for safety and environment.
- Avoid silica sand due to health hazards.
- Prefer screened, graded media for consistent surface texture.
Controlling Pressure Settings
Selecting the proper abrasive media sets the foundation for effective sandblasting, but controlling pressure settings fine-tunes the process to protect your wood and achieve the desired finish.
Start with low pressure to test how the wood reacts, preventing damage. Gradually increase pressure only if necessary for deeper texture or to remove stubborn finishes. Maintaining consistent operational techniques, such as proper feed rates, helps minimize stress on the wood during sandblasting.
Keep a consistent nozzle-to-wood distance and use smooth sweeping motions to evenly treat the surface.
Choosing the right abrasive media, such as soda blasting, can make a significant difference in preserving delicate wood surfaces during the process.
Continuously monitor the wood for signs of over-processing or uneven texture. Develop a mental pressure map based on wood hardness, adjusting accordingly while avoiding lingering in one spot.
This careful control prevents gouging and ensures a uniform finish, preserving delicate details and extending your wood’s life during sandblasting.
Post-Blasting Surface Care
Once the blasting process is complete, your priority should be thorough cleaning to remove all residual abrasive media and dust.
Start by using compressed air or a vacuum to clear loose particles. Then gently brush the wood grain with a soft-bristle brush to dislodge fine debris without damaging the texture. Ensuring the cleaning tools do not cause surface misalignment maintain the wood’s integrity.
Next, rinse the surface lightly with low-pressure water or a damp cloth, ensuring you avoid oversaturation. Maintaining a distance of about 12-18 inches from the surface is important to prevent damage such as splintering during cleaning.
To guarantee ideal post-blasting care, follow these steps:
- Dry the wood fully in a shaded, ventilated area, avoiding direct heat to prevent warping or cracking.
- Inspect the surface for uneven areas or damages, sanding lightly if necessary to preserve wood character.
- Apply appropriate sealants only after confirming moisture content is below 15% using a moisture meter. Proper drying time is essential because saturation from pressure washing or rinsing necessitates this step before sealing or staining.
Advantages of Using Sandblasting on Wood
When you choose sandblasting for wood preparation, you gain a highly efficient method that strips away old finishes, paint, and grime quickly while revealing the natural surface beneath.
This process uniformly removes layers without damaging the wood’s grain, especially when using softer media like walnut shells or baking soda.
It gently strips layers without harming the wood grain, especially using soft media like walnut shells or baking soda.
It also prepares surfaces with microscopic roughness, enhancing adhesion for stains and paints, resulting in longer-lasting, more even finishes.
Sandblasting works well on various wood types and shapes, from flat panels to intricate carvings, saving you time compared to manual sanding.
Additionally, dustless blasting reduces cleanup and environmental impact while minimizing chemical use, and can be tailored for delicate or large-scale projects to ensure surface integrity.
Potential Risks and How to Avoid Damage
Sandblasting offers efficient wood restoration, but it carries significant risks you need to manage carefully. To avoid damage and health hazards, follow these essential steps:
- Protect Yourself and Others: Always wear full respirators, goggles, gloves, and protective clothing. Ensure proper ventilation or use dust containment systems to minimize inhalation of silica and wood dust.
- Choose Appropriate Media and Pressure: Use less abrasive materials like walnut shells or glass beads. Test on small areas to prevent shredding wood fibers or destroying delicate details.
- Prepare and Protect the Workspace: Remove or cover nearby surfaces to prevent accidental damage from overspray. Clear the area to accommodate equipment safely and plan for thorough cleanup afterward.
Wet Sandblasting vs Dry Sandblasting
Although both wet and dry sandblasting effectively remove finishes and restore wood surfaces, you’ll find they differ considerably in setup, dust control, and application.
Dry sandblasting uses compressed air to propel dry abrasive media, requiring completely dry materials and producing significant airborne dust. You’ll need protective gear and containment.
Many professionals prefer using glass beads as the blasting media for wood to achieve a desirable finish and minimize surface wear, especially in detailed work with CNC parts. This method uses a glass bead media.
Wet sandblasting mixes water with abrasives, creating a slurry that minimizes dust and cushions the wood. This makes it ideal for delicate or indoor projects.
Dry blasting runs faster and is more aggressive, suitable for heavy paint removal but risks damaging soft woods. Wet blasting operates slower and gentler, preserving wood integrity.
Equipment-wise, dry systems are more common and simpler, while wet systems need specialized machinery to handle the water-abrasive mix. Choose based on your project’s sensitivity and dust control needs.
Post-Sandblasting Care and Finishing Tips
After sandblasting, it’s really important to kick things off by getting rid of all that dust and debris. You can do this easily with some compressed air or just a damp cloth—whatever works best for you.
This step is crucial because you want to make sure the surface is nice and clean before moving on. Use pressurized air or a rechargeable air duster to clean crevices thoroughly.
Once you’ve got that clean surface, take a moment to smooth out any uneven texture you might find. A little fine sanding can go a long way in getting the wood ready for finishing. It’s kind of like prepping a canvas before painting—every detail matters!
Finally, don’t forget to protect your hard work! Applying a good sealer or stain not only keeps the wood safe but also enhances its natural beauty. Trust me, you’ll be glad you took the time to finish it off right!
Dust Removal Techniques
When you finish sandblasting, promptly remove loose dust and abrasive residues using compressed air or a stiff brush to prevent contamination of the wood surface.
Next, vacuum the area with a HEPA-filtered vacuum to capture fine airborne dust particles and avoid their resettling. Choosing the appropriate blasting media, such as crushed glass, can influence the amount and type of residue left on the surface, affecting cleanup methods.
If you used wet blasting, rinse the surface with clean water or wipe it with a damp cloth, then dry thoroughly to prevent moisture damage.
Follow these steps for effective dust removal:
- Use compressed air or a stiff brush immediately after blasting to clear large debris.
- Vacuum with a HEPA-filtered unit to remove fine dust.
- Perform a final wipe with a tack cloth or microfiber cloth to eliminate residual particles before finishing.
Always wear protective gear and ensure proper ventilation throughout the process.
Surface Smoothing Methods
Since sandblasting often leaves a textured surface, you’ll need to smooth the wood before applying any finish.
Start by using a power sander or orbital sander for large, flat areas, moving with the grain to avoid scratches.
For intricate or detailed sections, hand sanding with fine-grit sandpaper gives you better control and precision. This is especially important when restoring delicate details on wooden artworks or sculptures.
After sanding, consider using steel wool to gently polish the surface for an even finer finish.
If you’re working on broad, flat pieces, vibratory sanding can also help achieve a smooth texture efficiently.
Remember to remove all dust thoroughly before proceeding to finishing steps.
Proper smoothing ensures your finish adheres well and highlights the wood’s natural beauty without emphasizing the sandblasted texture.
Sealing and Staining
Smoothing the wood surface thoroughly sets the stage for effective sealing and staining, especially after sandblasting. Proper sealing extends furniture lifespan by protecting against wear, spills, cracks, and humidity changes.
Once the wood is clean and dry, choose a sealant that matches your wood type: polyurethane for dark woods or polycrylic for lighter ones. Apply thin coats following the grain, allowing each to dry and sanding lightly between layers to avoid imperfections.
- Apply stain in thin, even coats, letting each dry fully before adding more to enhance the wood’s natural grain.
- Seal the stained surface with a clear protective coat to preserve color and durability.
- Inspect closely for flaws and correct by light sanding and additional sealing as needed.
Following these steps ensures a smooth, lasting finish that highlights your wood’s character.
Common Applications of Sandblasting in Woodworking
Although sandblasting might seem like a harsh process, it offers precise control and versatility that make it invaluable in woodworking.
Sandblasting may appear tough, but its precision and versatility are essential assets in woodworking.
You can use it to prepare surfaces by removing mill marks, cracks, and contaminants, creating clean, open-pored wood ideal for finishing or sealing. It is important to select the appropriate abrasive media to avoid damaging the wood fibers during this preparation.
It efficiently strips old paint, varnish, and stains without harsh chemicals, saving time on restoration projects like decks or antique furniture.
Sandblasting also revitalizes weathered wood by exposing fresh grain while minimizing damage, especially with wet blasting.
For design, you can texture or distress wood to achieve rustic or aged looks, adjusting abrasive type and pressure for specific effects.
In conclusion, it’s excellent for touch-ups, smoothing scratches or repairs to blend seamlessly before final staining or sealing.
Frequently Asked Questions
How Long Does Sandblasting Wood Typically Take?
Sandblasting wood typically takes anywhere from a few minutes for small sections to several hours for large surfaces. You’ll spend more time if the paint or varnish layers are thick, or if the wood is hardwood or damaged.
Prep, cleanup, and drying add extra hours. Using larger nozzles and higher pressure speeds things up, but you must balance speed with care to avoid damaging the wood.
Always test a small area first.
Can Sandblasting Be Done on Painted Wood Without Stripping First?
You can sandblast painted wood without stripping first, like peeling an orange in one smooth motion.
Choose softer abrasives like walnut shells or baking soda to avoid damaging the wood. Set pressure carefully; too much roughens the surface.
This method efficiently removes paint and prepares wood for refinishing, saving time over manual sanding.
Just remember to follow up with fine sanding if you need a perfectly smooth finish, especially on detailed pieces.
Is Sandblasting Eco-Friendly Compared to Other Wood Finishing Methods?
Sandblasting isn’t inherently eco-friendly compared to other wood finishing methods because it generates dust and potential pollutants.
However, you can make it greener by choosing biodegradable media like soda, corn cob, or walnut shells and using wet blasting to reduce airborne particles.
Always implement containment systems to prevent environmental contamination.
Compared to chemical treatments, these eco-friendly blasting options minimize hazardous waste.
If you want a sustainable approach, opt for these alternatives.
What Maintenance Does Sandblasting Equipment Require?
You need to routinely inspect nozzles for wear and replace them to maintain blasting efficiency.
Check viewing glass and door seals, swapping out any that’re damaged.
Monitor the pressure pot’s mesh screen and verify your abrasive media stays dry and clean.
Regularly clean equipment, check for leaks in hoses, valves, and compressors, and lubricate moving parts.
Don’t forget daily compressor moisture removal and operator training to keep everything running safely and smoothly.
How Does Sandblasting Affect Wood Durability Over Time?
You can improve wood durability by up to 30% through proper sandblasting, which creates a microscopically rough surface for better finish adhesion.
To maintain this, always use gentle abrasives like walnut shells and control pressure carefully. Avoid excessive blasting, as it can thin the wood and cause splintering.
Turn Sandblasting Into Your Secret Woodworking Weapon
Sandblasting wood can transform your project like a sculptor revealing hidden details beneath stone. By choosing the right abrasive, preparing surfaces properly, and using correct techniques, you’ll avoid damage and achieve a smooth finish.
Always wear safety gear and consider wet sandblasting to reduce dust. After blasting, take time to clean and seal the wood to protect your work. With careful attention, sandblasting becomes a powerful tool in your woodworking arsenal.