Can You Cut Plexiglass With a Bandsaw: 4 Steps to Success
Cutting plexiglass with precision requires carefully considering tools and techniques to ensure clean and smooth results. But can you cut plexiglass with a bandsaw for a perfect finish and professional-grade results?
A bandsaw offers versatility and control, making it a popular choice for curved cuts in plexiglass. You can use the bandsaw to create intricate shapes or trim sheets to size with its versatility and control.
As a DIY enthusiast, I’ve often wondered how to cut plexiglass with a bandsaw. Finally, I found out. Here, I’ll explain the precise steps to achieving a clean cut every time.
How Can You Cut Plexiglass With a Bandsaw: Follow the Steps
According to my findings, there are four key steps to consider when cutting plexiglass with a bandsaw.
- Blade selection
- Plexiglass preparation and lubrication
- Select cutting technique:
- Set blade height and tension
- Starting the cut
- Controlling blade speed
- Maintaining a straight line
- Completing the cut
- Post-cut measures
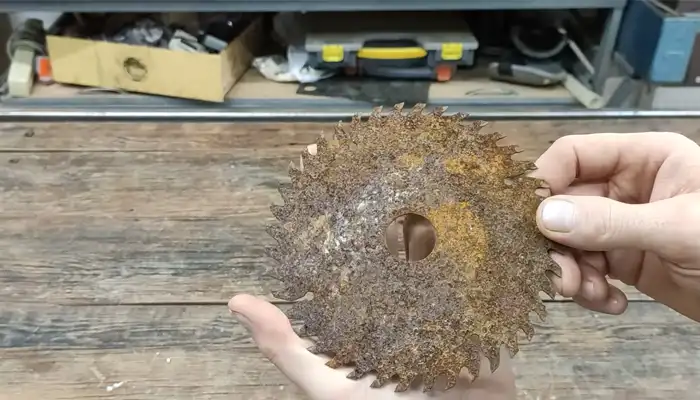
Step 01: Blade Selection
I recommend choosing a bandsaw blade for cutting plexiglass by matching it to the thickness of the material. If the plexiglass is 1⁄4′ or thinner, I prefer a 10–14 TPI (teeth per inch) blade. On the other hand, thicker acrylic plastics benefit from blades with 6-8 TPI.
It’s crucial to ensure the blade is sharp and in good condition to achieve clean cuts. A dull blade can cause chipping or melting of the plexiglass, resulting in imprecise and rough edges.
Step 02: Plexiglass Preparation and Lubrication
As I know, proper preparation and lubrication of the plexiglass is essential when cutting it with a bandsaw.
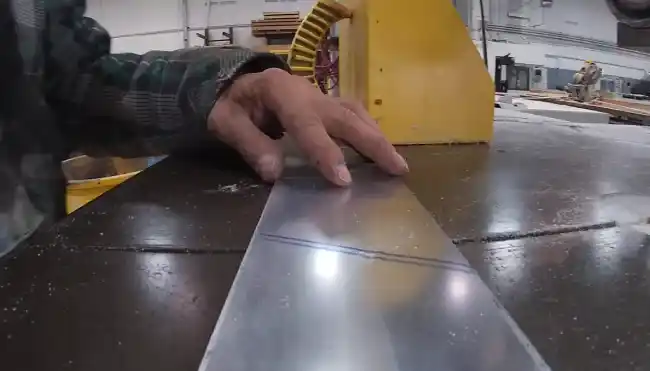
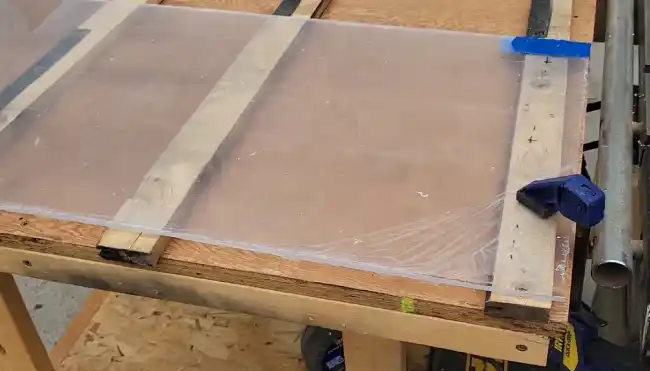
To begin, secure the plexiglass firmly on the bandsaw table, using clamps to prevent movement during cutting. You should also mark the cutting line on the plexiglass for guidance.
To minimize friction and prevent the plexiglass from sticking to the blade, it’s important to apply a lubricant. Clear packing tape, approximately 2 inches in width, works well as a lubricant in this case.
Simply place the tape on the surface of the plexiglass along the cutting path. This will ensure smoother and more controlled cuts, preventing bandsaw blade drift and any potential damage or cracking of the material.
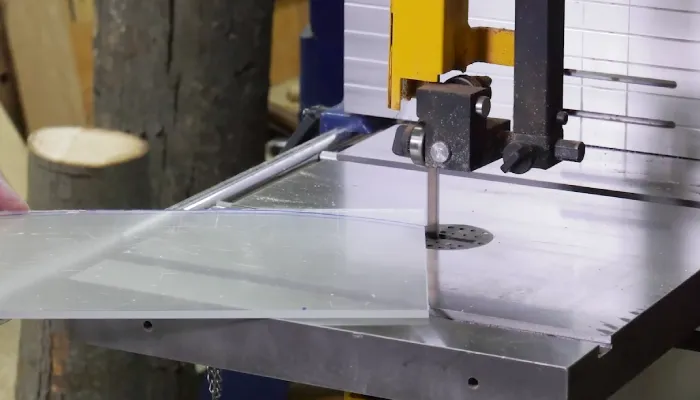
Step 03: Cutting Technique
Now all your preparations are done. It’s time to cut the plexiglass. Here’s the cutting procedure:
i) Set Blade Height and Tension
To achieve a successful cut, it’s essential to adjust the bandsaw blade height and tension properly.
Setting the blade height ensures that it extends just above the thickness of the plexiglass, preventing any unwanted chipping or splintering. Maintaining the correct blade tension is also crucial for stability during the cut. Also, keep the bandsaw fence parallel to the blade during the entire cut for accuracy and safety.
ii) Starting the Cut
After properly adjusting the blade height and tension, position the plexiglass against the bandsaw fence, aligning the marked cutting line with the blade.
- To start the cut, turn on the bandsaw and wait for it to reach full speed.
- With a steady hand, gently feed the plexiglass into the blade, ensuring that the blade does the cutting instead of applying excessive force.
- This technique helps prevent chipping or cracking.
iii) Controlling Blade Speed
Adjust the bandsaw’s speed settings to find the optimal balance for cutting plexiglass.
As far as I know, selecting a high speed within the range of 2,300 to 5,000 RPM is crucial to prevent chipping or melting.
However, you must exercise caution not to exceed the machine’s capabilities, as excessive speed can lead to overheating and undesirable outcomes.
Throughout the cutting process, continuously monitor the quality of the cut and make necessary adjustments to maintain optimal speed.
iv) Maintaining a Straight Line
During the cutting process, ensure the plexiglass remains guided along the marked cutting line by firmly pressing it against the bandsaw fence. This helps to maintain a straight and accurate cut.
Keeping the material in constant contact with the fence can prevent it from wandering or veering off course. Maintaining a consistent feed rate also helps ensure a clean and precise cut without any deviations.
v) Completing the Cut
To finish the cut, guide the plexiglass smoothly through the bandsaw while maintaining a consistent speed and ensuring the material doesn’t bind or catch on the blade. Continue the motion until the entire cut is completed.
Once finished, slow down the bandsaw, then turn it off and allow the blade to come to a complete stop. Inspect the quality of the cut and make any necessary adjustments.
Remember to prioritize safety throughout the process.
Step 04: Post-Cut Measures
Inspecting the edges for any roughness or imperfections is an important step after cutting plexiglass with a bandsaw. This ensures a clean and polished finish to your project.
- To start, I prefer to use a file or scraper to remove any saw-blade marks that may be present. This will help smooth out the edges and eliminate any rough spots.
- Next, sand the edges using progressively finer grits of sandpaper. Start with a coarse grit and gradually work your way up to a finer grit for a polished finish.
- Be sure to wipe down the bandsaw blade with solvent after cutting the plexiglass to maintain its condition and prevent any residue buildup.
Taking these post-cut measures will help you achieve a professional-looking result.
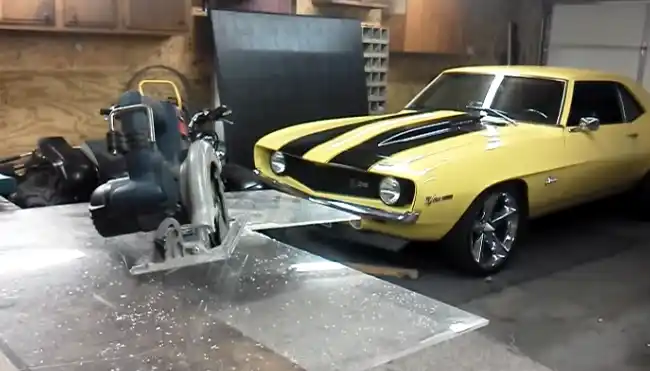
Can I use a jigsaw instead of a bandsaw for cutting plexiglass?
While a jigsaw can be used, a bandsaw or table saw is generally preferred for cleaner cuts. According to my findings, the jigsaw may leave a choppy edge on the plexiglass.
The reciprocating motion of the jigsaw blade, while effective for many materials, can cause more vibration and potential splintering when applied to plexiglass. This can lead to less precise cuts and may require additional post-cutting measures to smooth out the edges.
In comparison, the continuous cutting action of a bandsaw or table saw tends to provide cleaner and smoother cuts. This makes them the preferred tools for working with plexiglass when a polished finish is desired.
Does the type of plexiglass (cast or extruded) affect the cutting results?
The type of plexiglass cast or extruded can impact the cutting results when cut with a bandsaw.
Cast plexiglass is often preferred for cutting due to its smoother finish and overall better cutting performance. During casting, cast plexiglass becomes denser and contains fewer impurities, making it less likely to chip or crack during cutting. This allows for cleaner and more precise cuts when using a bandsaw.
On the other hand, extruded plexiglass may be more prone to chipping or cracking, especially when using a coarse-tooth blade. However, I believe with proper technique and the right blade, achieving satisfactory cutting results with extruded plexiglass on a bandsaw is still possible.
Cut Plexiglass with a Bandsaw like a Pro
Cutting plexiglass with a bandsaw is an effective method that provides precise and clean cuts. To avoid heating up or chipping, I recommend choosing the right blade type and adjusting the speed accordingly.
Also, choosing the right type of plexiglass to work with is important. In any professional or DIY setting, understanding the nuances of band sawing plexiglass will ensure smoother cuts and greater precision.
I hope you now know clearly about cutting plexiglass with a bandsaw. So go ahead and make the most of your bandsaw and get to work.