How to Refinish Veneer Table: Easy Meal Combinations
To refinish your veneer table, start by inspecting for chips, lifting edges, and previous finishes to assess repair needs.
Set up a ventilated workspace, wear safety gear, and remove hardware.
Carefully repair cracks or lifts with wood glue and filler.
Use a chemical stripper gently, then sand lightly from medium to fine grits to avoid damaging the thin veneer.
Apply stain evenly, seal with clear coats, and maintain the finish with proper care.
Explore the following steps to master each stage thoroughly.
Key Takeaways
- Inspect veneer for chips, lifting edges, and previous finishes to decide if repairs or refinishing are needed.
- Set up a well-ventilated workspace, remove hardware, and clean the surface thoroughly before starting.
- Repair lifted veneer or chips using wood glue and filler, ensuring smooth blending with surrounding areas.
- Remove old finish carefully with stripper or light sanding, progressing through grits 120 to 320 without sanding through veneer.
- Apply stain evenly along the grain, seal with thin coats of polyurethane, and sand lightly between coats for durability and smoothness.
Check Veneer Condition Before Refinishing

Inspecting the veneer condition before refinishing is crucial to guarantee a successful restoration. You should closely examine the surface for chips, bubbling, lifting edges, deep scratches, and worn-through spots.
Pay special attention to corners, edges, and joints, since veneer failure often begins there. Determine if the veneer is intact enough for refinishing or if localized repairs are necessary first.
Identify any previous finishes such as wax, oil, or paint that could affect stripping or adhesion. Be mindful of the veneer thickness, because aggressive sanding risks sanding through the thin top layer.
This careful assessment informs your refinishing strategy, helping you avoid damage and ensuring a smooth, durable finish. Taking these steps prepares you for a precise, effective restoration of your veneer table.
Additionally, addressing any screw holes with high-quality epoxy filler before refinishing can restore strength and create a uniform surface for the finish.
Set Up Your Work Area for Refinishing
Alright, let’s talk about setting up your work area for refinishing. First off, you’ll want to find a well-ventilated spot. Ideally, this means heading outdoors or finding a garage with the doors wide open. This way, you can safely handle any chemical strippers and manage dust without worrying too much.
Next, take a moment to remove all the hardware, drawers, and any detachable parts. This helps protect the fittings and makes it easier to access the surface you’ll be working on. Trust me, it’ll save you a lot of hassle later!
Before diving into the refinishing process, don’t forget to give the table a good clean. You want to get rid of any grime, wax, and oils. Once you’ve cleaned it up nicely, let it dry completely. This step is crucial for a smooth finish!
Also, be sure to wear safety goggles and a respirator when sanding or using chemical strippers to protect yourself from dust and fumes.
Workspace Ventilation Essentials
When setting up your workspace for refinishing a veneer table, ensuring proper ventilation is essential for both safety and effectiveness. You’ll be dealing with chemical strippers, solvents, and finishes that release strong fumes, which can be harmful if inhaled.
Work outdoors or in a garage with doors and windows open to maximize airflow. If indoors, use fans to create cross-ventilation, directing fumes away from your breathing zone. Avoid enclosed spaces without ventilation.
Wear a respirator mask rated for organic vapors to protect yourself further. Position your work table near an exhaust source if possible. Good ventilation helps these chemicals dry faster and reduces the risk of fire or health hazards.
Prioritize this setup before starting any refinishing steps to maintain a safe, efficient working environment. Using a HEPA-filter vacuum can also help reduce airborne dust and improve air quality during sanding and refinishing.
Surface And Hardware Preparation
Before you start stripping or sanding your veneer table, clear off any hardware, drawers, and detachable parts to give yourself full access while protecting these components from damage.
Next, thoroughly clean the surface using a mild degreaser, soap and water, mineral spirits, or TSP to remove grime, wax, and oils that could interfere with adhesion.
Make sure the table is completely dry before proceeding. Protect your work area with drop cloths or newspapers to catch dust and drips.
Set up in a well-ventilated space, preferably outdoors or in a garage with open doors, to minimize exposure to fumes.
Finally, inspect the veneer carefully for chips, bubbling, or lifting edges so you can plan any necessary repairs before refinishing.
Repair Chips, Lifts, and Cracks in Veneer
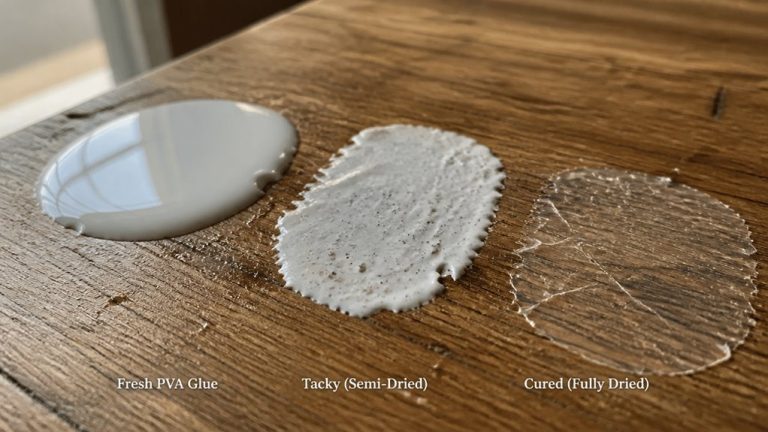
Addressing chips, lifts, and cracks in veneer requires careful attention to prevent further damage and guarantee a smooth, seamless finish. Start by re-gluing lifted veneer with wood glue and clamping it flat until dry.
Fill chips and cracks using wood filler or a glue-based repair compound, choosing one that matches the veneer’s color. After drying, sand the repaired spots lightly to blend with the surrounding surface. Regularly inspect edges and corners, as these areas are prone to damage and lifting.
To ensure lasting repair quality, maintain consistent humidity and temperature to prevent re-warping risks in the veneer.
| Issue | Repair Material | Key Step |
|---|---|---|
| Lifted veneer | Wood glue | Clamp firmly until dry |
| Chips | Wood filler | Fill and sand after drying |
| Cracks | Glue-based compound | Fill, let dry, then sand |
| Small voids | Colored putty | Match color, smooth finish |
| Edges | Careful re-gluing | Prevent further lifting |
Safely Remove Old Finish From Veneer
After repairing chips, lifts, and cracks, you’ll want to proceed carefully with removing the old finish to avoid damaging the delicate veneer beneath.
Handle old finish removal with care to protect the fragile veneer underneath.
Begin by working in a well-ventilated space. Remove hardware and clean the surface to eliminate wax and oils.
For thick or uneven finishes, apply a chemical stripper following manufacturer instructions. Gently scrape with a putty knife, never forcing it.
Avoid heavy sanding since veneer is thin. If you must sand, use fine grit and very light pressure.
Watch closely and stop immediately if the veneer layer starts to thin or looks uneven. This cautious approach preserves the veneer’s integrity, ensuring a smooth foundation for your refinishing work.
Always wear chemical-resistant gloves and ensure proper ventilation when using solvents or strippers to protect yourself during the removal process.
Sand and Smooth Veneer for a Flawless Finish
When you start sanding, go easy on the pressure and use some medium-grit sandpaper. This helps level the surface without risking damage to the veneer.
Once you’ve got that sorted, gradually switch to finer grits, like 220 or even 320. This step is key for achieving that smooth, even finish, which is perfect for prepping the wood for staining or sealing.
Oh, and don’t forget! After each sanding stage and before you apply any coats, make sure to give the surface a good clean. A quick vacuum and a swipe with a tack cloth will do wonders to remove dust and keep imperfections at bay.
For a durable and moisture-resistant finish, consider using penetrating finishes that protect wood surfaces while maintaining their natural beauty.
Start With Light Sanding
Light sanding gently levels the veneer surface and removes any lingering residue without risking damage to the thin wood layer beneath.
Use a fine-grit sanding block or a sanding sponge to apply even, light pressure across the entire surface.
Focus on smoothing any minor imperfections, such as residual finish gloss or slight roughness from previous steps.
Avoid aggressive sanding motions or pressing too hard, as veneer is delicate and can sand through quickly.
Pay close attention to edges and corners, where veneer tends to be thinner and more vulnerable.
After sanding, vacuum the dust carefully and wipe the surface with a tack cloth to guarantee cleanliness.
This initial step sets a smooth foundation, essential for achieving an even, professional finish during subsequent refinishing stages.
For best results, consider that pore filling and surface preparation significantly influence the uniformity and final appearance of stain on veneer surfaces.
Progress Through Fine Grits
As you move forward with sanding, gradually work through finer grits, typically progressing from 120 to 220 and even up to 320 grit. This will help you achieve a flawlessly smooth veneer surface.
Start by lightly sanding with 120 grit to level minor imperfections without risking damage to the thin veneer. Then switch to 220 grit to refine the surface, removing any remaining scratches from the coarser grit.
For an ultra-smooth finish, finish sanding with 320 grit, paying close attention to edges and corners where unevenness often occurs. Use gentle, even pressure and sand with the grain to avoid cross-grain scratches.
Between each grit, thoroughly vacuum dust and wipe with a tack cloth to prevent grit buildup. This ensures your veneer is perfectly prepared for staining or sealing.
To preserve the veneer’s integrity and prevent damage, avoid skipping grits during sanding as this can leave residual scratches that compromise finish quality.
Clean Surface Between Coats
Consistently cleaning the surface between coats is essential to achieving a flawless finish on your veneer table.
Each layer you apply can trap dust or grit, resulting in uneven texture and visible imperfections.
To maintain smoothness, follow these steps carefully:
- Lightly sand the dried coat using fine-grit sandpaper (220-320 grit) to remove dust nibs and smooth inconsistencies without cutting through the veneer.
- Vacuum the surface with a soft brush attachment to remove loose particles.
- Wipe the entire surface thoroughly with a tack cloth to pick up any remaining dust or debris.
- Inspect the surface under good lighting to confirm it’s perfectly clean and smooth before applying the next coat.
This disciplined routine will help your finish dry evenly, guaranteeing a professional, glass-like veneer surface.
For optimal adhesion and smoothness, lightly sanding between coats with 240-320 grit sandpaper is recommended to ensure proper bonding and an even base for buffing.
Stain and Seal Veneer to Protect It
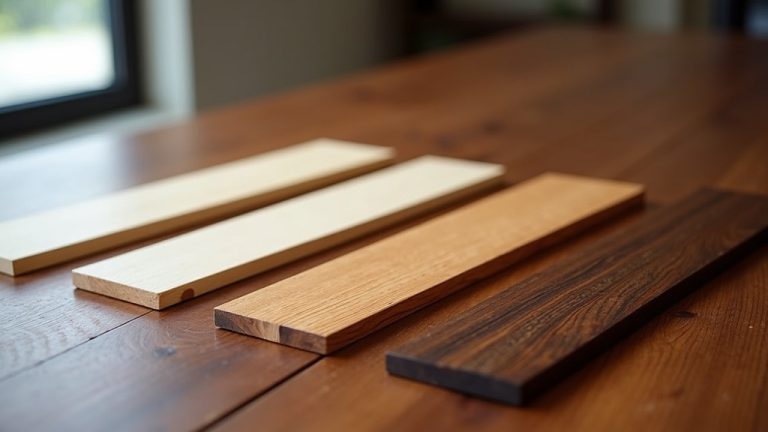
Begin by testing your chosen stain on an inconspicuous area of the veneer, such as the underside or inside a drawer, to guarantee it delivers the desired color without adverse effects.
Apply the stain evenly with a rag or foam brush, always following the wood grain. Allow it to dry completely before sealing. For protection, use a clear topcoat like polyurethane or lacquer. Apply thin, even coats with adequate drying time between each.
A polyurethane finish is ideal for providing durable protection while enhancing the natural grain of oak veneer.
| Step | Tips |
|---|---|
| Test Stain | Use hidden spots for accurate color |
| Apply Stain | Follow grain, avoid pooling |
| Dry Time | Wait fully before sealing |
| Choose Sealer | Polyurethane, lacquer, or shellac |
| Apply Sealer | Thin coats, light sanding between |
Maintain Your Veneer Table for Lasting Beauty
While veneer tables add elegance and warmth to your space, maintaining their appearance requires regular care tailored to their delicate surface.
To keep your veneer table looking its best, follow these precise steps:
- Clean gently using a soft cloth and mild soap solution; avoid harsh chemicals that damage the finish.
- Use coasters and placemats to prevent water rings and heat damage that can warp or discolor veneer.
- Address minor scratches immediately with a matching wood filler or touch-up markers designed for veneer.
- Regularly inspect edges and joints for lifting or bubbling; repair loose veneer promptly with wood glue and clamps.
Frequently Asked Questions
Can I Refinish Veneer Over Water Damage or Mold?
You can refinish veneer over water damage or mold, but you’ll need to address the issues first.
Mold must be thoroughly cleaned with a mild bleach solution or specialized cleaner and allowed to dry completely.
Water-damaged veneer might need repair or replacement if bubbling, lifting, or warping occurs.
Only once the surface is stable and dry should you proceed with refinishing.
Ensure any damaged spots are properly repaired to avoid future problems under the new finish.
What Tools Are Best for Precise Veneer Repairs?
Picture yourself delicately lifting a tiny chip with a razor-sharp craft knife. Precision is key.
For veneer repairs, you’ll want fine tools like a sharp utility knife or X-Acto blade for clean cuts. A small putty knife is ideal for spreading glue or filler smoothly, and clamps help press lifted edges flat.
Use fine-grit sandpaper (220-320 grit) to gently smooth repairs without damaging veneer. Tweezers help place tiny patches exactly where needed, ensuring flawless work.
How Long Does Each Drying Stage Typically Take?
Each drying stage usually takes between 2 to 24 hours, depending on the product and conditions.
Stain often dries in 2-4 hours, but you should wait up to 24 hours for full curing before sealing.
For finishes like polyurethane or lacquer, expect 4-6 hours between thin coats.
Always check manufacturer instructions, temperature, and humidity.
Rushing can cause tackiness or poor adhesion, so patience guarantees a smooth, durable finish.
Are There Eco-Friendly Alternatives to Chemical Strippers?
Imagine peeling an orange gently to keep the fruit intact. That’s how eco-friendly strippers work on veneer.
You can use soy-based or citrus-based strippers, which are biodegradable and less toxic than traditional chemicals.
These alternatives soften finishes without harsh fumes, protecting your health and the environment.
Always test first, since they might take longer to work.
Using these safer options helps you refinish responsibly without sacrificing effectiveness or veneer safety.
Can I Refinish Veneered Furniture With Intricate Inlays?
Yes, you can refinish veneered furniture with intricate inlays, but you’ll need to be extra cautious.
Avoid aggressive sanding to protect delicate details and edges. Use gentle chemical strippers and apply them carefully around inlays.
Repair any loose veneer or chips with precision, matching colors closely. Light sanding and careful staining will preserve the inlay’s beauty.
Patience and attention to detail are key to achieving a flawless finish without damaging intricate work.
Sanding Veneer: How to Protect the Thin Surface
Now that you’ve learned how to carefully refinish your veneer table, you might wonder if sanding too aggressively could damage the thin veneer layer.
In truth, gentle sanding is key. Pressing too hard risks wearing through the veneer, exposing the substrate beneath.
By taking your time with repairs, removal, and finishing steps, you’ll preserve the veneer’s delicate surface and restore its beauty.
With proper care, your table will impress for years to come.