How to Buff Polyurethane: Professional Finishing Method
To buff polyurethane, first make certain it’s fully cured, ideally 24 hours after the last coat. Sand progressively from 240-grit up to 2000-grit wet/dry paper for smoothness.
Use a low-speed random orbit sander with microfiber or superfine pads to avoid heat buildup and burns. Apply automotive polishes in increasing fineness, keeping the buffer moving steadily.
Hand-buff intricate areas carefully to maintain even gloss. Master these steps, and you’ll achieve a flawless, durable finish with control over sheen and gloss.
Key Takeaways
- Ensure polyurethane is fully cured for at least 24 hours before buffing to avoid surface damage.
- Use a microfiber buffing pad with a low-speed buffer and constant, overlapping motions to prevent heat buildup.
- Apply automotive polish progressively from coarse to ultra-fine for a smooth, high-gloss finish.
- Lightly sand between coats with 220–320 grit to promote adhesion and smooth the surface before buffing.
- Clean the surface thoroughly with a tack cloth and maintain a dust-free workspace during buffing.
Preparing Polyurethane for Buffing: Curing and Coats Needed

Before you begin buffing, make sure your polyurethane has fully cured. This means allowing at least 24 hours after the final coat application or until all odors have dissipated.
You need multiple coats, four at minimum, to build sufficient thickness for buffing. A thicker build, ideally 15 coats, prevents sanding through to bare wood during surface preparation.
Between coats, lightly sand with 240-grit paper to guarantee proper adhesion and smoothness. Before buffing, carefully inspect the surface for dust bumps, brush marks, or other imperfections. These will be highlighted after polishing.
Achieving a uniform, fully cured polyurethane layer with adequate thickness is critical for successful buffing and a flawless finish. This finish will resist damage and reflect light evenly.
Proper surface preparation, including progressive sanding, ensures optimal adhesion and a smooth final result.
Sandpaper Grits and Sanding Steps Before Buffing
You’ll kick things off by sanding with 320-grit to smooth out those pesky high spots. After that, just gradually work your way up to finer grits, like 1500 or even 2000, for that flawless finish you’re aiming for.
Oh, and don’t forget about wet sanding! Using water or naphtha at those higher grits really helps sharpen the finish and keeps those scratches to a minimum.
And here’s a little tip: make sure to sand lightly between each coat of polyurethane. This step is crucial for ensuring proper adhesion and giving you an even base to work with when you’re ready to buff.
Happy sanding! For best results, always follow a proper grit progression to achieve a smooth, professional finish.
Optimal Grit Progression
Mastering the ideal grit progression is essential to achieve a flawless polyurethane finish ready for buffing.
Begin with 320-grit sandpaper to gently remove high spots and surface imperfections without cutting through the finish.
Next, move to finer grits: 800, then 1000, carefully leveling the surface with consistent, light strokes.
For the final smoothing, use 1500-grit or higher, ideally wet sanding with 2000-grit wet/dry paper, to refine the finish and eliminate sanding marks.
Always sand along the grain and keep pressure even to avoid uneven abrasion.
This graduated approach guarantees a smooth, uniform surface that buffs easily, allowing the final polish to produce a mirror-like shine without scratches or haze.
Skipping or rushing grit stages compromises finish quality and makes buffing more difficult.
Using wet sanding in the finer grit stages helps reduce dust and prevent heat buildup, resulting in a smoother finish.
Wet Sanding Benefits
Incorporating wet sanding into your polyurethane finishing process markedly enhances surface smoothness and prepares the finish for effortless buffing.
Begin with 320-grit sandpaper to level high spots, then progressively move to finer grits: 800, 1000, and up to 2000-grit wet/dry.
Using water or naphtha during sanding helps prevent clogging and reduces heat buildup. This allows for an even, scratch-free surface.
Wet sanding at 1500-grit or higher greatly minimizes sanding marks, making the subsequent buffing stage smoother and more efficient.
It also promotes a uniform sheen by eliminating imperfections like dust bumps and brush strokes.
For best results, applying thin, even coats of a water-based polyurethane before sanding ensures better adhesion and reduces the risk of cloudiness.
Sanding Between Coats
| Step | Grit Range | Purpose |
|---|---|---|
| Initial Sand | 240 | Level high spots, smooth coat |
| Intermediate | 320 – 800 | Refine surface, remove bumps |
| Fine Sanding | 1000 – 1500 | Smooth and prep for buffing |
| Wet Sanding | 1500 – 2000+ | Final leveling, glass finish |
| Inspection | – | Make certain of a flawless surface |
Follow these steps precisely for prime adhesion and gloss. Using 220-320 grit sanding between coats ensures proper adhesion and a smooth finish before final buffing.
Essential Tools for Buffing Polyurethane Surfaces
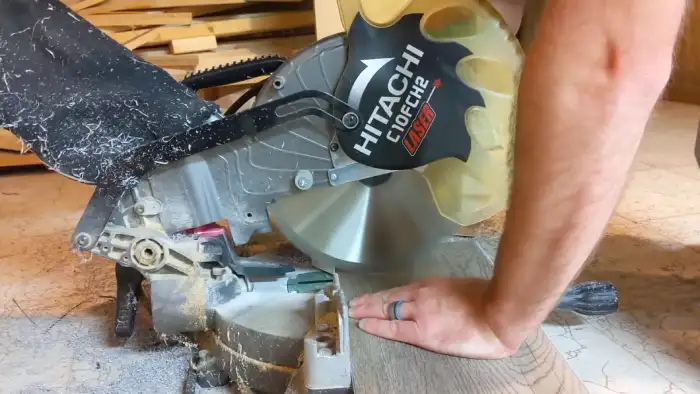
A well-equipped toolkit is essential when buffing polyurethane surfaces to achieve a flawless, high-gloss finish. You’ll need a random orbit sander fitted with a superfine rubbing pad for initial smoothing and buffing.
A microfiber buffing pad, like Surbuf, is vital for elevating the gloss without scratching. For intricate or curved areas, keep hand-held buffing pads ready to maintain control and avoid uneven finishes.
An automotive buffer proves invaluable for applying final polishes, delivering consistent pressure and speed. Select automotive-grade polishes ranging from coarse to ultra-fine to progressively enhance the surface sheen.
Don’t forget water or naphtha for wet sanding preparation. Investing in these precise tools guarantees you can effectively level, polish, and perfect your polyurethane surfaces with professional-grade results. Using natural finishes such as tung oil after buffing can enhance wood grain and provide durable moisture resistance.
Using a Random Orbit Sander for Buffing Polyurethane
When you’re using a random orbit sander to buff polyurethane, it’s a good idea to keep the speed low. This helps prevent any heat buildup that might damage the finish. Trust me, you definitely don’t want that!
As you work, make sure to move the sander in smooth, overlapping motions. This way, you can avoid any uneven spots or burns. Just keep it steady, and you’ll achieve a controlled polish with a beautiful, even sheen. It’s all about taking your time and doing it right!
Additionally, maintaining proper equipment maintenance ensures smoother operation and better results when buffing finishes like polyurethane.
Low Speed Operation
Although it might be tempting to use high speed for quick results, you should always operate your random orbit sander at low speed when buffing polyurethane to prevent overheating and surface damage.
High speeds generate excessive friction, causing the finish to soften or burn. This leads to dull spots or uneven sheen.
Running the sander slowly lets the abrasive pad work efficiently without compromising the polyurethane’s integrity.
This controlled speed also provides better feedback, allowing you to gauge pressure and polish evenly.
When you apply polish, low speed guarantees it spreads smoothly, promoting a consistent gloss.
Resist the urge to increase speed; patience here secures a flawless, durable finish that highlights your careful sanding and multiple polyurethane coats.
For best results, use a sander with variable speed control to precisely adjust the speed for optimal buffing performance.
Constant Movement Technique
Consistently keeping your random orbit sander in motion is essential for achieving an even, burn-free finish on polyurethane. When buffing, avoid lingering in one spot; this prevents heat buildup that can cause unsightly burns or uneven gloss.
Move the sander in slow, deliberate overlapping passes, maintaining constant contact without applying excessive pressure. This guarantees uniform abrasion and polish distribution across the surface.
Use a rubbing pad suited for your polish grade, and adjust sander speed to low for peak control. Shift smoothly between sections, never stopping abruptly.
This technique promotes a flawless, mirror-like sheen while preserving the polyurethane’s integrity. Mastering constant movement with your random orbit sander is key to professional-quality results and extending the longevity of your finish.
For optimal results, consider using polyester film construction pads for improved heat dissipation and durability during wet or dry buffing.
Applying Automotive Polishes for Buffing Polyurethane
Typically, you’ll apply automotive polishes in a progressive sequence, starting with a coarse polish and moving toward finer grades to build a deep, mirror-like sheen on your polyurethane surface.
First, load the coarse polish onto a microfiber buffing pad, then spread it evenly before turning on your buffer at low speed.
Maintain constant motion to prevent heat buildup and avoid burn marks.
After removing sanding marks and leveling the surface, switch to medium and then fine polishes, repeating the same controlled technique.
Each polish refines the finish by eliminating finer scratches and enhancing gloss.
Make certain you apply only enough polish to cover the area without excess, which can lead to hazing.
For optimal results, ensure the polyurethane finish is fully cured before buffing to avoid surface damage and achieve lasting protection through the drying/curing time phase.
Buffing Complex Polyurethane Shapes by Hand
When buffing complex polyurethane shapes, you’ll need to rely on hand techniques to navigate curves, corners, and intricate details that machines can’t reach effectively.
Use specialized buffing pads designed for hand application to maintain control and avoid damaging delicate areas.
Consistently apply polish in small sections, moving steadily to ensure even coverage.
Focus on:
- Utilizing microfiber or superfine non-woven pads for gentle abrasion.
- Adapting pressure to avoid over-buffing raised or detailed areas.
- Employing slow, circular motions to develop a uniform sheen.
This approach allows you to preserve the shape’s integrity while achieving a smooth, glossy finish.
Precision and patience are key; hand buffing complex contours demands steady hands and careful attention to avoid uneven gloss or missed spots.
Avoiding Buffing Burns and Uneven Gloss
Although buffing polyurethane can produce a stunning finish, you must carefully control pressure and speed to avoid burns and uneven gloss.
Apply light, consistent pressure and keep your buffer or sander moving steadily to prevent heat buildup. This buildup can cause burns that mar the surface.
Use steady, light pressure and continuous motion to avoid heat buildup and surface burns.
Use a low-speed setting initially, especially with power tools, to reduce friction.
Uneven gloss often results from lingering too long in one spot or applying inconsistent pressure. Maintain smooth, overlapping motions.
Hand-buff complex areas to better regulate contact and avoid overworking delicate profiles.
Always inspect your work frequently under good lighting to catch early signs of burning or gloss variation.
How to Control Sheen and Gloss Levels When Buffing
By adjusting your buffing technique and materials, you control the sheen and gloss levels of polyurethane finishes with precision. The key lies in how long and aggressively you buff, as well as the type of polishing compounds and pads you use. Here’s how to fine-tune your finish:
Buffing duration and pressure: Longer, consistent buffing increases gloss. Lighter, shorter passes yield a softer sheen.
Polishing compounds: Start coarse and progress to finer automotive polishes for a mirror-like gloss. Stop earlier for satin finishes.
Pad selection: Use superfine rubbing pads for subtle sheen control. Microfiber pads are ideal for high gloss.
Constantly move the buffer to avoid uneven gloss. Remember, final buffing is your last chance to dial in the exact sheen you want.
Common Buffing Mistakes and How to Fix Them
When it comes to buffing, one of the biggest pitfalls is overbuffing. If you’re not careful, you can actually damage that beautiful polyurethane surface and end up dulling the finish. No one wants that, right?
Another issue you might run into is uneven sheen. This usually happens due to inconsistent buffing pressure or speed. But don’t worry! A few targeted touch-ups can easily restore that uniform gloss you’re aiming for.
And let’s not forget about dust contamination. It’s a sneaky problem that can really mess things up. So, it’s super important to clean properly before and during buffing. That way, you can avoid those pesky particles that can mar your finish. Keeping everything clean is key!
Overbuffing Surface Damage
Overbuffing can quickly damage your polyurethane finish, leaving unsightly swirl marks, burns, or a dull haze on the surface. You need to recognize these signs early to prevent permanent damage.
Excessive pressure or staying too long in one spot causes heat buildup, which degrades the finish. To avoid overbuffing, keep your buffer moving constantly to distribute friction evenly.
Use low speed settings initially, increasing gradually only if needed. Apply polish sparingly; too much can clog the pad and cause uneven abrasion.
If you spot damage, lightly wet sand with 1500-2000 grit paper and re-buff carefully with a finer polish. Always test on a hidden area first.
Overbuffing is avoidable by controlling time, pressure, and polish amount, ensuring a flawless polyurethane surface.
Uneven Sheen Correction
Even with careful buffing, uneven sheen often appears as a common issue that can undermine the finish’s appearance. To fix this, first identify areas with inconsistent gloss. These usually result from uneven pressure or speed during buffing.
Revisit those spots using a microfiber buffing pad on a low-speed random orbit sander, applying light, consistent pressure while moving steadily. Avoid dwelling too long in one spot to prevent overbuffing.
If the unevenness persists, lightly wet sand with 1500-2000 grit to level the surface before re-buffing. Always follow with progressively finer automotive polishes to restore uniform gloss.
Dust Contamination Issues
Dust contamination is one of the most frequent and frustrating issues during polyurethane buffing. It often causes unsightly imperfections such as pits, scratches, or embedded particles in the finish.
To prevent this, you must maintain a clean workspace and prepare the surface meticulously. Here’s how to tackle dust contamination effectively:
Use tack cloth or microfiber to remove dust before buffing. Buff in a dust-free environment, ideally with minimal airflow. Inspect and clean buffing pads regularly to avoid reintroducing particles.
If you spot contamination, stop immediately. Lightly sand the affected area with 1500-2000 grit sandpaper, clean thoroughly, and reapply polish before continuing. Taking these steps guarantees a flawless, glass-like finish and protects your polyurethane’s durability and appearance.
Final Polishing Techniques for a Mirror Finish
When you’re ready to achieve a mirror finish, start by carefully selecting and applying a series of automotive polishes from coarse to ultra-fine on a low-speed buffer.
Begin with a coarse polish to remove minor sanding marks, applying it evenly with a microfiber buffing pad.
Start with a coarse polish and apply evenly using a microfiber buffing pad to remove sanding marks.
Maintain constant movement to avoid heat buildup and surface burns.
Progress to medium and then ultra-fine polishes, gradually increasing gloss and removing haze.
Use a superfine rubbing pad for the final polish to refine the sheen precisely.
For edges and complex shapes, hand-buff with appropriate pads to avoid uneven results.
Finish by wiping the surface with a clean microfiber cloth to remove residue.
This methodical approach guarantees a flawless, deep gloss that highlights the polyurethane’s durability and clarity.
Frequently Asked Questions
Can I Buff Polyurethane on Furniture Outdoors?
You can buff polyurethane on furniture outdoors, but it’s best to choose a calm, dust-free day to avoid debris settling into the finish.
Make sure the final coat has fully cured for at least 24 hours. Work in the shade to prevent the finish from softening in direct sunlight.
Use low-speed tools and keep your movements steady to avoid burning the surface. Protect your work area from wind and moisture for best results.
How Do Temperature and Humidity Affect Buffing Results?
Temperature and humidity directly impact your buffing results. High humidity slows curing, making the polyurethane softer and prone to smudging during buffing.
Low temperatures also delay curing, causing tackiness. Ideally, you want a controlled environment around 65–75°F with 40–60% humidity for peak hardness and smoothness.
Buffing too soon in high humidity or cold can ruin your finish. Always make certain of full cure before starting to buff.
Is It Safe to Buff Polyurethane Without Protective Gear?
You wouldn’t want dust swirling in your eyes or fine particles settling in your lungs while buffing polyurethane.
It’s not safe to skip protective gear. Wear safety goggles to shield your eyes and a respirator mask to avoid inhaling harmful fumes or dust.
Gloves protect your skin from irritants. Buffing releases tiny airborne particles and chemical residues, so always gear up to maintain your health and ensure a safe, clean workspace.
Can Buffing Remove Scratches From Old Polyurethane Finishes?
Yes, buffing can remove light scratches from old polyurethane finishes by leveling the surface and smoothing imperfections.
Start by sanding gently with fine grits like 1500 to 2000 to minimize deeper scratches. Then use a random orbit sander with a superfine rubbing pad and progressively finer automotive polishes.
Keep the buffer moving to avoid burns, and hand-buff intricate areas.
Deeper scratches may require spot sanding or refinishing for best results.
How Often Should Polyurethane Surfaces Be Rebuffed?
You shouldn’t rebuff polyurethane surfaces so often that it feels like you’re polishing the moon!
Generally, rebuff every 1–3 years depending on wear and exposure. High-traffic areas may need it more frequently, while protected surfaces last longer.
Always assess surface condition first; look for dullness or minor scratches.
Rebuffing too often risks thinning the finish, so maintain a careful balance to preserve durability and shine.
Buff Polyurethane Like a Pro with the Right Techniques
You might think buffing polyurethane is too complex or time-consuming, but with the right steps and tools, it’s straightforward and rewarding.
By properly curing, sanding through the right grits, and using automotive polishes carefully, you can achieve a flawless, mirror-like finish.
Avoid common mistakes like buffing burns by controlling speed and pressure.
Follow these precise techniques, and you’ll confidently elevate your polyurethane surfaces to a professional-quality sheen every time.