How to Install Crown Molding on Cabinets: Step-by-Step DIY Guide
To install crown molding on cabinets, first measure the cabinet tops and select 1×2-inch wood strips as nailing surfaces.
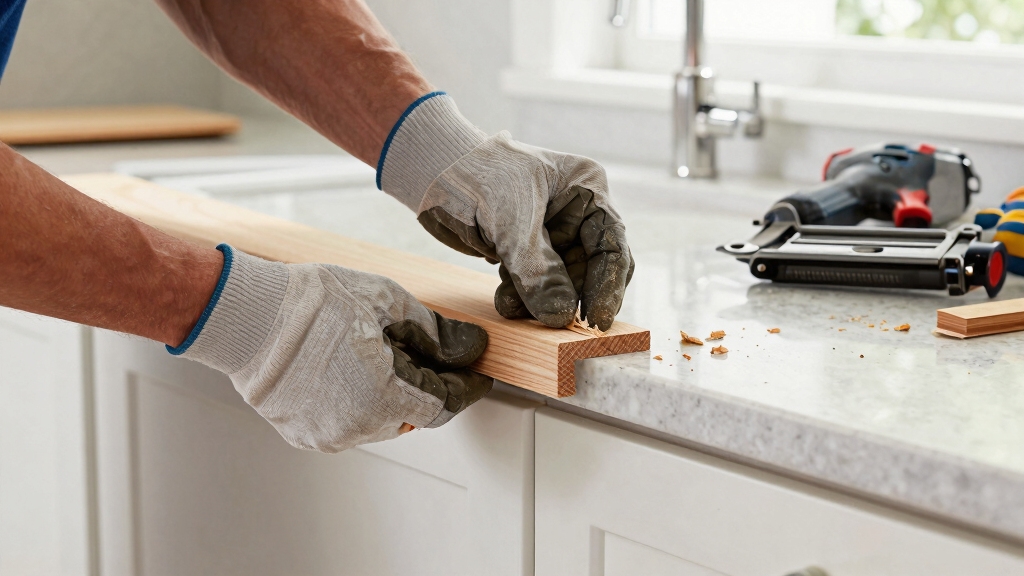
Glue and nail the strips securely. Then cut your molding precisely with a miter saw set at 45 degrees for inside and outside corners.
Attach the molding using glue and brad nails every 12 inches, pressing corners tightly and clamping overnight.
Finish by filling nail holes, sanding, and caulking for a flawless look. Keep going to master the details that guarantee a perfect fit.
Key Takeaways
- Measure cabinet top edges accurately and buy 10% extra molding material for angled cuts and errors.
- Attach 1×2-inch wood strips with wood glue and nails to create a sturdy nailing surface atop cabinets.
- Cut crown molding corners precisely using a miter saw set at 45 degrees, adjusting orientation for inside and outside corners.
- Secure molding with wood glue and 1.5-inch brad nails every 12 inches, adding extra nails near corners for strength.
- Fill nail holes with wood putty, sand smooth, apply paintable caulk at edges, then prime and paint or stain molding.
Measure Cabinets and Select Materials for Crown Molding

Measuring the top edge of your cabinets accurately is the essential first step in installing crown molding. Use a tape measure to record the full length, including any corners or irregularities.
Accurately measuring your cabinet tops, including corners, is crucial for perfect crown molding installation.
Note these dimensions clearly, as precise measurements prevent costly mistakes. When selecting molding, buy extra material—about 10% more—to cover angled cuts and potential errors.
Choose 1×2-inch wood strips to serve as a solid nailing surface atop your cabinets. These will guarantee the molding mounts securely.
Select paintable caulk for finishing touches, filling seams and nail holes neatly. Finally, pick a paint or stain color that complements your existing cabinetry to maintain a cohesive look.
Careful preparation here sets the foundation for a flawless, professional crown molding installation. Before beginning installation, it is important to clear cabinet interior to create an unobstructed workspace and protect your cabinetry during the process.
Install Nailing Strips to Support Your Crown Molding
Attaching 1×2-inch wood strips to the top surface of your cabinets provides a sturdy nailing base for the crown molding.
Begin by applying wood glue evenly along each strip’s bottom edge, then position them tightly against the cabinet’s top edge.
Ensure they overhang the doors slightly for a clean fit. Use a nail gun to secure the strips firmly, spacing nails every 12 inches to prevent movement.
For extra hold, apply a dab of super glue before the wood glue. If any strip edges remain visible through gaps, spray-paint them to match your cabinet color for a seamless look.
This solid nailing platform guarantees your crown molding installs flush and stays securely in place over time.
To protect your cabinets during installation, consider using a durable finish that resists scratches and moisture.
Cut Crown Molding Precisely for Inside and Outside Corners
With your nailing strips securely in place, the next step is to cut the crown molding accurately for both inside and outside corners. Use a miter saw set to a 45-degree angle for precise cuts.
For inside corners, cut the molding with the bottom edge facing up and the top edge against the fence. For outside corners, reverse the orientation.
Make relief cuts along your pencil marks to avoid binding. Then back-cut with a jigsaw for a clean profile match.
To ensure clean and accurate cuts, proper preparation and technique are essential when using a miter saw.
| Corner Type | Miter Angle | Molding Orientation |
|---|---|---|
| Inside Corner | 45° | Bottom up, top against fence |
| Outside Corner | 45° | Top up, bottom against fence |
| Relief Cuts | N/A | Along pencil marks |
| Back-cut | N/A | Use jigsaw for profile |
Attach Crown Molding Securely Using Nails and Glue
Secure the crown molding firmly by using a pneumatic brad nailer equipped with 1.5-inch brad nails. Start by applying wood glue to the back edges of the molding for a stronger bond.
Then, position the molding carefully onto the wood strips atop your cabinets.
Follow these steps to attach the molding securely:
- Nail every 12 inches along the molding to guarantee consistent support.
- Add extra nails within 1-2 inches of corners and joints to prevent shifting.
- Press glued outside corners together and tape them overnight for a tight hold.
For the best results, ensure you maintain proper pressure techniques during nailing to avoid damaging the molding.
Finish Crown Molding Seams and Corners for a Clean Look
Once the molding is firmly nailed and glued in place, focus on refining the seams and corners to achieve a polished appearance.
Start by applying wood glue to all joints. Secure corners with miter clamps until the glue dries completely.
Use wood putty to fill nail holes and any gaps at the seams, guaranteeing the surface is smooth and even.
After the putty dries, sand these areas carefully to eliminate ridges or unevenness.
Next, run a bead of paintable caulk along the edges where the molding meets the ceiling and cabinet tops to seal any tiny gaps.
Finally, prime the entire molding before painting or staining. This assures a consistent finish and highlights the clean, professional look you’ve created.
For added durability and a clean aesthetic in your cabinetry, consider installing hidden floating shelf brackets to provide seamless support for any additional shelving or decorative elements.
Frequently Asked Questions
Can I Install Crown Molding on Cabinets Without Damaging Existing Finishes?
Yes, you can install crown molding on cabinets without damaging existing finishes by taking careful steps.
Start by attaching 1×2” wood strips as a nailing surface using wood glue and a nail gun, avoiding direct nailing into the cabinet.
Use painter’s tape to protect surfaces during installation.
Always fill and sand nail holes and seams before painting.
Working slowly and using proper tools helps preserve your cabinet’s finish while adding molding.
What Tools Are Best for Beginners Installing Cabinet Crown Molding?
You’ll want a miter saw for accurate 45-degree cuts.
A pneumatic brad nailer with 1.5-inch brad nails provides secure attachment.
A tape measure is essential for precise measurements.
Add a pencil for marking cut lines and a caulk gun to finish seams smoothly.
A jigsaw helps with back-cuts, while a nail gun and clamps keep corners tight.
These tools make the job manageable, even if you’re new to crown molding installation.
How Do I Remove Old Crown Molding Without Harming Cabinets?
To remove old crown molding without harming your cabinets, start by scoring the caulk seam with a utility knife to break the seal.
Use a putty knife to gently pry the molding away, inserting it slowly between the molding and cabinet to avoid damage.
Work in small sections, alternating sides to evenly loosen the molding.
If nails resist, use pliers to carefully pull them out.
Take your time to prevent dents or scratches.
Can Crown Molding Be Installed on Curved or Rounded Cabinets?
Yes, you can install crown molding on curved or rounded cabinets, but it requires flexible or segmented molding.
You’ll need to use thin, bendable MDF or flexible PVC molding designed for curves.
Measure carefully and apply adhesive and brad nails gradually while shaping the molding to the curve.
Take your time with caulking and filling seams for a seamless finish.
Using flexible materials guarantees a professional look without cracking or gaps.
How Do I Maintain Crown Molding to Prevent Cracking or Warping?
You should maintain crown molding like you’d care for fine wood furniture. Regularly and gently keep humidity levels steady to prevent warping.
Wood expands and contracts with moisture changes. Clean the molding carefully with a soft cloth to avoid scratches.
Inspect seams and nail holes periodically, filling cracks with paintable caulk. Avoid harsh chemicals and direct sunlight that can dry or fade the wood.
Proper upkeep guarantees your molding stays flawless for years.
Cabinet Crown Molding Installation: Tips for a Professional Finish
You’ve measured, cut, and nailed your crown molding just right. Who knew cabinets could look this elegant?
It’s ironic that such a small detail demands so much precision. Yet it transforms your kitchen completely.
By following these steps carefully, you’ve not only enhanced your cabinets but also mastered a skill that makes you look like a pro.
Now, enjoy the compliments and the satisfaction of a job done meticulously.