How to Cut Curves in Wood: Precision and Perfectly Flowing
To cut curves in wood, first choose the right saw, like a turning saw or fret saw for tight curves and thin stock, or a bow saw or bandsaw for thicker wood. Mark your curve clearly with a stencil or template and clamp it securely. Cut slowly and carefully to avoid splintering, using relief cuts on tight turns.
After cutting, refine the shape with rasps or a spokeshave for smoothness. With the right tools and technique, your curves will be precise and clean. More tips will help you master each step with confidence.
Key Takeaways
- Choose an appropriate saw based on wood thickness and curve tightness, such as a turning saw for thin stock or a bow saw for thicker wood.
- Securely clamp the workpiece and template to prevent shifting before tracing and cutting curves for accurate results.
- Make relief cuts near tight curves to reduce blade stress and cut slowly following marked lines to avoid splintering and binding.
- Use rasps, spokeshaves, and chisels gradually to refine curves and maintain smooth, accurate contours after cutting.
- Set depth marks with a marking gauge and plane carefully with a sharp, cambered blade to achieve consistent curved surfaces.
How To Choose The Right Saw For Wood Curves?
When you’re cutting curves in wood, choosing the right saw can make all the difference in both accuracy and ease.
Selecting the right saw transforms curved cuts from challenging to precise and effortless.
For tight, intricate curves in stock up to 1 inch thick, a turning saw with a 12-inch blade and fine teeth (10-22 ppi) works best.
If you’re dealing with thicker wood between 1 and 3 inches, opt for a bow saw featuring an 18-24 inch blade pitched 7-10 ppi.
For detailed, delicate curves, a fret saw’s narrow blade provides precision you can’t match with larger saws.
Each saw suits specific thicknesses and curve radii, so select your tool based on your wood’s dimensions and the curve’s complexity.
Using the proper saw reduces effort and guarantees cleaner, more accurate cuts.
For especially fine and intricate internal cuts, consider using a fret saw due to its thin, fine blades and deep frame design.
Marking And Laying Out Curves On Wood
Before cutting, you’ll need to mark and lay out your curves accurately to guarantee a clean, consistent shape.
Start by selecting a clear pattern or template that matches your design.
Use a pencil or marking knife to trace the curve onto the wood surface carefully.
Make certain your lines are visible but precise, avoiding thick or uneven marks that hinder cutting accuracy.
Follow these steps:
- Secure a custom template firmly on the wood to prevent shifting during layout.
- Use marking gauges to establish depth lines on both sides, guiding even cuts.
- Double-check measurements and symmetry before proceeding to cutting.
This preparation minimizes waste and eases the cutting process, helping you achieve smooth, accurate curves in your woodworking project. It is also important to plan cuts carefully to maximize material usage and reduce waste.
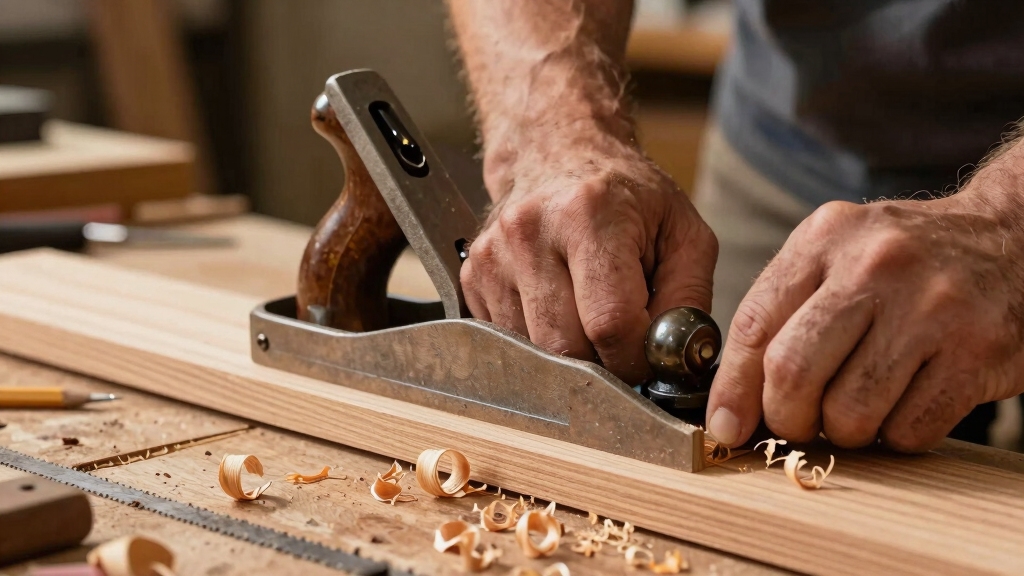
Using Hand Tools To Cut Smooth Wood Curves
Although power tools can speed up curve cutting, hand tools give you unmatched control and precision for smooth, detailed shapes.
Start by selecting a turning saw or fret saw for tight, intricate curves in thinner stock. For heavier wood, a bow saw provides stability and control.
Follow your marked lines carefully, making slow, deliberate cuts to avoid splintering. Use chisels and mallets to remove waste along the curve, working gradually to maintain accuracy.
After cutting, refine edges with a spokeshave and smooth surfaces using rasps or card scrapers. Keep your tools sharp and work steadily, checking frequently against your layout.
This hands-on approach lets you craft clean, flowing curves with greater finesse than power tools alone.
Additionally, always wear safety gear such as goggles and gloves to protect yourself during the cutting process.
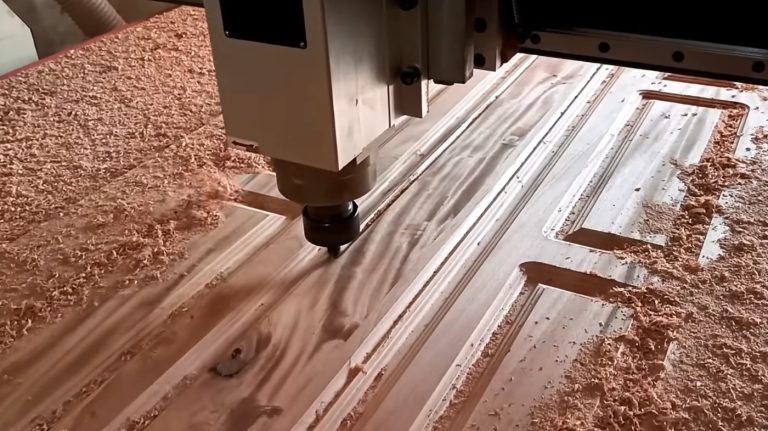
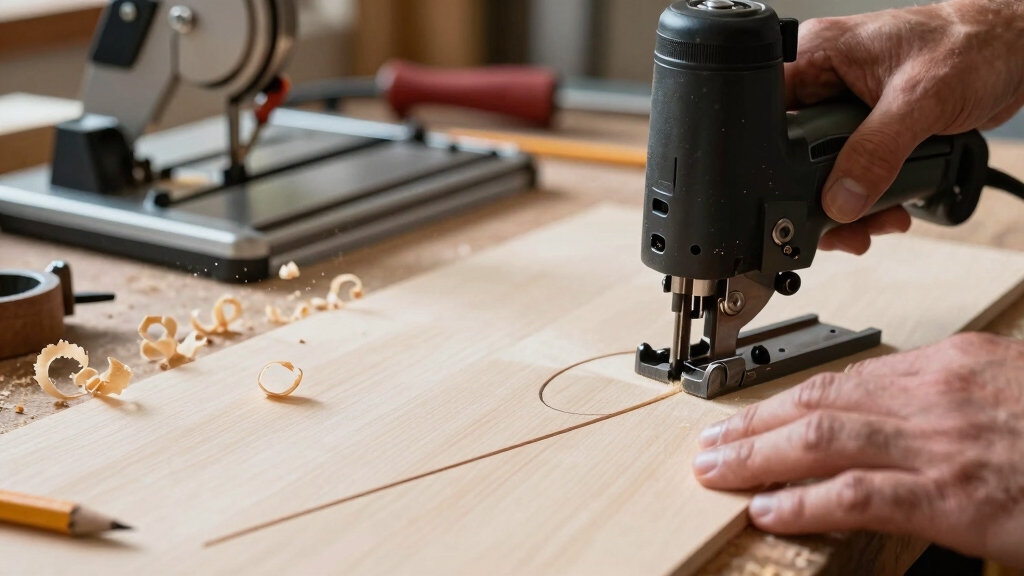
Power Tools For Cutting Wood Curves
Hand tools offer great control for detailed curves, but power tools can speed up the process and handle larger pieces more efficiently.
When cutting wood curves with power tools, you want to focus on efficiency without sacrificing accuracy.
Prioritize efficiency and accuracy when using power tools to cut wood curves.
Here are three key options:
- Band Saw: Ideal for roughing out curves quickly, especially on thicker stock. It lets you follow drawn lines with ease before refining by hand.
- Circular Saw: With a steady hand and proper technique, this tool cuts clean curves fast on thinner material. Use a fine-tooth blade for smoother results.
- Shaper or Large Router Bits: Perfect for producing professional, consistent curved profiles, particularly in production settings or repeated designs.
Choose the tool that matches your curve complexity and material thickness to work smart and precise. Additionally, selecting a bandsaw with the right cutting capacity ensures you can handle the size of your project effectively.
Guided Techniques For Precise Hand-Planing Of Curves
To get started, make sure you set some clear depth marks with a marking gauge. This will help guide your hand plane along the curve accurately.
Now, when you pick up your No. 4 hand plane, you’ll want to focus on shaping those smaller curved sections smoothly. Just remember to follow those gauge lines closely!
And when you’re working into hollows, consider using a beveled chisel, bevel-up. This technique really helps you maintain those continuous, clean curves without risking any damage to the wood.
It’s all about keeping that flow, right?
For best results, maintain a sharp blade and proper alignment to ensure smooth, controlled cuts along the curve.
Marking Gauge Setup
To set up your marking gauge for precise curve hand-planing, begin by adjusting the gauge to match the exact depth needed along both sides of your workpiece. This guarantees consistent planing and smooth curves.
Follow these steps to get it right:
- Measure the thickness at the curve’s deepest points to set your gauge’s pin or wheel accurately.
- Lock the gauge firmly to avoid shifting during marking, which could throw off your curve.
- Mark both edges of the workpiece, creating parallel depth lines that serve as visual and tactile guides.
Using a featherboard can help maintain consistent pressure on your workpiece during cutting, enhancing accuracy and safety.
No. 4 Plane Usage
With your marking gauge set to define clear depth lines, you can now use the No. 4 hand plane to shape your curves accurately. Hold the plane firmly and guide it along the depth marks, removing thin shavings.
Work slowly, checking frequently to maintain even curvature. Use short, controlled strokes to avoid gouging, especially on tight radii.
To achieve the best results, ensure your plane blade is properly sharpened and finely cambered for precise hand-planing that suits curved surfaces.
| Step | Action | Tip |
|---|---|---|
| 1 | Align plane with marks | Keep blade sharp for smooth cuts |
| 2 | Plane with short strokes | Focus on gradual material removal |
| 3 | Check curve frequently | Adjust pressure to maintain shape |
Beveled Chisel Technique
Use a beveled chisel held bevel-up to carefully shape continuous curves and hollows where planes can’t reach effectively.
This technique lets you work precisely along tight bends and recessed areas, removing waste without damaging surrounding wood.
To master the beveled chisel technique:
- Position the bevel edge facing up, allowing the chisel’s flat side to follow the curve closely.
- Use controlled, slicing cuts to pare away thin shavings, maintaining smooth shifts.
- Frequently check your progress against templates or markings to guarantee consistent shaping.
Keep the chisel sharp and your hand steady to avoid gouging.
This method excels at refining complex curves after rough cutting, giving you greater control and accuracy in hand-planing curved wood surfaces.
Regularly checking and adjusting your tools, similar to maintaining a bandsaw fence alignment, can significantly improve precision in woodworking tasks.
Creating And Using Templates For Consistent Wood Curves
When working on projects that require repeated curved shapes, creating custom templates guarantees accuracy and efficiency.
Begin by crafting a template from sturdy material like MDF or plywood, tracing your desired curve precisely.
Use a band saw or scroll saw to cut the template cleanly, then sand edges smooth to guarantee consistent marking and guiding.
Clamp the template securely onto your workpiece, then trace the curve with a pencil or marking knife to transfer the pattern accurately.
For cutting, use the template as a guide for your saw or router, maintaining steady contact to replicate the curve precisely.
This method minimizes errors, saves time, and secures matching pairs of curved components, essential for professional and repeatable woodworking projects.
Ensure your bandsaw blade is properly tensioned and guided to achieve smooth and accurate cuts when following the template with a bandsaw blade.
Finishing Curved Edges With Rasps And Sandpaper
To refine your curved edges, let’s start with some rasps. They’re perfect for shaping and evening out those contours. Just remember to choose the coarseness based on the hardness of the wood you’re working with.
Once you feel like the shape is consistent, it’s time to switch gears and grab some sandpaper. This will help you smooth out the surface nicely.
As you work, make sure to progress through finer grits for that clean finish you’re after. This combination of rasps and sandpaper really gives you precise control over your work, resulting in a professional look on both the inside and outside curves.
It’s a great way to elevate your woodworking project! Using half-round rasps is especially effective for shaping convex or concave curves to achieve smooth transitions.
Rasps For Curve Shaping
Rasps break down rough curves quickly, giving you control over shaping inside and outside edges.
When shaping curves, choose the right rasp to maintain accuracy and avoid overcutting. Use a coarse rasp for heavy material removal, then switch to finer ones as the shape nears completion.
Focus on these key points:
- Use a curved rasp for inside edges and a flat or half-round rasp for outside contours.
- Maintain consistent, light strokes following the curve’s direction to prevent gouges.
- Regularly check your progress against templates or markings to assure accuracy.
Sandpaper Smoothing Techniques
You’ll often find that sandpaper is crucial for refining curved edges after shaping them with rasps.
Begin with a coarse grit, around 80 or 100, to smooth out rasp marks and minor irregularities.
Use flexible sanding blocks or wrap sandpaper around a curved form matching your workpiece’s contour to maintain consistent pressure and avoid flattening the curve.
Progress gradually to finer grits, such as 150 and then 220, to achieve a clean, polished surface.
Always sand along the curve’s length, following its shape, to preserve its natural flow.
Avoid aggressive sanding, which can alter your intended profile.
Finally, check the curve frequently under good lighting to ensure even smoothing and prevent over-sanding any area.
This method produces clean, professional curved edges ready for finishing.
How To Safely Cut Curves On A Band Saw?
When cutting curves on a band saw, always start by securing your workpiece firmly to prevent any unexpected shifts. This stability is vital for accuracy and safety.
Next, adjust the blade guide and guard close to the wood’s surface to minimize blade wobble. Use a sharp blade with fine teeth for smoother cuts on curves.
Follow these steps for safe and effective curve cutting:
- Plan your curve and mark it clearly on the wood before cutting.
- Feed the wood slowly and steadily, guiding it gently without forcing.
- Make relief cuts near tight curves to reduce stress on the blade and avoid binding.
Refining Curved Surfaces With Spokeshaves And Scrapers
To refine your curved surfaces, you really want to start by getting comfortable with spokeshave techniques.
These tools allow for controlled, smooth shaping, which is super important.
Once you’ve got that down, you can follow up with a card scraper.
This tool is great for removing those fine tool marks without leaving behind any sanding dust.
When you use these methods together, you’re guaranteed to achieve a clean, precise finish that really highlights your craftsmanship.
It’s all about the right techniques!
Spokeshave Techniques
Master curved surfaces by using a spokeshave, which lets you remove fine shavings and smoothly refine contours after rough cutting.
To get the best results, start by adjusting the blade for a shallow cut. Too deep and you risk tearing the wood. Work with steady, controlled strokes along the curve, keeping the tool’s sole flat against the surface.
Follow these key steps:
- Position the spokeshave to cut with the grain, minimizing tear-out.
- Use alternating passes on convex and concave areas to maintain consistent shaping.
- Regularly check your progress with a template or straightedge to make certain smooth, even curves.
This method helps you achieve precise, comfortable-to-handle curves ready for final finishing without over-sanding or gouging.
Card Scraper Usage
Bring out the smoothest details in your curved wood surfaces by using a card scraper alongside your spokeshave. After rough shaping with the spokeshave, hold the card scraper firmly with both hands, angling its edge slightly to engage the wood fibers.
Use short, controlled strokes following the curve’s contour to remove fine shavings and burnish the surface. Keep the scraper’s edge sharp; regularly hone it with a burnisher to maintain a clean, burred lip.
Avoid heavy pressure; let the scraper do the work to prevent gouging. Work incrementally, checking frequently for smoothness and consistent curves.
This method refines your curves efficiently, producing a clean surface without the dust created by sanding. Use the scraper to perfect transitions and details, achieving a crisp, professional finish on your curved woodwork.
Surface Smoothing Methods
Frequently, achieving a smooth, well-defined curve requires careful use of both spokeshaves and card scrapers.
After rough cutting, use a spokeshave to refine the curve’s shape, removing tool marks and evening out irregularities.
Then, switch to a card scraper for smoothing the surface without sanding dust. Focus on these three key steps:
- Adjust the spokeshave blade for a fine, controlled cut; work with steady, even strokes following the curve.
- Use the card scraper with a sharp edge held at a slight angle to gently remove remaining roughness.
- Check frequently for consistent smoothness and shape, correcting with the spokeshave or scraper as needed.
This method leaves you with clean, precise curves ready for finishing.
Common Mistakes When Cutting Wood Curves
One common mistake when cutting wood curves is rushing through the process without proper layout and marking.
You need to use clear traced patterns or custom templates to guarantee accuracy before you start cutting.
Skipping this step often leads to uneven or mismatched curves that require excessive sanding or re-cutting.
Another error is forcing power tools through tight curves, which can cause blade binding or rough edges.
Instead, use appropriate hand tools like fret saws or turning saws for detailed sections.
You should also avoid neglecting safety by making rotating passes with saw blades; always cut with control and patience.
Finally, don’t overlook gradual rasping and smoothing after cutting.
This refinement prevents tool marks and sharp edges, resulting in professional, clean curved surfaces.
Frequently Asked Questions
How Does Wood Grain Direction Affect Curve Cutting Accuracy?
Wood grain direction impacts your curve cutting accuracy markedly.
Cutting with the grain lets your saw or chisel move smoothly, reducing tear-out and splintering.
Going against or across the grain increases resistance, causing rough edges and less control.
To get cleaner curves, align your cuts to follow the grain’s flow whenever possible.
If the grain changes direction, proceed slowly and use sharp tools to maintain precision and avoid damaging the wood.
What Types of Wood Are Easiest to Cut Into Curves?
Softwoods like pine and cedar glide under your blade like butter, making curves easier to shape.
You’ll find hardwoods such as cherry and maple more stubborn, requiring sharper tools and patience.
Choose straight-grained, knot-free boards to avoid surprises.
When selecting wood, aim for gentle fibers that yield smoothly.
This approach guarantees your curves flow precisely, saving you time and effort while keeping your cuts clean and controlled.
How to Prevent Wood Tear-Out When Cutting Intricate Curves?
To prevent tear-out when cutting intricate curves, you should use sharp blades with fine teeth, like those on fret or turning saws.
Score the curve line first with a utility knife to sever wood fibers. Support the wood firmly to reduce vibration.
Cut slowly and follow the marked curve precisely.
After cutting, smooth edges with rasps or spokeshaves to clean up any roughness without further tear-out.
Can Laminated Wood Improve Curve Stability During Cutting?
You might think solid wood offers more stability, but laminated wood actually improves curve stability during cutting.
By bonding three thinner pieces, laminated stock resists warping and holds shape better under your saw or chisel.
This layered construction supports cleaner cuts and reduces tear-out.
What Safety Gear Is Recommended for Hand Curve Cutting?
You should always wear safety glasses to protect your eyes from wood chips and dust.
Use a dust mask or respirator to avoid inhaling fine particles.
Gloves can protect your hands, but make sure they don’t interfere with tool control.
Ear protection is smart if you’re working near power tools.
Also, wear snug clothing to prevent snagging, and keep your workspace well-lit and clutter-free for safe, precise curve cutting.
Shaping Wood With Confidence, One Curve at a Time
Cutting curves in wood isn’t just about the tools; it’s about the touch you bring to each cut. By choosing the right saw, marking clearly, and using both hand and power tools carefully, you’ll carve smooth shapes like a sculptor with a chisel.
Remember, patience and precision are your best allies. Avoid common mistakes, keep safety in mind, and finish with care. With practice, those curves will flow as naturally as a river bends.