Can You Sand Resin: The Final Touch That Makes It Shine
Yes, you can sand resin effectively by starting with dry sanding using coarse grits (80–240) for shaping and removing flaws. Then switch to wet sanding from 320–400 grit onward to reduce dust and heat buildup.
Use silicon carbide wet/dry sandpaper and keep the surface lubricated with water to maintain clarity. Always wear protective gear and ensure proper ventilation.
Maintaining consistent pressure and wiping the surface between grits helps avoid damage. Learn how to optimize sanding techniques and finishes for professional results.
Key Takeaways
- Yes, resin can be sanded for shaping, smoothing, and preparing for finishing or polishing.
- Start with dry sanding using coarse grits (80–240) for shaping and removing imperfections.
- Transition to wet sanding at 320–400 grit to reduce dust, heat, and surface haze.
- Use silicon carbide wet/dry sandpaper during wet sanding for effective material removal and lubrication.
- Always wear PPE, ensure ventilation, and avoid power sanding during wet sanding for safety.
Safe and Effective Resin Sanding Techniques
When sanding resin, you’ll want to prioritize safety and technique to achieve ideal results without damaging the material or risking injury.
Begin with dry sanding for small areas or initial shaping, using gentle, circular motions to avoid heat buildup that can soften the resin.
Always wear a respirator and safety glasses to protect from fine dust.
Shift to wet sanding from around 400 grit onward to minimize airborne particles and reduce friction heat, preventing resin melting or surface haze.
Use silicon carbide wet/dry sandpaper for efficient material removal.
Maintain consistent pressure, sanding evenly in overlapping strokes from right to left and top to bottom.
Regularly wipe the surface with a microfiber cloth to inspect progress and avoid over-sanding thin spots, preserving underlying layers and artwork integrity.
Ensuring proper ventilation and using personal protective equipment is essential when dealing with resin dust to prevent respiratory issues.
Choosing the Right Sandpaper Grit for Resin Sanding
When you’re getting ready to sand resin, it’s best to kick things off with a coarse grit, somewhere between 80 and 240.
This helps you remove any imperfections and shape the surface really well.
Once you hit 400 grit, it’s time to switch gears and start wet sanding.
Using silicon carbide paper for this step not only reduces dust but also helps keep the heat down.
As you keep going, you’ll want to progress through finer grits, all the way up to 3000.
This will help you refine those scratches and get the surface prepped for a nice polished finish. Happy sanding!
To protect your lungs from fine resin dust, wearing a P100 respirator is recommended for superior filtration during sanding.
Coarse Grit Starting Point
Select sandpaper grit between 80 and 240 to address major imperfections, shape the resin surface, or remove amine blush effectively.
Begin with coarser grits, around 80 to 120, for rapid material removal and correcting uneven areas. These grits cut aggressively, so apply consistent pressure and avoid lingering to prevent gouging.
Move toward finer coarse grits, like 180 to 240, to refine the profile and reduce deep scratches before shifting. Use silicon carbide sandpaper for peak abrasion and durability.
Always sand evenly across the surface, following a systematic pattern to guarantee uniform results. Coarse grit sanding sets the foundation, so thorough coverage is essential; missed spots will cause visible defects later.
This initial step prepares resin for smoother intermediate sanding stages and ultimately a flawless finish. Proper material preparation can also reduce the risk of resin buildup and ensure a cleaner sanding process.
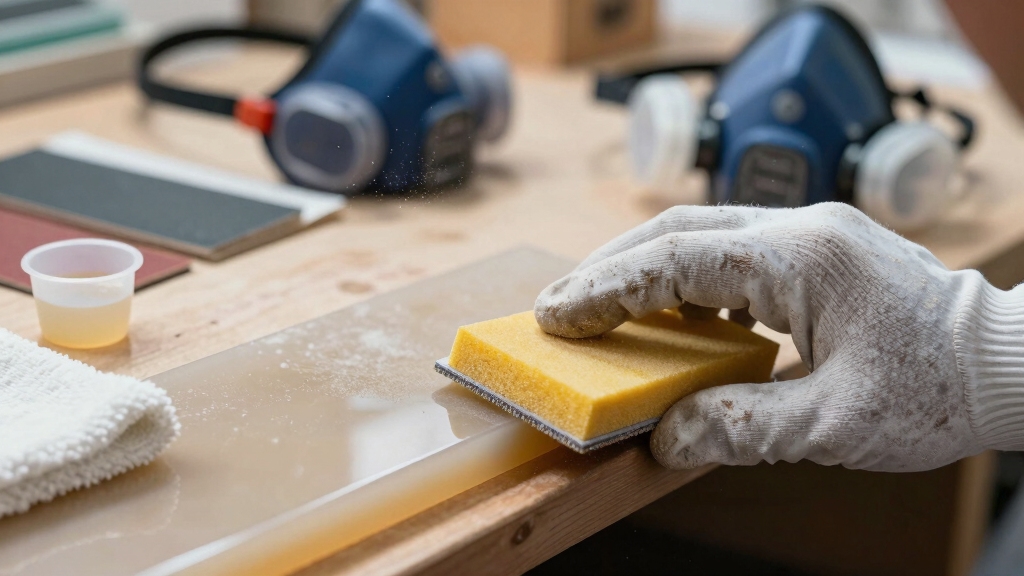
Transition To Wet Sanding
Progressing to wet sanding marks a pivotal shift in refining resin surfaces, enhancing both control and finish quality.
Once you reach 320 to 400 grit, switch to silicon carbide wet/dry sandpaper, which effectively removes material while minimizing heat buildup and dust.
Wet sanding lubricates the surface, reducing clogging and preventing deep scratches that compromise finish integrity.
Maintain a steady water flow to flush away residue, keeping abrasives sharp and the surface visible for precise assessment.
Avoid power tools during wet sanding to eliminate electrocution risks; instead, rely on hand sanding or low-speed detail sanders designed for wet use.
This change guarantees smoother surfaces and prepares the resin for finer grit progression, critical for achieving high-gloss, defect-free finishes in subsequent polishing stages.
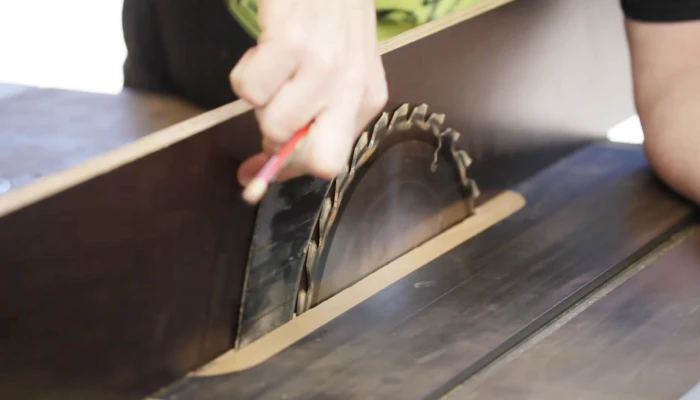
For stubborn roughness, you can incorporate fine sandpaper similar to the 400-grit sandpaper recommended for removing rust on circular saw blades to achieve a polished finish.
Fine Grit Polishing Prep
Refine your resin surface by advancing to fine grit sandpapers between 600 and 1200 grit, which systematically reduce scratch depth while preparing the substrate for polishing.
Use wet sanding with silicon carbide abrasives here to minimize dust and heat buildup. Progressing through these grits guarantees you eliminate deeper scratches from earlier stages without creating new ones, setting a smooth base for ultra-fine polishing.
| Grit Range | Purpose |
|---|---|
| 600 | Removes medium scratches |
| 800 | Smooths surface, reduces haze |
| 1000 | Refines finish, evens texture |
| 1200 | Prepares for polishing step |
| 1500+ | (Next step) Ultra-fine polishing |
Stick to this sequence meticulously to achieve a flawless, mirror-ready resin surface. Proper preparation and sanding technique are essential to ensure a uniform finish and prevent problems such as uneven texture or surface defects during the final sealing stage of resin projects, similar to how surface preparation is crucial for wood finishing.
Wet vs. Dry Resin Sanding: Which Method to Use?
When sanding resin, choosing between wet and dry methods depends largely on the stage of your project and the specific outcomes you want to achieve.
Selecting wet or dry sanding hinges on your project phase and desired finish quality.
You’ll typically use dry sanding for initial shaping and removing amine blush, especially on small pieces where controlling dust and heat is manageable.
Dry sanding works well with coarse grits (80-240) but generates fine dust, so take safety precautions.
As you progress to finer grits (400 and above), switch to wet sanding to minimize dust and prevent heat buildup that could soften the resin.
Wet sanding with silicon carbide paper improves surface smoothness while controlling scratches.
Remember to avoid power tools during wet sanding to prevent electrical hazards.
Wipe the surface between grits to remove residue, ensuring consistent material removal and scratch refinement.
Using the correct abrasive grit ranges during sanding ensures optimal surface finish and reduces the risk of damage.
Essential Tools and Techniques for Smooth Resin Sanding

When it comes to sanding resin, the choice between wet and dry methods really depends on the scale of your project and some safety considerations. For smaller pieces, dry sanding is typically the way to go, especially for those initial shaping stages.
On the other hand, if you’re working with finer grits—like from 400 grit onwards—wet sanding is definitely preferred. It helps minimize dust and reduces heat buildup, which is a big plus!
Now, let’s talk about grit progression. It’s important to follow a systematic approach here. You’ll want to start with a coarser grit, anywhere from 80 to 240, to tackle those imperfections.
After that, you can move on to finer grits, all the way up to 3000, to achieve that polished finish you’re after. Sticking to this sequence is key; it helps you avoid deep scratches and ensures that you end up with a smooth, even surface that’s ready for finishing.
For the best results when finishing resin, consider applying a protective coating such as oil-based polyurethane to enhance durability and sheen.
Wet Versus Dry
How do you decide between wet and dry sanding for resin projects? Use dry sanding for initial rough shaping or small areas to avoid electrical hazards with power tools.
Dry sanding is efficient for material removal but generates significant dust and heat, which can soften resin. From 400 grit onward, switch to wet sanding to minimize dust and prevent overheating.
Wet sanding employs silicon carbide wet/dry sandpaper, which removes material effectively while cooling the surface and reducing airborne particles. Keep the surface lubricated with water, wiping residue between grit changes to maintain clarity.
Avoid power sanding during wet sanding to eliminate electrocution risks. By selecting the appropriate method based on grit and project scope, you guarantee precision, safety, and peak resin surface quality. Proper dust and debris management during sanding also helps prevent overheating and maintains tool performance.
Grit Progression Strategy
Selecting the right grit progression guarantees you remove imperfections efficiently without causing unnecessary surface damage.
Begin with coarse grits between 80 and 240 to eliminate major flaws, shape resin, or remove amine blush.
Move to mid-range 320-400 grit, where wet sanding starts, refining surface texture and reducing scratch depth.
Progress through fine grits from 600 up to 1200 to smooth out residual abrasions systematically.
For ultra-fine finishing, use 1500-3000 grit to prepare the resin for polishing, achieving a mirror-like gloss.
Always wipe the surface with a microfiber cloth between grits to inspect scratches and confirm uniform abrasion.
Avoid skipping grits or advancing prematurely, as this causes persistent scratches that compromise finish quality.
This systematic approach confirms precise, controlled sanding outcomes on resin surfaces.
Additionally, using proper cutting techniques before sanding ensures a smoother surface and reduces sanding effort.
Common Resin Sanding Mistakes and How to Avoid Them
Although sanding resin may seem straightforward, several common mistakes can compromise your finish and require extensive rework.
Sanding resin appears simple, but common errors can ruin your finish and lead to costly rework.
One frequent error is advancing to finer grits before fully sanding all surfaces, which leaves unsanded spots visible and necessitates backtracking.
You should avoid insufficient sanding between cured layers, as it prevents proper adhesion of new coats.
Over-sanding wood beyond 240 grit can hinder oil absorption, affecting composite bonding.
Heat buildup from stationary sanding softens resin, forcing you to restart with a lower grit.
Ignoring amine blush haze also results in poor adhesion and finish quality.
To avoid these pitfalls, sand evenly with consistent pressure.
Use wet sanding from 400 grit onward to minimize heat, and thoroughly clean between grit changes to monitor progress and surface condition.
Ensuring that underlying finishes are fully cured before sanding is crucial to prevent adhesion problems and finish failure, especially when working over oil-based coatings like tung oil.
Finishing Resin for a Glossy Shine
To bring out a glossy shine on resin surfaces, you’ll need to carefully progress through ultra-fine sanding grits ranging from 1500 to 3000.
Begin by thoroughly wet sanding with silicon carbide sandpaper, ensuring even coverage with overlapping strokes to avoid uneven gloss.
After each grit, wipe the surface clean with a microfiber cloth to inspect and remove any residual scratches.
Once sanding reaches 3000 grit, apply a polishing compound or paste, working it in with a soft buffing pad or by hand to achieve a mirror finish.
Maintain consistent pressure to prevent heat buildup that can dull the surface.
Finally, you can add a thin layer of wax to control the sheen, ranging from high gloss to a softer shine, protecting the resin and enhancing its reflective qualities.
Frequently Asked Questions
How Long Should Resin Cure Before Sanding?
You should let resin cure for at least 24 to 72 hours before sanding, depending on the specific product and environmental conditions. Fully cured resin is hard enough to sand without clogging your sandpaper or causing surface damage.
Check the manufacturer’s cure time and make certain it’s completely hardened; pressing your fingernail should leave no mark. Proper curing prevents heat buildup and uneven sanding, guaranteeing a smooth, defect-free finish.
Can Resin Sanding Dust Be Recycled or Reused?
You can’t make a silk purse out of a sow’s ear, and resin sanding dust isn’t easily recyclable or reusable.
The fine particles are contaminated with cured resin, making them unsuitable for traditional recycling.
However, you can repurpose small amounts as filler in resin mixtures or embed them in clear resin for artistic effects.
Always handle the dust carefully, using proper safety gear, since it’s hazardous and airborne during sanding.
Does Resin Type Affect Sanding Technique?
Yes, resin type affects your sanding technique.
Epoxy cures harder, requiring more aggressive initial grits like 80-240.
Polyester may soften with heat, so you avoid prolonged pressure and use cooler wet sanding earlier.
UV resins cure quickly but remain brittle, so you sand gently with finer grits to prevent cracking.
Adjust grit progression and pressure based on resin hardness and brittleness to avoid damage and achieve smooth, even surfaces.
What Environmental Conditions Affect Resin Sanding?
Around 80% humidity can seriously impact resin sanding by softening the surface and causing clogging on sandpaper.
You’ll want to maintain a controlled environment with 40-60% humidity to prevent this.
Temperature matters too; keep it between 70-75°F to avoid resin overheating or becoming brittle, which affects sanding uniformity.
Proper ventilation reduces airborne dust.
Wet sanding minimizes heat buildup, ensuring precise, consistent resin surface finishing.
How to Repair Scratches After Resin Sanding?
To repair scratches after resin sanding, start by wet sanding with progressively finer grits, moving from 600 up to 1500 or 3000 grit to minimize scratch visibility.
Wipe the surface clean with a microfiber cloth between grits to inspect progress.
After removing scratches, apply a polishing compound and buff using a soft cloth or polishing tool for a mirror finish. Repeat multiple passes if necessary for uniform clarity and shine.
Sand Smarter, Not Harder: The Secret to Perfect Resin
You can sand resin, but doing it right requires precision and care. While dry sanding might seem quicker, wet sanding offers a smoother finish with less dust. Choosing the correct grit—from coarse to ultra-fine—can mean the difference between a rough surface and a glossy shine.
Avoid common mistakes like overheating or skipping grits to guarantee your resin piece transforms from dull to flawless. Master these techniques, and your resin projects will shine with professional polish.