How Are Quartz Countertops Installed: Dry-Fit First
To install quartz countertops, you’ll start by measuring and templating the area after cabinets are leveled and ready. Next, remove old surfaces and inspect your quartz slabs for defects.
Fabricate precise cutouts and edges, then dry-fit slabs on cabinets to ensure a perfect fit. Secure the slabs with high-quality adhesive, carefully install sinks and appliances, and conduct a thorough final inspection. Proper preparation and technique guarantee durability and a flawless finish.
Here’s what you need to know to do it right.
Key Takeaways
- Measure and template the countertop area precisely after cabinets and appliances are installed and levelled.
- Remove old countertops and sinks, shut off water, disconnect plumbing, and prepare cabinets ensuring a flat, stable surface.
- Transport and handle quartz slabs carefully using mechanical aids and protective padding to prevent damage during onsite maneuvering.
- Dry-fit quartz slabs on cabinets to verify fit, alignment, seam placement, and edge profiles before final adhesive application.
- Secure slabs with appropriate adhesives, check for levelness, and finish seams for a uniform, flush, and durable countertop surface.
Measuring and Templating the Countertop Area
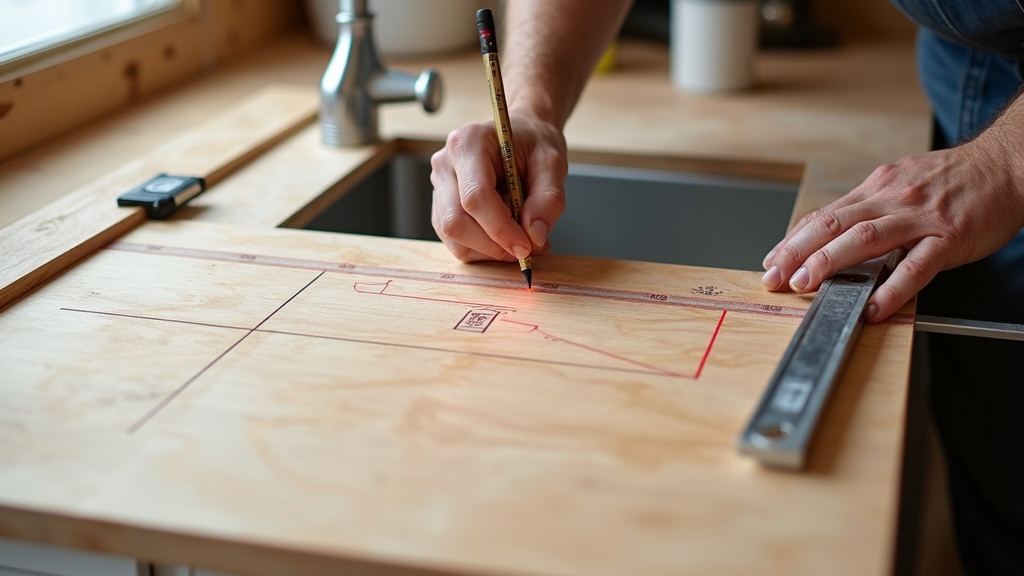
When you’re preparing to install quartz countertops, accurately measuring and templating the countertop area is essential to guarantee a perfect fit. You’ll create a physical or digital template that outlines the exact dimensions, including cutouts for sinks, overhangs, and edge profiles.
This process occurs after cabinets and appliances are fully installed to reflect final conditions. Use precise measuring tools, such as laser or analog devices, to capture contours and features, noting any irregularities.
It is important that cabinets are securely installed and levelled before templating to ensure measurement accuracy. Document seam locations, edge profiles, and special features like drainer grooves.
Additionally, understanding the cutting angle required for any adjustments during fabrication can help avoid errors and optimize the installation process. Before fabrication, review the completed template with the customer, confirming every detail to avoid costly errors.
Final approval ensures the fabrication team receives exact specifications, enabling seamless production and installation of your quartz countertop.
Preparing the Installation Site
Before installing quartz countertops, you need to verify site measurements for absolute accuracy to prevent fitment issues. Clear the workspace thoroughly and secure cabinets to create a stable, level foundation. Using tools like a featherboard can help ensure stability and precision during the installation process.
It is also important to ensure that someone authorized is available throughout the entire process to address any immediate concerns. Following precise area preparation steps guarantees a smooth and safe installation process.
Site Measurement Accuracy
Accurate site measurement is essential for a successful quartz countertop installation, ensuring precise fabrication and a flawless fit. Use a steel tape, level, and straight edge to measure length, width, and wall straightness carefully.
Avoid cloth tapes due to their stretchability affecting precision. Measure multiple times, especially for angled or uneven walls, and include overhangs and cutouts in calculations. Record data systematically and verify all measurements before fabrication.
Additionally, performing regular inspection and maintenance of tools can help maintain measurement accuracy over time. Assess site conditions, including cabinet stability and clearance around sinks or appliances. This helps prevent errors and ensures a smooth installation process.
| Tool/Equipment | Purpose |
|---|---|
| Steel Tape Measure | Accurate length and width |
| Level | Verify surface flatness |
| Calculator | Area calculation and conversion |
| Straight Edge | Check wall alignment |
Area Preparation Steps
Since proper area preparation directly impacts the quality and safety of quartz countertop installation, you must thoroughly clear and prepare the workspace. Start by removing existing countertops, sinks, cooktops, and all fixtures to expose clean, debris-free cabinets.
Then, clean and level the cabinet surfaces, removing nails, screws, and dust to ensure a flat, stable base. Cabinets should be within ¼” level to prevent issues such as cracks and misaligned seams during installation. Ensuring proper alignment during this step is crucial for the overall stability of the countertop.
Protect surrounding areas with drop cloths, clear pathways, and limit access to maintain safety. Finally, inspect and acclimate quartz slabs onsite, and prepare all necessary tools and materials for efficient installation.
Removing Old Countertops and Sinks
Before removing old countertops and sinks, shut off the water supply valves to prevent leaks during disconnection. Carefully disconnect all plumbing fixtures, including drain pipes and any garbage disposal units, following manufacturer guidelines.
Ensure you wear appropriate safety gear to prevent injury during the removal process. Once utilities are secured, use controlled leverage to separate and lift the countertop, taking care to protect the quartz surface from damage. Regular maintenance and proper handling can prevent surface chipping during removal and installation.
Water Shutoff Procedures
When you begin removing old countertops and sinks, shutting off the water supply is essential to prevent leaks and water damage.
Start by locating and closing the water supply valves under the sink or at the main line. Then, drain residual water by opening faucets to empty pipes. Verify both hot and cold valves are closed separately to enhance safety.
Disconnect drainage pipes carefully and collect any residual water to avoid spills. Disconnect drainage pipes. Using tools with improved grip stability can make this process easier and safer. Finally, test faucets to verify no water flows.
Follow these precise steps:
- Turn off main or under-sink water valves.
- Open faucets fully to release trapped water.
- Close hot and cold water valves independently.
- Confirm water shutoff by testing all relevant faucets.
These steps minimize risk and prepare you for safe countertop and sink removal.
Disconnecting Plumbing Fixtures
First, shut off water supply valves under the sink. Then, remove base cabinet panels for improved access. It is important to turn off hot and cold water supply valves located under the sink or outside to prevent water damage. Proper tool handling and workspace organization help maintain operator comfort and safety during this process.
Use wrenches to slowly loosen flexible water lines and drain connections, placing a bucket beneath to catch residual water. Detach the drain trap carefully, inspect parts, and cap open pipes as needed. If electrical or gas lines exist, ensure power or gas is off and consult professionals for safe disconnection.
Remove sink mounting hardware and cut sealant carefully to free the sink. Confirm all lines are fully disconnected and clear the workspace before proceeding.
Removing Old Countertops
Where should you start when removing old quartz countertops and sinks? Begin by clearing the work area completely—remove all items and protect floors. Next, disconnect plumbing lines and power sources to guarantee safety. It is important to secure the work area to prevent accidents during the removal process.
Then, loosen adhesives and fasteners securing the countertops and sinks. Follow this precise process:
- Apply adhesive remover to soften glue; use a putty knife and pry bar to gently separate countertops from cabinets.
- Remove screws securing countertops from inside cabinets.
- Carefully detach sinks by loosening hold-down clips and sliding a clay blade to break seals.
- Lift heavy quartz surfaces with assistance to prevent damage. Never attempt to remove a natural stone countertop alone to avoid injury and damage.
Wear gloves and safety glasses, plan for heavy lifting, and inspect cabinets post-removal for repairs before installing new countertops.
Selecting and Inspecting Quartz Slabs
Although selecting the right quartz slab might seem straightforward, you need to carefully evaluate factors like thickness, color consistency, surface quality, and supplier reliability to guarantee durability and aesthetic harmony in your project.
Choose slabs with 2cm or 3cm thickness for ideal strength and longevity, particularly in high-use areas like kitchens. Keep in mind that higher-grade quartz slabs often come in these thicker sizes and provide enhanced durability and scratch resistance.
Inspect slabs for uniform color and pattern depth, ensuring designs penetrate the full thickness to avoid surface-only finishes. Examine surfaces meticulously for flatness, smoothness, and absence of defects such as pits or discoloration. Regular maintenance tips can help preserve the quartz’s appearance and prevent damage.
Prioritize suppliers with strong reputations who offer warranties, extensive product variety, and reliable customer support. Factor in your project’s specific requirements—use, exposure, and design—to select quartz slabs that meet functional and aesthetic standards precisely.
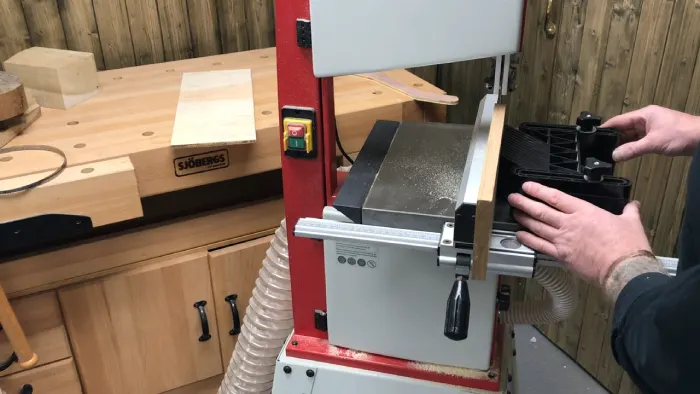
Fabricating Quartz Countertops to Precise Dimensions
When fabricating quartz countertops to precise dimensions, you must start by creating accurate templates that capture every detail of the countertop layout, including cutouts for sinks, faucets, and appliances.
Use precision laser measuring tools to record exact dimensions and break complex shapes into manageable sections. Verify the standard slab size of the quartz slabs beforehand to ensure optimal material use and reduce unnecessary waste.
Next, transfer these measurements to quartz slabs, confirming slab sizes to minimize seams and waste. Employ CNC machinery and 5-axis waterjet saws to cut slabs precisely per templates, including shaping and polishing edges simultaneously.
Finally, perform strict quality control checks to verify dimensional accuracy and finish uniformity before installation.
- Create detailed templates with cutouts and overhang allowances
- Confirm slab dimensions to optimize layout and reduce seams
- Use advanced CNC and waterjet cutting for precise fabrication
- Conduct thorough quality control to ensure dimensional and finish standards
Transporting and Handling Quartz Slabs Safely
You’ll guarantee quartz slabs are packaged securely using reinforced crates and proper restraints to prevent movement during transport. Typically, a container can hold about 7-8 bundles of quartz slabs, maximizing cargo volume while ensuring safety.
Onsite, handle each slab with mechanical equipment and maintain stability to avoid damage or injury. Regular checks and adjustments are necessary to maintain proper alignment during handling. Following precise packaging and maneuvering protocols is essential for safe and efficient installation.
Proper Slab Packaging
Ensuring quartz slabs arrive intact demands meticulous packaging tailored to transportation conditions and slab specifications. You’ll typically choose between A-frame packaging and wooden bundle packaging.
A-frames hold slabs vertically with minimal surface contact, ideal for local deliveries. Wooden bundles, often fumigated and reinforced with iron hoops, suit long-distance shipments and jumbo slabs. Using the correct type of packaging prevents damage during transit and maintains the slab’s quality throughout the delivery process.
Key packaging considerations include:
- Using durable, reusable materials like high-quality wood and protective padding to prevent scratches.
- Arranging slabs with polished faces inward and securing them firmly to avoid movement during transit.
- Complying with weight limits and transportation regulations, coordinating with specialized shipping firms.
- Conducting integrity checks at manufacture, pre-shipment, and delivery to ensure undamaged slabs.
Careful Onsite Maneuvering
Although quartz slabs are manufactured to be durable, transporting and handling them onsite requires careful maneuvering to prevent damage. You should use dollies, carts with soft wheels, or lifts equipped with suction cups to move slabs with controlled precision.
Always plan your route in advance and clear obstacles to minimize unnecessary handling. When lifting, instruct your team on proper techniques to avoid slab bending and injury. Coordinating team lifts for larger slabs can help distribute weight evenly.
Use wooden crates or frames to provide secure protection and prevent direct contact during transport. packaging & handling Protect slab surfaces with moving blankets or padding to prevent scratches and chips from rough contact.
Additionally, wear appropriate personal protective equipment such as gloves and steel-toed boots. Inspect all handling equipment beforehand to ensure reliability. Maintain steady control and avoid pushing, dragging, or sliding that could induce cracks or chips during onsite maneuvering.
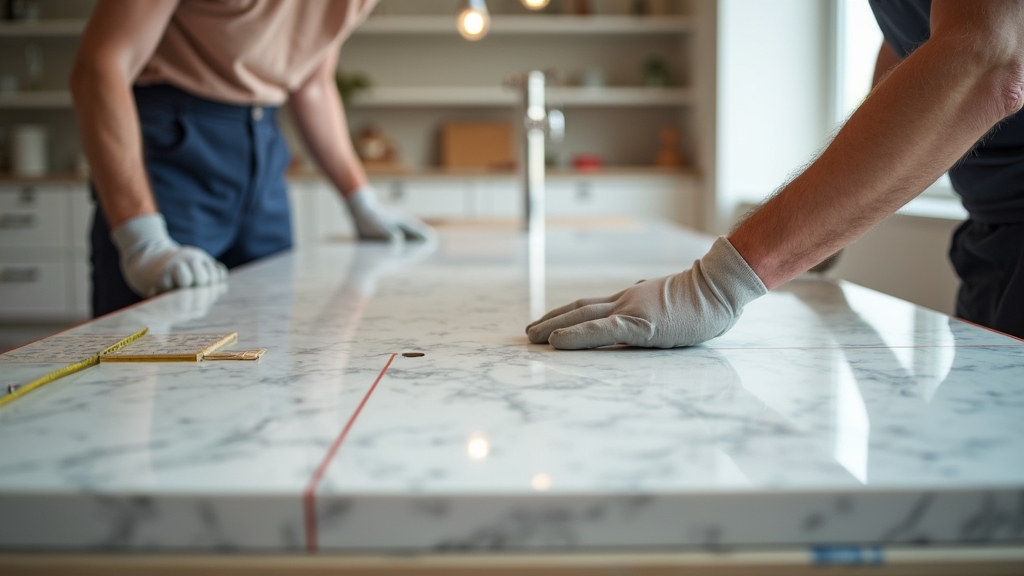
Dry-Fitting Quartz Slabs on Cabinets
Before applying any adhesive, dry-fitting quartz slabs on your cabinets lets you verify exact fit and alignment, preventing costly mistakes during final installation.
Begin by ensuring your cabinets are level within 1/16 inch over 18 inches and free of obstructions. It is also important to measure cabinet tops precisely with a tape, adding allowances for edges and cutouts to ensure accuracy.
Place each slab carefully, always with two people, to avoid damage and check seam alignment if multiple pieces are involved. Visually and manually inspect for gaps, overhangs, and flushness with adjacent surfaces. Mark any necessary trimming or adjustments directly on the slab before cutting.
Key steps include:
- Position slabs on cabinets without adhesive or sealant.
- Temporarily join seams to verify tightness and alignment.
- Inspect sink and cooktop cutouts for precise fit.
- Confirm clearance for backsplashes and upper cabinets.
Securing Quartz Countertops With Adhesive
Start by thoroughly cleaning the quartz slab underside and cabinet surfaces with denatured alcohol to remove contaminants. Ensure all surfaces are dry, maintaining ambient humidity between 40-60% and temperatures of 65-85°F for ideal curing. Maintain adhesive thickness between 1/16 to 1/8 inch as per manufacturer instructions to ensure optimal bond strength.
Select a high-quality epoxy or specialized quartz adhesive, applying it evenly in a 1/16 to 1/8 inch layer using a notched trowel. Position the slab carefully onto the adhesive-coated cabinet, applying uniform pressure of 15-25 psi with clamps or weights without shifting the slab.
Allow the adhesive to cure undisturbed for 24-48 hours. Then inspect the bond line for uniform thickness and absence of gaps. Address any defects promptly to ensure a durable, structural connection.
Installing Sinks and Appliance Cutouts
When installing sinks and appliance cutouts in quartz countertops, you must confirm all dimensions and placements carefully to guarantee precise fit and functionality. Begin by confirming sink and appliance sizes against templates, then accurately mark cutout outlines on the quartz surface.
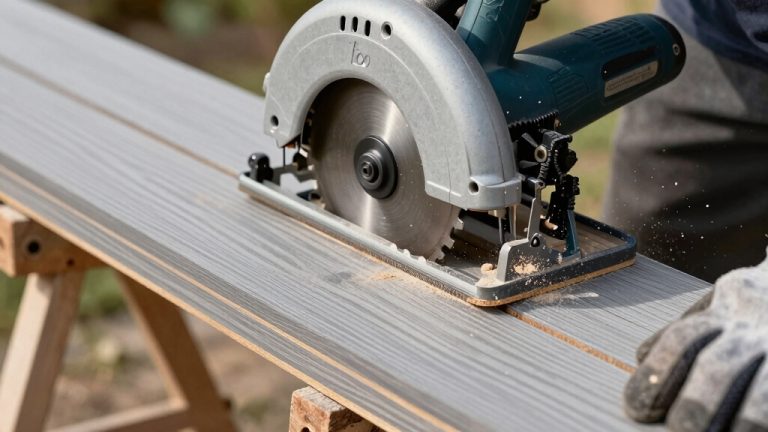
Use diamond blades or wet saws for clean cuts, avoiding chipping or fractures. It is important to clean the edges and surfaces with denatured alcohol before proceeding with installation to ensure proper adhesion and sealing. For undermount sinks, position the countertop upside down, apply epoxy anchoring posts, and seal with silicone before securing the sink with clamps or brackets.
Finally, inspect and smooth cutout edges to prevent stress points and ensure proper sealing.
- Confirm dimensions and placement with manufacturer templates.
- Cut quartz precisely using specialized diamond blade tools.
- Secure undermount sinks using epoxy posts and silicone sealant.
- Inspect and finish edges for durability and sealant adhesion.
Post-Installation Inspection and Care Recommendations
After securing sinks and appliance cutouts, focus shifts to thoroughly inspecting the installed quartz countertop. You should verify the surface is free from cracks, chips, or damage and confirm a seamless fit with cabinets, walls, and adjoining countertops, checking for gaps or unevenness.
Inspect edges and seams for smoothness and proper bonding without adhesive residue. Ensure appliance and sink cutouts align precisely, and validate the countertop is level and securely fastened to prevent future movement. The non-porous surface of Cambria quartz also ensures the countertop remains hygienic and easy to clean after installation.
Check edges and seams for smoothness, precise cutout alignment, and secure, level countertop installation.
For care, clean regularly with mild soap and water or quartz-specific cleaners, avoiding abrasive pads, harsh chemicals, and bleach. Use trivets for hot items and cutting boards to prevent heat damage and scratches. Quartz doesn’t usually need sealing, but follow manufacturer recommendations and provide customers clear guidance on maintenance and warranty limits.
Frequently Asked Questions
How Long Does Quartz Countertop Installation Typically Take From Start to Finish?
Quartz countertop installation typically takes about 3 to 5 weeks from start to finish. You’ll spend 1 to 2 weeks selecting materials and planning, followed by 1 to 2 days for precise measurements and templating.
Fabrication usually requires another 1 to 2 weeks. The actual installation on-site takes 2 to 7 hours, depending on complexity. After installation, you should allow 24 to 48 hours for curing before using the countertops.
Can Quartz Countertops Be Installed Over Existing Countertops?
Yes, you can install quartz countertops directly over existing ones, provided the old surface is smooth, stable, and in good condition. This overlay method speeds up installation, often completing in a day with minimal disruption and no demolition debris.
Proper surface preparation and precise fitting are essential to guarantee strong adhesion and prevent moisture infiltration. Keep in mind, overlays add height and aren’t suitable for warped or damaged countertops.
What Are the Best Maintenance Practices to Keep Quartz Looking New?
To keep quartz looking new, clean daily with warm water and a soft cloth, using mild soap if needed. Avoid abrasive scrubbers and harsh chemicals like bleach or oven cleaners. Wipe spills immediately to prevent stains. Use trivets for hot items and cutting boards to avoid scratches.
For stains, apply a baking soda paste or isopropyl alcohol gently. Regularly dry surfaces to prevent mineral buildup and maintain consistent, gentle cleaning habits.
Are There Any Special Considerations for Corner or Island Quartz Installations?
When installing quartz on corners or islands, remember overhangs can exert up to 50 pounds of force per square inch, requiring extra support like steel brackets or wood ledgers.
You’ll need to apply 2–3 inches of adhesive along cabinet corners with beads spaced 6–12 inches apart. Reinforce mitered corners with epoxy for durability. Always leave expansion gaps, avoid seams on edges, and use painter’s tape to keep joints clean during sealing.
How Are Seams Between Quartz Slabs Made Virtually Invisible?
You make seams virtually invisible by ensuring precise edge preparation with clean, smooth cuts using specialized blades. Then, you apply color-matched epoxy adhesives, blending tones to mimic the slab’s pattern and avoiding excess adhesive.
Position seams strategically in low-visibility areas and align vein patterns flawlessly. Finally, skilled fabricators polish seam joints meticulously, use minimal gap settings, and verify pattern continuity under bright light for a seamless, durable finish.
Precision Fabrication: Accurate Cutouts Make All the Difference
Now that you’ve mastered the precise art of installing quartz countertops, you’re practically a countertop wizard—transforming kitchens with flawless measurements, secure adhesion, and perfect sink placements.
With attention to every detail, from templating to post-installation care, your work guarantees durability and elegance that lasts a lifetime. Remember, skipping a step isn’t an option; precision here isn’t just recommended, it’s absolutely critical for a professional, flawless finish you’ll be proud of.