Can You Spray Stain on Wood? Tips for a Flawless Finish
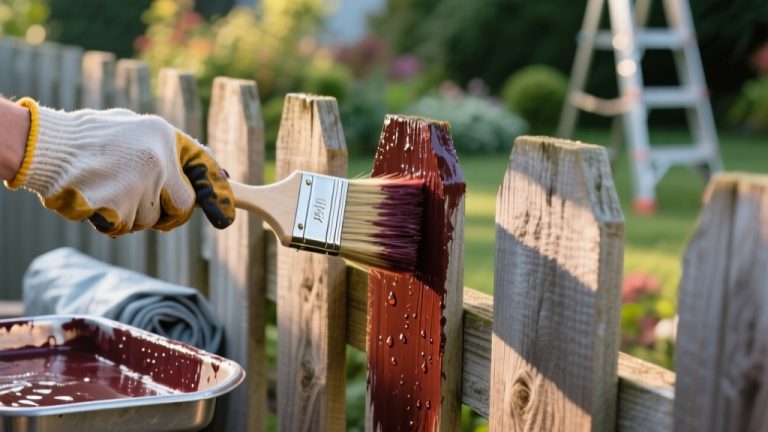
You can spray stain on wood effectively by preparing the surface, including sanding, cleaning, and ensuring low moisture content. Use the right spray equipment like HVLP or airless sprayers for best results.
Apply thin, even coats following the grain with proper pressure and tip size to avoid blotches. Let each coat dry fully before sealing. Choosing the correct stain type and understanding drying times ensures a smooth, durable finish. Keep going for detailed techniques and best practices to perfect your project.
Key Takeaways
- Yes, you can spray stain on wood using appropriate spray equipment like HVLP, air-assisted, or airless sprayers for even coverage.
- Properly prepare the wood by sanding, cleaning, and ensuring moisture content below 13% before spraying stain.
- Use thin, even coats with consistent spraying technique, spraying with the grain and maintaining 6-12 inches distance.
- Adjust spray pressure (20-23 psi) and tip size (1.0–1.8 mm) for optimal atomization and avoid over-application.
- Allow stain to fully dry before sealing, using compatible sealers applied in thin coats for long-lasting protection.
Preparing Wood Surface for Spray Staining
Before you begin spray staining, you need to thoroughly prepare the wood surface to guarantee even absorption and a professional finish. First, identify the wood species, as softwoods like pine absorb stain unevenly and may require a pre-stain conditioner.
Evaluate the wood’s age and moisture content, ensuring it’s below 13% to avoid poor uptake. It is important to measure moisture content with a moisture meter to confirm the wood is thoroughly dry. Inspect for dents, scratches, mildew, or rot, repairing and cleaning as needed. Ensuring a stable work surface during preparation will help maintain consistent results.
Check wood age and moisture below 13%, and repair dents or mildew for optimal stain absorption.
Sand the entire surface progressively with fine-grit sandpaper for uniform smoothness, then remove all dust with a brush or vacuum.
Test stain penetration on a hidden area to confirm readiness. Clean the wood thoroughly, avoiding staining within 24-48 hours after rain or washing to ensure complete dryness.
Choosing the Right Equipment for Spraying Stain
When selecting spray equipment for staining wood, you need to contemplate the project’s scale, the type of stain, and the desired finish quality. Different sprayers offer varied benefits:
- For small projects, HVLP or LVLP sprayers provide precise atomization with minimal overspray, ideal for detailed work like furniture or cabinets.
- Medium-sized projects benefit from air-assisted sprayers, balancing smooth finishes and efficient material use.
- Large-scale staining demands airless sprayers to deliver high-pressure, rapid coverage, suitable for floors or siding. Ensuring the proper equipment maintenance can prevent operational issues and prolong the sprayer’s lifespan.
- If you use stain intermittently, simpler, gravity or suction-fed guns are cost-effective and easy to maintain.
Choose equipment compatible with your stain’s viscosity to avoid unnecessary thinning and ensure ideal transfer efficiency for uniform finishes. Additionally, considering the core components such as spray gun nozzles and pressure regulators can significantly improve control and finish quality.
Optimal Spray Settings and Techniques
You’ll want to start by setting your spray pressure between 20 and 23 psi, adjusting fluid flow to achieve a fine, even mist without runs. Proper grip and control of your sprayer can reduce fatigue and improve precision.
Maintain consistent, steady strokes with about 50% overlap, keeping the spray gun perpendicular and 6 to 12 inches from the wood surface. This method is similar to how ergonomic handle designs enhance control in power tools.
These controlled settings and methodical movements ensure uniform stain application and minimize blotching.
Before spraying, it is important to strain the stain to remove any chunks or contaminants, preventing clogging and ensuring a smooth application.
Ideal Spray Pressure
Although selecting the right spray pressure can seem complex, understanding the balance between air and fluid pressure is key to achieving ideal stain atomization and uniform coverage on wood surfaces. For effective spraying, you should optimize both air and fluid settings carefully.
Follow these steps to dial in your ideal spray pressure:
- Set air pressure between 20-30 psi at the gun for HVLP systems to ensure fine atomization without overspray. This precision is akin to ensuring accurate tool setup for consistent results.
- Start with the fluid needle fully closed, then slowly open it about 2.5 turns to control stain volume and prevent flooding.
- Use smaller needle sizes (~1 mm) and fine-tune air pressure for thin or dye stains to avoid streaks.
- Adjust incrementally based on test sprays, aiming for a consistent narrow droplet pattern that penetrates evenly without runs or pooling. Proper cleaning of the spray tip during breaks is essential to prevent clogging and maintain sprayer performance.
Consistent Application Methods
Mastering ideal spray pressure sets the foundation, but consistent application techniques guarantee uniform stain coverage and maximum penetration on wood surfaces. Spray with the wood grain, aligning fan direction and spray tip to match grain orientation for even coverage.
Overlap passes by 50%, maintain a steady arm speed, and hold the spray gun about 12 inches away to prevent runs and overspray. Using a sprayer speeds up the process, saving time and effort on large projects, making staining more efficient and manageable. Regular maintenance of equipment is crucial to ensure optimal spray performance and consistent results.
Adjust fluid flow gradually to lightly saturate without flooding the wood. Immediately back-brush wet stain with a synthetic brush to enhance penetration and eliminate pooling.
Select a spray tip size between 1.0–1.8 mm, fine-tune fluid needle and airflow for atomization, and control fan width to minimize patchiness.
Consistency in distance, motion, and spray pattern ensures a smooth, uniform finish every time, especially when using High Efficiency Airless technology that reduces overspray and speeds coverage.
Best Practices for Applying Multiple Stain Coats
When applying multiple coats of stain, understanding the wood’s absorption capacity is essential to prevent surface issues like tackiness or peeling. Typically, one or two coats suffice, depending on wood type and stain. It is important to note that over-application can lead to a tacky surface and early peeling.
Hardwoods often absorb only one coat, while softer woods may take more. Using a “wet on wet” technique helps achieve uniform penetration without forming barriers. Proper application tools also enhance cutting precision and control during the staining process.
Follow these best practices for multiple stain coats:
- Test stain on scrap wood to determine absorption and color intensity.
- Apply the second coat shortly after the first, before it dries, to avoid uneven layers.
- Use high-quality application tools and maintain consistent stain stirring for uniformity.
- Avoid excessive coats; more than the wood can absorb leads to peeling and tackiness.
Managing Drying and Curing Times Safely
After applying multiple stain coats, managing the drying and curing phases becomes your priority to make certain a durable and defect-free finish.
Drying times vary: water-based stains dry faster, often within 1 to 24 hours, while oil-based stains can take up to 72 hours to surface dry. Applying thin, even coats and wiping off excess stain immediately helps promote faster drying and a smooth finish.
Guarantee good ventilation, maintain temperatures near 70°F, and control humidity between 50-70% to optimize drying speed.
Avoid handling the wood before it’s dry to prevent finish damage. Curing, distinct from drying, requires up to 21 days for water-based and 30 days for oil-based stains to reach full hardness.
During curing, minimize exposure to water, heat, and contaminants. Use PPE and keep ignition sources away due to solvent flammability. Dispose of oil-soaked materials carefully to prevent hazards.
Types of Stains Suitable for Spray Application
Which types of stains work best with spray application depends largely on the wood’s characteristics and the project’s environment. You’ll want to choose based on drying time, odor, viscosity, and finish durability.
Choosing the best stain for spraying depends on wood type, drying time, odor, viscosity, and durability needs.
- Water-Based Stains: Low viscosity, quick drying, easy cleanup, ideal for soft woods and indoor use with HVLP sprays.
- Oil-Based Stains: Higher viscosity, deep penetration, durable for exterior or high-traffic areas, but require solvents and PPE.
- Gel Stains: Thick, drip-resistant, suitable for vertical or detailed surfaces, may need dilution and longer curing times.
- Hybrid Stains: Combine oil and water benefits, moderate VOCs, balance drying and cleanup, but require testing due to limited spray guidelines.
When selecting stains for spray application, considering the equipment’s motor power and performance helps ensure smooth and consistent coverage.
Sealing and Finishing After Spray Staining
Once your stain has fully dried, you need to select a sealer compatible with the stain type—water-based with water-based or oil-based with oil-based—for maximum adhesion and protection.
Apply multiple thin coats using a fine mist sprayer to guarantee even coverage and prevent runs. Allow sufficient drying time between coats. Using a rear handle circular saw can improve precision when preparing wood surfaces before staining.
Proper sealing not only safeguards the wood surface but also enhances the finish’s durability and appearance. Applying multiple coats of clear finish extends the lifespan and durability of the stained wood.
Choosing the Right Sealer
When selecting a sealer for spray-stained wood, you need to contemplate factors such as compatibility with the stain type, intended use environment, and desired finish characteristics. Choosing the correct sealer ensures maximum protection and aesthetic results.
Consider these key points:
- Match the sealer to your stain type. Oil-based sealers pair with oil stains, while water-based sealers suit water stains to prevent finish defects. It is also important to verify that the sealer is free of solvents and additives to maintain food-safe properties when used on kitchenware or food-contact surfaces.
- Determine indoor or outdoor use. Outdoor wood requires UV-resistant, weatherproof sealers like silane-siloxane blends. Products such as Rainguard Premium Wood Sealer offer UV stabilizers that enhance durability on exterior wood.
- Decide on finish appearance. Oil-based sealers deepen grain warmth, while water-based sealers maintain clarity.
- Factor in drying time and odor. Water-based sealers dry faster with low VOC emissions, making them suitable for enclosed spaces.
Application Techniques for Sealers
Selecting the right sealer sets the foundation for protecting and enhancing your spray-stained wood. Proper application techniques, however, determine the quality and durability of the finish.
Adjust your sprayer to deliver a fine mist, maintaining an 8–12 inch distance for even coverage. It is important to wear protective gear such as masks and eyewear during application to ensure safety protective gear. Always ensure the work area is clear of obstructions and wear protective gear to reduce risk during application.
Apply multiple thin coats using long, continuous strokes to prevent runs and drips. Immediately back-brush each section to promote penetration and level the surface, using synthetic brushes compatible with your sealer type.
Confirm the wood is clean, dry, and below 12% moisture content before application. Work in well-ventilated areas, wearing protective gear.
Regularly clean and check sprayer components to maintain consistent spray patterns. Proper maintenance enhances the lifespan and efficiency of your tools maintenance for longevity.
Drying and Cure Times
How long should you wait before sealing or finishing spray-stained wood? The drying and curing times depend on stain type, wood porosity, and environmental conditions. To guarantee a durable finish, follow these guidelines:
- Wait at least 12 hours after staining before applying polyurethane or sealers to prevent pigment migration and finish flaws.
- Oil-based stains typically need 12-24 hours to dry and 24-72 hours for full curing. Water-based stains dry faster but still require 24-72 hours for full cure.
- Confirm the surface is dry to the touch before sealing to avoid streaking or lifting caused by residual solvents.
- Consider temperature and humidity. Higher humidity or cooler wood surfaces extend drying and curing times. Warm, sunny weather with low humidity can significantly reduce drying time, allowing stain to dry within 1-4 hours.
Frequently Asked Questions
Can I Spray Stain on Indoor Furniture Safely?
Yes, you can safely spray stain on indoor furniture if you use a low-VOC or plant-based stain labeled for indoor use. Make sure you ventilate the area thoroughly with open windows and fans.
Wear a respirator mask and gloves to protect yourself from fumes and skin contact. Apply thin coats evenly, protect surrounding surfaces, and allow sufficient curing time before regular use to minimize health risks from VOC exposure.
How Do I Clean My Spray Gun After Using Stain?
To clean your spray gun after using stain, flush it immediately with the appropriate solvent—use mineral spirits or xylene for oil-based stains, or hot water diluted with brush and gun cleaner for water-based stains.
Disassemble parts like the fluid nozzle and needle, soaking metal components separately. Use small brushes to clear passages, then rinse and dry thoroughly.
Avoid soaking plastic parts, and clean the gun fully after each use to prevent clogging and damage.
Is It Possible to Mix Different Stain Colors for Spraying?
Yes, you can mix different stain colors for spraying, but you need to match their base types—oil-based stains with oil-based, water-based with water-based—to guarantee proper blending and adhesion.
Follow manufacturer guidelines for compatible colors and mixing ratios like 2:1 or 3:1.
Test your blend on similar wood samples before spraying.
Thin or mix with compatible paint or finishes cautiously to maintain consistency and avoid streaks or uneven finishes.
Can Spray Staining Be Done in Humid Weather?
Yes, you can spray stain in humid weather, but expect slower drying and potential defects like blushing due to trapped moisture. To manage this, apply light coats, allow 5–10 minutes flash time, and use slower evaporating solvents or retarders.
Employ adjustable spray systems and consider dehumidifiers to minimize moisture. Monitor temperature and airflow carefully to avoid skinning. These steps help guarantee even stain absorption and a clear, durable finish despite high humidity.
What Are the Common Mistakes to Avoid When Spray Staining Wood?
You should avoid uneven spray patterns that cause stripes and missed spots, inconsistent spray distance, and incorrect spray angles leading to bounce-off.
Don’t apply heavy coats causing runs or pools; use multiple light passes and wipe excess promptly.
Avoid lap marks by maintaining a wet edge.
Prepare surfaces well by sanding uniformly with the grain to prevent blotchy absorption.
Finally, manage drying time carefully, wiping excess quickly to ensure even color and prevent streaks.
Master Spray Staining: Turn Any Wood Project Into a Showpiece
Spraying stain on wood can transform your project with the precision of a master painter’s brushstroke, offering even coverage and efficient application.
By preparing the surface properly, selecting the right equipment, and mastering spray techniques, you guarantee a flawless finish reminiscent of fine craftsmanship.
Remember to manage drying times and seal your work to protect it, just as a sculptor seals their masterpiece. This attention to detail guarantees durability and beauty in every coat.