How to Weld Bandsaw Blades: 4 Steps to Follow
Your bandsaw blade may break due to normal wear and tear or mishandling. Rather than purchasing a new blade, welding may be a viable option to save you time and money.
I looked up how to weld bandsaw blades and found that it requires meticulous attention to detail and an understanding of the proper techniques.
Based on my findings, you have to clean the oiled steel ends with acetone and flatten the blade ends with a grinding wheel to achieve a smooth surface. Then, you can go through the welding process.
According to my observations, many people use the blade welder, TIG, or MIG welding methods to join the blade ends.
I will discuss the methods involved in welding bandsaw blades so you can determine which is best for your needs.
How to Weld Bandsaw Blades: Step-By-Step Guide
To successfully weld a bandsaw blade, you need to follow the following step-by-step guide compiled from my research:
- Step 1: Prepare the bandsaw blade
- Step 2: Weld the bandsaw blade using various methods
- Step 3: Grind the welded blade
- Step 4: Anneal the welded blade
Now I will go into detail about each step and the techniques involved.
Step 1: Prepare the Bandsaw Blade
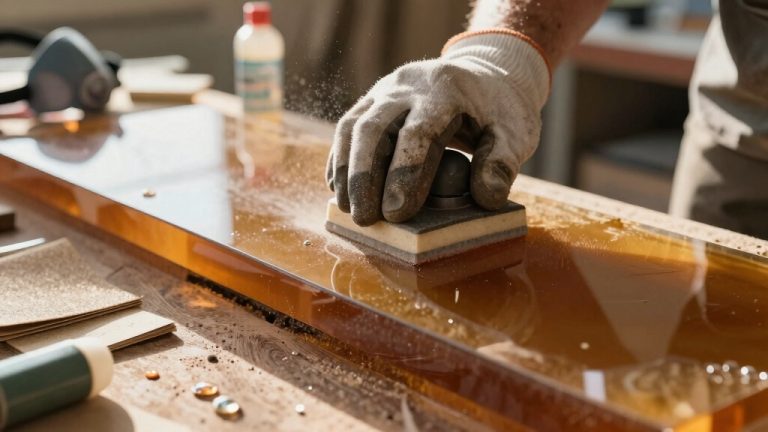
Before welding a bandsaw blade, use acetone to clean the oiled steel ends of the bandsaw blades, whether they’re carbon or bi-metal. It removes contaminants that could affect the welding process.
Once the ends are clean, use a grinding wheel to flatten them. This creates a smooth surface and promotes a strong and effective weld. The precision of this step plays a significant role in laying the foundation for a successful welding process.
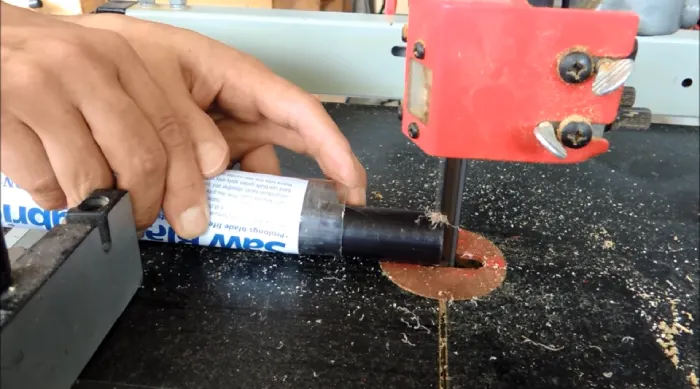
Step 2: Weld the Bandsaw Blade Using Various Methods
To weld a bandsaw blade, you have two options: using a blade welder or a TIG or MIG welder.
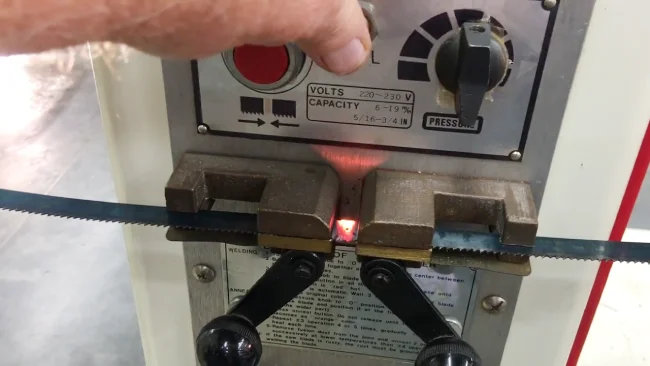
For Blade Welder
If you choose to weld bandsaw blades using a blade welder, you need to follow some straightforward procedures to ensure successful welding.
As a start, make sure that the blade welder is correctly calibrated and set to the correct specifications for your blade’s material and thickness. Incorrect settings can result in weak welds that won’t hold up during use.
Next, you’ll need to align the blade ends correctly so that the welding machine can join them correctly. Ensure that the prepared blade ends are perfectly positioned and aligned in the blade welder.
After the blade ends are aligned, you can initiate the weld. Activate the blade welder, which generates heat to melt the blade ends. The machine then applies pressure to forge a solid weld between the two ends.
Remember to remain attentive during the welding process to ensure everything goes smoothly.
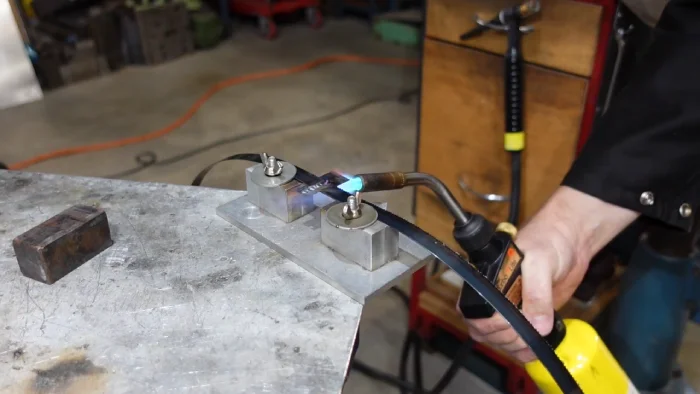
For TIG or MIG Welder
TIG and MIG welders offer a different approach to welding a bandsaw blade, but if done correctly, the results can be just as satisfying.
When using a TIG welder, set it to the appropriate settings, usually around 40-45 amps, suitable for thin metal. Position the broken blade ends and use clamps to secure them in place, ensuring a tight fit for accurate welding.
Once you have your blade ends in place, initiate the arc, focusing on creating a controlled welding pool. Add filler material carefully to form a solid weld. Proper attention to detail is critical here because the wrong amount of filler material could result in an ineffective weld or welding errors.
Alternatively, if using a MIG (Metal Inert Gas) welder, set it to the appropriate wire speed and voltage for your blade material. Ensure the broken ends are very close together and secured with clamps.
Then trigger the MIG gun to create a continuous weld bead along the seam. The sequencing of the welds should be specially calculated so the seam is strong enough without any missed areas.
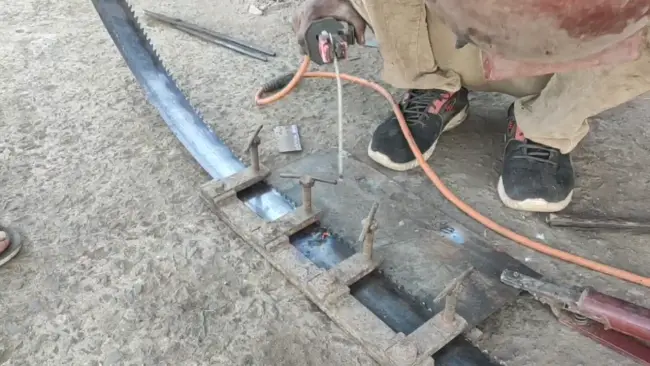
Step 3: Grind the Welded Blade
After completing the welding process, you need to carefully grind the welded joints using a grinding wheel to ensure seamless integration and smooth operation of the bandsaw blade.
When grinding the welded joints, matching the blade thickness is important to ensure a uniform surface. The grinding wheel should be used cautiously, applying light pressure and making smooth, continuous passes along the welded area.
Remove any excess material and blend the welded joint seamlessly with the rest of the blade. Take your time and pay attention to detail to achieve a properly ground blade that will deliver precise cuts and withstand heavy use.
Step 4: Anneal the Welded Blade
To ensure the integrity of the welded joint, you have to anneal the bandsaw blade by gradually heating and cooling the welded area. Annealing is a process that reduces stress and enhances the blade’s strength.
You have two annealing options: an annealing button or a soft flame torch. If you choose the annealing button, press it 2-3 times on the welded area.
Alternatively, you can use a soft flame torch to heat the welded area until it turns a dull red color. This controlled heating and cooling process enables the blade to maintain its structural integrity and prevents any potential damage or breakage during use.
Can the welded bandsaw blade perform well?
Regarding the performance of welded bandsaw blades, you can expect them to perform well when the welding process is executed with precision and care. Proper cleaning, alignment, welding, grinding, and annealing all contribute to a strong and reliable bond.
This attention to detail results in a blade that operates smoothly and effectively, with the ability to withstand rigorous cutting applications. The welded blade exhibits durability and structural integrity, meeting the required strength and performance standards for reliable use.
Due to these qualities, your bandsaw blade lasts for an extended period, ensuring prolonged efficiency and cost-effectiveness in your cutting tasks.
Can you weld blades with different tooth configurations together?
Welding blades with different tooth configurations together is generally not recommended due to the potential for irregular cutting performance and operational issues.
You should prioritize uniformity in tooth configurations when welding bandsaw blades. Blades with varying tooth patterns can lead to inconsistent cutting performance and may result in operational problems.
Also, welding bandsaw blades with different tooth configurations may increase the risk of the blade twisting during operation.
It’s best to stick to welding bandsaw blades that share similar tooth configurations to ensure optimal functionality and longevity. This allows for a consistent cutting experience and reduces the risk of performance discrepancies.
Properly Weld Your Bandsaw Blades and Experience Excellent Cutting Performance
I hope you now weld your bandsaw blades with confidence, armed with a comprehensive understanding of the meticulous process involved. Clean the blade ends diligently, flatten them with precision, and choose the welding method that suits your needs, be it a blade welder, TIG, or MIG.
Take care to grind the welded joints carefully for seamless integration and anneal the blade to enhance its strength. With attention to each step, your welded bandsaw blade is poised to perform exceptionally well, offering durability and reliability in your cutting applications.