How to Use Sawhorses? Step-By-Step Guide for Beginners
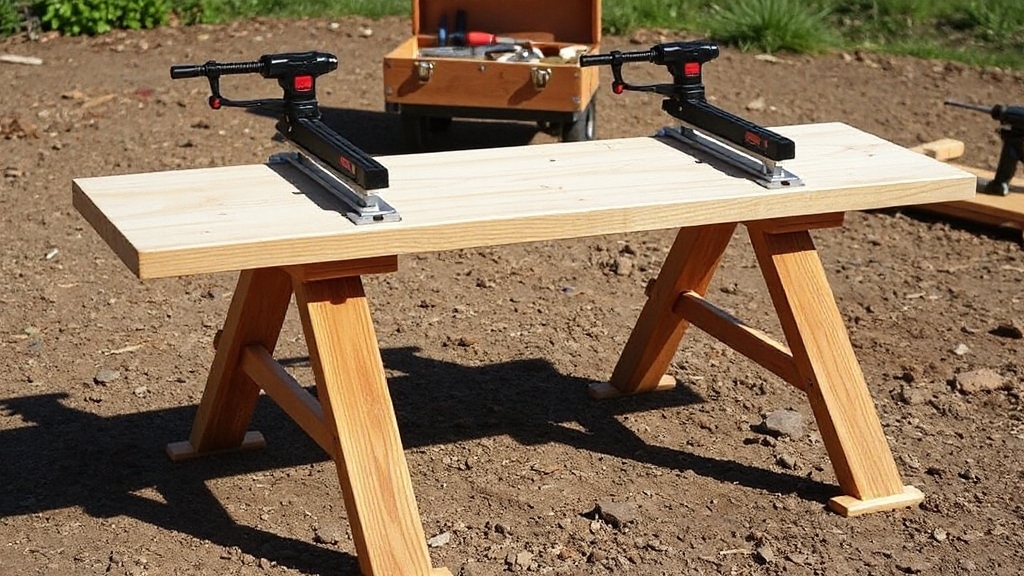
To use sawhorses effectively, first select strong, stable models that fit your project size. Place them on a flat, level surface, ensuring legs are fully extended and locked.
Adjust the height to about 2–3 inches below your elbow for ergonomic work. Position sawhorses to evenly support your material, securing it with clamps to prevent movement.
Always work with sharp tools and maintain safety gear. Master these basics to enhance precision, stability, and safety for your cutting and support tasks.
Key Takeaways
- Position sawhorses on flat, stable surfaces with legs fully extended and locked for maximum stability and safety.
- Adjust sawhorse height to 2-3 inches below elbow level for ergonomic cutting and working comfort.
- Center and evenly support workpieces on sawhorses, using clamps to secure materials and prevent movement.
- Use additional supports or multiple sawhorses for long or heavy materials to distribute weight and prevent sagging.
- Maintain a clean, well-lit workspace; wear proper PPE and regularly inspect sawhorses for damage before use.
Selecting the Appropriate Sawhorses for Your Project
When selecting sawhorses for your project, you need to take into account the type of load and workspace constraints carefully.
Heavy-duty sawhorses, often made from steel or plywood, suit heavy loads, while trestle sawhorses offer durability for various woodworking tasks.
Considering the motor power of your equipment can influence the choice of sawhorses to ensure they can support the necessary tools safely.
Heavy-duty steel or plywood sawhorses handle heavy loads, while trestle designs provide durable support for woodworking.
If space is limited, stacking sawhorses provide compact storage and adjustable working heights. A-frame designs enhance stability with tension members, and knock-down sawhorses fold for easy transport.
Consider materials: plywood and Baltic birch plywood offer strength and smooth finishes; steel is highly durable; wood provides traditional stability; plastic suits lightweight tasks but lacks heavy load capacity.
For mobile setups, a knock-down workstation made from a single sheet of plywood offers rock-solid stability and easy assembly.
Prioritize load capacity, stability features like gussets, and portability. Choose adjustable heights if your project demands flexibility. This ensures safety, efficiency, and practicality in your workspace setup.
Preparing the Work Area for Sawhorse Setup
Start by selecting a flat, level surface free of debris to guarantee your sawhorses remain stable. This ensures that the sawhorses provide a steady support for your materials and tools during use. Avoid working in areas with excessive dust to reduce respiratory risks associated with airborne particles.
Clear the area thoroughly to prevent any tripping hazards or obstructions during setup. Make sure to wear appropriate protective gear such as eye protection to guard against potential flying debris.
Keep your tools organized and within reach but outside the immediate work zone to maintain efficiency and safety.
Clear and Level Space
Although sawhorses can be set up quickly, guaranteeing your workspace is clear and level is essential for safe and effective use. Start by selecting a flat, stable surface like concrete or solid wood, avoiding slopes.
Clear all obstacles, debris, and moisture, and consider covering the floor to protect it. Use a level to confirm evenness and secure the area to prevent unwanted access.
For added stability, it is helpful to connect each leg to its neighbor about one foot from the ground using support pieces. Choosing the right surface and setup also helps maintain cutting accuracy by keeping materials steady during work.
| Task | Key Action |
|---|---|
| Surface Choice | Flat, stable, dry ground |
| Obstacle Removal | Clear debris and hazards |
| Level Check | Use a level tool for precision |
| Floor Protection | Use drop cloth or covering |
| Area Security | Block off with tape or cones |
Organize Tools Nearby
Since having tools within immediate reach immensely enhances workflow, organizing them near your sawhorses is essential for efficiency and safety. Use the flat surface spanning two sawhorses to set up your frequently used tools, and position mobile tool carts or portable toolboxes adjacent for quick access.
Install wall-mounted racks or pegboards nearby for hand tools like clamps, squares, and measuring devices, labeling each storage spot clearly. Store heavier tools on lower shelves within arm’s reach, while seasonal or specialty tools remain in secondary storage.
Keep safety gear and maintenance supplies close to minimize downtime. Employ drawer dividers and visual guides to maintain consistent tool placement, preventing loss or damage.
This systematic organization reduces search time and supports an ergonomic, uninterrupted workflow around your sawhorse workstation.
Additionally, choosing tools with ergonomic features such as a comfortable grip can further reduce fatigue during extended use.
Proper Alignment and Spacing of Sawhorses
When setting up sawhorses, you must guarantee proper alignment and spacing to maintain stability and optimize your workspace. Start by placing sawhorses on a level surface to avoid unevenness.
Ensure each leg’s ends are parallel, and position sawhorses so the workpiece is centered and evenly supported. Use clamps or temporary supports to hold alignment during tasks. For cutting tasks requiring precision, consider using a track saw for enhanced accuracy and control.
Space sawhorses to fit the workpiece length plus extra room for handling. Maintain clear pathways around the setup for safety and efficient movement. Because the legs are splayed for durability, this positioning adds to the overall strength of the support.
Leave a safety margin between sawhorses and nearby objects to prevent accidents. Position sawhorses for easy tool access, enhancing workflow. Proper alignment and spacing ensure stable, safe support, enabling precise and efficient work on your projects.
Adjusting Sawhorses for Optimal Working Height
To achieve ideal ergonomics and efficiency, you need to modify your sawhorses to the proper working height. Measure from the floor to your bent elbow at a 90° angle, then set the sawhorse surface about 2-3 inches below that point.
Most adjustable sawhorses range from 24 to 60 inches, with standard heights between 30 and 36 inches—perfect for standing tasks. Use fine incremental adjustments to tailor the height precisely to your needs, whether you’re pounding, chiseling, or sanding.
Ensure the locking mechanism—cam, pin, or lever lock—is securely engaged to prevent accidental shifts and maintain stability under load.
Many models include anti-slip rubber feet for added safety and stability during use. On uneven surfaces, adjust each leg independently for a level, safe work platform. Using adjustable height features can improve stability and accommodate different working conditions.
Techniques for Safely Supporting Materials on Sawhorses
Although sawhorses provide a versatile platform, you must position materials carefully to guarantee stability and safety.
Start by spacing sawhorses to evenly support the material, preventing sagging or tilting. Consider using sawhorses with a robust frame construction for maximum stability during heavy-duty tasks.
Keep materials centered and avoid placing them near sawhorse edges to maintain balance. For longer or heavier items like plywood or lumber, add extra sawhorses or supports to distribute weight evenly.
To enhance support, you can prepare sawhorses by cutting 1½” x 1½” notches at each end to hold additional lumber supports securely.
Always set sawhorses on a level surface with non-slip feet engaged and cross bracing secured to minimize tipping risks. Engage any locking mechanisms to prevent movement during use.
Use materials with a wide base sawhorse for enhanced stability. Following these techniques ensures your materials stay securely supported, reducing hazards and improving work accuracy.
Using Sawhorses Effectively for Cutting Wood
Place your sawhorses on firm, level ground and angle the legs to maximize stability before starting any cuts. Using a portable band saw can enhance cutting precision and efficiency when working with various materials.
Always position your workpiece so you cut away from your body, and avoid cutting in the center of supported boards to prevent binding or kickback.
Adjust your saw blade depth to just exceed the wood thickness, and use clamps or vices to secure the material firmly during cutting. Keep your gear simple and use basic knots to ensure everything stays secure without over-complication.
Proper Sawhorse Placement
When setting up sawhorses for cutting wood, you’ll want to guarantee they’re positioned at a comfortable height that minimizes strain and maximizes control.
Adjust the sawhorse height to match your working posture, typically using 2×4 lumber legs splayed between 15°-25° for ideal stability. It is important to ensure the workspace is clear of dust and debris, as dust generation can affect cutting precision and safety.
Ascertain the top surface is level to maintain cutting accuracy and tool steadiness. Position sawhorses so the weight of the wood is evenly distributed, preventing tipping.
Keep legs stable and evenly spaced, and consider adding tension members or braces to enhance rigidity. Using a brace made from 1×7 pine lumber can add significant strength and help maintain the sawhorse’s rigidity during use.
Maintain a clear workspace around the sawhorses to avoid obstacles. If possible, include additional supports under the saw to prevent imbalance during cuts. Proper placement ensures efficient, precise cutting and reduces physical fatigue.
Safe Cutting Practices
Properly positioning your sawhorses sets the foundation for safe cutting, but how you handle the cutting process itself directly impacts safety and efficiency.
Always work in a well-lit, clutter-free area and wear appropriate PPE, including safety glasses and gloves. Using a saw with a clear sightline improves cutting accuracy and safety.
Secure your workpiece with clamps to prevent shifting, and ensure sawhorses are stable and level. When cutting large sheets, place 2-inch rigid foam insulation on the sawhorses to support the material fully and prevent blade binding. This cutting platform also prevents cutoffs from falling and causing damage or injury.
Always cut outside the sawhorse edges to avoid kickback risks. Maintain sharp saw blades and functional saw guards per OSHA guidelines. Keep the saw blade depth minimal when cutting foam supports.
Essential Safety Measures When Working With Sawhorses
Although sawhorses are simple tools, you must inspect them thoroughly before each use to guarantee safety. Check for cracks, leg stability, and locking mechanisms.
Always place them on flat, dry, and level surfaces, keeping a 3-foot clearance from hazards. Never exceed the load limit and distribute weight evenly.
Regular inspections help identify structural damage such as cracks or rust that could compromise safety. Use personal protective equipment like goggles and ear protection and keep hands clear of pinch points. Train all users on safety protocols and maintain awareness of surroundings.
| Aspect | Key Action | Reason |
|---|---|---|
| Inspection | Check legs, locks, cracks | Prevent failure or collapse |
| Setup | Level surface, clear area | Ensure stability and safety |
| Load Handling | Even weight, respect limits | Avoid tipping or breakage |
| PPE & Training | Wear goggles, train users | Protect and inform operators |
Maintaining and Storing Sawhorses for Longevity
Keeping your sawhorses in top condition requires regular maintenance and thoughtful storage. After each use, remove sawdust and debris with a vacuum or compressed air, especially from joints and hinges. Wipe surfaces with a non-abrasive cloth and mild solvent to prevent grime buildup.
Inspect and tighten all hardware, replacing worn cords and damaged parts promptly to maintain stability. Lubricate moving components monthly with white lithium grease, avoiding dust-attracting oils like WD-40. Regularly check for any signs of wear or damage to ensure safe usage.
Regularly check hardware and lubricate moving parts with white lithium grease to keep sawhorses stable and smooth.
Apply weather-resistant finishes annually on outdoor sawhorses to prevent moisture damage. Store sawhorses off the ground in dry, ventilated areas, stacked carefully to avoid warping, and away from chemicals.
Regular inspections during storage help catch early wear, ensuring your sawhorses remain safe, functional, and durable over time.
Building Custom Sawhorses for Specific Needs
When you need sawhorses tailored to specific tasks, building custom models lets you optimize for space, load capacity, and functionality.
Start by selecting materials—plywood or solid wood for typical woodworking, steel for heavy industrial loads. Use a single 4ft x 8ft plywood sheet to minimize waste while producing multiple units. This approach aligns well with a design that is compact and versatile.
Incorporate features like adjustable pegs, sliders, and clamps to secure workpieces precisely. Design fold-flat or flat-pack sawhorses to maximize portability and storage efficiency.
Reinforce joints with advanced joinery and add braces for stability under heavy loads. Include replaceable top supports as sacrificial elements for easier maintenance.
Employ detailed cutting lists, exploded diagrams, and templates with metric and imperial measurements to ensure accuracy. Finally, consider load calculations and safety features such as non-slip feet to prevent accidents during use.
Frequently Asked Questions
Can Sawhorses Be Used for Metal or Only Wood?
You can definitely use sawhorses for metal, but metal sawhorses are better suited due to their high load capacity and resistance to sparks and heat.
Wood sawhorses risk fire hazards and usually can’t support heavy metal pieces safely. When working with metal, choose corrosion-resistant, stable metal sawhorses with features like V-grooves and anti-slip feet. Always guarantee the sawhorses match your metal’s size and weight for safe, efficient support.
How Do I Transport Sawhorses Safely in a Vehicle?
To transport sawhorses safely, first measure them to verify your vehicle has enough space. Secure any loose parts and clear your cargo area.
Use tie-down straps to anchor the sawhorses firmly, attaching to seat belts or cargo hooks. Load them evenly, positioning flat or folded to save space.
Drive smoothly, avoiding sharp turns or sudden stops. Check strap tightness before and during your trip to keep the load stable and prevent damage.
Are Sawhorses Suitable for Outdoor Use in All Weather?
You can think of sawhorses as reliable sentinels guarding your workspace against nature’s whims. Metal sawhorses with weather-resistant coatings excel outdoors, resisting moisture and temperature swings.
Wooden ones need extra care to avoid weather’s wear, like regular maintenance and protective covers. For uneven terrain, adjustable legs and non-slip feet enhance stability.
Always store them dry or covered to prolong lifespan and keep performance sharp under all weather conditions.
What Is the Maximum Weight Limit for Standard Sawhorses?
Standard sawhorses typically support between 100 and 300 pounds per pair if they’re light-duty models. For medium-duty sawhorses, expect a range of 500 to 1,000 pounds per pair.
Heavy-duty types can handle 1,000 pounds or more per pair. Always verify your specific sawhorse’s rating, as materials, design, and adjustability influence capacity. Choose a model exceeding your maximum load to guarantee safety and stability during your projects.
Can I Use Sawhorses With Power Tools Other Than Saws?
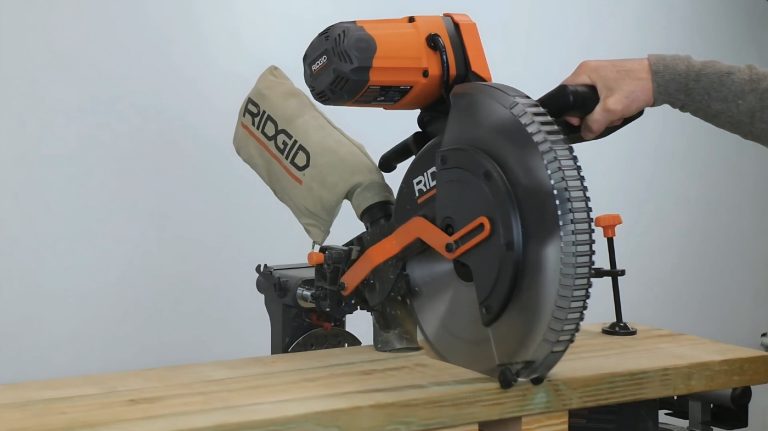
Yes, you can use sawhorses with various power tools beyond saws, including circular saws, miter saws, and jigsaws. They provide a stable, elevated platform that supports cutting, shaping, and assembling tasks.
Look for sawhorses with adjustable heights, sturdy metal frames, and anti-slip feet to guarantee safety and compatibility. Features like tool storage shelves and clamp channels enhance usability, making sawhorses versatile for many power tool operations.
Sawhorse Success Starts with Smart Setup
Now that you’ve mastered selecting, aligning, and adjusting your sawhorses, you’re equipped to work with efficiency and safety—no need to summon a medieval blacksmith for sturdy support.
Remember, proper setup and maintenance extend their lifespan and performance. Whether cutting wood or building custom units, keep safety protocols front and center.
With these practical skills, your sawhorses will become reliable partners in every project, delivering precision and stability every time.

