How to Use a Portable Band Saw? Step-By-Step Guide
To use a portable band saw, first verify you wear safety gear and select the right blade for your material. Secure and support your workpiece firmly, then adjust the blade tension properly and set the correct speed.
Hold the saw steadily, letting its weight guide the cut while applying consistent pressure without forcing. Keep the blade aligned and let it reach full speed before cutting.
Following these steps boosts accuracy and safety; exploring further will reveal tips on handling angles, maintenance, and troubleshooting.
Key Takeaways
- Wear safety gear and inspect the band saw, ensuring the blade is properly tensioned and aligned before use.
- Select the correct blade type and tooth pitch based on the material being cut.
- Secure and support the workpiece firmly to prevent movement during cutting.
- Let the blade reach full speed and apply steady, controlled pressure without forcing the saw.
- Perform regular maintenance by cleaning, lubricating, and inspecting the blade and machine components.
Essential Safety Measures for Portable Band Saw Operation
You’re trained on data up to October 2023. Before operating a portable band saw, always wear proper personal protective equipment: safety goggles to shield your eyes from flying debris, hearing protection against prolonged noise exposure, and a dust mask to prevent inhaling particles.
Avoid loose clothing, remove jewelry, and secure long hair or beards to prevent entanglement. Use gloves cautiously; ensure they don’t impair your control or risk being caught in the blade.
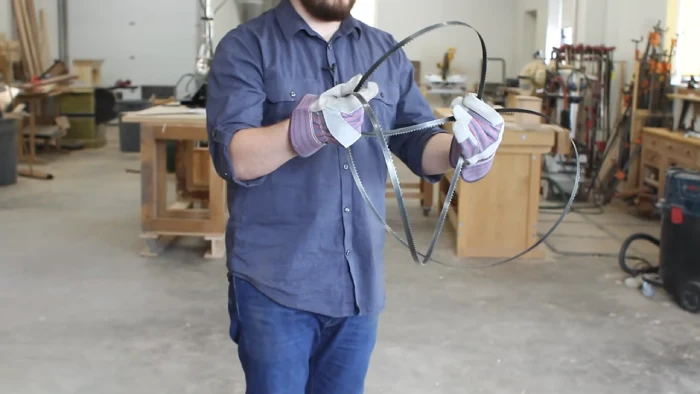
Inspect the machine thoroughly. Confirm full assembly and proper installation. Examine the blade for cracks or defects—never use a compromised blade. Always bring the blade into contact with the material before engaging automatic feed.
Adjust the upper guide and guard within 1/4 inch of the workpiece. Set blade pitch and cutting speed according to material.
Selecting the Right Blade for Your Project
After confirming safety measures and inspecting your portable band saw, focus on selecting the appropriate blade for your project. Blade choice hinges on the workpiece material, thickness, and cutting application. Use these guidelines:
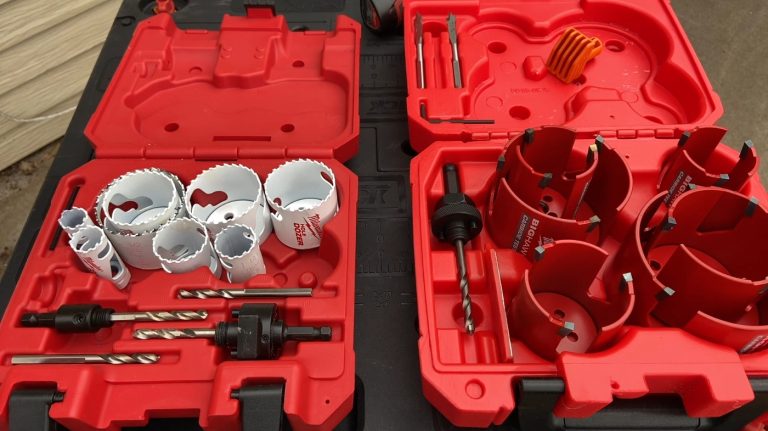
- Match blade composition to material: Bi-metal blades suit a range of metals, while specialized blades target carbon steel or non-ferrous materials. Selecting the correct blade tooth size is critical for optimal cutting.
- Choose blade length compatible with your saw, typically 32-7/8″ or 44-7/8″.
- Select tooth pitch (TPI) based on material thickness: fewer teeth (3-6 TPI) for wood, more teeth (6-24 TPI) for metals.
- Consider variable pitch blades for versatile cutting and reduced vibration.
Consult manufacturer charts for precise blade selection to optimize cut quality, reduce wear, and extend blade life.
Preparing the Portable Band Saw for Use
Before operating your portable band saw, conduct a thorough pre-use inspection and perform essential setup steps to guarantee safe, accurate cutting.
Begin by checking the power cord for damage and verify the blade is free from chips or cracks and appropriate for the material. It is also important to ensure the blade speed matches the material for optimal cutting efficiency and safety.
Start by inspecting the power cord and ensuring the blade is undamaged and suitable for your material.
Confirm the blade is properly seated and aligned with guide bearings.
Secure personal protective equipment and remove loose clothing or jewelry.
Clear the work area and ensure the saw is unplugged before adjustments. Models with a dust collection port help maintain a clean workspace and improve performance.
Adjust the blade guard to sit 1/4 inch above the workpiece, set the fence if needed, and stabilize round materials with a vise.
Always wear safety glasses and cut-resistant gloves as part of your safety precautions. Tighten all components and organize the workstation.
Finally, rotate the blade by hand to confirm smooth tracking and ensure the switch is off before plugging in.
Adjusting Blade Tension and Speed Settings
Start by setting the blade tension according to the blade width using the saw’s tension gauge or indicator. Next, select the appropriate speed based on the material hardness and blade type to optimize cutting performance.
Adjust the speed dial before operation, and monitor cutting quality to fine-tune settings as needed. Consider the blade speed (RPM) to balance cutting efficiency and precision for different materials.
Setting Proper Blade Tension
Although it may seem straightforward, setting proper blade tension requires careful attention to guarantee accurate cuts and prolong blade life. Before adjusting, always power down and wear safety glasses.
Move guides away from the blade and inspect it for damage. Center the blade on both wheels and ensure smooth rotation by hand.
Proper tensioning is essential because over or under tension can cause poor cuts, blade wandering, or curved cuts. Insufficient tension leads to slippage during operation, which can cause the blade to come off the wheels.
Use the tension knob or lever to adjust tension precisely. Verify correct tension through these methods:
- Perform a deflection test—blade should deflect 1/8″ to 1/4″ under moderate pressure.
- Conduct a pluck test, listening for the proper pitch.
- Employ a tension gauge if available for exact measurement.
- Make trial cuts to confirm clean, straight operation and adjust tension if needed. Regularly checking tension and following manufacturer guidelines ensures blade stability and extends blade life.
Selecting Appropriate Speed
When you select the appropriate speed for your portable band saw, you guarantee ideal cutting performance and extend blade life.
Start by consulting the blade speed chart in your operator’s manual to identify recommended speeds based on your material—metal, wood, or softer metals like aluminum.
The chart provides specific recommendations tailored to material size and type, helping you choose the best settings. Maintaining the correct cutting speed prevents excessive heat and friction that can dull the blade prematurely.
Measure the drive wheel circumference and multiply by the RPM to calculate blade speed in surface feet per minute (SFPM). Adjust speeds accordingly: use slower speeds (70-100 FPM) for stainless steel, moderate speeds (200-300 FPM) for aluminum and copper, and much higher speeds (around 5000 FPM) for wood.
Proper speed guarantees good chip formation and reduces wear. Always verify your saw’s variable speed settings align with these values before cutting to optimize efficiency and blade longevity.
Speed Adjustment Tips
Because proper blade tension and speed settings directly impact cutting accuracy and blade longevity, you must adjust them carefully before operation.
Start by using the tension knob to apply pressure, then verify blade tension with the pluck or deflection test, aiming for less than a quarter-inch deflection.
Using a tension meter can help achieve more precise and consistent tension levels. Additionally, applying a suitable bandsaw lubricant prior to cutting can reduce friction and extend blade life.
Check horizontal and vertical blade alignment to prevent uneven wear and inaccurate cuts. Adjust speed settings according to the material—lower speeds for harder metals and higher for softer materials—using your saw’s variable speed control.
- Power down and loosen blade tension before adjustments.
- Use tension meters or gauges for precise tensioning.
- Center the blade on wheels and keep it perpendicular to the table.
- Set speed based on material type and manufacturer’s recommendations.
Positioning and Securing Your Workpiece
Securing and positioning your workpiece correctly guarantees accurate cuts and prevents blade damage or accidents. Begin by aligning the material to allow a straight blade path without obstructions.
It is also beneficial to choose the correct blade type based on the material to improve cut quality and blade longevity, such as using a carbide-tipped blade for hardwood.
Orient the workpiece to minimize blade stress and maximize cutting efficiency—for example, position tubing to cut seams horizontally or angle iron with its legs down.
Use clamps or an adjustable vise to firmly secure the material, ensuring it doesn’t shift during cutting. Support the workpiece adequately, especially longer pieces, to maintain stability.
Adjust your workspace for clear visibility and unobstructed saw movement. It is important to keep your hands on designated handle areas to maintain control and safety during operation. Always confirm the cutting direction matches the blade’s natural path to avoid uneven wear.
Techniques for Accurate and Efficient Cutting
Below are essential techniques to ensure accurate and efficient cutting with a portable band saw, helping you achieve clean, professional results every time.
Steady Pressure Application
When you maintain consistent forward pressure without forcing the blade, you enhance cutting precision and prevent damage. Apply steady pressure that matches the material’s resistance, adjusting as the cut progresses to avoid blade strain or wandering.
Control your feed rate and saw speed in tandem to optimize cutting efficiency. Proper blade tension and alignment are critical to sustaining accuracy and preventing wobble.
The Makita Portable Bandsaw’s ergonomic design supports comfortable handling, which helps maintain steady pressure throughout the cut. Regular inspection and blade maintenance help prevent gumming and ensure smooth cutting performance.
To apply steady pressure effectively:
- Maintain a consistent feed rate relative to material hardness.
- Adjust forward pressure without forcing the blade through the cut.
- Synchronize saw speed with material thickness and type.
- Confirm blade tension and alignment before cutting.
These steps ensure smooth operation, extend blade life, and yield precise cuts.
Proper Workpiece Support
Maintaining steady pressure on the blade sets the foundation for accurate cuts, but supporting your workpiece properly prevents unwanted movement that can compromise precision.
Clamp the workpiece securely to a stable surface or use a vise for small shapes. Ensure even contact with the cutting surface to reduce vibration and blade deflection.
For larger or irregular items, fabricate custom supports or adjustable brackets to maintain stability and alignment. Regularly checking for fence alignment can help maintain consistent cutting accuracy.
Always make sure to remove battery or unplug the machine before adjusting or installing the blade to ensure safety. Verify blade alignment parallel to the workpiece before cutting and test on scrap material.
| Support Method | Purpose |
|---|---|
| Clamp or Vise | Prevents workpiece movement |
| Custom Fixtures | Supports large/irregular shapes |
| Alignment Verification | Ensures precise, straight cuts |
Handling Different Materials With a Portable Band Saw
Although portable band saws are versatile, handling different materials demands selecting the correct blade and adjusting your cutting technique accordingly.
First, match blade tooth configuration and TPI to the material—use finer teeth (18-24 TPI) for thin metals like aluminum and coarser teeth (10-14 TPI) for thicker steel. Choosing between bi-metal and carbon blades can significantly affect cutting efficiency and blade life.
Choose blade teeth and TPI based on material—finer for thin metals, coarser for thick steel.
Then, maintain a consistent feed rate to prevent crooked cuts and reduce blade wear. Third, guarantee the material is securely supported to minimize vibration and enhance accuracy. Always rest the shoe or back-up plate firmly against the material during cuts to stabilize the saw.
Finally, let the blade reach full speed before starting the cut to optimize performance. Remember to inspect and replace blades regularly, and always wear appropriate personal protective equipment to maintain safety during operation.
Performing Miter Cuts and Angle Adjustments
Before making miter cuts, set your angle limits precisely using adjustable stops or a miter gauge to guarantee repeatability. Secure the workpiece firmly with clamps or a jig to prevent any movement during cutting.
Maintaining a stable setup is critical for accuracy and safety when adjusting angles on your portable band saw. Using a custom-built jig similar to a miter box can significantly improve the precision of 45° angle cuts, especially for internal angles.
Setting Angle Limits
When setting angle limits on a portable band saw, you’ll need to adjust the swivel support carefully to achieve precise miter cuts up to 60 degrees. Follow these steps to guarantee accuracy:
- Loosen the angle lock handle to free the swivel support.
- Rotate the swivel support to align with your desired cutting angle, typically between 0 and 60 degrees.
- Use a precision gauge or built-in angle scale to verify the angle setting.
- Tighten the angle lock handle securely to fix the swivel support in place.
Accurate angle adjustments are essential for clean, precise cuts and preventing uneven edges. Ensuring the blade itself is properly aligned with the saw body before making angle adjustments will improve cut quality and ease of use blade alignment importance.
Avoid moving the swivel support during cutting to maintain consistent results. Always double-check your settings before initiating the cut to ensure maximum performance and safety.
Securing Workpiece Position
How do you guarantee your workpiece stays perfectly positioned during miter cuts and angle adjustments? Start by securing the workpiece firmly with clamps to prevent any movement.
Use a custom-made jig or a miter gauge to maintain precise angles—adjust the jig to the desired degree, ensuring the workpiece aligns perfectly with the guide. Using a miter gauge or layout lines can assist with angled and precise cuts.
If your portable band saw mounts on a table, utilize it for added stability. For miter cuts, especially 45-degree angles, ensure the jig’s guides are correctly set and the blade is aligned with the workpiece. Support longer materials adequately to avoid shifting.
Always measure angles precisely before cutting. Maintain proper hand positioning away from the blade and wear safety gear to prevent accidents.
Cleaning and Maintaining Your Portable Band Saw
Although regular use can cause dust and debris to accumulate, you can maintain your portable band saw’s performance by systematically cleaning and inspecting its components. Start by using compressed air and a nylon brush to remove dust and grime from moving parts and ventilation holes.
Next, wipe all surfaces with a soft cloth, focusing on blade teeth to clear material debris. Inspect the blade thoroughly for chips or cracks and check tension to ensure efficient cutting.
Finally, lubricate the blade’s backside, gear assembly, and shaft bearings per manufacturer guidelines to reduce friction and wear.
- Clean dust and debris with compressed air and brushes.
- Inspect blade condition and tension regularly.
- Lubricate moving parts and blade to prevent friction.
- Store in a dry environment and protect during transport.
Troubleshooting Common Issues During Operation
Since portable band saws operate under demanding conditions, you’ll occasionally encounter issues that disrupt performance or safety.
Start by inspecting the power cord for damage and verify all wiring connections, especially at the switch and motor. Check the circuit capacity to avoid overloads and watch for blown fuses indicating motor shorts.
Inspect power cords and wiring, check circuit capacity, and watch for blown fuses to ensure safe portable band saw operation
For blade issues, ensure the blade teeth face forward, maintain proper tension, and replace dull or damaged blades promptly. Always inspect blade tension with a tension gauge before operation to avoid damage. Address excessive vibration by adjusting blade guides and alignment.
Mechanical failures require tightening loose parts and inspecting bearings or motor condition. Operational problems like improper cutting angle, incorrect feed rate, or slipping material should be corrected by adjusting your technique and ensuring secure clamping.
Always heed warning signs like unusual noises or binding to prevent further damage.
Frequently Asked Questions
Can a Portable Band Saw Be Used Underwater or in Wet Conditions?
Using a portable band saw underwater or in wet conditions is like inviting lightning into your workshop—it’s extremely dangerous. You shouldn’t operate standard portable band saws when wet, as water heightens electrical shock risk considerably.
Instead, use specialized underwater band saws designed for marine environments, which require proper training and safety protocols. Always keep tools dry, handle them by insulated grips, and ensure your workspace is well-ventilated to maintain safety.
What Are the Common Accessories Compatible With Portable Band Saws?
You’ll find several common accessories that enhance your portable band saw’s performance and safety. Blade covers protect your blades, while tensioning tools and gauges help maintain ideal blade tension.
Safety accessories like blade guards and goggles keep you protected. For improved accuracy, consider guide upgrades, stabilizers, and jigs.
Quick-release systems speed up blade changes, and carrying cases make transport easier. Choosing compatible accessories ensures you get the most from your saw.
How Long Does the Average Portable Band Saw Blade Last?
You can expect an average portable band saw blade to last several months, depending on how often and what materials you cut. High-quality blades hold up longer, while frequent use or cutting abrasive materials shortens lifespan.
Keep an eye on signs like teeth falling off, increased noise, or decreased cut accuracy. Regular maintenance, proper tensioning, and cleaning will help extend blade life and maintain performance.
Is It Safe to Use a Portable Band Saw for Left-Handed Users?
When it comes to using a portable band saw left-handed, it’s not always a walk in the park. These tools typically favor right-handed users, increasing risks like blade exposure and stability issues for you.
You should perform a thorough hazard analysis, use additional guarding or custom shrouds, and make sure proper training. Always inspect your equipment and follow strict safety protocols to keep your hands safe while working left-handed.
Can Portable Band Saws Be Used for Cutting Non-Metal Materials Like Plastics?
Yes, you can use portable band saws to cut plastics effectively. Choose a thinner blade designed for plastics to reduce heat buildup and prevent melting.
Adjust the blade speed lower than you’d for metal to avoid deforming the material. Guarantee proper cooling with air or liquid to manage heat. Always wear safety gear and maintain good ventilation to avoid inhaling fumes during cutting.
Master Your Portable Band Saw with Confidence and Precision
By following these steps, you’ll wield your portable band saw like a skilled artist commands a brush—precisely and confidently. Always prioritize safety, choose the correct blade, and make certain of proper setup before cutting.
Adjust tension and speed to match your material, secure your workpiece firmly, and maintain your saw regularly to keep it sharp and reliable.
With practice, troubleshooting will become second nature, letting you tackle any project efficiently and accurately every time.