How to Sand a Cutting Board? Steps for a Smooth Finish
To sand your cutting board, choose sandpaper starting with coarse grit (around 80) to remove scratches and surface imperfections, then progress through medium (150–220) to fine grit (up to 320) for smoothness.
Always sand along the wood grain with even pressure, using a random orbital sander or hand sanding for end grain areas. Manage grain raising by lightly wetting and drying the board between sanding steps.
Finish by thoroughly cleaning dust before oiling. Understanding these steps guarantees durable, sanitary results.
Key Takeaways
- Start sanding with coarse grit (50-80) to remove deep scratches, then progress to medium (100-120) and finish with fine grit (150-220).
- Always sand along the wood grain using long, even strokes to avoid scratches and maintain surface integrity.
- Clean the board thoroughly with warm soapy water and remove all dust between sanding steps to ensure a smooth finish.
- For raised grain, lightly wet the surface, let it dry, then re-sand with fine grit to smooth fibers before applying oil.
- Use ergonomic tools or a random orbital sander for even sanding and finish with a clean, dry surface ready for oiling.
Choosing the Right Sandpaper Grit
When restoring your cutting board, choosing the right sandpaper grit is essential to efficiently remove damage without compromising the wood’s integrity.
Start with coarse grit (40–80) if the board has deep scratches or severe wear. Grits between 50 and 80 effectively strip old finishes and debris. Selecting the appropriate grit is similar to choosing the right cutting capacity on a table saw for different materials.
Always sand with the grain to prevent new scratches. Once the rough damage is removed, switch to medium grit (100–120) to smooth the surface and eliminate coarse sanding marks. This grit balances effective smoothing without over-sanding.
Finally, use fine grit (150–320), typically 220, to polish the board to a silky finish, ready for oiling. Opt for aluminum oxide abrasive for durability and non-clogging properties, ensuring consistent sanding performance across hardwood surfaces.
Preparing the Cutting Board Surface
Before you start sanding, remove any surface imperfections like scratches or stains using an appropriate sandpaper grit. Typically, start with a coarser grade.
Always sand in the direction of the wood grain. This prevents cross-grain scratches that can damage the board’s surface.
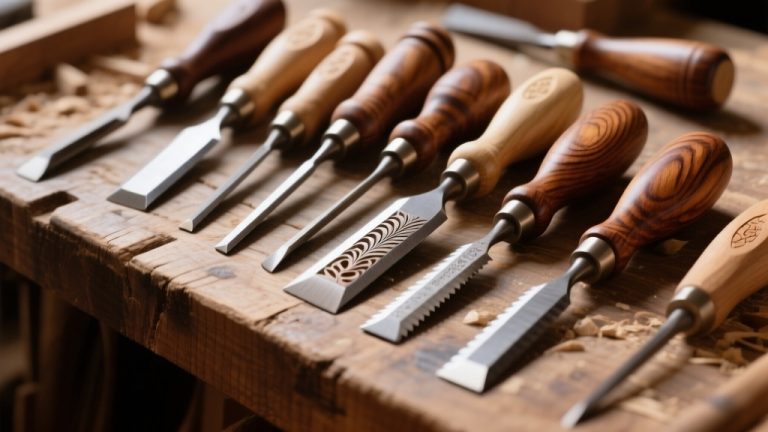
Selecting the right grit and technique guarantees efficient smoothing. It also prepares the board for finer sanding stages. Using tools with ergonomic handles can reduce fatigue during this process.
Proper care and maintenance, including sanding, extends the lifespan of your cutting board, keeping it functional and attractive for years.
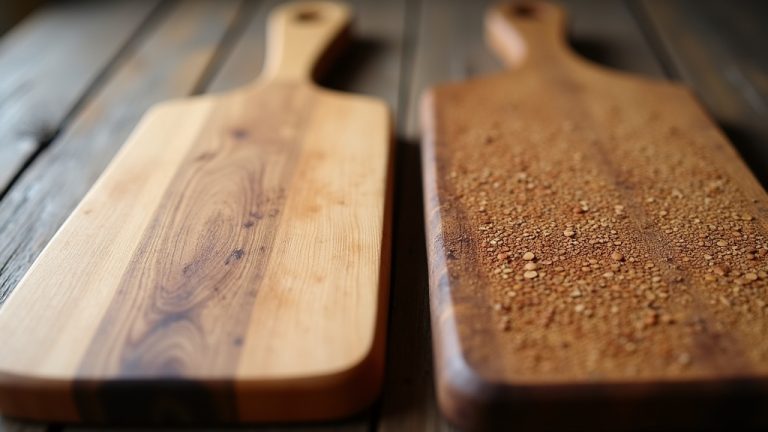
Removing Surface Imperfections
Although surface imperfections like scratches, gouges, and knife scars are common on cutting boards, you need to identify and address them thoroughly to guarantee a smooth, hygienic surface. Begin by inspecting for deep cracks, burn marks, or machine bites, as these defects can harbor bacteria and impede cleaning.
Check for natural wood irregularities such as knots and raised grain that cause unevenness. Remove dirt and oils with warm, soapy water and ensure the board is completely dry to prevent swelling during sanding.
Flatten warped or cupped areas mechanically before sanding. Focus sanding efforts on scars and gouges, sanding along the grain to avoid cross-grain scratches.
Choosing Sandpaper Grit
After addressing surface imperfections and ensuring the board is clean and flat, selecting the appropriate sandpaper grit will determine the quality of your sanding results. Begin with coarse grit (60–80) to efficiently remove deep knife marks and high spots. Progress to medium grit (100–150) to smooth the surface and eliminate coarse sanding scratches.
Next, use fine grit (180–220) to refine the wood grain and prepare for finishing treatments. It is important to carefully sand all facets, especially edges, to maintain sharp, clean profiles edges. For a polished feel without hindering oil absorption, finish with ultra-fine grit (320).
Avoid sanding beyond 320 grit, as it can overly close wood pores and reduce oil penetration, compromising maintenance. Wrap finer grit sandpaper around a block for control and sand until pencil marks fully disappear, ensuring even abrasion and a uniform, smooth cutting board surface ready for oil or wax application.
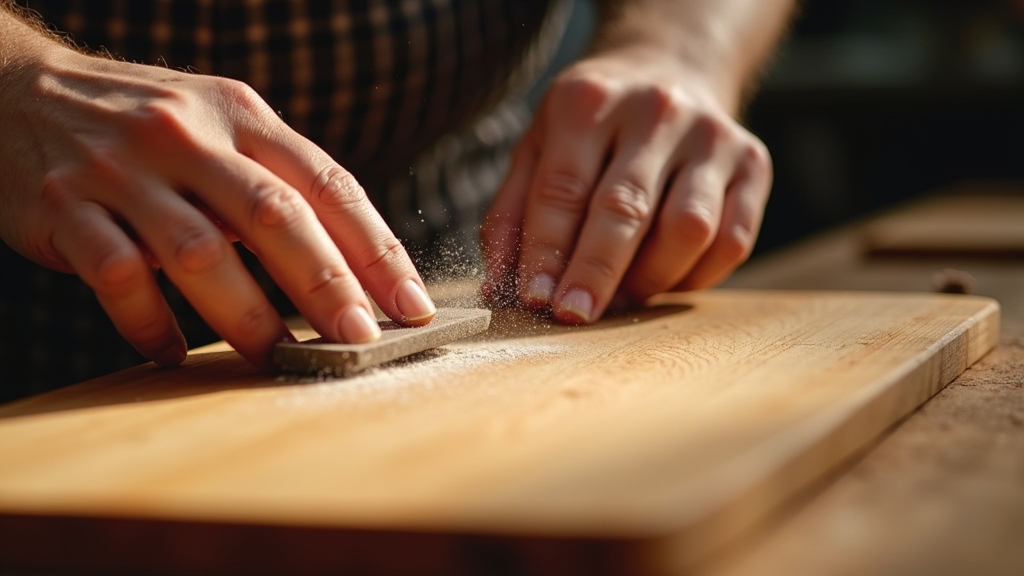
Sanding Direction Techniques
When sanding your cutting board, aligning your strokes with the wood grain is essential to prevent scratches that mar the surface finish. For solid wood boards, always sand parallel to the grain using long, even strokes, avoiding back-and-forth motion across fibers.
Wear a mask to avoid inhaling sawdust during sanding and protect your respiratory health. Ensuring stability during setup is also important to maintain control and safety as you work.
Hand sanding demands deliberate directional movement, while power sanders may self-correct multidirectional vibrations. End-grain and bamboo boards offer more flexibility, allowing diagonal or cross-grain sanding; however, maintain consistent pressure and coverage to avoid uneven spots.
Distribute sanding evenly across the surface, employing a geometric pattern to prevent divots. Use light to moderate pressure, letting the abrasive do the work.
Carefully sand edges and chips along the grain to avoid splintering, feathering transitions smoothly without rounding defined profiles.
Sanding Techniques for Different Grain Types
When sanding face grain boards, always move with the grain to prevent scratches. This technique helps guarantee a smooth finish and reduces vibration levels for better control.
End grain requires a gentler approach. Use random-orbit sanders or hand sanding to protect delicate fibers without tearing. Because of the delicate fiber structure, end grain boards benefit from careful sanding to maintain their durability and knife-friendliness. Don’t overlook grain raising. Lightly wetting the surface between sanding passes enhances smoothness.
Face Grain Sanding Direction
Although sanding might seem straightforward, following the wood grain direction on face grain cutting boards is essential to preventing scratches and tear-out. You must sand parallel to the grain to maintain surface integrity and avoid visible cross-grain scratches.
Use long, even strokes aligned with the grain for consistent abrasion and to preserve the natural texture. Ensuring proper tool maintenance before sanding can significantly improve the smoothness of the finish.
Follow these steps for effective face grain sanding:
- Sand strictly parallel to the wood grain, avoiding cross-grain motion.
- Use an orbital sander with a hard backing pad to maintain flatness.
- Progress through grits from 80 to 320, stopping only after fully removing pencil marks.
- After initial sanding, mist the surface with water, let dry, then resand with finer grit to smooth raised fibers. Vacuum thoroughly after sanding to remove all dust and debris before moving to the next grit.
End Grain Sanding Methods
Since end grain sandboards absorb finishes more readily and present a tougher sanding challenge than face grain, you must follow a specific grit progression and employ specialized tools to achieve a uniform, smooth surface.
Begin sanding with coarse grits such as 60 or 80 to remove tool marks and flatten the surface efficiently. Progress through 100, 150, 220, and 320 grit before finishing with 600 grit hand sanding for ultra smoothness.
It is recommended to consider using a Random Orbital Sander (ROS) to speed up the sanding process while maintaining consistent results. Selecting the proper grit sequence helps avoid premature wear on abrasive materials.
Use a random orbital sander for uniform results and minimize scratches, avoiding linear hand sanding alone. Clean abrasive dust thoroughly between grits to prevent contamination and maintain optimal cutting efficiency.
Apply water or mineral spirits to raise and smooth the grain between steps. Proper glue-up flattening prior to sanding guarantees even surfaces and helps avoid damaging the end grain during the surfacing stage.
Finally, respiratory protection is essential due to fine dust exposure. Regular maintenance practices can extend the tool life and improve overall sanding performance.
Grain Raising Importance
Because different wood grain types react uniquely to sanding and moisture, understanding grain raising is essential for achieving a smooth cutting board surface. Grain raising occurs when sanding lifts wood fibers, especially after moisture exposure, leaving a rough texture.
Proper cleaning and maintenance of woodworking tools also play a crucial role in preventing damage during sanding, ensuring consistent results and prolonging tool life.
Open grain woods like oak exhibit more pronounced grain raise due to larger pores, while closed grain woods such as maple show subtler effects. Among the wood types, end grain boards have a firmer and more durable surface that resists knife marks better than other grains.
To manage this, follow these sanding techniques:
- Start with coarser grit (80-100) on open grain woods to level pores before finer sanding.
- Use progressively finer grits (120 to 320) on closed grain woods to avoid over-sanding.
- After initial sanding and oiling, lightly re-sand with fine grit (~400) to remove raised fibers.
- Always sand with the grain direction to minimize fiber tear-out and maintain surface integrity.
Using Sanding Tools Effectively
When sanding a cutting board, selecting and handling your sanding tools with precision guarantees an even, smooth surface without damaging the wood.
Use stationary belt sanders for shaping edges and convex curves, while spindle sanders excel on tight concave curves. Drum sanders flatten large panels and end grain efficiently but are high-end.
Stationary belt sanders shape edges; spindle sanders tackle tight curves; drum sanders efficiently flatten large panels and end grain.
For handheld use, choose a random orbit sander or sanding pads with padded bottoms to avoid gouging. Apply even pressure and sand with the grain, progressing through grits—from coarse (50–80) to fine (220–400)—removing pencil marks to track progress.
Employ oscillating motion on stationary tools to minimize sanding marks. Additionally, use sanding sleds or jigs to maintain flatness on softwoods or end grain, ensuring uniformity without surface waviness or inconsistency.
For projects requiring high precision and clean results, consider the benefits of using a track saw as it provides enhanced control and accuracy during initial cutting stages.
Managing Grain Raising and Surface Preparation
Although sanding creates a smooth surface, moisture exposure causes wood fibers to swell and raise above the plane, a phenomenon known as grain raising. Managing this is critical to achieving a smooth, durable cutting board surface.
To handle grain raising and prepare your board effectively, follow these steps:
- Apply distilled water or a damp cloth to intentionally raise the grain after initial sanding.
- Let the board dry completely to allow fibers to swell and stand upright. It is important to air dry standing on edge to prevent warping and ensure even drying. Using tools with high accuracy can help maintain consistency in your preparation process.
- Perform a final sanding with fine grit sandpaper (around 220 grit) to smooth raised fibers without closing pores.
- Avoid sanding beyond 220 grit to maintain ideal oil absorption and surface texture.
Cleaning and Inspecting After Sanding
To guarantee your cutting board is ready for finishing, start by thoroughly cleaning off all sanding dust and debris using a damp cloth immediately after sanding.
Next, wash the board with hot water, dish soap, and a brush, focusing on scratches and knife marks to remove trapped particles. Rinse both sides thoroughly under running water, avoiding prolonged soaking to prevent warping. It is important to avoid harsh chemicals such as bleach during this process to maintain the integrity of the bamboo.
Dry promptly with a cloth or air dry upright. Inspect the surface for residual dust, deep cuts, warping, or uneven sanding. Run your fingers lightly to detect rough patches or raised grain. If needed, perform a light final sanding with fine-grit paper.
Consider a mild vinegar rinse for sanitation, then rinse and dry completely. This ensures a clean, smooth surface, ready for oil application without moisture or contaminants.
Applying Oil and Finishing Touches
After ensuring your cutting board is clean, dry, and free of rough patches, the next step is applying oil to protect and preserve the wood. Use food-grade mineral oil, applying it generously with a clean, soft cloth or small paintbrush. Avoid vegetable oils to prevent rancidity.
Apply oil evenly to all surfaces and edges until the board appears glossy and no longer absorbs oil. It is important to apply the oil to a thoroughly dry board to ensure proper absorption and effectiveness thoroughly dry board.
Let the oil soak for several hours or overnight, especially on new or dry boards. Repeat this process 2–3 times if needed. After drying upright, apply a thin layer of board cream or wax. Buff it in a circular motion to seal and protect the surface.
Frequently Asked Questions
How Often Should I Sand My Cutting Board for Maintenance?
You should sand your cutting board only when knife marks cover the entire surface or deep scratches affect usability. For daily use, this might be every several months to annually, depending on wear.
Avoid sanding too often to prevent thinning. Watch for roughness, splinters, or persistent odors signaling sanding is needed.
Always follow sanding with oiling to protect the wood and extend the time before the next sanding session.
Can I Use Electric Sanders for Small or Intricate Cutting Boards?
Yes, you can use electric sanders on small or intricate cutting boards, but you need precision. Choose detail or orbital sanders with variable speeds to avoid aggressive material removal.
Avoid belt sanders—they’re too rough and risk damaging edges. Use consistent pressure and complement with hand sanding in tight spots.
Also, guarantee dust control and wear respiratory protection. This combination preserves your board’s integrity while achieving a smooth, safe finish.
Is It Safe to Use Sandpaper on Plastic Cutting Boards?
You shouldn’t routinely use sandpaper on plastic cutting boards because sanding creates micro-scratches that trap bacteria, increasing contamination risk.
While you can sand HDPE boards if bleach cleaning fails or knife marks are severe, frequent sanding degrades board integrity and doesn’t guarantee full sanitization.
Instead, focus on thorough cleaning and timely replacement. If you must resurface, do so sparingly and cautiously, understanding it compromises hygiene and mechanical properties over time.
What Should I Do if My Cutting Board Has Deep Knife Gouges?
If your cutting board has deep knife gouges, start by securing it firmly.
Use a razor blade or hand plane to carefully scrape and level the gouged area before sanding.
Fill deeper cracks with wood filler or a glue and sawdust mixture, applying it thoroughly and removing excess.
Let it dry completely, then sand starting with medium grit to blend the repair smoothly.
Finish by conditioning the board to maintain its integrity.
Can Sanding Remove Food Odors Embedded in the Wood?
Yes, sanding can effectively remove food odors embedded in wood by eliminating the top layer where bacteria and smells reside. You should use fine-grit sandpaper to carefully sand the surface without thinning the board excessively.
After sanding, it’s vital to dry and reseal the wood with food-safe oil to prevent future odor absorption. Remember, sanding is a last resort after trying gentler odor removal methods like washing and deodorizing techniques.
Keep Your Cutting Board Flawless with Proper Care
Now that you’ve meticulously sanded every inch of your cutting board, envision a surface so smooth it could rival glass under a microscope.
With each precise stroke and carefully chosen grit, you’ve banished every imperfection, leaving a flawless canvas ready to resist knife marks and bacteria alike.
By following these exact steps, you guarantee your cutting board isn’t just restored—it’s perfected, standing up to countless culinary battles with unmatched durability and elegance.