How to Insulate a Shed Floor: Keep the Moisture Out
To insulate your shed floor, start by measuring joist spacing and ensuring they’re level and clean.
Choose insulation like fiberglass batts or foam boards suited for your climate.
Cut insulation slightly oversized to fit snugly between joists without compression.
Secure it with wooden support blocks or fasteners to prevent sagging.
Then, install a durable vapour barrier tightly sealed and overlapping seams before laying a sturdy subfloor.
This method blocks moisture, pests, and heat loss effectively.
Further details will guide you through each step for lasting results.
Key Takeaways
- Measure joist spacing and depth accurately, inspect and prepare joists by removing debris and ensuring they are level before insulation installation.
- Choose appropriate insulation like fibreglass batts, foam board, or spray foam based on climate, budget, and moisture considerations.
- Cut insulation slightly oversized for a snug fit between joists, avoiding compression and gaps to maintain thermal efficiency.
- Install a durable vapour barrier, overlapping seams by at least 6 inches and sealing all edges to prevent moisture infiltration.
- Secure insulation and vapour barrier properly, then install a sturdy subfloor with sealed seams to protect insulation and deter pests.
Why Insulating Your Shed Floor Matters?
Although sheds are often overlooked in home insulation plans, insulating your shed floor markedly improves energy efficiency and comfort.
By adding insulation beneath your shed floor, you reduce heat loss through the ground, maintaining more stable indoor temperatures. This minimizes energy consumption, especially during colder months, and prevents cold drafts.
Proper insulation also controls moisture accumulation, which protects the floor structure from rot and mold.
Additionally, insulating the floor enhances soundproofing, creating a quieter workspace or storage area.
Choosing the right insulation material, such as fibreglass batts or rigid foam boards, ensures effective thermal resistance and durability.
Installing insulation flush with the joist tops maximizes coverage and performance.
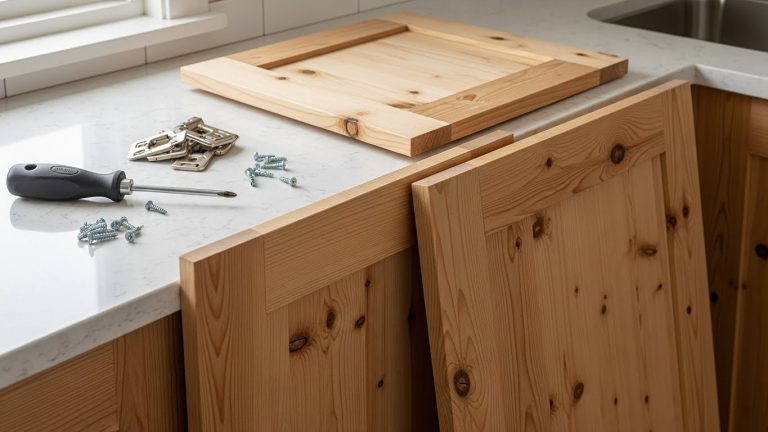
For optimal results, it is important to select materials and installation methods that prevent common issues like splintering and moisture damage, similar to how cut cleanliness & precision is critical in woodworking tools.
Measuring and Preparing Your Shed Floor Joists
Start by thoroughly measuring the spacing and depth of your shed floor joists to make sure your insulation fits precisely.
Use a tape measure to record the distance between joists, typically 16 or 24 inches on center, and measure the joist depth to determine insulation thickness.
Check for any irregularities, damage, or rot that might affect installation or performance.
Remove any debris or protruding nails to create a smooth surface.
If you’re retrofitting, consider removing existing flooring to access joists easily.
Cut wooden blocks to fit snugly between joists, placing at least two per cavity for support.
Confirm your joists are level to prevent gaps or compression in insulation.
Accurate preparation here guarantees efficient insulation installation and peak thermal performance.
Ensuring the shed floor joists are level and stable is crucial, as flooring stability impacts the effectiveness of insulation and overall durability.
Picking the Right Shed Floor Insulation Material

Choose insulation materials based on your shed’s climate, budget, and installation ease. You want a product that balances thermal performance with moisture resistance and fits your skill level for installation.
Here are three common options:
- Fibreglass Batts – Affordable and versatile, fibreglass slows heat transfer effectively. It’s fire-retardant and straightforward to install but requires protection from moisture.
- Foam Board (Polyisocyanurate or PIR) – Offers high R-values (up to 6.5 per inch) for excellent insulation in tight spaces. However, it absorbs water, so you’ll need a vapour barrier.
- Spray Foam – Provides superior air sealing and fills gaps completely, enhancing energy efficiency. It’s costlier and needs professional application but excels in extreme climates.
Select based on your priorities: cost-efficiency, R-value, moisture control, and installation complexity. Proper preparation and using the right tools and materials ensure a durable and effective insulation installation.
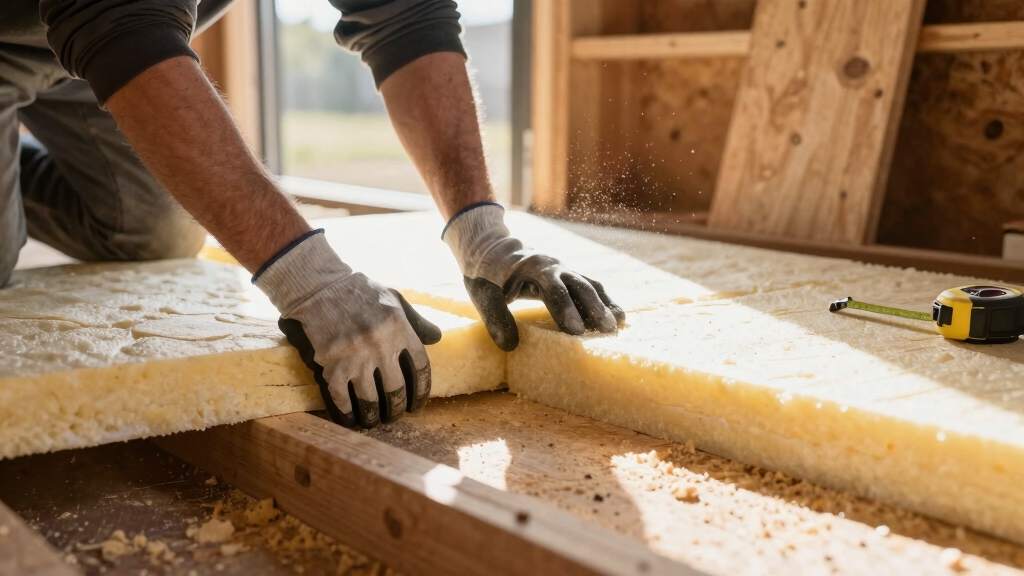
Cutting and Fitting Insulation Between Joists
Alright, let’s get started!
First things first, grab your tape measure and measure the width and depth of each joist cavity. It’s super important to get those measurements just right.
Once you’ve got that down, you can use a utility knife or saw to cut your insulation material to match those dimensions perfectly.
Now, you’ll want to make sure it fits snugly between the joists without any gaps. Why? Because a properly fitted insulation not only maximizes thermal efficiency but also helps to prevent any pesky air leaks.
For best results, regularly check the fit to ensure there are no gaps or spaces that could reduce thermal efficiency.
Measuring Joist Spaces
Measure each joist cavity carefully to make certain your insulation fits snugly between the joists without gaps or compression.
Precise measurements prevent energy loss and maintain insulation performance. Use a tape measure to record the width and depth of each cavity, as joist spacing may vary slightly.
Follow these steps:
- Measure the distance between joists at multiple points along the floor to account for irregularities.
- Record the depth from the top of the joist to any obstruction beneath to guarantee full thickness insulation fits.
- Note any deviations or obstacles that could affect the insulation’s fit.
Accurate measurements will guide your cutting process and ensure effective thermal protection in your shed floor. When cutting insulation, using a measuring tape accurately ensures a snug fit and optimal insulation efficiency.
Cutting Insulation Precisely
With your joist cavity measurements in hand, cut the insulation material carefully to guarantee a snug fit without gaps or compression.
Use a sharp utility knife or saw, depending on the insulation type. Fibreglass batts can be trimmed with a knife, while foam boards require a fine-toothed saw or jigsaw.
Score the material lightly before cutting to maintain clean edges. Cut slightly oversized pieces to secure tight placement but avoid compressing the insulation, which reduces its R-value.
Fit each piece flush with the joist tops, filling the entire cavity. If needed, notch corners or edges for obstructions like wiring.
Precise cuts prevent thermal bridging and air leaks, optimizing energy efficiency. Always wear protective gear when handling fibreglass or spray foam to avoid irritation.
For best results, ensure your workspace is well-maintained and clean by using efficient dust collection methods to minimize airborne particles during cutting.
Securing Insulation to Prevent Sagging and Gaps

Although insulation materials like fibreglass batts fit snugly between joists, you’ll need to secure them properly to prevent sagging and gaps that reduce thermal performance.
Without proper support, insulation can shift, leaving cold spots and undermining energy efficiency.
To secure insulation effectively, follow these steps:
- Install wooden blocks or cleats beneath joists to create support ledges that hold insulation batts flush.
- Use construction adhesive or 2-inch 16-gauge nails to fasten insulation, ensuring it stays in place without compressing the material.
- For loose-fill or foam boards, apply appropriate mechanical fasteners or adhesive compatible with the material to prevent movement over time.
These measures maintain consistent coverage, optimize R-value, and extend your shed floor’s insulation lifespan.
Additionally, choosing the right material quality for fasteners and supports can significantly enhance the durability and performance of your insulation setup.
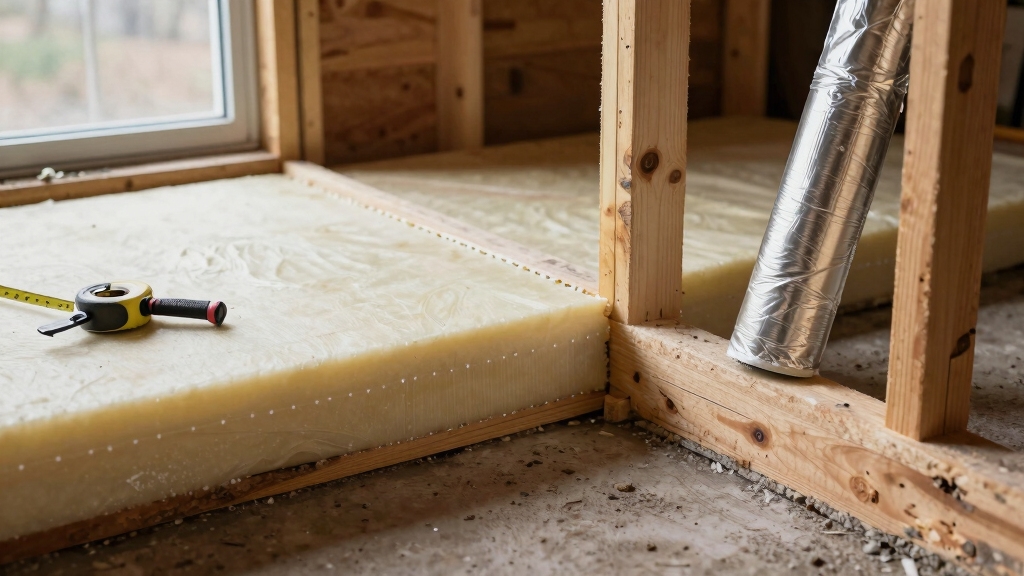
Installing a Vapour Barrier and Subfloor Over Insulation
When you’re installing a vapour barrier, it’s important to choose a durable material like polyethylene sheeting. Just make sure to overlap and seal all the edges tightly with tape or adhesive. This step is crucial to prevent any moisture from sneaking in.
Next, you’ll want to secure the barrier firmly to the joists or framing. This will help keep everything in place while you’re working on the subfloor installation.
Finally, go ahead and install a sturdy subfloor—something like 3/4-inch tongue-and-groove OSB works great. Place it directly over the insulation and vapour barrier. This will give you a solid, moisture-resistant base to work with.
For enhanced durability and precision in your construction, consider using Domino joiners to create strong, reliable joints in your subfloor framework.
Choosing Vapour Barrier Material
When installing a vapour barrier over your shed floor insulation, selecting the right material guarantees effective moisture control and durability.
You want a barrier that resists water penetration yet allows your insulation to perform efficiently.
Consider these key materials:
- Polyethylene Plastic Sheeting: A common choice, it’s affordable, easy to cut, and blocks moisture effectively. Use 6-mil or thicker for durability.
- Foil-Backed Vapor Barriers: These reflect radiant heat and provide superior moisture resistance but require careful sealing at seams.
- Breathable Membranes: Allow some moisture vapor to escape, preventing condensation buildup under the floor, ideal for humid climates.
Choose a material compatible with your insulation type and local climate to maximize protection and lifespan. Applying a protective barrier against moisture can help maintain the integrity and longevity of your shed floor.
Securing and Sealing Edges
Once you’ve laid the vapour barrier over the insulation, you need to secure its edges firmly to prevent moisture intrusion and air leaks. Use a staple gun or adhesive to fasten the barrier up the walls, overlapping seams by at least 6 inches.
Seal all joints with vapor-barrier tape to maintain continuity. Before installing the subfloor, confirm the barrier is taut and damage-free. For added protection, extend the barrier slightly beyond the joists.
Proper site preparation is essential to ensure the barrier installation is effective and long-lasting.
| Step | Tool Needed | Purpose |
|---|---|---|
| Secure edges | Staple gun | Fasten barrier to framing |
| Overlap seams | Vapor-barrier tape | Seal joints, prevent leaks |
| Inspect barrier | Visual check | Assure no tears or gaps |
Proper sealing guarantees effective moisture control and insulation performance.
Installing Subfloor Materials
Securing the vapour barrier tightly along the joists sets the stage for installing your subfloor materials.
Make certain the barrier extends up the walls and overlaps seams by several inches, then tape or staple to create a continuous moisture shield.
Next, install your subfloor over the insulation, choosing 3/4-inch tongue-and-groove OSB or plywood for durability and stability.
Follow these steps:
- Lay the vapour barrier flat and secure all edges to prevent moisture intrusion.
- Position subfloor panels perpendicular to joists, staggering joints for strength.
- Fasten panels with screws or nails, making certain tight seams and flush surfaces.
This method protects insulation from moisture and provides a solid, level foundation for your shed floor.
Protecting Your Shed Floor Insulation From Pests and Damage
To keep your shed floor insulation effective, you’ll need to guard it against pests and physical damage.
Install a fiberglass screen wire beneath to block rodents and insects.
Avoid moisture accumulation by using a vapour barrier and sealing seams meticulously.
Cover insulation with rigid subflooring or plywood to prevent compression and wear.
| Protection Method | Key Benefit |
|---|---|
| Fiberglass Screen Wire | Blocks rodents, insects |
| Vapour Barrier | Prevents moisture damage |
| Rigid Subflooring | Shields against compression |
| Sealing Seams | Stops air, moisture ingress |
Frequently Asked Questions
Can I Insulate a Shed Floor Without Removing the Existing Floorboards?
You can insulate a shed floor without removing the existing floorboards by installing insulation from underneath, provided you have access to the floor joists.
Measure and cut rigid foam board or batt insulation to fit snugly between joists. Secure insulation with cleats or adhesive.
Add a vapour barrier to prevent moisture buildup. This method maintains your current flooring while improving thermal efficiency effectively.
How Do I Maintain Insulation Effectiveness in a Damp Climate?
Oh sure, just ignore moisture and let your insulation turn into a soggy mess!
Instead, you’ve got to install a proper vapour barrier: plastic or foil sheets sealed tightly at seams and edges.
Use water-resistant insulation like closed-cell spray foam or rigid foam boards.
Elevate the floor to prevent ground moisture and make certain good ventilation underneath.
That way, you keep insulation dry, effective, and your shed cozy despite damp climates.
What Tools Are Essential for Insulating Shed Floors Effectively?
You’ll need a utility knife for precise insulation cuts and a tape measure to make certain accurate dimensions.
Use a staple gun or adhesive to secure insulation and vapor barriers firmly.
A saw, like a jigsaw or table saw, helps cut wooden blocks and rigid boards to size.
Heavy-duty scissors are essential for trimming breathable membranes.
These tools will streamline installation and guarantee a snug, effective fit in your shed floor insulation project.
Is Additional Ventilation Needed After Insulating the Shed Floor?
Yes, you’ll need additional ventilation after insulating the shed floor to prevent moisture buildup and mold growth.
Insulation traps heat but can also trap humidity, so installing vents or a vapour barrier with proper sealing is vital.
Guarantee airflow beneath the shed by adding foundation vents or soffit vents, especially if you use materials like foam board that absorb water.
Proper ventilation maintains a dry, healthy environment and prolongs insulation effectiveness.
How Often Should Shed Floor Insulation Be Inspected or Replaced?
You probably want to inspect your shed floor insulation at least once a year.
Unless you enjoy the thrill of surprise cold drafts or soggy floors, check for moisture, compression, or pests that can compromise performance.
Replace it every 5-10 years or sooner if damaged. Regular checks prevent energy loss and structural issues, ensuring your insulation keeps doing its job efficiently.
This helps avoid turning your cozy shed into a chilly, damp mess.
Warm, Dry, and Built to Last: Finish Your Shed the Right Way
Insulating your shed floor can cut heat loss by up to 25%. This makes your space more energy-efficient and comfortable.
By measuring accurately, choosing the right insulation, and securing it properly, you’ll prevent drafts and moisture issues that damage your shed.
Don’t forget a vapour barrier and pest protection to extend insulation life. Taking these practical steps guarantees your shed stays warm, dry, and durable year-round with minimal maintenance.