How to Drill a Straight Hole Without a Drill Press: DIY Guide
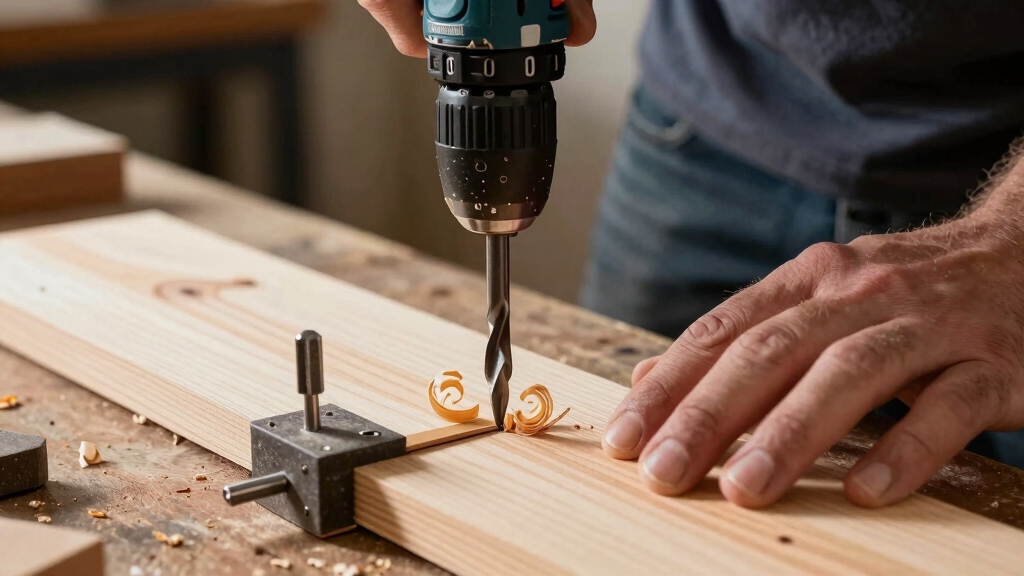
To drill a straight hole without a drill press, use a sturdy drill guide clamped firmly to your workpiece. Match the guide hole to your drill bit for a snug fit and test on scrap for accuracy.
Use a square to check alignment and adjust clamps as needed. Consider commercial guides with metal bushings or make a simple hardwood or metal guide for precision.
Keep your drill steady, use depth stops, and verify perpendicularity for best results. More tips can improve your hole accuracy and consistency.
Key Takeaways
- Use a commercial or homemade drill guide clamped securely to ensure perpendicular drill alignment and prevent bit wandering.
- Employ a pilot hole guide with a precise small-diameter hole to maintain accurate drill bit positioning.
- Verify drill guide alignment with a speed square, combination square, or by sighting down the hole before drilling.
- Maintain steady, firm pressure and consistent drilling angle while using a depth stop or marked bit to control hole depth.
- Test the setup on scrap material and adjust the guide or clamps until holes are straight and precise.
How to Choose the Right Drill Guide for Straight Holes?

Start by considering the type of project and materials you’ll work with when choosing a drill guide for straight holes.
If you need precision on wood or resin, a homemade guide with a 2mm pilot hole offers accuracy without extra tools.
For precise wood or resin work, a homemade guide with a 2mm pilot hole ensures accuracy without extra tools.
For thicker workpieces, plywood guides provide sturdy, perpendicular support, especially when clamped firmly to your benchtop.
If you want portability and flexibility, commercial guides like the Milescraft DrillBlock or metal guide bushings give reliable alignment and adjustable angles.
Metal or steel guides suit heavy-duty drilling, offering durability and easy fabrication with basic tools.
Always pick a guide that matches your drill bit size and the hole angle you need.
Secure the guide properly for consistent, straight drilling every time.
Regularly checking and maintaining your tools, including proper safety measures during use, ensures optimal performance and longevity.
Building Simple Pilot Hole Guides at Home
When you build simple pilot hole guides at home, you can greatly improve the accuracy of your drilling without investing in expensive equipment.
Start by cutting a small block of hardwood or ABS resin that fits comfortably in your hand. Drill a precise pilot hole, around 2mm (3/32″), through the center using a drill bit that matches your intended larger bit’s diameter.
This pilot hole will guide the larger bit, keeping it straight during drilling. Use sandpaper to fine-tune the hole’s fit if it’s too tight. Clamp the guide securely to your workpiece to prevent movement.
This straightforward method guarantees consistent perpendicular holes, even if you don’t have a drill press or commercial guides. It’s a practical, low-cost way to boost your drilling precision at home. Always remember to use a depth stop or mark your drill bit to ensure you do not drill too deep.
How to Use Plywood and Wood Blocks to Drill Straight Holes?
When you’re getting ready to drill straight holes, it’s best to start with plywood that’s at least 3/4″ thick. This thickness ensures that your guides are sturdy enough to keep your drill steady. Trust me, you don’t want any wobbling while you’re working!
Next, make sure to clamp that plywood or any wood blocks securely to your work surface. You really want to prevent any movement during the drilling process—it’s crucial for accuracy.
Now, let’s talk about the dado method. This technique is fantastic for creating perfectly square guide holes. You’ll cut and glue blocks with grooves that are the same size as your drill bits. This way, you’ll have precise alignment every time. It’s a game-changer for getting those holes just right!
For best results, ensure your workspace is clear of obstructions to prioritize safety and efficiency while drilling.
Selecting Proper Plywood Thickness
Cutting plywood to the right thickness is essential for creating effective drill guides that keep your holes perfectly perpendicular. Aim for plywood that’s at least 3/4″ thick to provide enough stability and support during drilling.
Thinner plywood tends to flex or warp, compromising hole accuracy. A thick plywood block resists twisting, allowing you to clamp it securely without distortion. If you can, use a hardwood plywood for added rigidity.
Also, consider the total thickness when stacking blocks or adding wood blocks with dado cuts for precise bit guidance. Keep your edges straight and smooth to make certain the guide sits flush against your workpiece, preventing any tilt.
Proper thickness combined with a well-cut guide guarantees consistent, straight holes without a drill press.
Clamping Guides Securely
Using plywood or wood blocks of the right thickness sets a solid foundation, but securing your guide firmly is what keeps your drill bit perfectly aligned.
Start by positioning the guide exactly where you want the hole. Use strong clamps to fasten the guide to your workpiece or benchtop, guaranteeing it won’t shift during drilling.
Check that the clamps don’t block your drill’s path or interfere with the bit. If possible, clamp both the guide and the workpiece to a stable surface, which prevents any movement.
Double-check the guide’s perpendicularity before drilling. This secure setup minimizes wobble and guarantees the hole stays straight.
For added stability, you can also consider using ratchet straps or ropes to fasten components securely during your setup process.
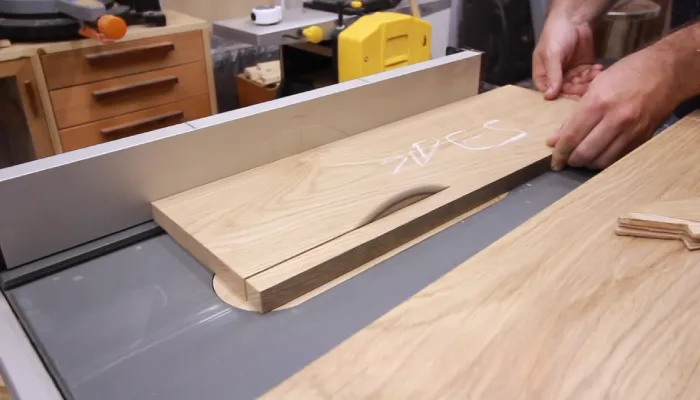
Using Dado Method Blocks
When you need perfectly perpendicular holes, dado method blocks offer a reliable solution by guiding your drill bit with precision.
Start by cutting two blocks of plywood or hardwood thick enough to hold a snug dado groove matching your drill bit’s diameter.
Glue the dado groove on one block, then clamp both blocks firmly to your workpiece, aligning the groove exactly where you want the hole.
The drill bit fits into the dado, preventing lateral movement and ensuring a straight plunge.
This method works well on assembled surfaces or benchtops where a drill press isn’t an option.
Make sure your blocks are dead straight and securely clamped to avoid slipping.
Using dado method blocks gives you a simple, repeatable way to drill clean, square holes without expensive jigs.
For best results, ensure your setup is stable and properly aligned, as accurate alignment is essential for precision drilling.
Making Simple Metal or Steel Drill Guides for Accuracy
Sure thing! Here’s a more conversational version of your text:
If you want to create a simple metal drill guide, you’ll need a few basic tools and materials. Start by gathering some steel square tubing, a hacksaw, and a speed square. These will help you make accurate cuts and ensure everything lines up just right.
Once you have your materials, follow some straightforward steps to fabricate your guide. It’s all about creating something sturdy that clamps securely to your workpiece.
As you’re working, use that speed square to keep everything perfectly perpendicular. Trust me, it’ll make a big difference during the drilling process!
Using a speed square is essential to maintaining accuracy and ensuring your drill holes remain straight without the need for a drill press.
Materials and Tools Needed
Although making a simple metal or steel drill guide requires only a few basic materials and tools, gathering the right items is essential for accuracy and ease of construction.
You’ll need a length of steel square tubing, a hacksaw to cut it to size, and a speed or try square to guarantee perpendicular alignment during fabrication.
Clamps or a homemade vise will hold both your guide and workpiece securely.
A measuring tape or ruler helps with precise dimensions.
If needed, 120-grit sandpaper can fine-tune the fit.
Basic hand tools like a drill with appropriate drill bits will complete the setup.
Having these materials ready lets you build a dependable drill guide quickly, improving your hole drilling accuracy without complex machinery.
Ensuring the setup is level with a carpenters level further enhances drilling precision.
Fabrication Process Steps
Starting with a clean, measured piece of steel square tubing guarantees your drill guide will align accurately.
First, cut the tubing to your desired length using a hacksaw, assuring a straight, clean edge.
Next, use a speed square to mark the drilling line precisely on the tubing’s surface.
Secure the tubing firmly in a clamp or homemade vise to prevent movement during drilling.
Drill a pilot hole slightly larger than your drill bit to assure smooth guidance.
Test the fit by inserting the bit; adjust with 120-grit sandpaper if it’s too tight.
Finally, remove any burrs and clean the guide.
Proper cleaning and maintenance of your tools is essential for long-lasting performance and accuracy, as detailed in cleaning and maintenance tips.
Ensuring Perpendicular Alignment
When you want to achieve perfectly perpendicular holes with your metal or steel drill guides, precise alignment is essential.
Start by cutting steel square tubing to fit your drill bit snugly. Use a speed square or try square to guarantee the guide’s opening is exactly 90 degrees to the base.
Clamp the guide securely to your workpiece or benchtop to prevent any movement during drilling. Double-check alignment by marking the hole location with a combination square before you drill.
If needed, adjust the guide slightly and retighten clamps. Maintaining firm, steady pressure and a consistent drilling angle will help you bore straight holes without a drill press.
This simple setup takes about 15 minutes and provides reliable, accurate guidance for your drilling tasks. Using a sturdy cast aluminum work surface can further enhance stability and precision during drilling.
Commercial Drill Guides for Consistent Straight Holes
Commercial drill guides like the Milescraft DrillBlock help you drill straight holes with minimal setup and maximum reliability.
These handheld guides keep your drill bit perfectly aligned, reducing wobble and ensuring consistent perpendicular holes every time.
Many commercial guides come with precision metal bushings that resist wear and maintain accuracy over extended use.
You simply position the guide on your workpiece, lock it in place, and drill through the metal bushing.
Some models also offer adjustable angles for versatile drilling beyond just 90 degrees.
Rubber feet and handles improve stability, making your work safer and more controlled.
Using a commercial drill guide saves you time and effort, especially when you need repeatable, precise holes without investing in a drill press.
For even greater precision, pairing these guides with self-centering drill bits can further reduce bit walking and improve hole accuracy.
Tips for Using Drill Guides to Drill Straight Holes Without a Drill Press
Clamp your drill guide securely to your workpiece or benchtop to prevent any movement while drilling.
Guarantee the guide’s hole matches your drill bit size for a snug fit, which keeps the bit aligned.
Use a pilot hole guide if you’re working with larger bits to maintain precision.
Keep your drill steady and apply consistent pressure to avoid wandering.
Check that your drill is perpendicular to the guide for a straight hole.
If your guide feels tight, slightly sand it or use a 2.1mm bit to ease resin guides.
Avoid forcing the drill; let the guide direct the bit smoothly.
Finally, make sure your work surface is stable and well-supported for the best results when drilling straight holes without a drill press.
Testing and Adjusting Your Drill Guide for Precision
After securing your drill guide and confirming it fits your drill bit snugly, you’ll want to test its accuracy before starting your project.
Clamp the guide firmly to a scrap piece of wood and drill a pilot hole.
Check if the hole is straight by measuring its angle with a square or by sighting down its length.
If the hole isn’t perpendicular, adjust the guide by sanding it slightly with 120-grit sandpaper or loosening the fit with a 2.1mm bit if it’s resin-based.
Repeat drilling and measuring until the hole aligns perfectly.
Make sure the guide remains stable during tests and tighten clamps as needed.
This process guarantees your drill guide delivers precise, straight holes every time you work.
Frequently Asked Questions
What Drill Bit Types Work Best for Drilling Straight Holes?
Drill bits that cut like a sharp arrow piercing the sky work best for straight holes.
You’ll want brad-point bits or Forstner bits; they keep your hole true with precise centering and clean edges.
Twist bits can work but tend to wander, so use them cautiously.
Carbide-tipped bits hold their edge longer, giving you consistent results.
Always pick sharp, high-quality bits to help you drill straight every time.
How Do I Prevent Wood Splitting When Drilling Straight Holes?
You can prevent wood splitting by drilling a pilot hole first, which reduces stress on the wood fibers.
Use a sharp drill bit and clamp the wood securely to avoid movement.
Drill slowly and steadily, avoiding excessive pressure.
If you’re near the edge, back the drill bit out halfway to clear debris, then continue.
Also, use masking tape over the drilling spot to minimize splintering on the surface.
Can Cordless Drills Maintain Straight Drilling Accuracy Without Guides?
Cordless drills alone can’t guarantee straight drilling accuracy without guides. Your hand steadiness and consistent pressure help, but slight deviations are common.
To improve accuracy, clamp a homemade or commercial drill guide, use a pilot hole, or rely on built-in levels if available. Without these, you risk angled holes, especially on harder materials.
For precise, perpendicular holes, pairing your cordless drill with a guide is your best bet.
What Safety Gear Is Recommended When Drilling Without a Press?
You should always wear safety glasses to protect your eyes from flying debris and dust when drilling without a press.
Ear protection helps reduce noise exposure, especially with power drills.
Use gloves to protect your hands, but make certain they fit well to avoid getting caught in the drill.
A dust mask is recommended if you’re working with materials that create fine particles.
Secure your workpiece firmly to prevent movement and accidents.
How Do I Fix a Drill Bit That Wanders Off-Center?
If your drill bit decides to take a scenic route, gently start with a smaller pilot hole to guide it straight.
Clamp a plywood or metal guide firmly to your workpiece for extra discipline.
You can also create a homemade drill guide or use a commercial one to keep the bit on track.
Remember to mark your spot clearly and apply steady pressure. This way, your bit won’t wander off-center again.
Work Smarter, Drill Straighter, Build Better
Picture your drill slicing perfectly straight through wood, guided by a simple jig you built yourself.
With the right guide, whether plywood blocks or a sturdy metal frame, you’ll skip frustrating crooked holes and wasted material. Just set up carefully, test your guide, and steady your hand.
Without a drill press, you can still achieve professional results by combining patience with these straightforward techniques. Drill straight, work smart, and watch your projects come together flawlessly.