How to Cut Hardie Backer Board? Easy Ways You Can Master
To cut Hardie Backer board, first verify the board is clean, dry, and supported on a flat surface. For straight cuts, score deeply with a carbide-tipped knife along a straightedge, then snap the board upward.
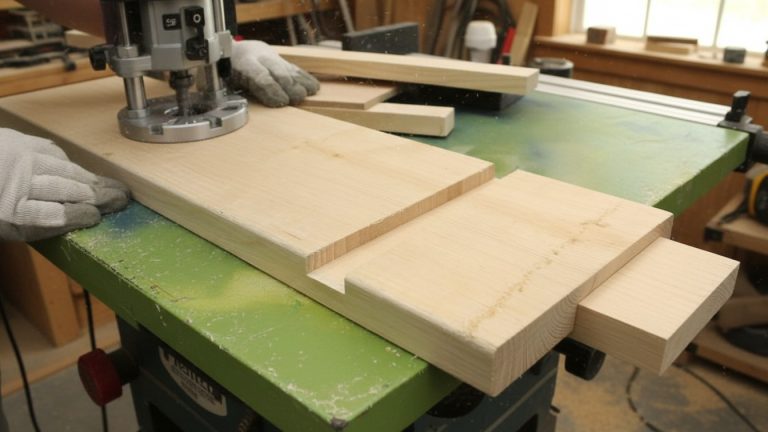
Use a jigsaw with a carbide-grit blade or an angle grinder with a diamond wheel for curves. Always wear a NIOSH-approved respirator and use dust control measures to limit silica exposure.
Choosing the right tools and techniques ensures precision and safety—explore advanced methods to enhance your cutting accuracy.
Key Takeaways
- Score the Hardie Backer board deeply with a carbide-tipped utility knife along a straightedge, then snap it cleanly for straight cuts.
- Use a jigsaw with a carbide-grit blade or an angle grinder with a diamond blade for curved or circular cuts.
- Measure twice carefully using a calibrated tape measure and mark with a sharp knife to ensure accuracy before cutting.
- Wear NIOSH-approved respirators, safety goggles, and use dust extraction systems to manage hazardous silica dust safely.
- Support the board on a flat, stable surface to prevent cracking and use proper PPE to protect against dust and debris.
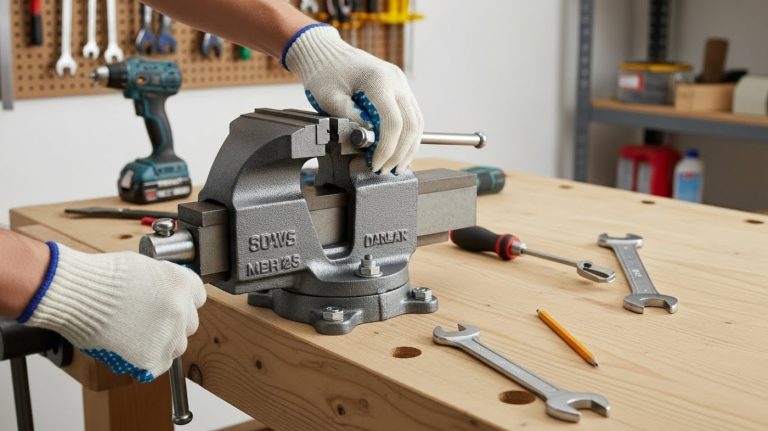
Tools Required for Cutting Hardie Backer Board
When cutting Hardie Backer Board, selecting the right tools is essential to achieve clean, efficient cuts while managing dust and safety.
For power tools, use an angle grinder with a masonry or diamond cutting wheel for fast, straight, and curved cuts. A circular saw fitted with carbide-tipped or diamond ceramic blades works best for long, straight cuts.
For tight curves, a jigsaw with a coarse diamond-grit blade offers precision. Choosing the correct blade type and ensuring proper blade maintenance can significantly reduce friction and improve cutting performance.
Angle grinders, circular saws, and jigsaws with masonry or diamond blades provide precise cuts on Hardie Backer Board.
Hand tools like a fine-toothed handsaw provide superior control for complex shapes, while the score-and-snap method suits straight cuts with minimal dust. Hardie Backer Board is composed mainly of cement and fibers, making it designed for moisture-prone areas.
Always choose blades designed for masonry or diamond cutting. Remember, power tools generate significant dust, so proper ventilation, PPE, and dust extraction are mandatory to protect your health and maintain cutting quality.
Preparing the Hardie Backer Board for Cutting
Before cutting, make certain the Hardie Backer Board surface is clean and flat to achieve accurate results. Using a saw with a carbide-tipped blade can help maintain clean cuts on the board.
Use a straightedge or speed square to mark precise cut lines with a fine-tip pencil, confirming all measurements twice. Proper marking and measurement are critical to prevent errors and ensure a clean, professional cut.
For best results, score the board by applying pressure with a sharp utility knife along the straightedge before making the cut.
Surface Preparation Tips
Although prepping the Hardie Backer Board may seem straightforward, ensuring a structurally sound and stable surface is crucial to achieving clean, accurate cuts.
First, verify the installation surface is solid, removing any damaged materials. Lay the board flat on a stable platform to prevent bending or cracking. Ensure the board is dry and free of dust or grease for precise marking and cutting.
Using the right cutting tools can significantly enhance the quality of the cuts. Check panels for cracks or defects before proceeding. It is also important to use the board on a flat surface prior to cutting to maintain stability and ease of handling.
| Preparation Aspect | Key Action |
|---|---|
| Surface Integrity | Remove damaged materials |
| Board Condition | Inspect for cracks or defects |
| Workspace Setup | Use flat, stable cutting surface |
| Cleanliness & Dryness | Remove dust, keep board dry |
Accurate Measurement Techniques
Ensuring a stable and clean Hardie Backer Board surface sets the stage for precise measurements that directly impact the quality of your cuts.
Start by using a calibrated, high-quality tape measure, extending it fully and keeping it taut to avoid inaccuracies. Measure twice at multiple points, recording dimensions clearly.
Position the board against the installation area, checking edges and corners for gaps; adjust measurements accordingly. Use a level to verify board orientation during fit verification.
Leverage the Hardie Backer’s built-in grid system to align measuring tools, ensuring straight, level lines and consistent dimensions. This visual guide aids in planning cuts around obstacles and maintaining uniformity.
Selecting tools with appropriate cutting capacity helps accommodate the material’s thickness and density for accurate cuts. Always wear respirator mask and safety gear when preparing to cut to protect against harmful silica dust.
Accurate measurement techniques minimize errors and ensure your cuts fit perfectly, streamlining installation and enhancing durability.
Marking Guidelines Overview
When preparing to cut Hardie Backer Board, marking the board accurately is essential for clean, precise cuts that fit your project requirements.
Use a sharp utility or carbide-tipped knife alongside a straightedge to ensure straight, visible marks. Score firmly multiple times to deepen the score line, facilitating a clean snap.
Utilize the board’s grid lines when available for guided scoring. Always wear safety goggles and gloves, and work on a flat, stable surface. Environmental factors such as temperature and humidity can affect the board’s behavior during cutting, so consider your workspace conditions.
Avoid dull blades and inadequate leverage to prevent uneven breaks or poor scoring. Using a utility knife for scoring and snapping is one of the easiest and fastest methods and produces no dust during the cutting process.
| Aspect | Best Practice |
|---|---|
| Tools | Sharp utility/carbide knife |
| Guide | Straightedge and grid lines |
| Marking | Clear, visible pencil marks |
| Scoring | Firm pressure, multiple scores |
| Safety | Goggles, gloves, stable surface |
Scoring and Snapping Method for Straight Cuts
To achieve clean, straight cuts on Hardie Backer Board, you’ll need to master the scoring technique using a sharp utility knife guided by a straightedge. After scoring deeply along the cut line, the snapping process requires precise support and controlled pressure to break the board cleanly.
Keep in mind this method is effective only on boards 12mm thick or less for ideal results. Using a spirit level underneath the board helps protect the surface and ensures a straight, controlled cut.
For enhanced precision and control during cutting, consider using tools with a rear handle design to improve stability and sightline.
Scoring Technique Tips
Although cutting HardieBacker cement board may seem straightforward, mastering the scoring and snapping technique requires precise tool selection and careful execution. Use a carbide-tipped scoring knife for clean, deep scores; avoid glass cutters that dull quickly.
Secure a straight edge firmly along your marked line to ensure accuracy. Apply steady, firm pressure with the scoring tool, repeating 3–4 passes to deepen the score, especially on thicker boards.
Maintain a consistent angle and score in one continuous motion for uniform depth. Using a stable work surface is crucial to maintain control and achieve clean cuts.
Follow these tips:
- Measure and mark clearly on a stable, flat surface.
- Hold the straight edge firmly to prevent slipping.
- Score multiple times for deeper cuts without damaging the edge.
- Inspect the score line for uniformity before snapping.
Using common tools such as a spirit level as a guide can simplify the scoring process and help achieve a straight cut.
Snapping Process Steps
Once you’ve scored the HardieBacker board deeply and evenly along the marked line, you’re ready to perform the snapping step. Position the board so the score line aligns with a raised edge or table corner. Kneel or apply firm downward pressure on both sides of the score line.
Then, snap the board upward with controlled force, ensuring the break follows the groove precisely. Always snap upward to avoid uneven breaks.
For thicker boards, deepen the score or consider saw cutting. When using power tools for cutting, consider whether a corded or cordless option best suits your project needs.
| Step | Action |
|---|---|
| 1. Position | Align score line with edge or surface |
| 2. Stabilize | Kneel or press down on both sides |
| 3. Snap | Apply upward force to break along score |
| 4. Inspect | Check for clean break, avoid cracks |
| 5. Finish | Trim mesh fibers on back with utility knife |
Best Board Thickness
Selecting the right HardieBacker board thickness considerably impacts the ease and quality of scoring and snapping straight cuts. Thinner boards, such as 6 mm, are easier to score deeply and snap cleanly, making them ideal for quick, precise cuts and minimal transition in flooring.
When working with these boards, maintaining a stable work area helps ensure accuracy and safety during cutting. Thicker 12 mm boards offer greater strength but require more effort during snapping due to their density.
Consider these factors when choosing thickness:
- Application Load: Use 12 mm for high-traffic or heavy-load areas; 6 mm suffices for lighter use.
- Cutting Precision: Thinner boards score more easily, enhancing straight cut accuracy.
- Installation Flexibility: Both thicknesses resist moisture, making them suitable for floors and walls.
- Cost Efficiency: Thinner boards reduce material costs and cutting effort.
Additionally, the 6mm board weighs approximately 9kg and covers 0.96m², offering a manageable size and weight for handling during installation (weight and coverage). Choose thickness to balance durability and ease of scoring and snapping for ideal installation results.
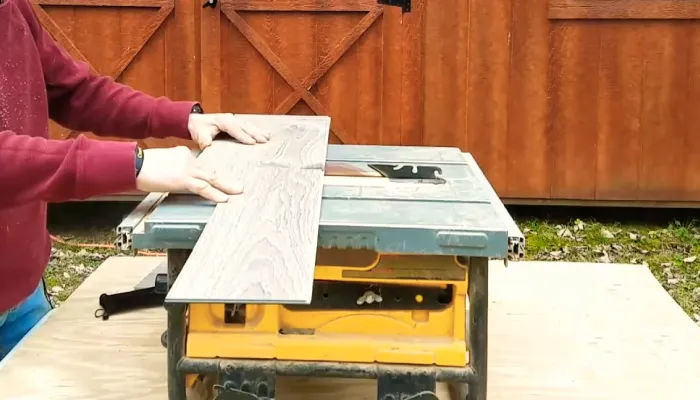
Using Power Tools for Straight and Complex Cuts
When you need to make both straight and complex cuts in Hardie Backer Board, choosing the right power tool and blade is essential for efficiency and accuracy.
Use a circular saw with a carbide-tipped blade for long, straight cuts—this setup delivers clean, precise edges and speeds work on large sheets.
Power shears designed specifically for Hardibacker work well for straight cuts and create little to no dust. Applying proper maintenance to your cutting tools ensures consistent performance and longevity.
For detailed or some intricate cuts, a jigsaw equipped with a coarse diamond grit blade offers control without sacrificing cut quality. Angle grinders with diamond cutting wheels cut rapidly but lack precision, so reserve them for rough trimming.
Always mark cut lines clearly and secure the board on a stable surface before cutting. Maintain a steady feed rate and support both sides of the cut line to prevent splintering.
Cutting Curves and Circular Shapes
When cutting curves and circular shapes in Hardie Backer board, your best option is a jigsaw fitted with a carbide-grit blade for precision and control.
Scoring techniques won’t work for curves, so rely on proper tool selection and steady cutting methods to maintain accuracy.
Always wear eye protection and a respirator to safeguard against silica dust during the cutting process. Using a jigsaw allows for smoother cuts and is ideal for connecting lines and removing center sections when shaping the board, especially when cutting curves and holes.
Best Tools for Curves
Although cutting curves and circular shapes in Hardie backer board presents challenges, choosing the right tool guarantees accuracy and clean edges. You’ll want to select based on curve complexity, dust control, and finish quality.
- Jigsaw with carbide-grit blade: Best for tight curves and interior cutouts; offers precision and low dust. Always clamp the board securely, use sharp blades, and wear appropriate PPE for safe, clean cutting.
- Angle grinder with diamond blade: Ideal for rough curves and thick boards; expect more dust and rough edges. Remember to wear protective gear including gloves, safety goggles, and a sanding respirator when using power tools.
- Wet tile saw: Provides smooth, dust-minimized cuts for small, detailed curves; limited by saw size.
- Hole saw and rotary tool: Perfect for small circular holes and delicate cuts; less effective on large curves.
Scoring Techniques for Shapes
Since cutting curves and circular shapes in Hardie backer board requires controlled precision, scoring techniques become essential for achieving clean, accurate outlines.
Use a carbide-tipped scoring tool or sharp utility knife to make multiple passes along your marked curve, gradually deepening the score without cutting through. This method is especially useful because it is inexpensive and simple.
For thinner boards, gently bending at the score line can snap small curved sections. Thicker boards demand finishing cuts with a jigsaw fitted with a carbide or diamond blade to refine curves and circular holes. Maintain consistent pressure and follow a precise template to ensure alignment.
Avoid crossing score lines to prevent unintended cracking. After cutting, smooth edges with sanding or grinding to ensure a proper fit. This incremental scoring and finishing approach balances control with accuracy on complex shapes.
Safety Tips for Cutting
Proper safety measures are critical to protect yourself from the respirable silica dust and physical hazards generated while cutting curves and circular shapes in HardieBacker board.
Always equip yourself with a NIOSH-approved N-95 respirator, safety goggles, hearing protection, and gloves to shield your respiratory system, eyes, ears, and hands.
It is important to understand that the OSHA Permissible Exposure Limit (PEL) for respirable crystalline silica is 50 μg/m³ averaged over an 8-hour workday.
Perform cutting outdoors or use dust collection systems to minimize airborne particles. Select carbide-tipped jigsaw blades designed for fiber cement to enhance precision and reduce dust.
- Wear washable coveralls to prevent skin exposure and clothing contamination.
- Position your cutting station so wind carries dust away from you.
- Inspect and maintain all dust control equipment before starting.
- Establish barriers to keep unprotected personnel from the dust zone.
Manual Shears and Their Best Applications
When working with Hardie Backer Board, manual shears offer a reliable solution for making clean, precise cuts without generating excessive dust or noise.
Lever-action shears like the Pactool SS211 handle up to 12” wide boards, providing straight cuts with adjustable fences. Guillotine-style shears such as the Malco FCC7 deliver exact, tear-free edges, while angle-cutting shears enable accurate miters and bevels around windows and corners.
Snips excel at detailed arc and trim cuts in thinner fiber cement planks. Manual shears minimize airborne dust, operate quietly, and require no electricity, making them ideal for indoor or remote jobsites.
However, they’re limited to boards ½ inch thick or less and aren’t suited for curved or complex cuts. They also provide minimal dust compared to power tools, reducing health hazards associated with silica dust. Use them primarily for straight cuts, precise openings, and final adjustments after power tool work.
Safety Precautions When Cutting Hardie Backer Board
Although cutting Hardie Backer Board demands specific tools and techniques, prioritizing safety is essential to protect yourself and others from silica dust and physical hazards.
You must adhere strictly to OSHA guidelines and manufacturer instructions to guarantee compliance and operational safety.
Follow these key precautions:
- Use handheld power saws equipped with 99% efficient dust collection systems; maintain equipment rigorously to minimize dust.
- Position your cutting station in a well-ventilated area, isolate it with barriers, and keep it clean to control dust dispersion.
- Always wear NIOSH-approved respirators, safety glasses, hearing protection, and washable coveralls to safeguard against airborne particles and noise.
- For indoor cutting, avoid high-speed tools; opt for score-and-snap methods and wet dust suppression to reduce silica exposure effectively.
Techniques for Achieving Clean and Accurate Cuts
To achieve clean and accurate cuts in Hardie Backer Board, you must employ the right tools and techniques tailored to the cut type.
For straight cuts, use carbide-tipped scoring knives along a straight edge, scoring firmly multiple times before snapping the board with knee pressure or a tool.
Circular cuts demand more skill; a wet saw provides the smoothest edges, while routers and jigsaws are alternatives. Always smooth edges post-cutting with sandpaper or a rasp. For HardieBacker® boards, the use of the HardieBackerScore-and-snap knife is recommended to ensure clean cuts and ease of handling.
| Cut Type | Recommended Tools | Key Technique |
|---|---|---|
| Straight | Carbide-tipped knife, power shears | Score multiple lines, snap cleanly |
| Circular | Wet saw, router, jigsaw | Use wet saw for precision |
| Edge Finishing | Sandpaper, rasp | Smooth rough edges thoroughly |
| Efficiency | Power shears, utility knife | Match tool to project complexity |
Managing Dust and Debris During and After Cutting
Effective dust and debris management during and after cutting Hardie Backer Board demands the use of specialized equipment and rigorous work practices.
You must use saws with enclosed blades and attach dust collection ports connected to vacuum systems rated at 80 CFM or higher. Maintain these vacuums with 99% efficient filters and clear hoses to ensure maximum dust capture.
Use enclosed blade saws with 80 CFM+ vacuum systems and 99% efficient filters for effective Hardie Backer Board dust control.
Always wear appropriate respirators based on your environment and cutting method, ensuring proper fit and training.
After cutting, clean surfaces with HEPA-filtered vacuums—never dry sweep or use compressed air. Dispose of dust-containing debris according to regulations.
Key steps include:
- Employ dust collection shrouds around blades
- Run vacuum systems continuously during cutting
- Conduct outdoor cutting when feasible
- Perform immediate post-cut cleanup using HEPA vacuums
Tips for Cutting Different Thicknesses of Hardie Backer Board
When cutting Hardie Backer Board, you must choose your technique based on the board’s thickness. For 12mm boards, use the score and snap method: make multiple deep score lines at a slight angle with a utility knife, then snap the board cleanly using a straight edge and hand or hammer pressure.
Thicker boards require power saws with carbide-tipped or diamond blades. Use steady, moderate speeds and multiple shallow passes to prevent chipping. Using a circular saw equipped with a cement cutting blade designed specifically for Hardieboard is highly recommended for best results.
Circular saws excel at straight cuts but generate dust, while angle grinders enable precise curves. Jigsaws offer finer detail cuts with less dust.
Always mark cuts clearly, protect surfaces below, and wear appropriate protective gear. Selecting the right method guarantees clean cuts, preserves material integrity, and optimizes efficiency.
Frequently Asked Questions
Can Hardie Backer Board Be Cut Underwater to Reduce Dust?
You shouldn’t cut Hardie Backer Board underwater to reduce dust. This practice isn’t standard and can cause water damage to the board, compromising its integrity.
Plus, it poses safety risks like electrical shock and poor visibility. Instead, control dust by using a wet saw or power tools with dust-collection attachments.
Always follow safety guidelines, wear protective gear, and keep the work area well-ventilated to minimize dust exposure effectively and safely.
What Is the Best Way to Dispose of Hardie Backer Board Scraps?
Did you know fiber cement scraps can be shredded into particles as small as 20 mm for recycling? To dispose of Hardie Backer board scraps properly, you should collect them separately, avoid landfill dumping, and use facilities equipped for fiber cement recycling.
Always control dust by sealing scraps in containers and wearing protective gear. This approach minimizes health risks from silica dust and guarantees compliance with environmental regulations.
How Does Humidity Affect Cutting and Handling Hardie Backer Board?
Humidity doesn’t change Hardie Backer Board’s hardness or cutting properties, but you should avoid cutting in damp areas to keep dust from settling and maintain clean breaks.
You’ll want to store boards flat and dry to prevent surface chalking or powdering that can weaken edges. When handling in humid conditions, use gloves for better grip and protect edges from chipping. Always work in well-ventilated spaces and wear a dust mask to guarantee safety.
Are There Any Eco-Friendly Alternatives to Hardie Backer Board?
Imagine a builder choosing Magnesium Oxide (MgO) boards for a sustainable home project. You’ll find MgO boards lightweight, fire-resistant, and mold-resistant, making them a great eco-friendly alternative to Hardie Backer.
They’re recyclable and have a lower environmental impact due to reduced transportation emissions. While costlier and less available, MgO boards offer durability and sustainability, helping you balance performance with environmental responsibility in your construction choices.
Can Hardie Backer Board Be Cut With Standard Woodworking Tools?
You can cut Hardie Backer board with standard woodworking tools, but only if you use specialized carbide-tipped or diamond-grit blades designed for cement board. Plain wood blades dull quickly and risk overheating.
For straight cuts, choose a carbide-tipped circular saw blade with few teeth. Jigsaws require carbide or diamond blades for curves, and hole saws must be carbide-grit. Always prioritize safety gear and dust control when working with these materials.
Cut Hardie Backer Board Like a Pro
Cutting Hardie Backer Board might seem like taming a wild beast, but with the right tools and techniques, you’ll slice through it as cleanly as a hot knife through butter.
Master scoring, snapping, or power cutting, and you’ll achieve razor-sharp precision every time. Don’t underestimate safety and dust control—they’re your armor in this battle.
Follow these expert steps, and cutting Hardie Backer Board will feel less like a chore and more like a surgical strike.