
How to Clean a Bandsaw Blade: 7 Steps to Take
Cleaning your bandsaw blade is an essential task that ensures optimal performance and extends the lifespan of your cutting tool. Neglecting this crucial task might result in sawdust accumulation, corrosion, and, ultimately, a dull blade that jeopardizes the efficiency and safety of your woodworking.
Professional woodworkers follow a series of systematic steps that I have found in my research. Based on the recommended procedures, cleaning involves carefully detaching the blade from the bandsaw to ensure easy access and avoid accidental injuries.
After removing the blade, the process continues using a nylon or brass brush to address residue buildup. I will share with you all the detailed steps that I have collected from my research that you can follow to clean your bandsaw blade effectively.
How to Clean a Bandsaw Blade: Step-By-Step Guide

To effectively clean a bandsaw blade, you need to follow the step-by-step guide that I am going to provide below:
- Step 1: Detach the blade from the bandsaw
- Step 2: Remove the residue buildup from the blade
- Step 3: Immerse the blade in a cleaning solution
- Step 4: Gently scrub the blade clean
- Step 5: Thoroughly dry the bandsaw blade
- Step 6: Apply lubrication to the cleaned blade
- Step 7: Carefully reattach the blade to the bandsaw
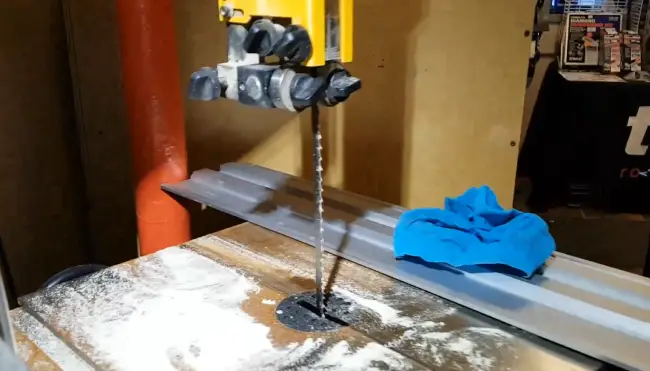
Step 1: Detach the Blade From the Bandsaw
Before you can begin the process of cleaning a bandsaw blade, the first step is to ensure that the bandsaw is turned off and unplugged for safety reasons.
Once the bandsaw is powered down, locate the blade tension knob or lever, and release the tension on the blade. To do this, turn the tension knob counterclockwise or manipulate the tension lever according to your bandsaw’s design.
After releasing the tension, carefully remove the blade from the bandsaw, taking note of its orientation. You have to handle the blade with caution to avoid any injuries. Make sure to wear protective gloves and use a blade removal tool if necessary.
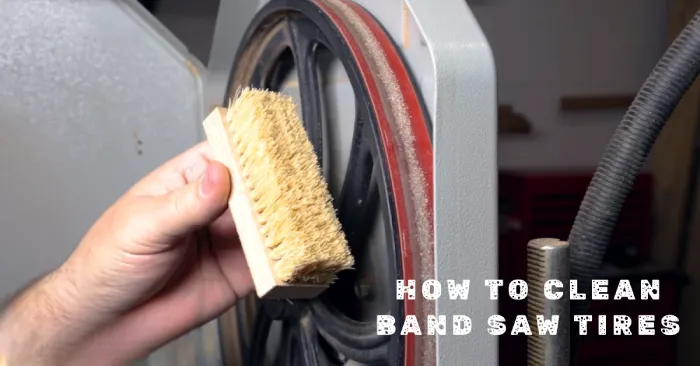
Step 2: Remove the Residue Buildup From the Blade
After detaching the bandsaw blade, you have to address any residue buildup. To remove residue buildup from the bandsaw blade, carefully scrub away sawdust, pitch, or other debris clinging to the blade using a nylon or brass brush.
Make sure to move the brush along the entire blade length, including the teeth and gullets. Take your time and pay attention to detail as you scrub away the buildup.
Step 3: Immerse the Blade in a Cleaning Solution
Once the initial residue is removed, you have to prepare a cleaning solution. While various options exist, a mixture of soapy water is often effective.
Another recommended solution that I have found is a combination of citrus degreaser and water. Mix the citrus degreaser with water according to the product instructions and immerse the bandsaw blade into this solution.
Once the residue buildup has been removed, it’s time to immerse the blade in the cleaning solution. Ensure that the entire bandsaw blade is fully submerged in the solution. In this manner, the cleaning solution will penetrate and loosen any stubborn residue that may still be present on the blade.
It’s recommended to let the blade soak in the cleaning solution for about 15-20 minutes. This will give enough time for the solution to work its magic and effectively clean the blade.
Step 4: Gently Scrub the Blade Clean

After the blade has been soaked in the cleaning solution, gently scrub away any remaining debris using a nylon or brass brush. Pay special attention to the areas between the teeth and along the edges of the blade. You have to be thorough but gentle during this process to avoid damaging the blade.
The nylon or brass brush will help remove any stubborn particles that may be stuck to the blade. Scrubbing between the teeth is crucial as this is where debris tends to accumulate the most. Also, cleaning along the edges of the blade ensures that all surfaces are residue-free.
Step 5: Thoroughly Dry the Bandsaw Blade
Once the blade is free from debris and contaminants, use a clean, dry cloth to wipe away any remaining moisture carefully. Pay special attention to the surface of the blade, ensuring that it’s completely dry.
Moisture left on the blade can lead to rusting, which can compromise the blade’s performance and longevity. After wiping the blade, allow it to air dry fully before reattaching it to the bandsaw.
Step 6: Apply Lubrication to the Cleaned Blade
Once the bandsaw blade has been thoroughly dried, the next step is to apply lubrication to ensure smooth operation and protect against corrosion.
I found that many experts recommend using mineral oil mixed with a small amount of bar oil as a lubricant for bandsaw blades. This combination provides excellent lubrication properties and helps reduce friction during operation.
To apply the lubricant, run the blade backward while evenly distributing the oil along its length. This ensures that the lubrication covers the entire blade surface and reaches all the teeth.
Proper lubrication not only helps the blade glide smoothly through the material but also prevents rust and corrosion, extending the life of the blade and maintaining its cutting performance.
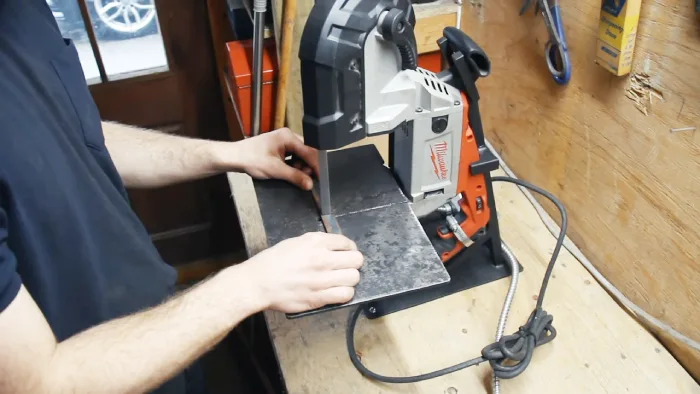
Step 7: Carefully Reattach the Blade to the Bandsaw

Once the blade is cleaned and lubricated, you have to carefully reattach it to the bandsaw. Use a wrench to carefully slide the blade back onto the bandsaw wheels, making sure it fits into the grooves.
Make sure the blade is properly seated on both the upper and lower wheels, with the teeth aligning with the tracking groove on the wheels.
Next, tension the blade by gradually tightening the tensioning knob or lever until the blade is taut. Refer to your bandsaw’s manual for recommended tension levels based on the blade size and type.
Without proper tension, your bandsaw blade may keep coming off, compromising both its effectiveness and your safety during operation.
Rotate the wheels by hand to check the blade alignment. It should stay centered without drifting off the edges. Make minor adjustments to the tracking if needed.
Lastly, ensure the blade guides are properly adjusted for support without causing friction.
Once the blade is securely attached, tensioned, and aligned, you can plug in and turn on the bandsaw to observe its movement and ensure correct tracking without any wobbling.
How often should you clean your bandsaw blade?
You need to clean your bandsaw blade after every use or at least once a week, depending on how often you use it. Regular cleaning helps prevent the buildup of sawdust, resin, and other debris that can accumulate on the blade, affecting its cutting efficiency and potentially causing overheating.
Cleaning also extends the lifespan of the blade and ensures smoother, more precise cuts. Additionally, a clean bandsaw blade reduces the risk of accidents and enhances overall safety in your woodworking or metalworking activities.
Taking a few minutes to clean your bandsaw blade regularly can go a long way in preserving its effectiveness and promoting a safer working environment.
Also, using a good-quality bandsaw blade further contributes to improved performance and longevity, making it a worthwhile investment for your woodworking endeavors.
Can vinegar effectively clean a bandsaw blade?
Vinegar can be an effective cleaning agent for your bandsaw blade. When you notice a buildup of pitch, resin, or other gunk on your blade, a simple solution of vinegar can help break down and dissolve these substances.
The acidity of vinegar works to loosen the debris, making it easier to wipe or brush off. To clean your bandsaw blade with vinegar, you can create a mixture of equal parts water and vinegar and soak a cloth or sponge in it.
Gently wipe down the blade, ensuring that the vinegar solution reaches all areas. Afterward, thoroughly clean and dry the blade to prevent any potential rusting.
This natural and cost-effective cleaning method can be a handy solution to maintain the performance and longevity of your bandsaw blade.
Also, when storing your bandsaw, ensure it is kept in a dry and well-ventilated space to safeguard its condition further and prevent any issues with rust or degradation.
Keep Your Bandsaw Blade Clean and Safe for Top Performance
Maintaining a clean bandsaw blade helps ensure optimal performance and safety in your woodworking endeavors. You can now effectively clean your bandsaw blade. Just follow the steps that I’ve shared with you.
Remove carefully accumulated residue, immerse the blade in a cleaning solution, and gently scrub away any stubborn debris. Thoroughly dry the blade to prevent rust, apply lubrication for smooth operation, and reattach it securely to the bandsaw.
Regular cleaning, whether with a vinegar solution or other recommended methods, not only extends the blade’s lifespan but also enhances precision and safety in your cutting tasks. I hope you find these steps valuable in maintaining a sharp and efficient bandsaw blade for all your woodworking projects.


what is bar oil?
Bar oil is a type of lubricant specifically designed to keep your bandsaw blade running smoothly. It’s made from virgin oil, not reclaimed oils, which means it’s a more refined, higher-quality product. Essentially, it’s a 30-weight oil with a tackifier added in. The tackifier helps the oil stick to the blade, which is crucial for keeping the blade lubricated during use.
This oil also has additives that do two important things: first, they help prevent the blade from rusting, and second, they keep sawdust from clogging up the bar tips and sprockets. So, not only does bar oil keep your blade in good shape, but it also helps your bandsaw operate more efficiently.