How to Change the Blade on a Miter Saw? A Complete Guide
To change the blade on a miter saw, first, unplug the saw and wear safety gear. Remove the spindle cover by rotating the blade guard and unscrewing it.
Engage the spindle lock, then use the appropriate tool to loosen and remove the blade. Install the new blade with teeth facing down, securing the bolt tightly.
Reattach the spindle cover and lower the guard. After checking everything, perform a test cut to guarantee everything functions properly. There’s more you can learn about this process.
Key Takeaways
- Ensure safety by unplugging the saw, wearing protective gear, and clearing the workspace before starting the blade change process.
- Remove the spindle cover by rotating the blade guard and unscrewing any securing screws for access to the blade.
- Engage the spindle lock or use timber to prevent blade movement while loosening the bolt in a counterclockwise direction.
- Install the new blade with teeth facing downwards, ensuring it aligns with the saw’s rotation direction before securing it tightly.
- Reassemble the saw by reattaching the spindle cover and performing a test cut to verify the blade’s functionality and alignment.
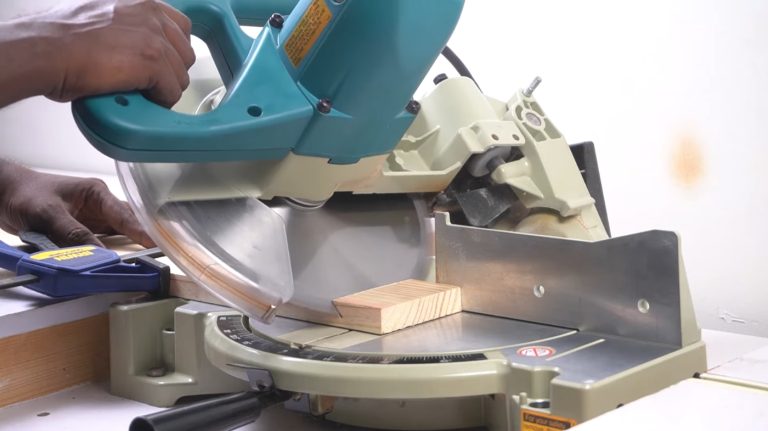
Preparation
Before you begin changing the blade on your miter saw, it’s important to guarantee your safety and the proper functioning of the tool.
First, unplug the saw and make sure it’s completely off by squeezing the trigger. Clear the workspace of debris and familiarize yourself with the miter saw’s manual for specific instructions.
Knowing the specific blades required for different materials can also help you select the appropriate blade for your project. Additionally, ensure that you understand the safety precautions outlined in the user manual before starting the process.
Wear appropriate safety gear, including safety glasses, and check for loose clothing or long hair that could get caught. Make sure the workspace is well-lit and free from obstructions.
Gather the necessary tools, like an Allen wrench or Torx key, and inspect them for damage. Confirm the saw is on a stable, level surface and keep the manual nearby for quick reference during the process.
Removing the Spindle Cover
To remove the spindle cover, first, rotate the blade guard to its top position, ensuring you have a clear view of the screws.
Next, locate and carefully remove the front screw while checking for any additional clips or screws that may secure the cover.
Each locking mechanism plays a vital role in the safe operation of the miter saw. Once these are addressed, the spindle cover should pivot away from the blade area for easy access.
Blade Guard Positioning
Proper blade guard positioning is essential for guaranteeing your safety while using a miter saw. A well-positioned blade guard protects you from the spinning blade and enhances the saw’s performance.
Follow these key considerations:
- Safety Enhancement: Guards reduce the risk of injury by covering the blade during cuts. They act as a physical barrier that minimizes the chances of accidental contact with the blade.
- Functional Integrity: Properly positioned guards maintain the saw’s stability and resist wear.
- Operational Efficiency: Correctly aligned guards ensure they don’t interfere with your cutting operations. Additionally, correct positioning of prongs is crucial for the functionality of the blade guard.
Before adjusting the guard, verify the saw is unplugged and inspect for damage.
Adjust the guard to the fully raised position if needed. Confirm alignment with the blade housing and secure it tightly.
Finally, test the guard’s movement to confirm smooth operation and engage all safety features.
Spindle Cover Removal Steps
Removing the spindle cover on your miter saw is a straightforward process that requires attention to safety and detail.
First, disconnect the saw from the power source. Next, rotate the spindle cover or lower blade guard to expose the spindle bolt. Use a screwdriver to remove the front screw, allowing the cover to pivot on the back screw.
Verify the area around the spindle is clear for secure access. If the screws are tight, apply gentle force to loosen them. Once the cover is removed, engage the spindle lock for safety.
Always wear safety glasses and gloves throughout this process to protect yourself from debris and sharp edges. Additionally, ensure the miter saw is unplugged from the electrical outlet before starting this procedure.
For optimal performance, consider the cutting capacity of your miter saw model, as this can influence the effectiveness of your blade change. Follow the owner’s manual for model-specific instructions.
Securing the Blade for Removal
Securing the blade for removal is a crucial step in the process, ensuring safety and efficiency. Before you begin, follow these essential steps:
- Engage the spindle lock to prevent movement while loosening the bolt.
- Use a piece of timber under the blade if there’s no spindle lock.
- Identify the bolt type to know the correct direction for loosening. The spindle lock feature helps maintain stability during the removal process.
Once you’ve taken these precautions, use the appropriate tools, such as a wrench or Allen key, as specified in your manual. Remember that the Milwaukee 254 Mida is a battery-operated saw, so always ensure no power is supplied before you start.
If the bolt is reverse-threaded, remember to turn it clockwise to loosen. Properly securing the blade not only protects you but also facilitates a smoother removal process.
Always double-check your setup before proceeding.
Installing the New Blade
When installing the new blade, make certain the teeth face downwards for accurate cutting. Secure all fasteners properly to prevent the blade from loosening during operation.
Finally, confirm the rotation direction by checking the arrows on the blade to guarantee it spins correctly when you power up the saw.
Additionally, ensure that the blade locking mechanism is engaged before tightening the bolt for added safety. Always remember to wear safety goggles to protect your eyes from any debris during the blade installation process.
Blade Orientation Matters
Proper blade orientation is essential for effective miter saw operation, as it directly impacts the quality of your cuts and overall safety.
You must guarantee that the blade teeth are aligned with the direction of the saw’s rotation. Failing to do so can lead to poor cuts and increased risk of accidents.
- Always look for directional arrows on the blade. Additionally, it’s important to verify blade alignment to prevent imprecise cuts.
- Consult the manufacturer’s manual for specific orientation details.
- Check that no protective covers obscure the view of these arrows. Additionally, ensure that you follow safety measures during the blade change process to prevent accidents.
Secure Fasteners Properly
To ensure a safe and effective installation of your new blade, focus on securing the fasteners properly. Start by confirming the outer blade washer is correctly positioned; remove the old washer first.
It’s important to ensure that the blade compatibility aligns with the necessary specifications for your saw. Depress the spindle lock to stabilize the spindle while you work.
When tightening the blade bolt, remember that most miter saws have left-handed threads, so turn it counterclockwise. Verify the D-flats on the blade washers align with those on the spindle for proper seating.
Use the blade wrench included with your saw for secure fastening. Additionally, always check the spindle lock to ensure it is engaged before tightening the blade bolt.
Finally, consult your miter saw manual for specific requirements and always disconnect the power cord before beginning any installation process to prevent accidents.
Confirm Rotation Direction
How can you guarantee the new blade is installed correctly on your miter saw? First, confirm the rotation direction to verify safe operation and ideal performance.
- Always check the manufacturer’s manual for specific instructions.
- Align the directional arrows on the blade and saw for proper installation.
- Confirm the blade teeth point downward for efficient cuts. Blade rotation ensures stable, accurate, and safe cutting. Additionally, knowing the tooth count can help you choose the right blade for the material you’re cutting.
Misalignment can cause accidents and poor cuts, so take this step seriously. The blade usually rotates clockwise, so verify that the arrows match that direction.
Reassembling the Saw
Reattach the spindle cover after securely placing the new blade to guarantee your miter saw is ready for operation. Regular maintenance is essential for reliable performance of the brake system.
Use the same screws you removed, tightening them properly to prevent the cover from loosening during use. Lower the blade guard back into its original position, making sure it fits snugly and locks securely. This guard is essential for your safety, so check for any obstructions between it and the blade.
Next, tighten the arbor bolt using a wrench in the correct direction; many have a left-hand thread. Verify it’s snug but avoid over-tightening to prevent damage.
Confirm the blade is oriented correctly, with teeth facing down, following the manufacturer’s instructions for optimal cutting performance.
Final Check
A thorough final check is essential to confirm your miter saw operates safely and efficiently. Before using your saw, verify you’ve completed the following:
- Verify Blade Direction: Check that the teeth face downwards and align with the saw’s rotation arrows.
- Secure the Blade: Tighten all bolts and washers firmly using a wrench. Loose blades can lead to dangerous vibrations.
- Engage Spindle Lock: Disengage the spindle lock after installation; it mustn’t be engaged during operation.
After completing these steps, perform a test cut to confirm the blade functions correctly. Look for smooth operation and inspect the cut quality for accuracy.
Pay attention to any unusual noises or vibrations, as they may indicate a problem needing immediate attention. Additionally, be aware of increased vibration during the test cut, as this may signal issues with the blade’s condition.
Safety Considerations
While changing the blade on your miter saw, prioritizing safety is essential to prevent accidents and confirm proper functionality.
First, disconnect the saw from the power source and verify it’s off by attempting to start it. Wear safety glasses, gloves, and other protective gear. Inspect the saw for any damage before starting. Regularly replacing dull blades ensures a safer operation and reduces the risk of injury.
When removing the old blade, disengage the spindle lock and use an Allen wrench to take out the bolt, noting the blade’s teeth direction.
Install the new blade with teeth facing down, securing it tightly. After the change, reattach the blade guard, run a test cut on scrap wood, and keep your workspace clear.
Frequently Asked Questions
How Often Should I Change My Miter Saw Blade?
Just like a chef sharpens their knives, you need to keep a close eye on your miter saw blade. Change it when cutting becomes laborious or produces rough edges; this often indicates wear. If you notice rust or tooth damage, it’s time for a replacement.
Check your blade regularly, especially after heavy use or when switching materials. Following manufacturer guidelines can help you maintain ideal performance and extend the life of your saw.
What Type of Blade Is Best for My Miter Saw?
To choose the best blade for your miter saw, consider the material you’ll be cutting. For wood, a combination blade offers versatility, while a crosscut blade provides smooth finishes.
If you’re cutting metal, opt for a carbide-tipped blade. Additionally, assess the desired cut type—crosscut, rip, or both.
Higher tooth counts yield cleaner cuts, so select accordingly. Always verify the blade fits your saw’s specifications to maximize performance and safety.
Can I Use a Blade From Another Brand?
Yes, you can use a blade from another brand, but verify it meets the specific size and arbor requirements of your miter saw. Check the blade diameter, typically 7-1/4″, 10″, or 12″, and confirm the arbor size matches your saw’s specifications.
Additionally, select a blade designed for the material you’re cutting. Always prioritize safety and compatibility to maintain performance and avoid voiding your warranty with non-recommended blades.
What Are the Signs That My Blade Needs Replacing?
You’ll notice several signs indicating your blade needs replacing. Look for increased resistance when cutting, burn marks on your material, and tearout or chipping in your cuts.
Listen for any unusual sounds from the saw, and visually inspect the blade for rounded or missing teeth. If you’re experiencing sluggish cuts or difficulty following cut lines, it’s time to change the blade to maintain peak performance and safety in your projects.
Is It Safe to Use a Damaged Blade?
Is it wise to drive a car with a flat tire? Using a damaged blade is just as reckless. It poses serious risks like kickback and inconsistent cuts, which can lead to accidents.
If you notice cracks or any damage, don’t hesitate—replace it. Always prioritize your safety and the quality of your work.
Change Your Miter Saw Blade with Confidence
In conclusion, changing the blade on your miter saw is a straightforward yet important task that ensures safe and efficient cutting.
By following the proper safety measures, removing the spindle cover, securing the blade for removal, and correctly installing the new blade, you can maintain optimal performance and prevent accidents.
Always double-check your work, perform a test cut, and never compromise on safety. With these steps, you’ll be ready to tackle your next project with confidence.
Remember, a well-maintained saw is key to achieving precise, clean cuts every time. Stay safe and happy sawing.