How to Build a Wood Box: Quick & Easy DIY Method
To build a sturdy wood box, start by selecting quality hardwoods like oak or maple, or lighter woods such as pine.
Measure and mark your wood carefully, accounting for thickness and joints. Cut precise pieces with a table saw or miter box.
Use strong joinery like miter joints with splines or dowels glued securely. Clamp the pieces until dry.
Finish by sanding progressively and applying your choice of protective finish. Following proper steps guarantees durable, professional results and sets the stage for mastering advanced techniques.
Key Takeaways
- Select hardwood or lightweight wood, measure and sketch your box design before cutting for precise dimensions.
- Cut four sides and bottom from a 1×4 board using a table saw, setting blade height slightly above the wood surface.
- Use butt, miter, box, or dovetail joints, reinforced with nails, splines, dowels, or pocket holes for strong assembly.
- Apply wood glue evenly on edges, clamp sides to maintain pressure, and check squareness by measuring diagonals.
- Sand progressively from coarse to fine grit, clean dust, and finish with varnish, oil, or food-grade mineral oil for protection.
Select Wood and Materials for Your Box

Choosing the right wood and materials is essential for building a durable and attractive box.
Select high-quality hardwoods like oak, maple, or cherry for strength and visual appeal. For lighter projects, softwoods such as pine or cedar work well.
Typically, a single 4-foot 1×4 board suffices for simple boxes. Reinforce joints with 1/8 to 1/4-inch wood dowels and use a strong adhesive like Gorilla wood glue for lasting bonds.
Prepare the necessary tools: a table saw for precise cuts, a miter box for angled joints, and a drill or drill press to pre-drill holes.
A thickness planer guarantees uniform wood thickness, while clamps and sandpaper aid assembly and finishing. Selecting these materials upfront sets a solid foundation for your build.
For fastening the joints securely, consider using screws with coarse threads designed to maximize holding strength and reduce wood splitting.
Plan, Measure, and Cut Wood Pieces for Your Box
Before you start cutting, sketch your design and finalize the dimensions to guarantee accuracy. Measure twice using a tape measure and square, assuring each dimension aligns with your plan.
Carefully plan and measure twice before cutting to ensure your design fits perfectly and avoids mistakes.
Account for wood thickness and any grooves for the bottom panel during layout. Use a thickness planer to achieve uniform 3/8-inch stock if necessary.
Cut the four sides and bottom from a single 1×4 board, employing a table saw for straight, precise cuts. For angled edges, use a miter sled at 45°.
Resaw thicker stock on a bandsaw if needed. Mark all cut lines clearly, then proceed steadily to maintain clean edges. Avoid cutting before confirming measurements to prevent waste and assure your box components fit perfectly.
To ensure clean and accurate cuts, set the blade height approximately 1/8 inch above the wood surface before starting.
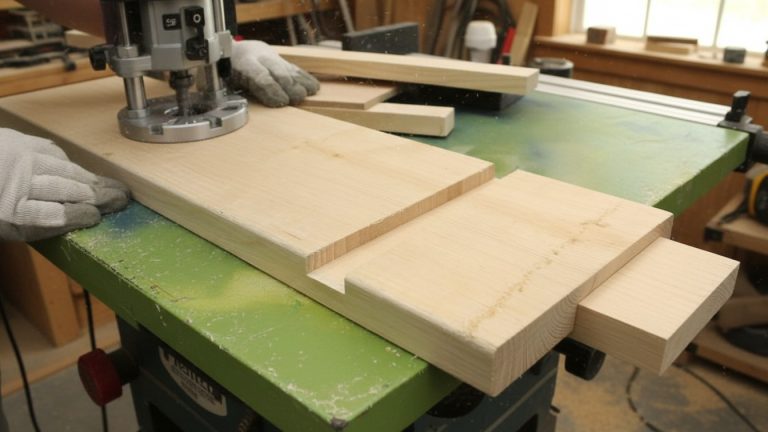
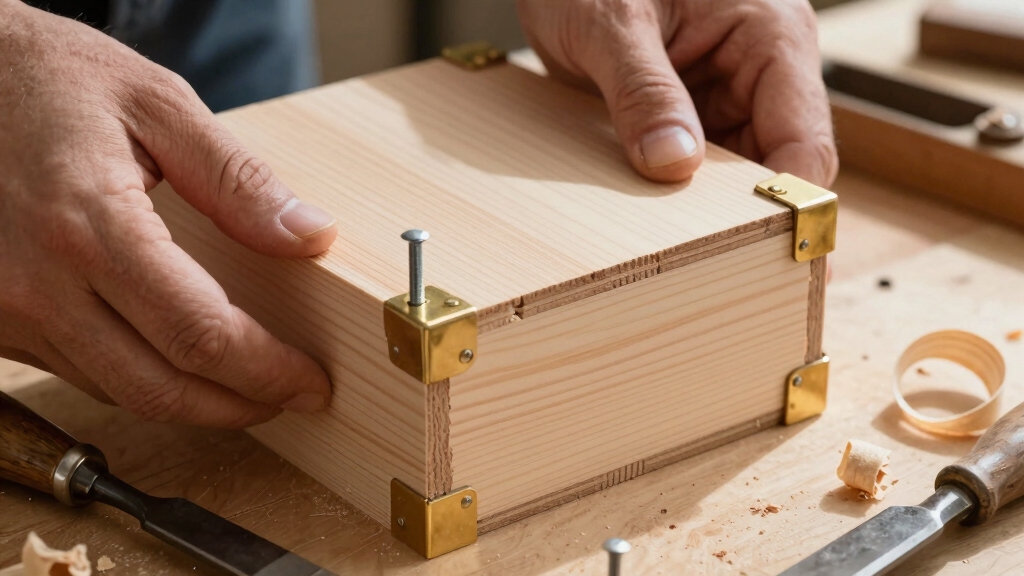
Use Joinery Techniques for Strong Wood Boxes
Strengthen your wood box by selecting appropriate joinery methods tailored to your design and materials.
For simple boxes, butt joints secured with 1½- to 2-inch nails or brads offer quick assembly but limited strength.
Elevate durability by using miter joints reinforced with splines, which improve alignment and resist twisting.
For superior long-grain bonds, employ box joints or dovetails. These interlocking joints distribute stress evenly.
When working with hardwoods, pre-drill holes to avoid splitting during nailing or doweling.
Consider friction fit or sliding lid joints to eliminate metal fasteners while maintaining functionality.
Always test your joints on scrap wood to ensure fit and strength before final assembly.
Applying a quality wood glue to all mating surfaces enhances joint integrity markedly.
Using a pocket hole jig can further improve joint strength and precision by creating angled screw holes for secure fastening.
Assemble and Clamp Your Wood Box Securely
Begin assembling your wood box by applying a thin, even layer of wood glue to all mating edges to guarantee a strong bond. Position each side carefully, ensuring the corners align precisely.
Start your wood box assembly by evenly applying glue to all edges and aligning corners precisely.
Use clamps to maintain pressure and prevent gaps during drying. Check squareness by measuring diagonal distances; adjust clamps until diagonals are equal. Avoid over-tightening, which can squeeze out glue and weaken joints.
To assemble and clamp your box securely:
- Apply consistent glue coverage on all joints.
- Use corner clamps or band clamps for even pressure.
- Verify squareness by comparing diagonal measurements.
- Wipe excess glue immediately with a damp cloth.
Using accurate measurements during assembly is crucial to ensure the best fit and structural integrity.
These steps assure a robust, accurately aligned box ready for finishing.
Sand and Finish Your Wood Box Like a Pro
Sanding your wood box systematically guarantees a smooth, professional surface ready to accept finish evenly.
Start with coarse grit (80-100) to remove glue squeeze-out and rough spots. Progress through medium (150-180) to fine grit (220) for a flawless texture.
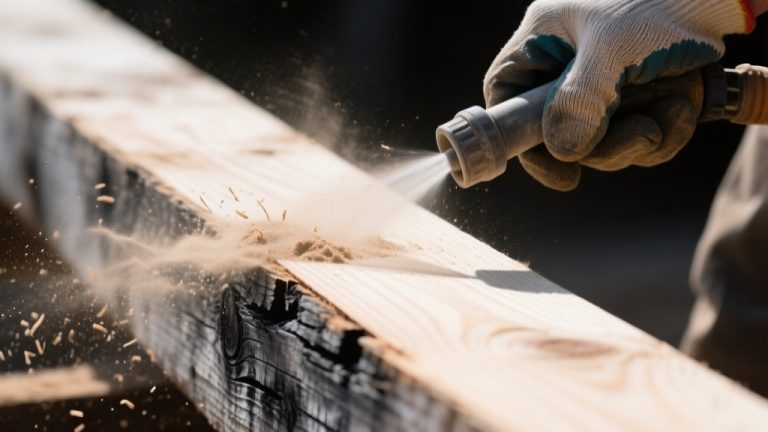
Always sand with the grain to avoid scratches. After sanding, clean dust thoroughly before applying your finish: varnish, oil, or lacquer depending on the desired look and protection.
Applying food-grade mineral oil after sanding helps protect the wood and enhance its natural beauty.
| Sandpaper Grit | Purpose |
|---|---|
| 80-100 | Remove glue, roughness |
| 150-180 | Smooth surface |
| 220 | Final smoothing |
| Cleaning | Dust removal |
| Finish | Apply protective coat |
This process guarantees durability and enhances wood aesthetics, giving your box a polished, professional appearance.
Frequently Asked Questions
How Do I Prevent Wood From Warping Over Time?
You prevent wood from warping by selecting high-quality, properly dried hardwoods and maintaining consistent moisture levels.
Seal all surfaces evenly with varnish or oil to minimize moisture absorption.
Design your box with allowances for seasonal wood movement, like floating panels.
Avoid attaching wood to metal fasteners that restrict expansion.
Store your project in a stable environment, away from direct sunlight and humidity fluctuations.
This ensures long-term dimensional stability and prevents warping.
What Is the Best Way to Store Leftover Wood Scraps?
The best way to store leftover wood scraps is to keep them flat and off the ground to prevent moisture absorption and warping.
Use a horizontal rack with spacers for airflow or vertical slots for longer pieces.
Store in a dry, climate-controlled area away from direct sunlight.
Label scraps by wood type and size for easy access.
Avoid stacking too tightly to maintain wood integrity and ensure you can quickly find what you need.
Can I Use Alternative Glues Instead of Gorilla Glue?
Yes, you can use alternative glues instead of Gorilla Glue, but choose carefully based on your project.
PVA wood glue works well for most hardwood and softwood joints, providing strong, easy-to-sand bonds.
For water resistance, consider polyurethane or epoxy adhesives. Avoid general-purpose glues that lack gap-filling properties or require longer curing times.
Always test on scrap wood to ensure compatibility and strength before final assembly.
How Do Seasonal Changes Affect Wood Joints?
Just like the tides shift the shore, seasonal changes cause wood to expand and contract.
You’ll notice joints loosening or tightening as humidity fluctuates.
To avoid cracks or warping, you should design joints allowing slight movement. Floating panels or elongated screw holes work well.
Always pre-drill to prevent splitting and choose joinery methods that accommodate wood’s natural rhythm.
This ensures your box stays sturdy through the cycles of seasons.
What Safety Gear Is Essential When Cutting Wood?
You need safety glasses to protect your eyes from flying debris and dust.
Wear hearing protection like earmuffs or earplugs to guard against loud saw noise.
Use a dust mask or respirator to avoid inhaling fine wood particles.
Gloves help prevent splinters, but avoid loose ones near spinning blades.
Also, wear sturdy, closed-toe shoes to protect your feet from dropped tools or wood.
Always follow safety protocols for your tools.
Precision, Polish, and Power: The Perfect Wood Box Finish
By selecting sturdy stock, skillfully sizing sections, and securing seams with strong joinery, you set the stage for a solid structure. Assembling and aligning accurately allows a tight, tidy fit. Sanding smooth surfaces sharpens shape and shine.
Finishing firmly fends off flaws and flaunts fine features. With careful craftsmanship and consistent care, your wood box will stand strong. It will serve your space with style and strength for years to come.