How to Build a Miter Saw Stand: Easy DIY Guide for Precision
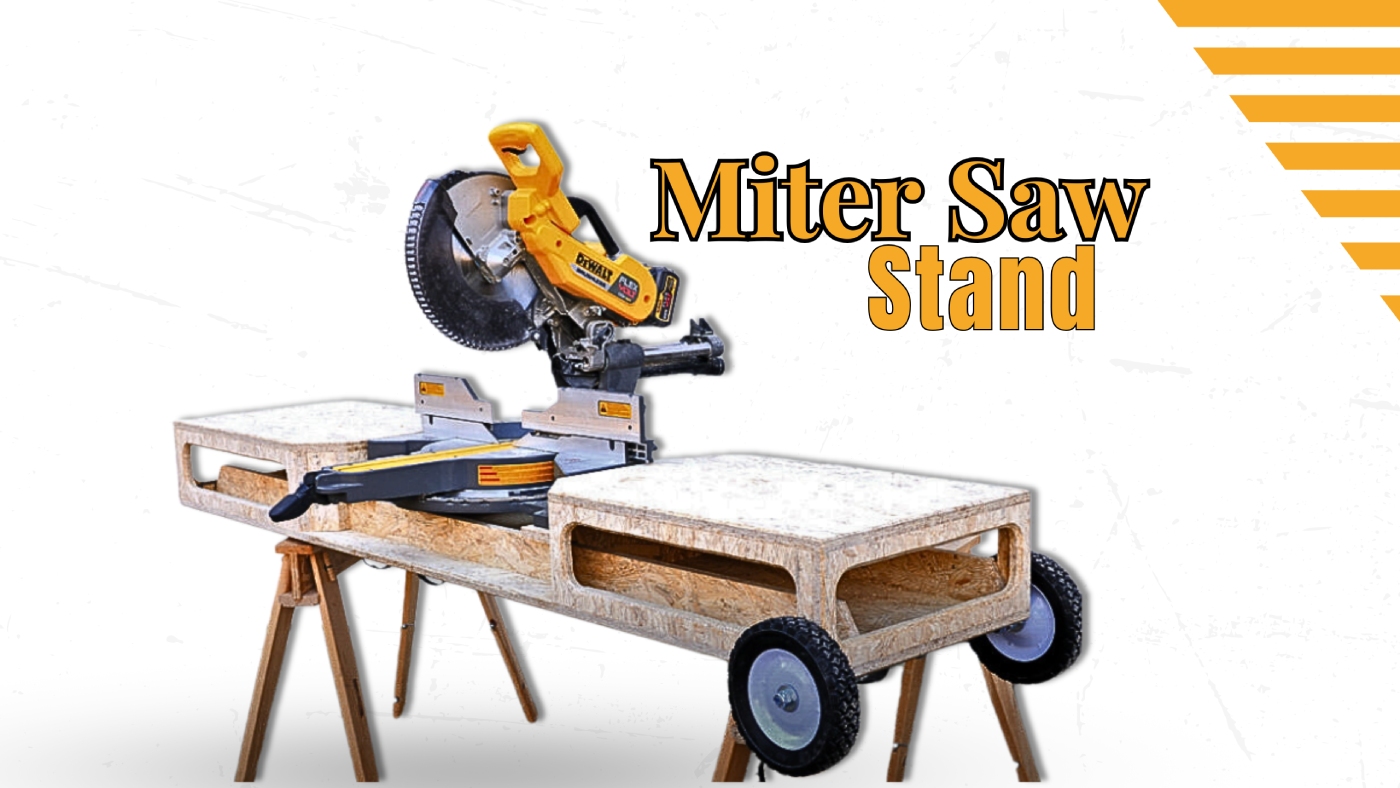
To build a miter saw stand, gather four 2×4 boards (96 inches) for the frame, two 1×4 boards (72 inches) for support, and a 3/4 inch thick plywood top (24×48 inches).
Start by assembling the frame with Kreg pocket-hole screws, guaranteeing it’s stable and aligned. Attach the miter saw at a comfortable height, typically between 34 to 36 inches.
Incorporate adjustable legs for uneven surfaces and a sturdy base for safety. Use clamps to secure workpieces.
Verify your design enhances dust collection and supports at least 300 lbs. You’ll find additional tips to optimize your build and functionality.
Key Takeaways
- Gather necessary materials including 2×4 boards, plywood, screws, and ensure proper dimensions for stability and accurate cuts.
- Assemble a sturdy frame using Kreg pocket-hole screws for secure leg attachment and proper alignment.
- Center the miter saw on the base, drill mounting holes, and attach the saw for optimal performance.
- Incorporate adjustable height features and sturdy legs to accommodate different user preferences and ensure comfort.
- Include safety measures such as clamps, protective equipment, and a clean workspace to enhance user safety during operation.
Materials Needed
To build a sturdy miter saw stand, you’ll need a variety of materials that guarantee durability and functionality. Start with four 2×4 boards at 96 inches each for the main legs and center frame.
For additional support, use two 1×4 boards, each 72 inches long. Add one 1×6 board, measuring 48 inches, to enhance stability.
One essential component in workbench frame construction is to ensure that the top frame is securely attached to the legs for added strength.
A miter saw stand not only provides stability but also improves workflow efficiency as you work on various projects.
The top surface requires a piece of plywood, 3/4 inch thick, measuring 24 by 48 inches. A 1-inch diameter dowel, 48 inches long, serves as extra reinforcement.
When it comes to assembly and fastening, you’ll use 2 1/2-inch self-tapping screws to assemble the frames. Secure joints with 36 2 1/2-inch Kreg pocket hole screws and add 65 1 1/4-inch flat-head wood screws for further fastening.
Clamps are essential for holding frames together during assembly, while a tape measure guarantees precision in your cuts.
For mobility, incorporate 14-inch folding brackets for collapsible wings and 3-inch locking casters for ease of movement.
Use 7-inch lawnmower replacement wheels, secured with 1/2-inch fender washers and 2 1/2 x 4 1/2-inch hex-head bolts, to complete your stand.
Design Considerations
When designing your miter saw stand, focus on table dimensions and stability to ensure accurate cuts. Incorporating adjustable height features allows for versatility across different projects, while considering safety and transportability will enhance usability.
These elements are essential for creating a functional and reliable workspace. Additionally, ensuring that leg pairs mirror or oppose each other is crucial for maintaining a solid foundation. A well-designed stand can also improve dust collection efficiency, which is vital for keeping your workspace clean and maintaining air quality.
Table Dimensions and Stability
A well-designed miter saw stand must prioritize both table dimensions and stability to guarantee peak performance during cutting tasks.
Start by considering the width of your stand. For ideal space, a width of 21 to 26.5 inches is perfect, depending on your saw’s size and any desired overhang. Additionally, using a stable base can significantly enhance your cutting accuracy and safety.
Length is also vital; look for a table that extends at least 7 to 9.5 feet to accommodate large workpieces easily. A good option is the BORA Portacube STR Miter Saw Workstation, which expands to 7 feet of working surface to handle larger projects.
Stability is non-negotiable. A sturdy base with wide legs is essential to prevent tipping during operation.
Verify the stand can support your miter saw’s weight—aim for a design with a minimum weight capacity of 300 lbs for added safety. The construction material you choose, whether plywood or 2x4s, also influences stability and durability.
Lastly, level your surface. An uneven table can lead to inaccurate cuts and increased frustration, so make certain your stand provides a stable, level workspace.
Adjustable Height Features
Building on the importance of stability and table dimensions, adjustable height features are essential for customizing your miter saw stand to meet various cutting needs.
Using telescopic arms allows you to easily adjust both height and length, accommodating workpieces up to 10 feet long. Quick-release mounting brackets facilitate rapid adjustments, guaranteeing you can set up quickly.
Folding legs with pin release levers enable height adjustments from 2 feet to 3 feet, providing versatility for different projects. Incorporating bolts and washers into your design will add stability, while vertically adjustable support arms with built-in end stops guarantee precise, repeatable cuts.
To support heavy loads—up to 400 lbs—you’ll want to use robust materials like steel or heavy-duty aluminum, which also offer corrosion resistance for longevity. Additionally, sliding miter saws can accommodate wider boards, making them a great choice for larger projects.
Additionally, incorporating level adjustments will help you maintain precise saw positioning, enhancing accuracy in your cuts.
Safety and Transportability
Ensuring safety and transportability in your miter saw stand design is essential for effective woodworking. Start with a stable mounting system; mount your miter saw on a level surface using a sturdy stand specifically made for this purpose.
Secure your workpieces with clamps to prevent movement, and keep the table surface clear of debris to avoid hazards from a spinning blade.
Regularly inspect the stand for any signs of wear or damage. Inspecting your equipment regularly can help identify potential safety issues before they become problems.
Incorporate proper guarding and safety accessories. Always keep the blade guard in place, and use eye protection and hearing protection while operating the saw.
Confirm the fence and table are adjusted correctly for secure support of your workpieces. Additionally, ensure that you consult general safety tips for woodworking machines to enhance your safety measures.
When considering transportability, design your stand to balance portability with stability. Use lightweight yet sturdy materials like 2x4s or plywood. Aim for a design that’s heavy enough to prevent tipping but still easy to move.
Consider adding a cantilever overhang for additional clamping support and verify the dimensions accommodate various workpieces and saw sizes.
Practical accessories, like sawhorses or table extensions, can further enhance stability during transport and use.
Pre-Build Measurements
Before you start building your miter saw stand, you need to gather precise measurements. Measure the dimensions of your miter saw, including its width and height, to establish the minimum size for your worktable.
Additionally, consider the desired table height, ensuring it aligns comfortably with the saw’s metal bed for peak performance and stability. The table should also be designed with a portable design in mind, making it easy to transport when needed.
Miter Saw Dimensions
A solid understanding of miter saw dimensions is essential for creating an effective stand that meets your needs. Knowing the base, mounting, and frame dimensions guarantees your setup is stable and functional.
Here’s a quick reference table of key dimensions:
| Dimension | Measurement |
|---|---|
| Miter Saw Base Length | 24-28 inches |
| Miter Saw Base Width | 15-20 inches |
| Miter Saw Base Depth | 12-18 inches |
| Frame Height | 29-34 inches |
When planning, consider the mounting holes, typically 5/16 or 3/8 inches, spaced 1-2 inches apart. The mounting plate should match the saw base dimensions for a secure fit, using durable materials like aluminum or steel.
Additionally, ensure that the miter saw table height aligns with your elbow height for optimal comfort and control during operation.
Your frame length can vary from 30-48 inches based on your workspace. Aim for a frame width of 18-24 inches to accommodate the miter saw base and any additional tools.
Table Height Considerations
Understanding the dimensions of your miter saw lays the groundwork for determining the right table height for your stand.
Achieving a comfortable working height is essential to prevent back strain and enhance efficiency. Typically, a height range of 34-36 inches is recommended for work surfaces.
Proper height minimizes back strain and discomfort, ensuring that you can work efficiently for extended periods without fatigue.
Ergonomics and user comfort are vital considerations when determining the optimal height for your table saw, as they directly influence your efficiency and safety.
Here are some key considerations:
- User Height: Adjust the table height based on your stature to maintain comfort.
- Saw Bed Alignment: Confirm the table height matches the miter saw bed for seamless workflow.
- Testing Heights: Temporarily set up different heights to find your ideal working position before finalizing the build.
- Workspace Coordination: Consider the height of adjacent workbenches to facilitate smooth changes between tasks.
Assembly Steps
The assembly steps for your miter saw stand require careful attention to detail to guarantee stability and functionality.
Start by assembling the frame. Cut the legs to length and attach them using 2 1/2″ Kreg Pocket-Hole Screws. Next, attach the rails to the legs, making certain of proper alignment.
For added support, attach the long stretcher to the outer legs, aligning it with the bottom’s long point, and then attach the short stretcher to the inner legs, following the same alignment principle. Make certain both leg sets mirror each other for maximum stability.
Additionally, using a Kreg Pocket-Hole Jig can enhance the assembly process by ensuring precise and secure connections between components.
Moving on to the miter saw mounting, center the saw on the base, adjusting it for comfort and making certain it’s parallel to the stand’s top edge. Mark and drill the mounting holes, then secure the saw with bolts and washers, using wing nuts for easy removal.
For the fence assembly, cut the fence parts, drill 1/8″ pilot holes, and attach the front to the base with 1 1/4″ screws, making certain it’s flush with the saw fence.
Finally, assemble any additional components like handles and wheels, making necessary adjustments to make certain everything is level and properly aligned.
Safety Features
Safety is paramount when working with a miter saw, ensuring both your well-being and the efficiency of your projects. To maximize safety while using your miter saw stand, adhere to the following critical features:
- Secure Mounting: Firmly mount the saw at waist height on a stable workbench or frame to minimize movement during operation.
- Personal Protective Equipment: Always wear safety glasses or goggles, gloves, and appropriate hearing protection. A dust mask or respirator is essential if you’re working in dusty conditions. Additionally, consider a fold-away miter saw design to enhance safety by allowing for efficient storage when not in use. It’s also advisable to avoid gloves when operating power tools to maintain a better grip and control.
- Work Area Maintenance: Keep your workspace clean and clutter-free. This reduces the risk of accidents and provides a safer environment for your tasks.
- Secure Operation Practices: Attach the saw securely and use clamps to stabilize your workpiece. Make all adjustments only when the machine is powered off to avoid accidental activation.
Additional Tips
When setting up your miter saw stand, practical considerations can greatly enhance both functionality and user experience.
Start by selecting standard materials like 3/4″ plywood for the top and shelves and 2×4 lumber for the legs. Make certain to measure your miter saw base carefully to adjust the leg height for a proper fit and stability. This guarantees compatibility with various miter saw models, including sliding ones.
Incorporate storage solutions such as pegboards or drawers to keep your tools organized and easily accessible. Utilize a Kreg Pocket Hole Jig for precise pocket holes during assembly, ensuring the frames are square and stable.
When attaching the top, brad nails work well to secure the plywood or MDF. Additionally, consider implementing a multi-purpose station to maximize workspace efficiency and functionality.
For added convenience, consider adjustable leg heights to accommodate different users and work environments. Build the stand at a comfortable height—around 36″—to reduce fatigue during use.
Finally, if you want mobility, attaching 4″ casters will allow you to move the stand effortlessly while maintaining stability.
Customization Options
Customizing your miter saw stand can greatly enhance its functionality and adaptability to your specific needs.
By tailoring the stand to fit your workspace and workflow, you can optimize your setup for efficiency and precision. Here are some key customization options to evaluate:
- Adjustable Height: Modify the legs to accommodate uneven floors or different miter saw heights, ensuring stability.
- Extension Wings: Install adjustable wings that align horizontally with the saw base and vertically to create a level surface, enhancing support for longer workpieces. This is especially beneficial as FastCap Best Fence PRO features adjustable wings for support during cuts.
- Integrated Fences: Incorporate adjustable tape measures and knobs for precise fence alignment, streamlining your cutting process.
- Material Selection: Choose from DIY materials like 2×4 lumber and plywood, allowing you to build sturdy frames and customizable fences tailored to your needs.
Maintenance and Care
To keep your miter saw stand functioning at its best, regular maintenance and care are essential. Start by verifying you regularly remove dust from the tool’s surface, paying special attention to moving parts using compressed air. Regular maintenance ensures optimal performance and longevity of your tools.
Clean the table and fence with a cloth in a fluid circular motion, applying extra force on stubborn debris. For the blade, immerse it in a cleaning agent, scrub with a brush, rinse, and dry thoroughly to prevent rust. It is also important to ensure that the dust collection system is clear and functional to minimize mess during cutting operations.
Lubricate moving parts to reduce friction and enhance longevity. Before each use, inspect the power cord and safety features to verify everything is in proper working order.
Check the blade for sharpness and replace it as needed. Remove pitch and resin buildup using a water-based formula, and consider professional sharpening to maintain cutting efficiency.
Store your miter saw in a dry area and keep the dust collection system clear. Always use safety gloves or a brush when removing debris from blades.
Frequently Asked Questions
What Type of Wood Is Best for a Miter Saw Stand?
When choosing wood for a miter saw stand, consider that 3/4-inch plywood is often favored for its balance of strength and weight.
High-grade plywood, like cabinet-grade, offers durability and flatness, essential for stability.
If you’re looking for a robust frame, 2x4s can provide solid support.
Remember, using solid wood edging reinforces the top, enhancing longevity.
Ultimately, your choice should prioritize stability and ease of assembly for efficient woodwork.
How Much Weight Can a Miter Saw Stand Support?
When choosing a miter saw stand, consider its weight capacity, which typically ranges from 300 to 1,000 pounds.
Higher capacities, like the DeWalt DWX725B, support heavier loads, while others, such as the Bosch T4B, support less.
Focus on durable materials, extendable arms, and locking mechanisms to enhance stability.
Additionally, ascertain the stand’s portability aligns with your needs, as heavier models may be more challenging to transport.
Can I Use a Miter Saw Stand Outdoors?
Yes, you can use a miter saw stand outdoors, but you need to take into account a few factors.
Choose a stand made from durable materials like aluminum or treated wood to resist weather elements. Make sure it’s stable and can handle the weight of your saw and materials.
Regularly inspect it for wear, and think about securing it to the ground in windy conditions.
Finally, protect it with a cover when not in use to prolong its lifespan.
How Do I Clean and Maintain My Miter Saw Stand?
Think of your miter saw stand as the sturdy backbone of your woodworking projects; it needs care to support you effectively.
Start by wiping down all surfaces with a dry cloth, removing dust and debris. Inspect for any wear or damage, and tighten loose screws.
If your stand has wheels, lubricate them to guarantee smooth movement.
Finally, store it in a dry area to prevent rust and prolong its life.
What Is the Ideal Height for a Miter Saw Stand?
The ideal height for a miter saw stand typically ranges from 34 to 36 inches, promoting comfort and reducing back strain while you work.
This height aligns well with other workshop tools, facilitating smooth operations during long cuts.
Consider your personal body height and posture, as well as any storage needs beneath the stand.
Ensuring visibility of the saw’s features is essential, so adjust the height to avoid squinting while you cut.
Build a Durable Miter Saw Stand for Long-Lasting Reliability
Building a miter saw stand is like crafting the foundation of a sturdy house; it sets the stage for all your projects. By following the outlined steps and incorporating your personal touches, you’ll create a reliable workspace that enhances your efficiency and safety.
Remember, a well-maintained stand is essential for longevity, just as a solid foundation supports a home. With the right care, your miter saw stand will serve you well for years.

