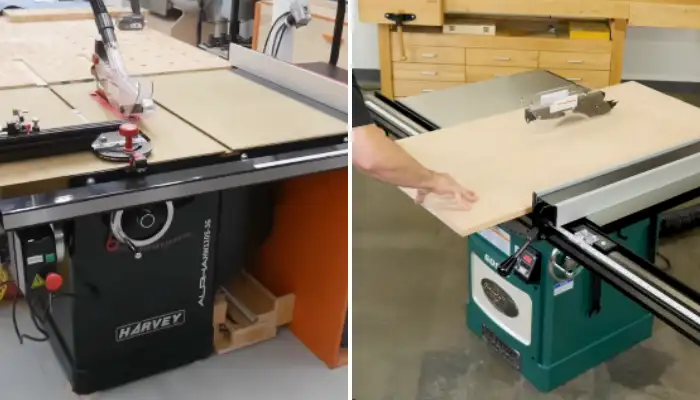
How to Add a Riving Knife to a Table Saw: 5 Easy Steps
Adding a riving knife to your table saw is an essential safety measure that can make your woodworking experience much more secure. It not only protects you from kickback accidents but also prevents material from pinching the blade, making your cuts much more precise.
As a woodworking enthusiast, I researched how to add a riving knife to ensure the proper installation and functionality of the knife for improved safety and cutting precision.
Based on my research, adding a riving knife to a table saw involves removing the blade insert to easily install the knife and securing the riving knife with screws or bolts.
I will explain the step-by-step process in detail on how to add a riving knife to your table saw so you can enjoy a safer and more precise woodworking experience.
How to Add a Riving Knife to a Table Saw: Follow These Steps
To add a riving knife to your table saw, follow these steps carefully that I have outlined below:
Step 1: Remove the blade insert
Step 2: Insert the riving knife and secure it
Step 3: Check the alignment
Step 4: Re-install the blade insert
Step 5: Test the setup
I will now discuss each step in detail and provide tips to ensure a successful installation of the riving knife for safety and precision.
Step 1: Remove the Blade Insert
Before you can add a riving knife to your table saw, you need to remove the table insert from the top of the saw. For safety purposes, make sure to unplug your table saw. Once you have taken this precaution, you’ll need to locate the screws that hold the table insert in place.
These screws are typically found around the edges of the insert. You’ll need a screwdriver or a suitable Allen wrench to remove the screws carefully. Take your time, and make sure not to strip the screws.
Once the screws are removed, lift the table insert out of its position and set it aside in a secure location. Be sure to keep the screws and the table insert together, as you’ll need them later in the process.
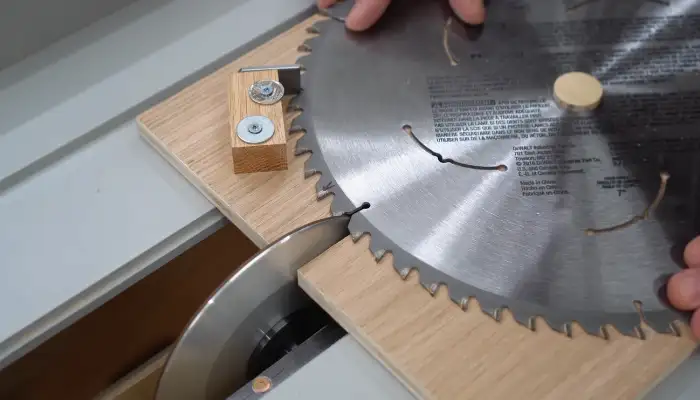
Step 2: Insert the Riving Knife and Secure It
After removing the table insert, you can proceed to securely insert the riving knife into the designated slot on the table saw, located just behind the blade.
Gently slide the riving knife into the slot, making sure it fits snugly. Once the knife is in place, use the appropriate screws or bolts to secure it firmly. Make sure to tighten the screws or bolts adequately to prevent any movement during operation.
Step 3: Check the Alignment

After installing the riving knife, you’ll need to check its alignment using a reliable straightedge or alignment tool. Begin by placing the straightedge against the side of the blade, ensuring that it makes contact with both the blade and the riving knife.
Carefully inspect the alignment, looking for any gaps or inconsistencies between the two. If you notice any misalignment, adjustments may be necessary to ensure proper functionality.
Step 4: Re-install the Blade Insert
To ensure a secure and stable work surface, carefully re-install the table insert after properly aligning the riving knife on your table saw.
Begin by positioning the insert over the opening, making sure it fits snugly. Take care to align the insert with the surrounding table surface, ensuring that it sits flush. This will provide a smooth and even work surface for your materials.
Once the insert is in place, secure it using the original screws. Make sure the screws are tightened securely, but be careful not to overtighten and damage the insert or table surface.
Step 5: Test the Setup
Once you’ve completed the installation, it’s time to test the setup. Start by plugging in your table saw and conducting a series of test cuts on scrap material to evaluate the performance of the riving knife and ensure proper functionality of the table saw.
Pay close attention to the behavior of the riving knife during the cuts. It should effectively prevent the material from pinching the blade, reducing the risk of kickback.
Can you use a riving knife on every type of table saw?
According to my findings, not all table saws are equipped to accommodate a riving knife, so you should check your saw’s user manual or contact the manufacturer to determine compatibility.
As of 2008, Underwriters Laboratories (UL) mandates that all new table saw designs include a riving knife for enhanced safety. However, older table saw models may not have the slots or configurations to install a riving knife but have a splitter.
What is the typical height for a riving knife on a table saw?

The height of a riving knife on a table saw is aligned with the height of the saw blade to ensure synchronized movement and consistent distance. Setting the riving knife at the same height as the blade creates a reliable and effective safeguard against potential kickback and other safety hazards while operating the table saw.
This alignment ensures that the riving knife moves in conjunction with the raised blade, maintaining a consistent distance throughout the cut. The purpose of the riving knife is to prevent the wood from binding or pinching against the back of the blade, enhancing safety and promoting smoother, more accurate cuts.
Elevate Your Woodworking Safety and Precision with a Riving Knife
Adding a riving knife to your table saw is crucial in ensuring safety and precision in your woodworking projects. I hope you can now confidently add the riving knife to your table saw, following the detailed steps I have shared with you.
A properly installed and aligned riving knife not only protects you from potential kickback accidents but also enhances the accuracy of your cuts. As you embark on your woodworking journey, prioritize safety by incorporating this essential tool into your table saw setup.