Best Way to Cut Formica: Achieve Chip-Free, Clean Results
To cut Formica cleanly, use a circular saw with a fine-toothed, carbide-tipped blade and keep the laminate face down to protect the surface. Secure the sheet firmly on a flat surface using clamps and a straight edge guide to prevent chipping. Mark your cuts clearly, and work slowly and steadily.
After cutting, smooth edges with fine sandpaper and apply edge sealer. Following these steps helps guarantee precise cuts and durable edges. Explore more tips to perfect your technique.
Key Takeaways
- Use a circular saw with a fine-toothed, carbide-tipped blade and keep the laminate face down to minimize chipping.
- Secure the Formica sheet on a flat surface with clamps and use a straight edge guide for precise, stable cuts.
- Apply masking tape over the cut line to prevent surface chipping and mark cut lines clearly with a dark pencil.
- For curves or intricate cuts, opt for a jigsaw or router with a flush trim bit using templates for accuracy.
- Finish edges by sanding lightly with fine grit sandpaper and apply edge sealer or banding tape to protect and smooth edges.
Choosing the Right Tools for Cutting Formica
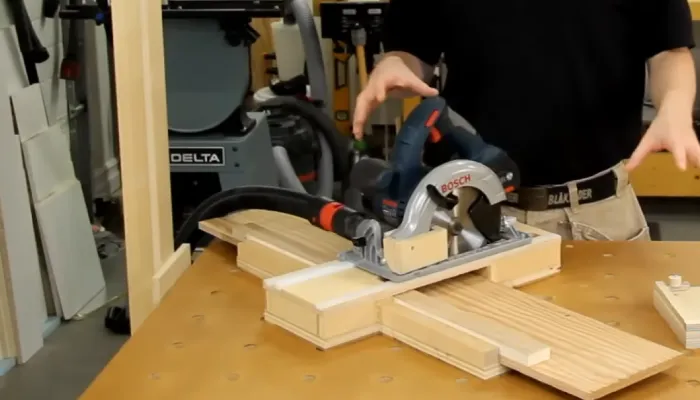
When cutting Formica, choosing the right tools is essential to achieving clean, precise edges without chipping or tearing. Circular saws are your best bet for straight cuts, especially when fitted with fine-toothed, carbide-tipped blades like a 60-tooth blade. Always cut with the Formica face side down to protect the visible surface.
For clean, precise Formica cuts, use a circular saw with a fine-toothed carbide blade, cutting face down.
For thicker sheets, slow your feed speed to prevent blade wear.
Jigsaws come in handy for intricate curves and fine-tuning after rough cuts. Use fine-toothed blades designed for laminates and cut slowly to avoid splintering. Routers with flush trim bits are perfect for finishing edges post-installation, running with the laminate face up for smooth results.
For thin laminates, scoring cutters offer a quiet, low-cost alternative, though they require multiple passes and are less effective on thick sheets.
Selecting a circular saw with an adjustable bevel capability can help achieve precise angled cuts on Formica sheets when needed.
Preparing and Securing Formica Sheets for Cutting
Before cutting your Formica sheet, you need to prepare and secure it properly to guarantee clean, accurate cuts and prevent damage. Start by placing the sheet on a stable, flat work surface like plywood, ensuring full support to avoid flexing.
Using a straight edge guide during cutting will help maintain accuracy and prevent mistakes. Selecting a cutting tool with appropriate blade speed settings ensures smoother results.
Measure twice and mark cut lines clearly on both sides, applying masking tape over decorative surfaces to reduce chipping. Clamp the sheet firmly near the cut line, using multiple clamps if needed, but avoid excessive pressure to prevent cracking.
Position cut lines slightly overhanging the edge for scoring or snapping. Clean the surface and use a straight edge guide to maintain accuracy. Incorporating a dust collection system can help maintain a clean work area and improve visibility during cutting.
Techniques for Achieving Clean and Precise Cuts
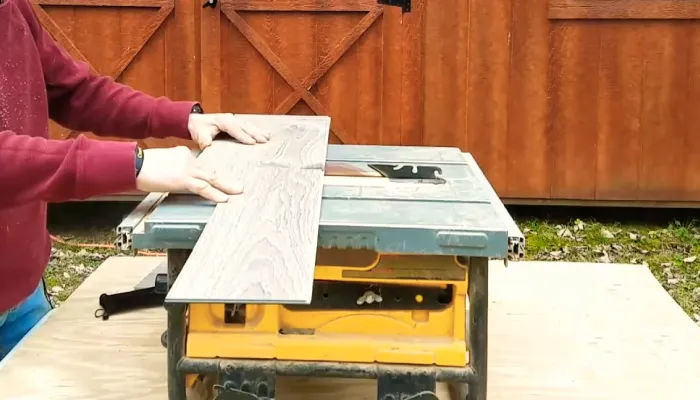
Although cutting Formica can be challenging, choosing the right tools and techniques guarantees clean, precise edges without chipping. Use a circular saw with a fine-toothed blade, like a 60-tooth or compound miter blade, for straight cuts, and keep the laminate face down to protect the surface.
Set blade height about 3/4 inch above the sheet and feed the saw slowly and steadily. Secure the sheet firmly with clamps and guides to prevent movement. Mark cut lines clearly using a dark pencil and masking tape for visibility and chip reduction.
When working with large sheets, it is important to provide adequate support and clamping to prevent shifting and ensure stability during cutting. For curves, opt for a band saw with a fine blade or a router with a flush trim bit, using templates to maintain accuracy.
Selecting a bandsaw with features like an adjustable work table and blade speed options can improve cutting precision and ease.
Post-Cutting Finishing and Edge Treatment
Once you’ve made your cuts, refining and protecting the exposed edges becomes essential to guarantee durability and a professional finish. Start by smoothing rough edges with a fine file or 120-220 grit sandpaper, sanding lightly along the cut line to avoid chipping.
Use a sanding block to maintain even pressure and check frequently to keep edges straight. Regular maintenance such as cleaning and inspecting your sanding tools can help ensure consistent results and prolong tool life.
Smooth and protect cut edges with fine sanding to ensure durability and a clean, professional look.
Next, apply a clear edge sealer or wood glue with a small brush to prevent moisture damage and delamination—let it dry fully before installation. Postforming often involves gluing laminate over the edges to create a seamless profile that enhances durability. For enhanced durability, consider a polyurethane coat.
If desired, add edge banding tape and carefully trim it flush using an edge trimmer or utility knife, then buff to smooth transitions. Finally, clean dust and residue to ensure a pristine, lasting result. Proper bandsaw maintenance and cleaning after cutting can prevent debris buildup that might affect future cuts and blade performance.
Safety Tips and Best Practices When Cutting Formica
When cutting Formica, you’ll want to prioritize safety and accuracy by following proven best practices. Start by securing your sheet on a flat, stable surface with clamps to prevent slipping and reduce chipping.
Use clamps and plywood to firmly hold the material in place, ensuring more precise cuts and minimizing movement during the process. Regularly checking and adjusting your setup helps maintain consistent alignment for cleaner results.
Use a sharp, fine-toothed blade set just above the surface, and feed it steadily to maintain clean cuts. Always cut with the decorative side facing up and score the cut line first to minimize damage.
Protect yourself by wearing safety glasses, dust masks, and hearing protection. Make certain your workspace is well-ventilated.
Feel confident knowing your cuts will be precise and chip-free. Enjoy peace of mind with proper personal protective equipment. Work efficiently in a clean, hazard-free environment.
Frequently Asked Questions
Can Formica Be Cut Using a Laser Cutter?
Yes, you can cut Formica with a laser cutter, but you’ll need a high-powered CO2 laser—around 110W—for clean, precise edges.
Lower-powered lasers can cut it but often leave rough, burnt edges. You’ll want to manage power settings carefully to avoid charring and ash buildup.
Also, guarantee proper ventilation due to fumes. If you’re cutting large sheets, use a laser with pass-through capability for efficiency and safety.
How to Fix Deep Chips or Gouges After Cutting Formica?
When life gives you deep chips or gouges in Formica, don’t fret—fix them right. Clean the area thoroughly, then fill the damage using a hard wax filler, SeamFil, or Light Cure Acrylic.
Build up layers for deep gouges and cure or let dry as needed. Sand gently with fine grit sandpaper, then polish to restore shine.
This method guarantees a durable, smooth finish that blends seamlessly with your countertop’s original look.
Is It Necessary to Wear a Dust Mask When Cutting Formica?
Yes, you need to wear a dust mask when cutting Formica. The dust generated can irritate your eyes, nose, and respiratory tract. Use a NIOSH-rated respirator like an N95 or P100 for proper protection.
Simple cloth masks won’t filter fine particles effectively. Combine the mask with goggles and gloves, and make certain good ventilation.
Taking these precautions helps you avoid irritation and keeps you safe during cutting tasks.
What Is the Best Way to Store Leftover Formica Sheets?
You should store leftover Formica sheets flat in a dry, temperature-controlled space around 18°C to 24°C with 45% to 60% humidity. Keep them fully supported on horizontal racks with cover boards to prevent warping and scratches.
If horizontal storage isn’t possible, use slightly inclined vertical racks with full surface support.
Always stack sheets face to face, remove protective films simultaneously before reuse, and guarantee good air circulation to maintain sheet quality.
Can Formica Be Cut Underwater to Reduce Dust?
You shouldn’t cut Formica underwater to reduce dust. Water can damage the particleboard or MDF beneath by causing swelling and delamination.
Plus, electrical tools pose serious safety risks when used near water. Instead, use fine-tooth blades, apply masking tape along cut lines, and work with dust collection systems.
These methods control dust effectively without risking damage or safety hazards, ensuring cleaner, safer cuts.
Take Your Formica Projects to the Next Level with Precision Cutting
Cutting Formica might seem tricky, but with the right tools, steady hands, and careful preparation, you’ll master it quickly. Remember, clean cuts come from patience and precision—measure twice, cut once. Secure your sheet firmly, choose your blade wisely, and finish edges smoothly to avoid rough spots.
Safety isn’t optional; it’s essential. So, gear up, focus, and turn that tough sheet into a flawless surface with confidence and care.