How to Square a Miter Saw? Essential Tips for Accurate Cuts
To square your miter saw, start by checking the blade alignment. Lower the blade and verify the cutline matches the teeth. Use a quality square to confirm both miter and bevel angles are accurate.
For miter cuts, lock the 90-degree detent and make test cuts, adjusting the detent plate screws as needed. For bevel cuts, verify the table is flat and check alignment with a machinist square.
After each adjustment, conduct test cuts for verification. Regular checks will help maintain accuracy, and addressing common challenges will ensure your saw performs at its best. There’s more to take into account for flawless operation.
Key Takeaways
- Check blade alignment by lowering the blade and using a square to ensure it aligns with the cutline and is square to the table.
- Lock the 90-degree detent for miter cuts and use a quality square to verify accuracy after initial test cuts.
- Ensure the miter saw table is flat; use a machinist square to check blade alignment with the table for bevel cuts.
- Perform multiple test cuts after adjustments to confirm accuracy, and calibrate angles at common settings for overall precision.
- Regularly inspect and adjust the detent plate and fences to maintain cutting precision and prevent misalignment during use.
Preparing the Miter Saw
Preparing your miter saw involves several critical steps to guarantee it’s aligned and ready for precise cuts.
Start by checking the blade’s alignment. Lower the blade without turning it on, ensuring the cutline on your workpiece lines up with the blade’s teeth. Raise the blade head, power on the saw, and let it reach full speed before engaging the blade with the workpiece.
Use a square to check the blade’s tilt, placing the long leg against the saw’s table and the short leg against the blade. Illuminate the area with a light source to spot any gaps between the square and the blade.
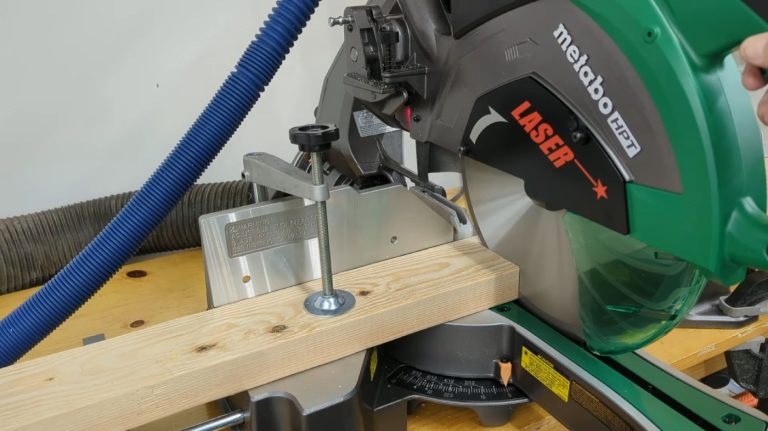
If you find a gap, recalibrate the blade’s tilt according to your owner’s manual. It’s important to regularly calibrate the miter and bevel angles for consistent accuracy, as this ensures the best cutting performance with a laser guide that enhances precision.
Next, align the fence. Remove any auxiliary fences, placing a straight edge across the main fence to assess its straightness. If it’s bowed, loosen the screws and adjust accordingly, using a pry bar if needed.
Check the miter measurement by setting it to zero. Confirm the blade is square to the table with a combination square, ensuring it doesn’t hit the blade’s teeth. Make adjustments as necessary for accuracy, and you’ll be ready for precise cuts.
Squaring the Miter Cut and Locking 90-Degree Detent
To square the miter cut, start by locking the 90-degree detent to ensure a precise angle. After that, you’ll want to make test cuts with a stable material like MDF to check for any necessary adjustments.
When you’re ready to confirm your miter saw‘s cuts are precise, locking the 90-degree detent is an essential step. First, confirm your miter saw is securely positioned in the 90-degree detent.
Use a quality square calibrated to at least one thousandth of an inch to check for accuracy. Fit an MDF block to the detent plate, leaving a 10-15 thousandth gap, and make your first test cut.
After cutting, check the accuracy of the piece with a combination square. If you find discrepancies, identify the direction the detent plate should move. Loosen the detent plate screws while keeping the saw locked in position. Use feeler gauges or shims to adjust the detent plate accordingly.
Once aligned, secure the middle screw and recheck accuracy. Remove shims and tighten the remaining screws. Verify the detent is square by checking the full travel of the slider, if applicable.
Use a large square for added verification. Calibration is crucial for ensuring accurate cuts in woodworking, as even small errors can compound significantly over time.
Additionally, ensuring your miter saw’s alignment helps maintain consistent cutting performance across various projects.
Make additional test cuts to confirm the 45-degree accuracy and adjust the degree indicators if needed. Double-check all adjustments for consistency to achieve precise cuts every time.
Test Cut Adjustments
After securing the 90-degree detent, the next step involves making test cut adjustments to confirm the miter cut is perfectly squared.
Start with an initial test cut using a straight-edged piece of test material. Set your saw to zero degrees and mark the reference side before making the cut. Once done, check the cut’s squareness with a square.
Follow these steps for accurate adjustments:
- Verify Alignment: Use a square or digital protractor to check the cut’s squareness. Identify any gaps using a light source.
- Adjust as Needed: If the cut isn’t square, loosen the screws on the detent plate to make adjustments. Utilize feeler gauges for precision.
- Re-Test: After adjustments, repeat the test cut to confirm accuracy. Check the full travel of the slider.
- Calibrate Angles: Test at common angles like 45 degrees to confirm the overall calibration of the saw.
Squaring the Bevel Cut
Squaring the bevel cut is essential for guaranteeing precise and accurate angles in your woodworking projects. Start by verifying the miter saw table is flat and even, providing a reliable reference plane.
Lock the saw head in place to maintain stability during your adjustments and set the bevel stop to the 90-degree position.
Next, loosen the adjustment screws on the bevel detent plate, allowing you to make necessary adjustments.
Use a machinist square or a digital protractor to align the blade with the table; remember to reference the blade body, not the teeth.
Check the alignment and make any adjustments needed for accuracy. Regular tune-ups are crucial to achieving this alignment, as maintaining blade specifications directly influences cutting precision.
Once aligned, tighten the adjustment screws to secure the bevel detent plate. Perform a test cut to verify the accuracy of your bevel adjustment. If the cut isn’t square, use a test piece to check for square and iterate adjustments until you achieve the desired accuracy.
Secure the detent plate once your bevel cut is accurate, and verify it with multiple test pieces to guarantee consistency across different cuts.
Checking Accuracy
Achieving a perfectly squared bevel cut is only part of ensuring your miter saw operates with precision; checking the overall accuracy of the saw is equally important.
Follow these steps to guarantee your miter saw is accurate and ready for precise cuts:
- Check Table Accuracy: Use a level to assess the table’s flatness. Look for gaps by sliding a sheet of paper between the level and the table.
- Inspect Blade: Examine the blade for warps, bends, or broken teeth. Replace it if you find any irregularities, as a damaged blade can greatly affect cutting accuracy. Regular maintenance of the saw is essential for ensuring saw performance.
- Align the Fence: Guarantee both fences are aligned if using a two-fence system. Adjust one fence and then align the other to guarantee consistent cuts.
- Perform the Flip Test: Make a 90° cut on a piece of lumber, then make a second cut a few inches long. Flip the piece to check for a triangular gap, adjusting the saw if needed.
Common Challenges
When squaring your miter saw, you might face challenges with detent plate adjustments and fence alignment.
If the detent plate isn’t properly calibrated, it can lead to inaccurate angle settings, while a misaligned fence will throw off your cuts.
Regularly inspecting and adjusting these components is essential to achieving precision in your projects.
Detent Plate Adjustments
The accuracy of your miter saw hinges on proper detent plate adjustments, which can often present challenges that affect cutting precision.
Here are some common issues you might face:
- Detent Plate Misalignment: If the detent plate isn’t aligned correctly, you’ll notice discrepancies between the detent plate and the saw blade angle. This misalignment can lead to cuts that aren’t true to the workpiece.
- Inconsistent Detent Stops: Over time, wear and tear can cause detent stops to become inconsistent. This variance affects your saw’s ability to hold precise angles, making adjustments or replacements necessary.
- Over-tightening of Detent Plate Screws: Be cautious with the screws. Over-tightening can bind the detent plate, preventing smooth movement and resulting in inaccurate cuts.
- Wear and Tear on Detent Components: Frequent use and lack of maintenance can affect the accuracy of detent components. Regularly inspect and replace worn parts to maintain consistent performance.
Additionally, ensuring that the tooth count of your miter saw blade is appropriate for smooth cuts can also help maintain cutting precision.
Fence Alignment Issues
Fence alignment issues can greatly impact your cutting accuracy, leading to frustrating results. Misalignment often arises from incorrect installation of fence components, wear and tear on moving parts, or loose screws.
You might notice uneven or angled edges on your sawn pieces or discrepancies in measurements taken from different points on the fence. These signs indicate a need for immediate attention.
To check for misalignment, use a precision square to guarantee the fence is perpendicular to the table. Measure the distance between the fence and saw blade at multiple points. If you have a laser alignment tool, employ it to verify accuracy.
If you find misalignment, consult the manufacturer’s instructions for adjustment procedures. Typically, you’ll need to tighten or replace screws and bolts that secure the fence.
In cases of tolerance discrepancies, shims or spacers can help. Finally, recalibrate the saw’s bevel and miter scales if necessary, and perform test cuts to confirm that your adjustments have resolved the issue.
Solutions for Challenges
Achieving a perfectly squared miter saw can present several challenges, but understanding the common pitfalls and solutions can streamline the process.
Here are some practical solutions to help you overcome these challenges:
- Detent Plate Adjustment: Loosen the screws on the detent plate to allow for movement. This flexibility will help you achieve a more precise angle setting.
- Use a Reference Piece: Employ a flat, stable piece of wood like ¼-inch MDF to mark reference sides. This guarantees you’re testing against a reliable surface, which is essential for making accurate cuts.
- Digital Protractor: Utilize a digital protractor for setting your saw to 90 degrees. This tool allows for fine-tuning adjustments that might be missed with a standard square.
- Iterative Testing: Perform multiple test cuts and check them with a square. This iterative process helps you identify the necessary direction and degree of adjustments needed to achieve squareness.
Safety Considerations
Before you plunge into using your miter saw, it’s crucial to prioritize safety to prevent accidents and injuries. Start by ensuring that all guards are in place and functioning correctly. Remove any jewelry, loose clothing, and confine long hair to keep them away from the saw’s moving parts.
Always wear safety glasses, a dust mask, and hearing protection to shield yourself from debris and noise. Miter saws provide quick and precise cuts, making it essential to be attentive during operation. Regularly checking and adjusting blade tension can help maintain cutting accuracy and safety.
When operating the saw, keep your hands clear of the blade’s path and never reach around it. Allow the motor to reach full speed before making a cut to minimize the risk of kickback. Make sure your workpiece is securely positioned against the fence and table for stable cutting.
Avoid cutting warped or twisted materials, and only use accessories designed for your specific saw. Never attempt to cut pieces smaller than the recommended minimum length, and steer clear of stock with defects or foreign objects.
After using the saw, wait for the blade to stop completely before removing any work or adjusting settings. Keep your workspace clean and well-lit, and always unplug the saw when not in use or when servicing it.
Final Tips for Squaring
Assuring precision in your miter saw setup is essential for achieving accurate cuts. Here are some final tips to help you achieve that perfect square:
- Use a Combination Square: This tool assures accuracy when aligning the blade and fence. Always reference off the blade and fence, not the teeth.
- Iterative Adjustments: Start by checking the 90° detent for both miter and bevel angles. Use your combination square to make incremental adjustments until both angles are precise. Regularly checking for proper alignment ensures that your cuts remain accurate throughout your projects.
- Verification Techniques: After adjustments, test your saw with multiple cuts to verify alignment. Use larger squares to magnify any discrepancies, focusing on both 90° and 45° angles for consistency.
- Troubleshooting: If you encounter issues, check for movement in the rails, the detent plate’s freedom of movement, and any defects. Address these before re-testing for accuracy.
Frequently Asked Questions
How Often Should I Square My Miter Saw?
You should square your miter saw regularly, especially after making adjustments or moving it.
It’s wise to check alignment every few uses, as wear and tear can cause misalignment. If you notice inaccurate cuts or gaps between the blade and fence, it’s time to square it up.
Even new saws may require checking right out of the box. Regular maintenance helps guarantee your cuts remain precise and professional.
Can I Use a Digital Angle Finder Instead of a Square?
You can use a digital angle finder instead of a square for certain tasks, but it shouldn’t fully replace traditional squares.
Digital angle finders excel at measuring angles and can help set up power tools with precision, particularly for intermediate angles.
However, for critical measurements and guaranteeing perfect right angles, engineer’s squares and drafting triangles are still necessary.
Always calibrate your angle finder before use to ensure its accuracy.
What Tools Are Essential for Squaring a Miter Saw?
To square a miter saw, you’ll need a quality square to guarantee precision.
An Allen key is essential for adjusting bolts, while a Torx driver secures the detent plate.
Use feeler gauges for accurate gap measurements and a mallet for fine adjustments without damage.
Test blocks will help you check the accuracy of your cuts.
Don’t forget a digital protractor for setting bevel angles, ensuring all adjustments are precise.
Is Squaring Necessary for All Types of Cuts?
Yes, squaring’s necessary for all types of cuts.
For cross cuts, it ensures you get precise 90-degree angles, crucial for framing.
Miter cuts depend on accurate 45-degree angles for joints, while bevel cuts need correct alignment for smooth edges.
Compound cuts combine miter and bevel angles, demanding even more precision.
Neglecting squaring can lead to poorly fitting pieces, so always check your setup for every cut type to maintain accuracy and quality.
How Can I Tell if My Miter Saw Is Out of Square?
How can you tell if your miter saw is out of square? Look for signs like misaligned cuts or joints that just won’t fit together.
Cut a test piece, then check it with a square. Flip it and compare the edges; discrepancies indicate issues.
You can also use a machinist square against the blade and fence. Consistent unevenness in assembled pieces is a clear indicator that adjustments are needed.
Square Your Cuts, Perfect Your Craft
In the end, squaring your miter saw is like tuning a fine instrument; precision is key. By ensuring both your miter and bevel cuts are accurate, you set the stage for flawless projects that echo the craftsmanship of the greats.
Remember to check your accuracy often, tackle common challenges head-on, and always prioritize safety. With these tips in hand, you’re not just cutting wood—you’re creating masterpieces. Go ahead, let your saw sing with precision.

