Can You Sand Plywood? Tips for a Smooth Finish
Yes, you can sand plywood, but you need to be careful to protect the veneer. Use light, even pressure and always sand with the grain to avoid scratches or splintering.
Start with a medium grit like 120–150, then progress to finer grits for a smooth finish. Keep your sander flat and moving steadily, especially near edges, to prevent damage.
Following proper techniques improves adhesion and surface smoothness. Explore key steps and tips to master sanding plywood effectively.
Key Takeaways
- Yes, plywood can be sanded to smooth the surface, improve finish adhesion, and remove imperfections before painting or staining.
- Always sand with the grain using light, even pressure to avoid damaging the veneer or causing splintering.
- Start sanding with 120 to 150 grit sandpaper and progressively use finer grits up to 220 for a smooth finish.
- Use a flat sanding block or orbital sander to maintain consistent contact, especially on edges and corners to prevent damage.
- Clean and inspect plywood before sanding to remove debris, fill voids, and avoid scratches or uneven sanding results.
How To Sand Plywood Without Damaging The Veneer?

When sanding plywood without damaging the veneer, use light, even pressure and always sand with the grain to minimize scratches. This prevents cutting through the thin face layer.
Use light, even pressure and sand with the grain to protect the thin veneer layer on plywood.
Keep the sander flat against the surface and move it steadily to avoid creating dips or uneven spots.
Start with a finer grit, typically 120 or 150, and avoid coarse grits that risk burning through the veneer.
Focus on smooth, controlled passes rather than aggressive sanding, especially near edges and corners, which are prone to splintering. Avoid dwelling in one area too long to prevent localized damage.
Maintain clean abrasive surfaces and replace sandpaper when clogged. This approach guarantees you preserve the plywood’s finish quality while preparing it efficiently for subsequent steps.
For the best results, always ensure your workspace is well-lit and clean to maintain precision and safety during sanding.
Easy Steps To Prepare Plywood Before Sanding
Before sanding plywood, you need to thoroughly clean the surface to remove dust, debris, and any loose particles that could cause scratches during sanding.
Use a dry or slightly damp cloth to wipe the sheet, then let it dry completely.
Next, inspect the plywood for rough spots, glue residue, or pencil marks, and remove any contaminants with a scraper or fine sandpaper if necessary.
If you’re working with previously finished plywood, strip paint, stain, or varnish to expose bare wood for even sanding.
Finally, fill any voids or imperfections with wood filler and let it cure fully.
These preparatory steps guarantee a smooth, consistent surface, minimizing the risk of veneer damage and improving your sanding efficiency and finish quality.
It is also important to inspect surface finishes that might block sanding or moisture absorption, especially if you plan to flatten or treat the plywood later.
Choosing The Right Grit For Plywood Sanding
Select the appropriate sandpaper grit to balance effective smoothing with veneer protection.
Start with 120 or 150 grit for general smoothing, especially on finish-grade plywood that requires minimal abrasion.
For rougher surfaces or splintery plywood, you may begin with 80 grit but proceed cautiously to avoid cutting through the thin veneer.
Follow initial sanding with 180 grit to refine the surface and remove scratches left by coarser grits.
Finish with 220 grit to prepare for paint, stain, or varnish, ensuring a smooth, uniform finish.
Avoid very coarse grits that increase the risk of damaging the face ply.
Always sand with light pressure and along the grain to maintain veneer integrity and achieve consistent results without uneven spots or burn-through.
When To Use Light Or Aggressive Sanding On Plywood?
When it comes to sanding plywood, the approach really depends on the type you’re working with. For finish-grade plywood, it’s best to go with light sanding. This way, you can protect that thin veneer while keeping the surface nice and smooth.
On the flip side, if you’re dealing with rough plywood, you’ll need to step it up a notch with more aggressive sanding. This helps get rid of splinters and levels out any uneven areas. Just remember to balance your pressure and the grit you’re using so you don’t end up damaging the face layer. It’s also important to sand following the wood grain to maintain texture and appearance consistency.
Light Sanding For Finish-Grade
Finish-grade plywood usually requires only light sanding because its smooth veneer surface minimizes the need for aggressive abrasion.
You should use fine grit sandpaper, typically 180 to 220 grit, applying light, even pressure along the wood grain. This approach refines minor surface imperfections without risking damage to the delicate veneer layer.
Focus on smoothing edges, removing faint scratches, and preparing the surface for paint or varnish. Avoid heavy sanding or coarse grits, as these can quickly wear through the face ply, exposing the core.
Always keep your sander flat and move steadily to maintain an even finish. Proper dust removal before and after sanding also guarantees peak adhesion and a flawless final appearance on finish-grade plywood.
For optimal paint adhesion and durability, consider applying a stain-blocking primer specifically formulated for wood surfaces after sanding.
Aggressive Sanding On Rough Plywood
While finish-grade plywood benefits from gentle sanding to protect its smooth veneer, rough plywood often demands a more assertive approach.
You’ll need aggressive sanding to remove splinters, rough textures, and uneven surfaces inherent in lower-grade sheets. This process preps the plywood adequately for further refinishing or sealing.
When deciding to sand aggressively, consider these points:
Start with 80–120 grit to tackle coarse surfaces efficiently.
Sand with the grain to avoid veneer damage and minimize scratches.
Apply steady, moderate pressure, ensuring the sander remains flat against the surface.
Avoid lingering too long in one spot to prevent gouges or depressions.
Inspect frequently to prevent sanding through the veneer, especially near edges and corners.
Using the right tools, such as blades with aggressive pitch tooth designs, can also improve surface preparation before sanding.
This targeted approach guarantees a level surface without compromising plywood integrity.
Balancing Pressure And Grit
Mastering the balance between sanding pressure and grit choice is essential to preserving plywood’s veneer while achieving the desired surface smoothness.
Apply light, even pressure to avoid cutting through the thin face layer, especially on finish-grade plywood.
Use coarser grits (80–120) only on rough or splintery sheets, paired with gentle pressure to remove imperfections without excessive material removal.
For general smoothing, start with 120 or 150 grit, then refine with 180 grit. Finish with 220 grit for a smooth surface ready for paint or stain.
Avoid aggressive sanding or coarse grits on thin veneers, as they risk burn-through and uneven spots.
Always sand with the grain, keep the sander flat, and move steadily. This balance guarantees effective preparation without damaging the plywood surface.
For best results, consider using a hand sander or drum sander to level uneven areas and prepare the surface properly before finishing.
Techniques For Smooth Plywood Sanding
To get that smooth finish we all want, it’s important to sand plywood with the grain. This helps minimize scratches and protects the veneer from damage. Trust me, it makes a difference!
When you’re sanding, try to apply light, even pressure. This way, the abrasive does its job without cutting too deeply into the surface. If you press too hard, you might end up with some unwanted marks.
Also, keep your sander flat while you work. Move it steadily to avoid creating uneven spots or dips. A little patience goes a long way in achieving that perfect finish!
Using tools with ergonomic handles can reduce hand fatigue during prolonged sanding sessions, making your work more comfortable and efficient.
Sanding With The Grain
Consistently sanding with the grain is essential for preserving plywood’s veneer integrity and achieving a smooth surface.
When you follow the wood grain, you minimize scratches and prevent damage to the thin face veneer.
Sanding against or across the grain risks visible marks and uneven texture, which are difficult to fix.
Keep these tips in mind when sanding with the grain:
- Align your sanding motion parallel to the wood grain direction.
- Use light, controlled strokes to avoid cutting through the veneer.
- Maintain consistent speed and avoid lingering in one spot.
- Check your progress frequently to catch any deviations early.
- Finish with finer grit sandpaper to enhance smoothness without abrasion.
For added protection after sanding, applying a durable finish can help preserve the plywood surface and extend its lifespan.
Maintaining Even Pressure
Maintaining even pressure while sanding plywood markedly reduces the risk of uneven surfaces and veneer damage.
You should apply consistent, light pressure, allowing the abrasive grit to do the work rather than forcing material removal.
Uneven pressure causes dips or burn-through, especially on thin veneer layers.
Hold the sander flat against the plywood to prevent gouges and keep your hand steady.
Move the sander in smooth, overlapping strokes along the grain, avoiding dwelling in one spot.
If you notice resistance, check your pressure. Too much force can wear out sandpaper prematurely and damage the face ply.
Using a sanding block or orbital sander with controlled pressure helps maintain uniform contact.
This technique guarantees a smooth, even finish without compromising the plywood’s delicate surface.
Choosing a sander with ergonomic grips can also help maintain consistent pressure and reduce user fatigue during prolonged sanding sessions.
Special Tips For Sanding Plywood Edges And Corners
When sanding plywood edges and corners, you need to exercise extra caution because these areas are prone to splintering and damage. To protect the veneer and maintain structural integrity, focus on controlled, light sanding and avoid aggressive pressure.
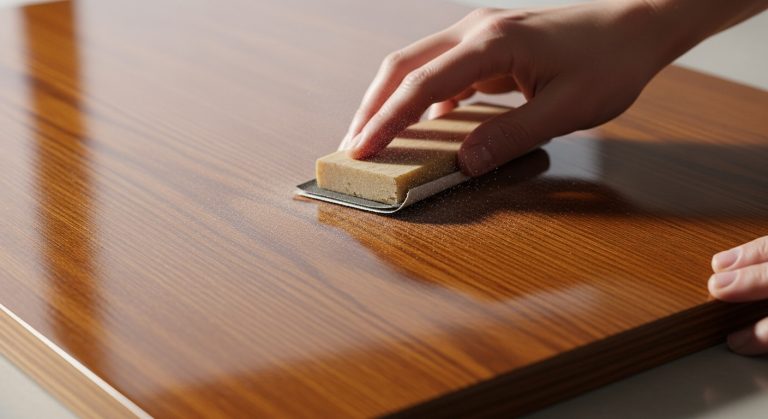
Use a sanding block or sponge to maintain flat, even contact. Sand with the grain along edges to minimize tear-out. Employ finer grit sandpaper initially to reduce roughness gently.
Avoid stationary sanding to prevent localized wear or burn-through. Regularly inspect edges for splinters or veneer lifting during sanding.
Following these tips helps you preserve the plywood’s appearance and strength while preparing edges and corners for finishing. Precision and a gentle approach are key to preventing costly surface damage in these vulnerable sections. Additionally, the use of self-drilling screws can help minimize splitting when fastening plywood after sanding.
What Grit To Use For Final Plywood Finishing?
Choose the right grit for your final plywood finishing to guarantee a smooth, even surface that enhances paint, stain, or varnish adhesion. For this stage, 220 grit sandpaper is ideal. It’s fine enough to eliminate minor scratches and smooth the veneer without risking damage.
Avoid coarser grits like 80 or 120 at this point, as they can cut too deeply into the thin face layer. If you’ve done initial sanding with 120 or 150 grit, follow up with 180 grit before moving to 220 grit. Always sand lightly with the grain, applying even pressure to prevent uneven spots.
This sequence refines the surface effectively, preparing it for a uniform finish and a professional-quality result.
Why Sanding Helps Paint And Finish Stick Better?
After properly sanding your plywood to the right grit, you create a surface that allows paint and finish materials to adhere more effectively.
Sanding removes surface irregularities, exposing fresh fibers that bind better with coatings.
It also roughens the veneer microscopically, increasing mechanical grip for paint or varnish.
This preparation minimizes peeling and flaking by promoting uniform absorption and penetration.
Key reasons why sanding improves adhesion include:
- Eliminates dust, debris, and contaminants that block bonding
- Smooths surface imperfections that cause uneven coating thickness
- Opens wood pores for deeper finish penetration
- Creates uniform texture, preventing finish pooling or running
- Enhances mechanical keying, strengthening finish durability
How To Avoid Common Plywood Sanding Mistakes?
Although sanding plywood might seem straightforward, it demands careful control to prevent damaging the thin face veneer. To avoid common mistakes, use light pressure and sand with the grain. Select appropriate grits and don’t rush with coarse grits early on. Always clean dust before sanding. Pay special attention to edges and corners to prevent splintering.
| Mistake | Cause | Prevention |
|---|---|---|
| Sanding through veneer | Excessive pressure or coarse grit | Use light pressure, start 120–150 grit |
| Uneven surface | Dwelling too long in one spot | Keep sander moving steadily |
| Scratches from dust | Not cleaning surface pre-sanding | Wipe surface before sanding |
| Edge splintering | Aggressive sanding on corners | Sand edges gently, with care |
Follow these steps to maintain plywood integrity and a smooth finish.
Frequently Asked Questions
Can Plywood Sanding Create Harmful Dust Particles?
Yes, sanding plywood creates fine dust particles that can be harmful if inhaled.
You should always wear a dust mask or respirator to protect your lungs.
Use proper ventilation or a dust extraction system to minimize airborne particles.
Also, avoid sanding in confined spaces without airflow.
Taking these precautions helps you reduce exposure to wood dust, which can cause respiratory irritation or long-term health issues with repeated inhalation.
Is Sanding Plywood Safe for Beginners?
Yes, sanding plywood is safe for beginners if you follow basic precautions.
Use light pressure and fine grit sandpaper to avoid damaging the veneer.
Work with the grain and keep the sander flat to prevent uneven spots.
Always wear a dust mask and eye protection to avoid inhaling dust or debris.
Start with smoother plywood to build confidence and gradually practice on rougher sheets to improve technique safely and effectively.
What Tools Are Best for Sanding Large Plywood Sheets?
Think of sanding large plywood sheets like painting a wall. You want broad, even strokes.
Your best tools are a random orbital sander for smooth, swirl-free finishes and a belt sander for quick material removal on rough surfaces.
Use 80–120 grit sandpaper first, then refine with finer grits.
Keep the sander flat, move steadily, and apply light pressure to protect the veneer and guarantee an even, professional result.
How Long Does Plywood Sanding Typically Take?
You’ll typically spend 15 to 30 minutes sanding a standard 4×8 plywood sheet, depending on its roughness and your finish goals.
Light sanding on smooth, finish-grade plywood takes less time, around 10-15 minutes.
Rougher sheets or prepping for paint may require 25-30 minutes.
Using the right grit progression and sanding tools efficiently will speed the process while protecting the veneer.
Always work steadily and avoid over-sanding to prevent damage.
Can Sanding Restore Water-Damaged Plywood Surfaces?
Sanding can improve the appearance of water-damaged plywood, but it won’t fully restore it if damage penetrates deeply.
You’ll need to remove surface stains and roughness by sanding lightly with fine grit, but swelling, warping, or delamination can’t be fixed this way.
For minor surface issues, sanding smooths fibers and preps for finishing.
However, extensive water damage requires repair or replacement to ensure structural integrity and a quality finish.
The Bottom Line on Sanding Plywood Without Damage
Sanding plywood properly guarantees a smooth, durable finish that enhances both appearance and adhesion.
By choosing the right grit and sanding technique, you can avoid damaging the delicate veneer and achieve professional results.
Are you ready to transform rough plywood into a flawless surface with precision and care?
Remember, careful sanding isn’t just a step; it’s the foundation for a long-lasting, high-quality finish that stands the test of time.