Best Way to Apply Shellac: Beginner’s Guide to Wood Finishing
To apply shellac effectively, start by sanding your wood smoothly and cleaning off all dust for proper adhesion.
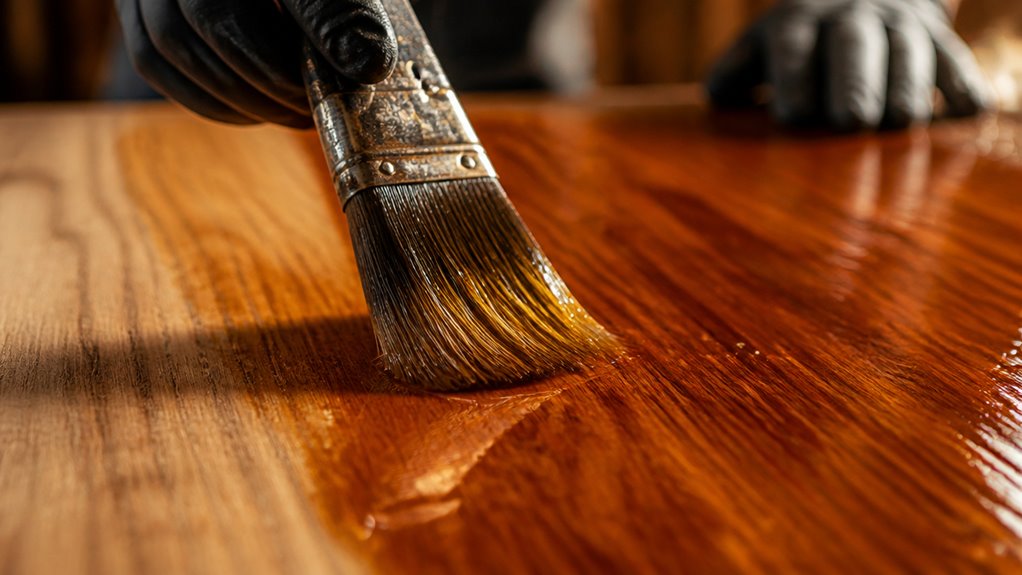
Use a fine natural bristle or china bristle brush, lightly dampened with alcohol, to apply thin, even coats with the grain.
Choose the right shellac cut: thin for sealing, thicker for build-up. Wait 30–60 minutes between coats before sanding lightly with fine grit.
Maintaining these steps guarantees a smooth, durable finish. Explore further for pro tips on mixing, drying, and storage.
Key Takeaways
- Use a fine natural bristle or china-bristle brush, applying thin, even coats with long strokes following the wood grain.
- Start with a thin 1–2 lb. cut shellac sealer to stabilize wood and prevent blotchiness before build-up coats.
- Allow each coat to dry for 30–60 minutes and sand lightly with 320-grit between coats to remove dust nibs and ensure adhesion.
- Stir shellac gently before use to avoid bubbles and apply from the wet edge, avoiding overbrushing or touching up once setting begins.
- Work in a clean, dust-free, well-ventilated area, ensuring the wood surface is dry, smooth, and free of oils before application.
Preparing Wood for Shellac

Before applying shellac, you need to prepare the wood surface thoroughly to guarantee proper adhesion and a smooth finish.
Start by sanding the wood smoothly, removing old finishes and any loose particles. Use progressively finer grits to eliminate scratches and achieve an even texture.
Begin by sanding the wood thoroughly, removing old finishes and smoothing with finer grits for an even surface.
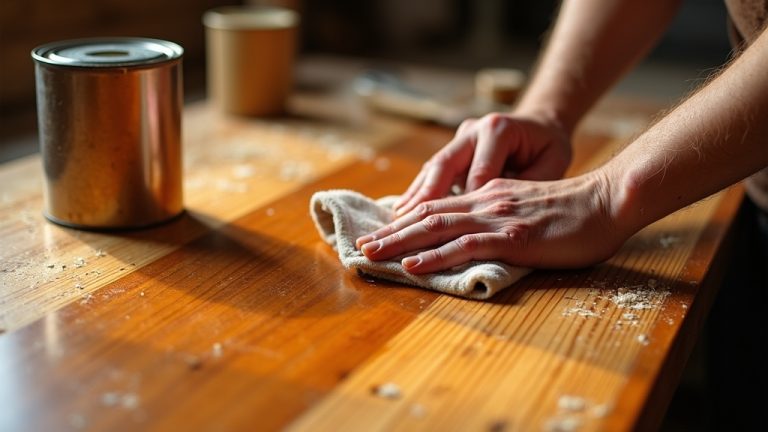
After sanding, clean dust completely using a tack cloth or vacuum; any residue will prevent proper bonding. Inspect the surface carefully for defects since shellac dries quickly and limits correction time.
If the wood is bare, consider a thin shellac sealer coat to stabilize the surface and promote even buildup.
Finally, make certain the wood is dry and free from contaminants like oils or moisture to avoid adhesion problems.
For best results, use a wax- and silicone-free tack cloth to remove dust without leaving residue.
Proper preparation sets the foundation for a flawless shellac finish.
Best Brushes and Tools for Shellac
When it comes to applying shellac, you’ll want to pick the right brush for the job. A fine natural bristle, china bristle, or even a badger brush can work wonders for achieving that smooth, even coat. It really makes a difference!
But if you prefer something a bit different, you can also use a clean, unwrinkled cloth, pad, or sponge. These tools are great for thinner coats and give you greater control over the application. Plus, choosing the right tool helps prevent those pesky brush marks and ensures that you get proper adhesion and finish quality.
For best results, be sure to lightly sand the shellac with 320-grit sandpaper before applying a topcoat to promote adhesion.
Happy shellacking!
Ideal Brush Types
A fine natural bristle brush, such as those made from china bristles or badger hair, offers the best control and smooth application when working with shellac.
These brushes hold just the right amount of liquid, allowing you to spread thin, even coats without streaks or bubbles.
Choose a brush with a fine, tapered tip to reach tight corners and maintain a consistent flow.
Synthetic brushes tend to be less effective, as they may not absorb or release shellac evenly.
Before starting, dampen the brush slightly with alcohol to prevent shellac from hardening in the bristles.
Always work with long, steady strokes following the grain, and avoid overbrushing to prevent marks.
Investing in a quality natural bristle brush improves your finish’s clarity and smoothness markedly.
For optimal results, consider the drying time of your finish to plan multiple coats effectively.
Alternative Application Tools
When working with shellac, branching out beyond traditional brushes can help you achieve more control and varied textures in your finish.
Consider using lint-free cloths or pads for applying thin, even coats quickly, especially on flat or gently curved surfaces.
Sponges also work well for delicate edges and tight spots, allowing you to avoid brush marks.
For detailed work, a small foam brush can offer precise application without streaking.
When padding shellac, make sure your cloth is smooth and unwrinkled to prevent surface marks.
Remember to keep your tools clean and free of dried shellac, as residue can affect application quality.
Experimenting with these alternative tools lets you tailor your technique to the project for a flawless, professional finish.
Ensure that you work in an environment with controlled temperature and humidity to optimize the curing and finish quality.
Choosing the Right Shellac Mix
When it comes to choosing the right shellac mix for your project, it’s all about finding that sweet spot. Typically, you’ll be looking at cuts ranging from 1 to 3 pounds per gallon, depending on what you’re aiming for.
Now, when you’re mixing flake shellac, take your time. Combine those flakes with denatured alcohol carefully to ensure you get a nice, consistent solution. And remember, gentle stirring is key! You don’t want to introduce bubbles into the mix, as they can really mess with the quality of your finish. So, go easy and enjoy the process! Applying shellac as a barrier coat can improve adhesion and reduce peeling risks when finishing over lacquer.
Optimal Shellac Cut
Select the proper shellac cut to match your project’s needs and desired finish characteristics. A cut refers to the ratio of shellac flakes to solvent, influencing drying time, build, and smoothness.
For thin, fast-drying coats, use a 1 lb. cut. For buildable layers, a 2–3 lb. cut works better. Thicker cuts take longer to dry but provide more protection.
Match your cut to the application method and wood type to avoid issues like blotching or uneven film.
When choosing finishes for wood surfaces near water, consider products with proven moisture resistance to ensure durability.
| Cut (lbs) | Description |
|---|---|
| 1 | Thin coats, fast dry |
| 1.5 | Light build, smooth |
| 2 | Medium build, durable |
| 2.5 | Thick coats, slower dry |
| 3 | Heavy build, max protection |
Adjust your shellac cut accordingly for best results.
Mixing Flake Shellac
Adjusting your shellac cut sets the foundation, but getting the mix right guarantees consistent application and finish quality.
When mixing flake shellac, measure flakes precisely to match your desired cut.
Typically, use 1 ounce of flakes per 8 ounces of denatured alcohol for a 1 lb. cut.
Use clean, room-temperature alcohol to guarantee proper dissolution.
Add flakes gradually to the alcohol, allowing them to soften before stirring gently.
Let the mixture sit for several hours or overnight, stirring occasionally to promote full dissolution.
Avoid rushing this step; incomplete mixing leads to uneven finishes and poor adhesion.
Once fully dissolved, strain the shellac to remove any undissolved particles.
Store your mix in a sealed container to preserve freshness and maintain consistent performance throughout your project.
For the best results, ensure your workspace is well-ventilated to avoid inhaling fumes during mixing and application.
Stirring Without Bubbles
Stir the shellac mix gently and deliberately to prevent introducing bubbles that can mar the finish. Bubbles create uneven spots and weaken the smoothness of your coat, so careful mixing is essential.
When stirring, use a flat stir stick, not a circular motion, to minimize air entrapment. Stir slowly and steadily, avoiding vigorous shaking or whipping. Mix just enough to combine flakes and alcohol without overworking.
Let the shellac sit briefly after stirring to allow any bubbles to rise and dissipate. Avoid stirring immediately before application to reduce bubble formation on the surface.
Choosing the right cut and mixing method guarantees a consistent, clear shellac coat. With careful stirring, you’ll achieve a flawless finish that enhances wood’s natural beauty.
Proper drying and curing conditions are crucial to avoid uneven finishes and ensure the shellac forms a durable, food-safe surface, similar to the curing process of pure tung oil.
How to Apply Shellac Step-by-Step?
Begin by thoroughly preparing your wood surface. Sand it smooth, remove any loose finish, and clean away all dust to guarantee proper adhesion.
Thoroughly prepare your wood by sanding smooth, removing loose finish, and cleaning dust for perfect adhesion.
Next, choose a fine natural or china-bristle brush or a clean pad for thin coats. Stir your shellac gently to avoid bubbles.
Dip your applicator lightly, then apply shellac using long, even strokes with the grain. Keep coats thin and overlapping to prevent drips and unevenness.
Stop brushing as soon as the finish begins to drag to avoid marks. Allow the coat to dry fully before considering the next step.
If needed, lightly sand with fine-grit paper to smooth the surface before applying subsequent coats. Maintain a clean, dry environment to ensure the best finish results.
For a durable and protective finish, consider using a waterborne polyurethane as a complementary topcoat after shellac has fully cured.
How Long to Wait Between Shellac Coats?
After applying your first shellac coat and allowing it to dry completely, the timing before adding another layer plays a critical role in the final finish quality.
Shellac dries quickly, but how long you wait affects adhesion and smoothness. Generally, you should wait between 30 minutes to an hour before recoating.
Factors like coat thickness, temperature, and humidity influence drying time. Consider these guidelines:
Thin coats dry faster, often ready in 5–30 minutes.
Thicker coats need up to 60 minutes or more.
High humidity slows drying; allow extra time.
Cooler temperatures extend drying time.
Avoid recoating too soon to prevent lifting or uneven finish.
For comparison, water-based finishes like Varathane Premium Polyurethane typically recommend recoating after 2 hours to ensure proper adhesion and durability, highlighting the importance of respecting drying and recoating times for best results.
Sanding Between Shellac Coats
Regularly sanding between shellac coats enhances both adhesion and surface smoothness, ensuring a flawless finish.
After each coat has fully dried, use fine-grit sandpaper, typically 180 to 220 grit for the first coat and 320 to 400 grit for subsequent coats.
Sand gently with the grain to avoid visible scratches and remove any dust nibs or imperfections.
This step not only smooths the surface but also creates a slight texture for the next layer to bond effectively.
Be careful not to over-sand and expose bare wood.
Once sanding is complete, thoroughly clean the surface to eliminate dust before applying the next coat.
While sanding isn’t absolutely required for adhesion, it markedly improves the final look and feel of your shellac finish.
Using Shellac as Sealer and Buildable Finish
When you want to protect bare wood or create a solid foundation for additional layers, shellac serves effectively as both a sealer and a buildable finish.
Start with a thin 1–2 lb. cut to seal the wood, blocking stain blotchiness and preventing excessive absorption. Then, apply progressively thicker 2–3 lb. cuts for build-up.
Here’s what to keep in mind:
Make sure the wood is clean, dry, and smooth before sealing.
Apply thin, even coats with a natural bristle brush or pad.
Allow sufficient drying time, typically 30–60 minutes, between coats.
Lightly sand between coats with fine grit for adhesion and smoothness.
Avoid heavy coats to prevent slow drying and surface defects.
Following these steps helps you achieve a durable, glossy finish that’s ready for further refinement.
Common Shellac Mistakes and How to Avoid Them
Achieving a flawless shellac finish requires more than just proper application and drying times. You also need to watch out for common mistakes that can compromise your work.
Avoid applying heavy coats; instead, use thin, overlapping passes to prevent drips and uneven drying. Don’t overwork the finish. Stop brushing as soon as it begins to drag to avoid marks.
When padding, use a smooth, unwrinkled cloth to prevent streaks. Always work from the wet edge to maintain even coverage. Never touch up missed spots after the shellac starts to set, as patching shows distinctly.
Finally, keep your shellac container closed when not in use to limit solvent evaporation and maintain consistent mixing quality. Following these steps keeps your finish smooth and professional.
Storing and Maintaining Your Shellac Mix
Although shellac is prized for its ease of use and quick drying time, maintaining its quality between sessions requires careful storage. To keep your shellac mix fresh and effective, you need to protect it from air, moisture, and temperature fluctuations. Follow these key tips:
Store shellac in an airtight container to prevent evaporation and contamination. Keep the container in a cool, dark place away from direct sunlight.
Store shellac airtight in a cool, dark spot to preserve quality and prevent evaporation.
Avoid exposure to heat, which can degrade the shellac and reduce shelf life. Gently stir the mix before each use to re-incorporate any settled flakes without creating bubbles.
Label your container with the mix date to track freshness. Typically, shellac lasts a few weeks unopened, but only days once opened.
Proper storage guarantees consistent results and saves you from costly remixes.
Frequently Asked Questions
Can Shellac Be Applied Over Painted Surfaces?
Yes, you can apply shellac over painted surfaces, but you need to prepare the paint properly first.
Make sure the paint is fully cured, clean, and lightly sanded to create a smooth, slightly rough surface for better adhesion.
Remove all dust before applying shellac.
Apply thin, even coats, and avoid thick layers to guarantee proper drying and prevent peeling.
Proper surface prep guarantees your shellac finish bonds well and looks professional.
Is Shellac Safe for Food-Contact Surfaces?
“An ounce of prevention is worth a pound of cure.”
Yes, shellac is safe for food-contact surfaces once fully cured, as it’s a natural resin free from harmful chemicals.
To guarantee safety, apply thin coats and allow thorough drying. Avoid over-thick layers.
Use food-grade shellac if possible, and keep the surface clean and sealed.
Proper preparation and curing give you a durable, non-toxic finish ideal for utensils or cutting boards.
How Does Humidity Affect Shellac Drying Time?
Humidity slows shellac drying time by increasing moisture in the air, which delays solvent evaporation.
When humidity is high, you’ll need to wait longer, sometimes up to 60 minutes or more, between coats to guarantee proper curing.
To avoid tacky or uneven finishes, apply thinner coats and work in a well-ventilated, low-humidity environment when possible.
Monitoring humidity helps you plan drying times and avoid defects like blotching or poor adhesion.
Can Shellac Be Tinted or Colored?
You can absolutely tint or color shellac, turning it into a versatile artist’s palette. To do this, add dry pigments or dyes to your shellac mix carefully, ensuring you stir gently to avoid bubbles.
Start with small amounts, testing on scrap wood to achieve your desired shade. Remember, colored shellac still maintains its fast drying time and finish qualities, so precise mixing and application are key for a flawless, tinted result.
What Are the Best Solvents to Remove Shellac?
To remove shellac effectively, you’ll want to use denatured alcohol, also known as shellac thinner. It dissolves shellac quickly without damaging the wood beneath.
Apply it with a clean cloth or brush, let it sit briefly to soften the finish, then gently scrape or wipe away the shellac.
Avoid harsh solvents like acetone or lacquer thinner, as they can harm the wood or underlying finishes. Always work in a well-ventilated area.
Shellac Application: Tools, Sanding, and Coating Tips
Now that you know how to prepare, apply, and maintain shellac properly, are you ready to achieve that flawless finish?
With the right tools, careful sanding, and precise timing between coats, shellac can transform your woodwork into a smooth, durable masterpiece.
Remember to avoid common mistakes and store your shellac correctly to extend its usability.
Follow these steps closely, and you’ll master shellac application with confidence and professional results every time.