How to Finish a Cutting Board: Best Oils and Finishes Explained
To finish a cutting board, first flatten it using a drum sander. Then hand sand through grits from 80 to 150 to remove marks and achieve smoothness.
Create edge profiles and finger grips before final sanding for uniform shaping. Apply food-grade mineral oil in multiple coats, allowing full absorption.
Then add a beeswax-mineral oil blend to form a protective, moisture-resistant finish. Regular oil and wax maintenance preserves durability and appearance.
You’ll also find guidance on professional oiling and buffing techniques ahead.
Key Takeaways
- Sand the board progressively from 80 to 150 grit, removing drum sander marks and ensuring smooth edges and finger grips before final sanding.
- Apply food-grade mineral oil by soaking or flooding, letting it absorb for 12 hours, and repeat 3-4 times with light sanding between coats.
- Use a butcher block conditioner with food-safe waxes after oiling to enhance wood protection and improve finish durability.
- Warm a beeswax and mineral oil blend to chapstick consistency, spread thinly, let solidify for an hour, then buff with a soft cloth for a smooth finish.
- Maintain the cutting board monthly by reapplying oil and wax to nourish wood, repel moisture, and extend its lifespan.
Prepare Your Cutting Board by Flattening and Initial Sanding

Before you begin sanding, make sure your cutting board blank is perfectly flat by running it through a drum sander set to 120 grit. This step removes any unevenness from glue-ups and establishes a uniform surface for subsequent profiling and hand sanding.
Next, add edge profiling and finger grips to the board, ensuring all contours are crisp and well-defined. Use 80 grit sandpaper by hand to remove drum sander lines, working systematically across the surface.
Draw pencil lines perpendicular to the grain to verify complete sanding coverage. Only proceed once these lines are fully removed, indicating even abrasion.
This meticulous preparation optimizes the board’s texture, ensuring subsequent sanding stages refine rather than correct imperfections. It sets a precise foundation for a quality finish.
After initial sanding, applying distilled water or a damp cloth to raise the grain before final sanding can help achieve a smoother surface.
Progress Through Sandpaper Grits for Smoothness
Once you’ve smoothed out the initial roughness with 80 grit sandpaper and verified complete coverage using pencil lines, it’s time to refine the surface further.
Progress sequentially through 100, 120, and 150 grit sandpapers, removing scratches left by the previous grit. Each step should be thorough, ensuring uniform abrasion without ignoring edges and end grain.
Maintain consistent sanding pressure and direction, reversing grain to eliminate swirl marks. After 150 grit, inspect the board for any remaining imperfections; repeat sanding if necessary.
This progression prepares the wood for final sanding steps, enhancing smoothness and surface uniformity. Avoid skipping grits to prevent residual scratches that compromise finish quality.
This methodical approach results in a finely prepared surface, ready to accept oils or other finishes that highlight the wood’s natural beauty.
For optimal results, it is important to follow a grit progression from coarse to fine to achieve a professional and flawless finish.
Add Edge Profiles and Finger Grips Before Sanding (Optional Step)
Hey there! Before you dive into sanding, consider adding edge profiles. Not only do they enhance grip and look great, but they also help reduce sharp edges.
Now, when it comes to designing finger grips, getting the shape just right is key. You want them to feel comfortable and functional while making sure the board stays strong.
This optional step is a great opportunity to personalize your cutting board’s handling before you smooth out the surface. Happy crafting!
For best results, be sure to finish your board with a food-safe sealer to protect the wood and maintain its durability.
Benefits of Edge Profiling
Incorporating edge profiling and finger grips into your cutting board design enhances both functionality and safety.
Edge profiles create smooth, rounded corners that reduce splintering and improve grip comfort. Finger grips provide secure handling, making board lifting and repositioning safer and easier.
Adding these features before sanding guarantees uniform shaping and prevents sanding inconsistencies. This step also helps avoid sharp edges that can cause injury or damage surfaces.
Using templates and jigs made from stable materials and clamped securely ensures precision and consistency in shaping these features.
| Benefit | Detail |
|---|---|
| Safety | Rounded edges reduce cuts and splinters |
| Handling | Finger grips improve control and stability |
| Durability | Profiles protect edges from chipping |
| Sanding Efficiency | Uniform shapes ease consistent sanding |
Designing Finger Grip Shapes
Although adding finger grips is optional, designing them thoughtfully can markedly enhance your cutting board’s ergonomics and safety.
Before sanding, carve finger grips that fit your hand comfortably, ensuring secure handling. Follow these steps:
- Measure your hand span to determine ideal grip size and depth for ease of use.
- Mark precise finger grip locations on the board’s edge with a pencil for symmetry.
- Use a router or carving tools to create smooth, rounded recesses, avoiding sharp corners that can cause discomfort.
- Verify the grip’s fit by holding the board, adjusting contours as needed for a secure, natural hold.
Complete edge profiles and finger grips before sanding to blend them seamlessly with the board’s surface.
This enhances both function and aesthetics. For the best results, consider using a hand plane with proper grip and body positioning to refine the edges smoothly.
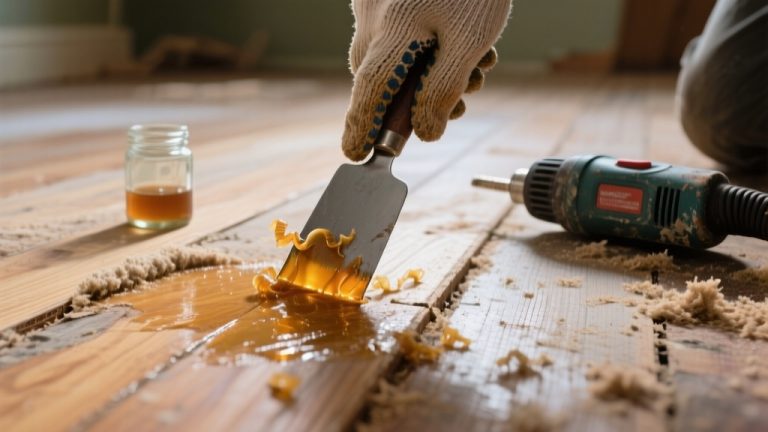
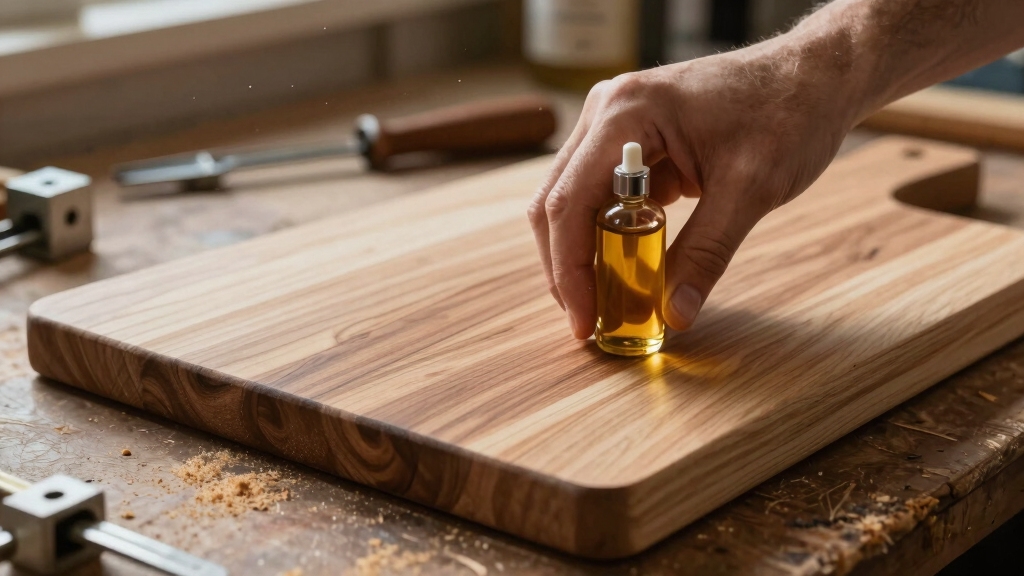
Apply Mineral Oil to Nourish Your Cutting Board
When you apply mineral oil to your cutting board, you actively nourish the wood by allowing the oil to penetrate deeply into its pores, preventing drying and cracking.
Begin by dipping the board in a mineral oil bath for five minutes to guarantee thorough saturation. If dipping isn’t practical, flood large surfaces with oil from a container, applying liberally to soak into the fibers.
After soaking, place the board on a drying rack for 12 hours to drip and absorb fully. Once dry, wipe off any residue with a clean cloth.
Repeat this process three to four times, lightly sanding with fine grit between applications to enhance oil absorption and surface smoothness. This method maintains the board’s integrity and extends its usable life.
For best results, use a food-grade mineral oil that is odorless, tasteless, and meets USDA or FDA safety standards to ensure non-toxicity and effective protection.
Finish Your Cutting Board With Wax for Lustrous Smoothness
Once you’ve nourished your cutting board with mineral oil, it’s time to take it up a notch by applying a thin, even layer of wood wax. This step is super important because it seals and enhances the surface, making your board look fantastic.
Now, let that wax sit for about an hour. This gives it time to do its magic. After that, grab a cotton cloth and buff it thoroughly. You’ll want to ensure that smooth, lustrous finish really shines.
For best results, choose a food-safe wood finish to maintain safety and durability for kitchen use.
Applying Wood Wax
Enhance your cutting board’s durability and appearance by applying a thin layer of wood wax immediately after mineral oil treatment. This step seals the pores and adds a protective, moisture-resistant barrier.
Follow these steps precisely:
- Warm a beeswax and mineral oil mixture to a chapstick-like consistency for easy application.
- Pour the warm wax onto the board and spread evenly with a spatula, ensuring full coverage.
- Allow the wax to solidify fully, then carefully scrape off any excess to avoid buildup.
- Let the wax set for at least an hour before proceeding to buffing (covered in the next section).
Applying wax this way creates a smooth, buttery finish that enhances wood grain while providing food-safe protection without compromising the board’s cutting surface. For enhanced long-lasting protection, consider using 100% pure tung oil as a durable natural finish before waxing.
Buffing For Luster
Once the wax has fully set and excess has been removed, you’ll begin buffing to bring out the cutting board’s luster and smoothness.
Use a clean, soft cotton cloth, applying firm, circular strokes to evenly warm and polish the wax layer. This friction slightly melts the wax, allowing it to penetrate wood pores, enhancing depth and sheen.
Focus on consistent pressure to avoid uneven gloss or wax buildup. Continue buffing until the surface reflects light uniformly with a buttery, smooth finish.
If needed, repeat the process after an overnight soak for best results. Proper buffing not only improves aesthetics but also seals the wood, providing durable moisture resistance while preserving the board’s natural texture and food-safe qualities.
Additionally, applying a protective wax layer helps prevent moisture damage and extends the cutting board’s lifespan.
When and How to Use Commercial Oils and Conditioners?
Although mineral oil is widely recommended for maintaining cutting boards, commercial oils and conditioners offer specialized formulations that deeply penetrate wood fibers. They provide enhanced protection. You’ll find these products valuable when you want to preserve the board’s rich appearance and improve water resistance.
Follow these steps for prime use:
- Apply a generous coat of commercial cutting board oil, ensuring the wood fully saturates.
- Let the oil soak in for at least 20-30 minutes to penetrate deeply.
- Follow with a butcher block conditioner containing food-safe waxes to add a protective barrier.
- After drying, buff the surface thoroughly to achieve a lustrous glow and enhance durability.
Using these products strategically maintains the board’s integrity without compromising food safety. Many commercial products are made with food-safe oils that are certified for contact with food, ensuring safe and effective treatment.
Maintain Your Cutting Board With Regular Oil and Wax Treatments
Regularly treating your cutting board with oil and wax is essential to preserve its durability and appearance.
Start by applying mineral oil liberally, allowing it to penetrate wood pores for at least 12 hours. Repeat this 3-4 times, sanding lightly between coatsingto maintain smoothness.
After oiling, spread a thin layer of beeswax and mineral oil blend, heated to chapstick consistency, evenly across the surface. Let it solidify for an hour, then buff with a cotton cloth to create a protective, food-safe barrier that fills knife marks and repels moisture.
Perform this maintenance monthly or when the board looks dry. Avoid varnishes; oils and waxes maintain the wood’s natural properties while preventing cracking and warping.
This ensures your cutting board remains functional and visually rich over time.
Frequently Asked Questions
Can I Use Other Oils Besides Mineral Oil on My Cutting Board?
You can use other oils like walnut or fractionated coconut oil, but mineral oil remains the best due to its food-safe, non-rancidifying properties.
Avoid vegetable or olive oils as they can spoil and smell unpleasant. If you choose alternatives, make sure they’re food-grade and stable.
For deeper protection, follow oiling with a beeswax-based finish. Always reapply regularly to maintain wood hydration and prevent cracking or bacterial growth.
How Do I Remove Stains or Odors From My Cutting Board?
To remove stains or odors from your cutting board, start by sprinkling coarse salt or baking soda over the surface.
Rub it vigorously with a lemon half, squeezing juice as you go to break down stains and neutralize odors.
Let it sit for 5-10 minutes before rinsing with warm water.
For tough stains, repeat or apply a paste of baking soda and water, then scrub.
Always dry thoroughly to prevent moisture damage.
Is It Safe to Put My Wooden Cutting Board in the Dishwasher?
Don’t toss your wooden cutting board into the dishwasher’s fiery tempest. It’s a recipe for warping and cracking.
The high heat and relentless water strip natural oils, leaving your board vulnerable and dried out. Instead, hand wash gently with mild soap and warm water, then dry immediately.
Regularly reapply mineral oil and beeswax to restore its protective barrier. This will preserve both its beauty and food-safe integrity for years to come.
How Often Should I Replace My Cutting Board?
You should replace your cutting board once deep grooves, cracks, or warping appear, as these harbor bacteria and compromise safety.
With proper maintenance, regular oiling, waxing, and thorough cleaning can extend its life for years.
However, if you notice persistent odors, discoloration, or the board becomes excessively thin from sanding, it’s time to invest in a new one to guarantee hygiene and functionality in your kitchen.
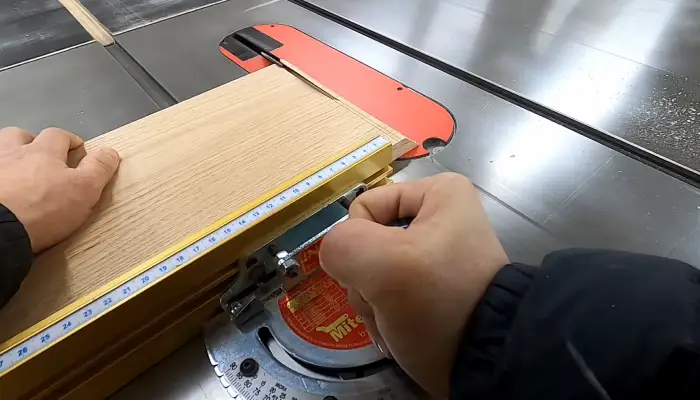
Can I Use Sanding Machines Instead of Hand Sanding?
Yes, you can use sanding machines like a drum sander to flatten and smooth your cutting board initially.
Start with 120 grit to remove glue lines, then proceed to hand sanding for finer control.
Machines remove material quickly but risk unevenness or over-sanding edges.
Always follow machine sanding with progressive hand sanding from 80 to 150 grit to eliminate machine marks and guarantee a smooth, consistent surface before final finishing.
Keep Your Cutting Board Durable, Smooth, and Ready for Daily Use
You’re now equipped to bring your cutting board to its best self, ensuring it’s both durable and inviting.
By carefully flattening, sanding through finer grits, adding thoughtful edges, and nourishing it with mineral oil and wax, you create a surface that’s ready for daily culinary adventures.
Regular upkeep with oils and conditioners keeps it resilient and charming. This turns maintenance into a simple ritual that preserves your board’s prime condition for years to come.