How to Remove Latex Paint: Fast & Effective Techniques
To remove latex paint, start by scraping wet paint carefully with a rag-covered scraper to protect surfaces.
For small dried spots, apply solvents like Goof-Off or use water-based methods such as hot water soaking and rubbing alcohol.
For larger areas, chemical strippers or a heat gun can soften paint for easier removal, followed by gentle scraping.
Always prioritize safety with gloves and ventilation.
Proper sanding and cleaning prepare the surface for refinishing, ensuring a professional finish as you explore further steps.
Key Takeaways
- Use a scraper covered with a dry rag to lift wet latex paint without scratching delicate surfaces.
- Apply specialized solvents like Goof-Off or use hot water and rubbing alcohol to soften and remove dried latex paint.
- For large areas, heat latex paint with a heat gun until it bubbles, then scrape gently with a putty knife.
- Always wear protective gear and ensure good ventilation when using chemical strippers or solvents to remove latex paint.
- Sand the surface starting with medium-grit paper, then finish with fine grit for smooth, paint-ready results after removal.
How to Remove Wet Latex Paint Without Damaging Surfaces?

When you need to wipe up wet latex paint without harming the underlying surface, start by covering your scraper with a dry rag. This prevents direct contact that could scratch or mark delicate finishes.
Cover your scraper with a dry rag to safely remove wet latex paint without damaging delicate surfaces.
With each swipe, slide the rag to expose a fresh, clean section. This maintains an effective wiping edge and avoids smearing paint back onto the surface.
Use the scraper’s sharp edge carefully to lift paint efficiently, whether indoors or outdoors. Be vigilant that wet paint on the rag doesn’t create additional mess; replace or refold the rag as needed.
This technique allows you to remove latex paint precisely without damaging substrates, ideal for touch-ups or cleaning lines. It’s a controlled, mechanical cleanup that minimizes cleanup time and surface risk. For best results, ensure surfaces are dry and avoid using high heat, as moisture and heat can damage delicate finishes during cleanup.
Best Solvents for Removing Small Dried Latex Paint Spots
Target small dried latex paint spots efficiently by applying specialized solvents designed to soften and loosen the paint for easy removal.
Industry standards like Goof-Off and Motsenbocker’s Lift Off work effectively; apply a small amount directly on the spot and let it penetrate briefly.
Goof-Off 2 contains ammonia, which softens dried latex without harming oil-based finishes, making it ideal for mixed surfaces.
For delicate or sensitive areas, test the solvent first to prevent residue or damage.
Alternatives such as rubbing alcohol on a terry cloth or Windex provide milder action for light spots.
After softening, wipe gently with a clean rag, minimizing scraping to avoid surface abrasion.
Always use gloves and ventilate the area well to ensure safe and efficient paint removal.
Keep in mind that proper ventilation is important to manage dust generation when using any chemical solvents indoors.
Water-Based Remedies to Soften and Lift Dried Latex Paint
Although dried latex paint can be stubborn, you can effectively soften it using water-based methods that leverage thermal and chemical principles.
Start by soaking the painted area in very hot water for about 30 minutes to induce thermal expansion, which loosens molecular bonds.
Next, apply a sponge saturated with rubbing alcohol and hold it over the paint spot. This melts and lifts the paint without harsh solvents.
Finally, use a biodegradable cleaner like Simple Green on finished surfaces to break down paint residues chemically and safely.
- Soak with very hot water to soften paint through thermal expansion.
- Use rubbing alcohol on a sponge to dissolve dried paint gently.
- Apply Simple Green for chemical breakdown on delicate finishes.
These steps prepare dried latex paint for easy removal with minimal surface damage. For best results, ensure the surface is clean and free of dust or oils before starting, as surface preparation significantly improves treatment effectiveness.
How to Use Chemical Strippers Safely on Latex Paint?
When you’re tackling latex paint with chemical strippers, start by applying a thick, even layer.
It’s really important to follow the manufacturer’s recommended dwell time, as this helps prevent any damage to the surface beneath.
Don’t forget to gear up! Always wear protective gear, and make sure you have good ventilation to keep those fumes at bay.
Safety first, right?
Once the paint starts to soften, you can carefully scrape it off.
After that, grab a clean rag and some warm water to wipe away any residue.
This will give you the best chance at a thorough removal.
Proper ventilation and safety precautions are essential when working with chemical strippers.
Happy stripping!
Proper Application Techniques
Apply chemical paint strippers carefully to avoid damaging the underlying surface or exposing yourself to harmful fumes.
Begin by spreading a thick, even layer of stripper using a brush, ensuring full coverage without drips.
Next, cover the treated area with laminated paper or plastic wrap taped down to retain moisture and boost effectiveness.
Follow the manufacturer’s dwell time strictly to prevent substrate harm.
After the paint softens, use a putty knife or scraper at a 30-degree angle to gently lift the coating without gouging the surface.
Finally, wipe away residue with a warm, damp rag to prepare for refinishing.
Remember these steps:
- Apply thick, even coat and seal with plastic wrap.
- Observe recommended dwell time carefully.
- Scrape gently, then clean residue thoroughly.
Using proper surface preparation techniques helps ensure the best results when refinishing.
Safety Precautions
Since chemical paint strippers contain potent solvents, you must prioritize ventilation and personal protective equipment. This helps avoid inhaling harmful fumes or contacting corrosive substances.
Always work outdoors or in well-ventilated areas. Use fans if necessary to disperse vapors. Wear chemical-resistant gloves, safety goggles, and long sleeves to protect your skin and eyes from splashes.
Avoid direct contact by applying the stripper with a brush rather than your hands. Keep a supply of clean water nearby for immediate rinsing in case of accidental exposure.
Follow the manufacturer’s dwell time strictly to prevent substrate damage. Dispose of used stripper and paint scrapings according to local hazardous waste regulations.
Never mix chemical strippers with other products, as this can cause dangerous reactions. Taking these precautions guarantees your safety during latex paint removal.
In addition, performing surface inspection after paint removal can help ensure all residues are properly cleaned and prevent future damage.
Effective Residue Removal
During chemical paint stripper use, removing residue effectively guarantees a clean surface and prevents damage.
After applying the stripper and allowing the dwell time, follow these steps for optimal residue removal:
- Scrape softened paint gently with a plastic or putty knife. Collect debris in a bucket to avoid spreading residue.
- Wipe the surface thoroughly with a warm, damp rag to remove remaining chemical traces and loosened paint particles.
- Rinse with clean water and dry promptly to prevent moisture damage or chemical residue buildup.
Always wear gloves and work in a ventilated area.
Covering the stripper with plastic wrap during dwell time keeps it moist and increases effectiveness.
Proper residue removal ensures the surface is ready for refinishing without compromising material integrity. Using tools with adjustable depth control can help prevent damage when preparing surfaces for repainting.
Heat Gun Removal of Latex Paint: A Step-by-Step Guide
Master the heat gun method by preparing your workspace with a drop cloth to catch debris. Warm the gun according to the manufacturer’s instructions.
Prepare your workspace with a drop cloth and warm the heat gun as per the manufacturer’s guidelines.
Hold the heat gun about two inches from the painted surface. Move it steadily in a back-and-forth motion to evenly heat the latex paint until it bubbles.
Avoid overheating or smoking, which indicates excessive heat. Once bubbling occurs, use a putty knife at a 30-degree angle to scrape the softened paint into a collection bowl.
Always wear a respirator to protect against fumes during this process. After scraping, smooth remaining paint particles with extra fine sandpaper or steel wool for a clean finish.
This technique efficiently removes latex paint without damaging the underlying surface when done with care and precision. Be mindful of the dust generation that can occur during scraping, and take appropriate steps to minimize inhalation and cleanup.
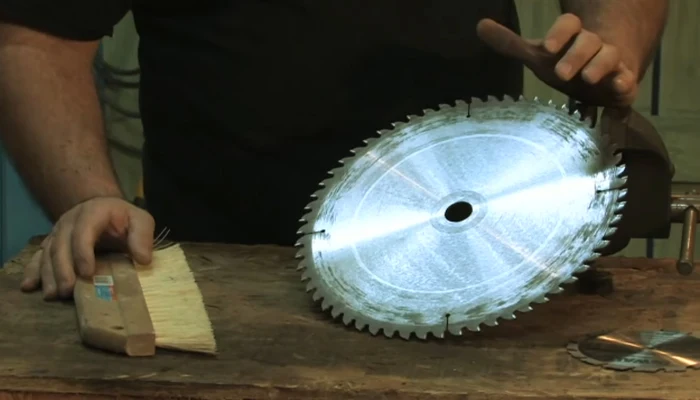
Mechanical Methods for Removing Large Areas of Latex Paint
After using a heat gun to soften latex paint on smaller sections, you might find mechanical methods more efficient for tackling larger areas. Here’s how to proceed:
- Use an angle grinder fitted with a strip disk. Hold it at a steady angle, applying even pressure, and work in small sections to avoid damaging the surface beneath. Wear hearing protection for safety.
- For softened paint, switch to a plastic scraper or putty knife to gently lift residue without gouging the substrate.
- Always wear rubber gloves when handling hot water or solvents during cleanup to protect your skin.
These mechanical techniques speed up removal on wide surfaces, especially outdoors or on durable materials. They complement heat treatment and solvent use, letting you remove latex paint efficiently and prepare for finishing steps.
Regular maintenance of your tools, including cleaning and inspecting blades, is important to prevent issues like increased friction and heat during mechanical removal.
Finishing Touches: Sanding and Cleaning After Latex Paint Removal
Once you’ve removed the bulk of the latex paint, sanding becomes vital to smooth the surface and eliminate any remaining residue.
Start with medium-grit sandpaper (120-150 grit) to remove uneven patches, then finish with fine-grit (220 grit) for a smooth, paint-ready surface.
Use a sanding block or orbital sander for even pressure, avoiding gouges or scratches.
After sanding, thoroughly clean the area to remove dust and debris.
Use a vacuum with a brush attachment followed by a damp microfiber cloth to wipe the surface clean.
Allow it to dry completely before applying any new finish.
Proper sanding and cleaning guarantee peak adhesion for repainting and a professional-quality result.
Don’t skip these finishing touches; they’re essential for a flawless finish.
Additionally, ensuring optimal environmental conditions such as temperature and humidity can significantly improve the drying and curing of any new finish applied.
Frequently Asked Questions
Can Latex Paint Removal Damage Different Types of Wood Finishes?
Yes, latex paint removal can damage wood finishes if you’re not careful.
Solvents like Goof-Off may harm sensitive or oil-based finishes, so always test a small area first.
Chemical strippers and heat guns risk drying or scorching the wood, especially softwoods or delicate veneers.
Mechanical methods might scratch or gouge surfaces.
To protect finishes, use gentle techniques, follow product instructions precisely, and wear gloves to avoid residue buildup or staining.
How to Dispose of Latex Paint Removal Chemicals Safely?
You should never pour latex paint removal chemicals down drains or into soil.
Instead, store leftover solvents like Goof-Off or Citristrip in sealed, labeled containers.
Take them to a local hazardous waste disposal facility or community collection event.
Check your municipality’s guidelines for chemical disposal, as they vary.
Always wear gloves and ventilate when handling residues and clean containers.
Proper disposal prevents environmental contamination and complies with safety regulations.
Are There Eco-Friendly Alternatives for Removing Latex Paint?
Yes, you can use eco-friendly alternatives like soaking dried paint in hot water to soften it before scraping with a plastic tool.
Simple Green works well on finished surfaces without harsh chemicals.
Rubbing alcohol on a sponge can melt paint spots gently.
These methods reduce chemical exposure and minimize environmental impact.
Always test on a small area first to avoid damage and wear gloves to protect your skin during removal.
What Safety Gear Is Essential During Latex Paint Removal?
You know the saying, “Better safe than sorry.” When removing latex paint, you need gloves to protect your skin from solvents and irritants.
Wear a respirator or mask to avoid inhaling fumes, especially with chemicals or heat guns. Safety goggles shield your eyes from splashes or debris.
Use hearing protection if you operate power tools. Finally, wear old clothes or a protective suit to prevent paint contact and contamination.
How Long Should I Wait Before Repainting After Removal?
You should wait at least 24 hours before repainting to guarantee the surface is fully dry and free of residues.
After using chemical strippers or solvents, rinse thoroughly and allow extra drying time.
If you used heat or mechanical methods, inspect for moisture or damage and let it cure accordingly.
Proper drying time prevents adhesion issues and guarantees a smooth, durable finish when you apply new paint.
Smooth Surfaces Start with Smart Paint Removal
Removing latex paint might seem intimidating, but with the right methods, you won’t damage your surfaces.
For example, wet paint wipes away easily with water, while dried spots respond well to solvents or gentle heat. Even if you worry about harsh chemicals, water-based remedies and mechanical removal offer safe alternatives.
Follow each step carefully, and finish with sanding and cleaning to restore smooth, paint-free surfaces efficiently and precisely.