How to Mount a Bench Vise? Expert Tips for Perfect Setup
You mount a bench vise by first choosing an ergonomic spot near the bench edge, prioritizing dominant hand comfort and clearance for handle movement.
Prepare the workbench by cleaning and marking precise mounting holes using a center punch. Drill pilot and counterbore holes carefully, then install hardwood spacer blocks to align jaw height.
Secure the vise with heavy-duty bolts and attach wooden jaw cheeks flush to the surface. Finalize with alignment and lubrication to guarantee smooth operation. Detailed steps will guide your setup perfectly.
Key Takeaways
- Choose a vise location that keeps your dominant hand free and positions the fixed jaw 1-2 inches from the bench edge for optimal ergonomics.
- Select a thick, flat hardwood or plywood workbench surface, clean and sand it, then use hardwood spacers to align the vise jaws flush with the bench.
- Mark mounting hole centers precisely using a pencil and center punch, double-checking alignment to ensure secure and accurate drilling.
- Drill pilot holes with appropriate bits, counterbore to fit bolt heads flush, and use stainless steel or Grade 8 bolts with washers for strong mounting.
- Tighten fasteners gradually and evenly, regularly inspect hardware for loosening, and maintain clearances to avoid interference with handle rotation or nearby tools.
Choosing the Optimal Vise Location
When choosing the ideal location for your bench vise, you should prioritize ergonomics by placing it on the side that keeps your dominant hand free.
Typically, this means the front left corner for right-handed users and the front right corner for left-handed users. This positioning guarantees better control and reduces strain during operation. Selecting the correct side also facilitates safer and more precise work, similar to how left-handed saws improve cutting visibility.
Positioning the vise opposite your dominant hand optimizes crank handle movement and enhances precision.
Align the fixed jaw about 1-2 inches from the bench edge to balance accessibility and stability. This ensures long workpieces clamp securely.
Maintain clearance for the handle’s full rotation to avoid interference with walls or tools.
Consider your personal workflow, reach, and frequency of use when finalizing placement. Proper placement also helps to avoid interference with other bench components, ensuring smooth operation.
Selecting Appropriate Tools and Materials
When it comes to mounting your vise, you’ll want to gather some specific hardware. Think lag screws, washers, and through bolts – these are key for securing the vise firmly to your workbench.
And don’t forget about your power tools! A good drill with the right bits is a must, plus some saws for cutting those hardwood components. Using hardwood like ash for the face plate ensures durability and strength during use. Choosing the right blade, such as a carbide-tipped blade, can make cutting hardwood easier and more precise.
Essential Hardware Types
Although selecting the right hardware may seem straightforward, choosing appropriate fasteners and materials is critical to guarantee a secure and durable bench vise installation.
Use lag bolts for wooden benches due to their superior tensile strength. For metal or composite benches, machine bolts paired with lock nuts prevent loosening from vibration. Carriage bolts offer added security on metal surfaces. Regular inspection and maintenance of mounting components ensure long-term hardware stability and prevent loosening over time.
Stainless steel hardware resists corrosion in humid environments, and Grade 8 bolts provide high tensile strength for heavy-duty use. Incorporate flat washers to evenly distribute pressure under bolt heads. Use lock washers to maintain nut tightness and hardened washers for high-torque applications.
Consider hardwood spacer blocks or plywood bases to reinforce thin benchtops and adjust vise height. Ensure a snug fit with countersunk holes for flush mounting. Position the vise approximately 2-4 inches from the workbench edge to balance stability and reach effectively. This systematic approach guarantees a robust vise mount.
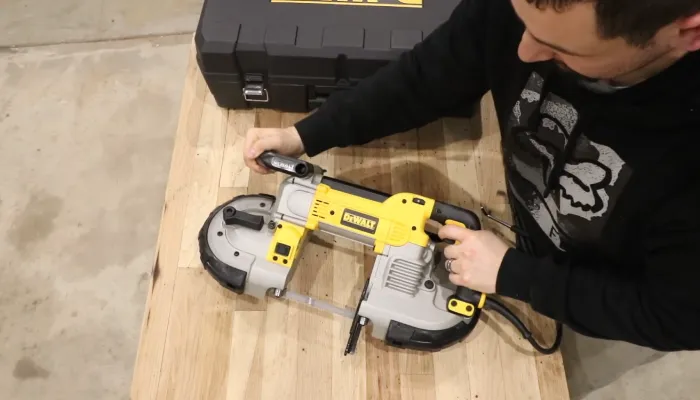
Required Power Tools
Since accurate hole preparation and secure fastening are critical for mounting a bench vise, selecting the right power tools is essential.
Use a cordless drill or drill-driver fitted with Forstner or spade bits for clean, flat-bottomed pilot and clearance holes. Employing a tool with variable-speed control enhances precision when drilling different materials.
Employ self-centering drill bits for precise alignment of mounting plate holes. For hardwood benches, auger bits enhance accuracy.
A drill press or variable-speed hand drill improves control over hole depth.
For fastening, an impact driver or electric screwdriver delivers controlled torque on lag bolts and screws.
Wrenches or socket sets ensure tight bolt and nut installation.
Utilize heavy-duty clamps to stabilize components during assembly. When assembling the vise mounting plate, it is important to apply glue in the dado and allow it to cure for a strong joint.
Supplement with brad point bits for initial marking and consider torque wrenches for consistent bolt tension.
Always wear appropriate safety gear during power tool operations.
Preparing the Workbench Surface
Before mounting your bench vise, you must thoroughly prepare the workbench surface to guarantee maximum stability and alignment. Start by selecting a thick, rigid hardwood or plywood top free from cracks or rot. Many workbenches, like those modeled after ShopNotes #75, feature a plank top with structural side stretchers that contribute to overall stability.
Clean the area, degrease thoroughly, and sand minor irregularities to ensure full contact. Use a digital level to verify flatness and levelness in all directions. If necessary, employ hardwood spacer blocks to align the vise jaws perfectly with the surface. Proper preparation also minimizes material buildup that can affect the vise’s secure mounting.
| Task | Tool/Material | Purpose |
|---|---|---|
| Surface Cleaning | Degreaser, Cloth | Remove oils and contaminants |
| Flattening | Digital Level, Sandpaper | Ensure flat, level base |
| Spacer Blocks Usage | Hardwood Blocks, Screws | Maintain vise alignment |
Meticulous preparation prevents loosening and maintains precision during use.
Marking Mounting Hole Positions
How do you guarantee your bench vise mounts securely and aligns perfectly?
Begin by placing the vise bracket firmly on the chosen spot, ensuring it’s parallel to the workbench edge and that the handle can rotate unobstructed.
Use a pencil or permanent marker to mark the exact center of each mounting hole clearly. Confirm these marks by double-checking the vise’s alignment before proceeding.
Focus on these key steps:
Mark all mounting holes, usually three or more, ensuring visibility and adequate distance from edges.
Record hole spacing for future reference or adjustments.
Verify marks don’t interfere with bench structure or tools.
Use a center punch to enhance drilling accuracy by marking hole centers through the bracket holes.
Make sure to double-check the alignment before drilling to prevent any misplacement.
Ensuring a stable and secure mounting setup is essential for maintaining tool performance.
This systematic marking ensures precise, stable mounting.
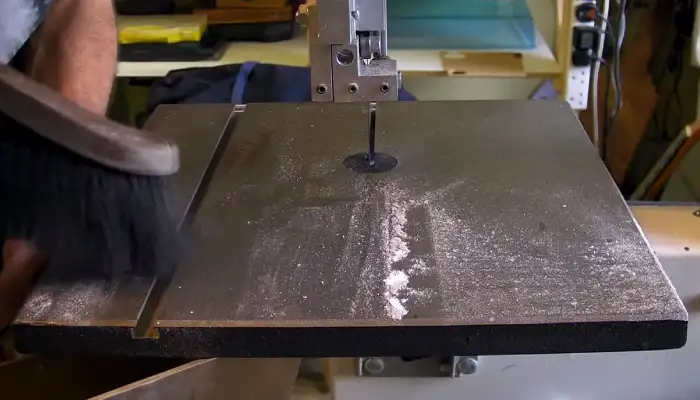
Drilling Pilot and Counterbored Holes
Let’s kick things off by making sure your hole markings are spot on. Use a center punch to create a small indentation; this helps prevent the drill bit from wandering off course. It’s a simple step, but it makes a world of difference!
Once you’ve got your markings set, it’s time to drill those pilot holes. Grab a small-diameter bit for this part. These pilot holes will guide your larger bits accurately, making the whole process smoother. For best results, avoid rotating the workpiece on the drill press table between holes and instead slide it to maintain consistent alignment and prevent errors consistent drilling. Using the right drill bit material, such as high-speed steel, can ensure durability and precision during this step.
Now, when it comes to counterboring, be sure to control that depth precisely. You want those bolt heads to sit flush with the surface, right? Just remember, getting that depth right is crucial to maintaining the integrity of your material. Employing tools with adjustable depth stops can aid in achieving perfect cutting capacity for your project.
Accurate Hole Marking
When positioning your bench vise, carefully align it on the mounting surface and mark the hole centers through the base with a fine-point marker or pencil.
Double-check these marks to guarantee precise placement before drilling. Use a combination square or straightedge to confirm that the holes are parallel or perpendicular as required.
Secure any mounting templates with clamps to prevent shifting while marking.
To assure accurate hole marking, follow these steps:
Draw intersecting reference lines at hole centers using squares or rulers.
Use center punches to create small indentations, preventing drill bit wandering.
Mark counterbore locations precisely over bolt centerlines for recessing bolt heads.
Apply painter’s tape over drill areas to reduce tear-out and maintain clean edges. This is especially helpful when you mark mounting holes on delicate surfaces.
Proper preparation and accurate hole marking are crucial to avoid issues like misalignment and material movement during mounting.
Pilot Hole Drilling
Why are pilot holes essential for mounting a bench vise? They guide larger drill bits for precise hole placement, reduce bit wandering, and prevent material splitting.
Pilot holes also protect your drill bits by minimizing deflection and overpressure during drilling. It is important to use a brad point drill bit for pilot holes, as it ensures precision and clean starts, which is crucial for accurate alignment. Additionally, understanding the correct drill speed and pressure can enhance the quality of the pilot hole and extend the life of your drill bits.
Start by securely clamping the workpiece. Use a drill bit smaller than the screw diameter, and consider a brad point bit or center punch for accuracy. Drill slowly at first, applying light pressure. After pilot holes, switch to a larger bit for counterboring, ensuring bolt heads sit flush.
| Step | Tool/Material | Purpose |
|---|---|---|
| Mark & Clamp | Measuring tools | Precise hole location |
| Drill Pilot Hole | Small drill bit | Guides larger bits, prevents splitting |
| Drill Counterbore | Larger bit | Recess bolt heads |
Counterbore Depth Control
Although drilling pilot and counterbored holes may seem straightforward, controlling the counterbore depth is critical to guarantee fasteners sit flush and maintain assembly integrity.
You’ll want the counterbore slightly deeper, typically 0.5 to 1.0 mm, than the fastener head height. Use precise depth stops on your drill press or CNC machine.
Consider pecking cycles to manage chip clearance and surface finish.
Keep these points in mind:
- Specify counterbore depth with tight tolerances (±0.01mm for precision, ±0.05mm otherwise).
- Use guide pilots to align tools and improve depth accuracy.
- Counterbore diameter should exceed fastener head diameter by 0.1–0.2 mm.
- Apply cutting fluids and monitor spindle speed to prevent tool wear and maintain depth control.
- Remember, a counterbore is a flat-bottomed, cylindrical cavity designed to recess fastener heads effectively.
- For enhanced safety and precision during woodworking assembly, it’s important to consider riving knife technology when working with powered tools.
Installing Hardwood Spacer Blocks
Since hardwood spacer blocks provide the necessary thickness and durability to mount your bench vise securely, you’ll need to cut and fit them carefully to guarantee a flush alignment with your bench surface.
Begin by measuring the distance between the vise carriage and the bench underside to determine block thickness, ensuring total thickness meets the 2-1/4″ minimum.
Cut hardwood blocks precisely to size using stop blocks for consistent dimensions. Plane the blocks to align flush with the bench top, positioning the vise jaw about 1/2″ below surface for tool protection.
Temporarily clamp blocks and vise, marking the rear jaw location and maintaining a 1/16″–1/8″ gap for wood movement. Using a stop block ensures the wooden jaws are identical in size for a balanced vise grip.
After verifying fit, glue and clamp the blocks in place, preparing for lag screw installation in the next step.
Attaching the Vise With Proper Hardware
After securely installing the hardwood spacer blocks to achieve a flush alignment with your bench surface, you can proceed to attach the vise using the proper mounting hardware.
Select Grade 5 or better bolts, at least 2 inches longer than your bench thickness, to guarantee full penetration and strength. Include flat and lock washers to distribute pressure and prevent loosening.
Use Grade 5 or higher bolts, 2+ inches longer than bench thickness, with flat and lock washers.
Drill vertical pilot holes matching bolt diameters, countersinking as needed for flush hardware seating. Position the vise with the rear jaw flush or slightly below the benchtop edge, ensuring the base is perfectly level before tightening. The rear stabilizer on the vise prevents vibration during sawing and provides additional clamping support.
Tighten bolts gradually and evenly, verifying alignment with a level.
Use lag or machine bolts, not wood screws. Include flat and lock washers on all bolts. Drill straight, vertical mounting holes with pilot bits. Tighten bolts evenly to prevent base twisting.
Installing Wooden Jaw Cheeks
When installing wooden jaw cheeks, you’ll want to select hardwoods like maple, beech, or Douglas fir for their durability and ease of machining.
Cut the cheeks to about 3/4 inch thick, leaving them slightly oversize for planing and final fitting.
Clamp each cheek to the vise jaw to mark hole positions accurately. Then pre-drill slightly oversized, countersunk holes for the mounting screws.
Use a drill press for perpendicular holes and mark centers with a punch to prevent wandering.
Attach the cheeks with flathead screws and washers, optionally adding wood glue for stability.
Verify the cheeks fully cover the metal jaws and align flush with the benchtop.
It is important to leave space from the edge of the benchtop to allow proper operation of the vise.
After installation, plane and sand cheeks to achieve a smooth, flush surface that won’t interfere with vise operation.
Final Adjustments and Protective Finishing
Although mounting the bench vise secures it physically, you’ll need to perform careful final adjustments to guarantee smooth operation and long-term durability.
Start by verifying that the vise sits flush on a flat surface behind the front jaw to prevent distortion. Center the screw in its hole to avoid rubbing during rotation, using shims if necessary.
Ensure the vise rests flush on a flat surface and center the screw to prevent rotation friction.
Clean and lubricate the screw and guide rods to prevent binding and wear. To improve motion and reduce racking, consider adding a wooden guide by attaching a block to the outer stretcher.
Finally, apply a protective finish on wooden surfaces to shield against moisture and workshop debris while ensuring jaw cheeks are flush with the benchtop.
- Verify flat surface and jaw alignment to prevent mechanical stress
- Center vise screw and adjust spacing with shims and spacers
- Lubricate moving parts to maintain smooth operation and longevity
- Apply protective finish to safeguard wood and improve grip quality
Frequently Asked Questions
Can I Mount a Bench Vise on a Metal Workbench?
Yes, you can mount a bench vise on a metal workbench. Secure it by bolting through structural support points, ideally using half-inch carriage bolts or all-thread for custom lengths.
Position the vise over leg structures to transfer force efficiently and prevent wobbling. Consider drilling and tapping holes in the frame for a flush fit.
Reinforce the mounting area with a steel plate if needed to guarantee maximum stability during heavy-duty tasks.
How Do I Remove a Bench Vise Without Damaging the Bench?
To remove a bench vise without damaging your bench, first clear the area and gather tools like wrenches and penetrating oil.
Loosen mounting bolts evenly, applying lubricant to stuck fasteners. Support the vise firmly to prevent sudden drops.
Remove jaws and swivel bases to reduce weight and improve access. If bolts are stripped, use extractors carefully.
After removal, inspect and repair any bench surface damage before storing hardware for future use.
What Maintenance Is Required for a Bench Vise After Installation?
Think of your bench vise as a steadfast gatekeeper guarding your projects. After installation, you’ll regularly clean dust and debris with a dry cloth and brush.
Inspect for wear or misalignment, and apply lubricant to the lead screw and sliding surfaces.
Don’t forget rust protection with light oil or wax.
Tighten loose bolts, check jaw integrity, and make sure the vise stays securely mounted. These steps keep your tool reliable and safe.
Can I Install a Bench Vise on a Portable Workbench?
Yes, you can install a bench vise on a portable workbench.
Use a 3/4-inch plywood base to create a stable mounting surface. Drill holes matching the vise and workbench dog holes, and countersink them for flush seating.
Secure the vise to the plywood with bolts, washers, and nuts.
Then attach the plywood to the workbench using clamps or dog hole bolts.
This setup guarantees stability and portability, allowing easy removal and repositioning as needed.
How Do I Choose Between an End Vise and a Front Vise?
You’ll find 70% of woodworkers prefer front vises for their versatility in edge clamping and joinery.
Choose an end vise if you need to hold long boards securely for edge jointing and planing, benefiting from bench dogs and smooth lateral movement.
Opt for a front vise if you require quick, strong clamping on board edges or smaller parts. This is especially useful for detailed work like dovetailing, prioritizing ease of access and simpler installation.
Maximize Workshop Efficiency With a Properly Mounted Vise
By carefully following each step, you’ll mount your bench vise with rock-solid stability that could hold up a small building.
Choosing the right location, drilling precise holes, and securing hardware properly guarantees ideal performance.
Installing hardwood spacers and wooden jaw cheeks protects both your tools and workpieces.
Finally, making precise adjustments and applying a protective finish guarantees long-lasting durability.
With this systematic approach, your vise will become an indispensable, precision tool in your workshop.