How to Remove Pencil Marks From Wood? Professional Guide
To remove pencil marks from wood, first test denatured alcohol on a hidden spot to avoid finish damage. Gently apply it with a soft cloth, working in small sections and using circular motions to lift graphite without saturating the surface.
For deeper marks, lightly sand with fine-grit paper along the grain, avoiding veneers. Always wear gloves and make certain good ventilation. If marks persist or you’re working on delicate wood, exploring specialized techniques can help protect your piece further.
Key Takeaways
- Lightly erase pencil marks using a kneaded or specialized eraser before considering other removal methods.
- Apply denatured alcohol with a soft cloth on an inconspicuous wood area to dissolve pencil marks safely.
- Sand gently with fine-grit sandpaper (220-320 grit) along the grain to remove stubborn marks without damaging the wood.
- For veneered or delicate woods, avoid sanding and use minimal solvent application to prevent peeling or surface damage.
- Always test removal methods on scrap or hidden wood areas and ensure proper ventilation and protective gear during cleaning.
Pencil Marks on Different Wood Types
When working with pencil marks on wood, you need to contemplate the wood’s grain, hardness, color, and finish, as these factors directly affect mark visibility and removal difficulty. Choosing the appropriate tools depends on the wood’s texture and finishing, similar to how selecting the right blade material is essential for optimal cutting performance.
Hardwoods have compact grain, limiting smudging but making erasure tougher, while softwoods’ open grain lets graphite seep into grooves, complicating removal. Rough textures trap lead in pores, whereas smooth, finished surfaces allow easier erasing but require caution to avoid damaging finishes like varnish or wax.
Hardwoods resist smudging but challenge erasure; softwoods absorb graphite, while surface texture affects mark removal ease.
Light woods demand darker pencils, increasing contrast and residue visibility; dark woods often use metallic or white pencils with different removal responses. Additionally, hardwoods are generally more expensive and used in high-end furniture, which often requires careful restoration to maintain value.
Hardness, measured by Janka scale, influences graphite penetration: harder woods resist deep embedding but hold surface marks; softer woods absorb deeper. Lead hardness also impacts mark resilience—hard leads resist smudging yet erase less cleanly than softer leads.
Choosing the Right Solvent for Pencil Mark Removal
When selecting a solvent to remove pencil marks, denatured alcohol stands out for its efficiency and ability to clean without raising the wood grain.
You should always work in a well-ventilated area and apply solvents sparingly with a soft cloth to prevent over-wetting. Testing on a hidden spot first helps make certain the solvent won’t damage your wood’s finish or surface.
Denatured Alcohol Benefits
Why choose denatured alcohol for removing pencil marks from wood? It efficiently dissolves graphite without harming wood fibers or finishes. Its rapid evaporation prevents wood swelling, preserving grain integrity.
Plus, it breaks down waxy binders in pencil marks due to its non-polar characteristics. Regular maintenance with proper cleaning helps in preserving wood surfaces and extending their lifespan.
When applying, consider these benefits:
- Effectiveness: Lifts pencil graphite with gentle rubbing, avoiding abrasive damage common in erasing or sanding.
- Compatibility: Safe on both softwoods and hardwoods, and works well with stains, shellacs, and clear coats.
- Practicality: Readily available, cost-effective, and leaves minimal residue, streamlining cleanup before finishing. Proper cleaning solutions, such as commercial cleaning solutions, can also be effective for more stubborn residues.
Using denatured alcohol ensures precise, clean mark removal while maintaining the wood’s natural appearance and surface quality. This method provides a quick, clean removal process that is superior to time-consuming and potentially damaging alternatives.
Solvent Safety Tips
Although selecting a solvent for removing pencil marks on wood might seem straightforward, you must carefully evaluate its chemical properties and compatibility with wood finishes. Choose solvents that dissolve graphite effectively without raising the wood grain or damaging finishes.
Acetone and denatured alcohol evaporate quickly and leave no residue but require ventilation and flammability precautions. Acetone-free nail polish removers offer a less harsh alternative.
Always test solvents on hidden areas to assess wood reaction. Apply solvents sparingly with a soft cloth or cotton swab, avoiding over-wetting. Wear nitrile gloves to prevent skin irritation and work in well-ventilated spaces. Store solvents securely and dispose of soaked materials properly to mitigate fire risks.
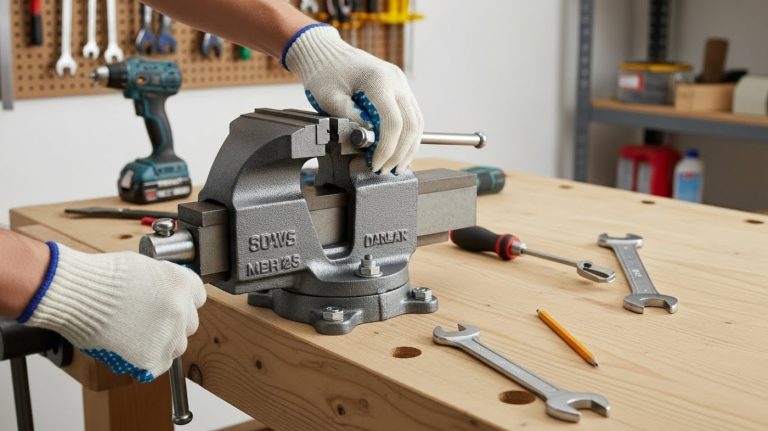
Avoid mixing solvents and monitor for exposure symptoms, seeking fresh air if needed. However, when working with power tools such as a table saw, it is important to avoid wearing gloves to maintain optimal control and accuracy and reduce safety risks.
Step-by-Step Guide to Using Denatured Alcohol Safely
Since denatured alcohol is highly flammable and can irritate skin and eyes, you must prioritize safety before application. Start by working in a well-ventilated area to minimize fumes and wear protective gloves and safety goggles to prevent skin and eye contact.
Keep the solvent away from heat or flames. Using tools with appropriate safety features can further reduce risks during maintenance or cleaning.
Follow these steps to apply it safely:
- Lightly dampen a soft, lint-free cloth or cotton ball—avoid soaking—to gently wipe pencil marks, testing first on an inconspicuous area to check wood reaction. Denatured alcohol contains ethanol with added denaturing agents making it suitable for cleaning and erasing.
- Use controlled, gentle motions to avoid damaging the finish; blot excess solvent with paper towels.
- Allow the wood to dry completely before inspecting; repeat sparingly if marks persist, always minimizing solvent use.
Dispose of solvent-soaked materials properly to prevent fire hazards and store denatured alcohol securely.
Effective Mechanical Techniques: Sanding and Planing
When chemical methods risk raising the wood grain or affecting the finish, mechanical techniques like sanding and planing offer precise control for removing pencil marks. Using proper maintenance tips for your tools ensures optimal performance during these mechanical processes.
Start sanding with 80-grit sandpaper, using light pencil scribbles as guides to monitor progress and avoid over-sanding. Using the pencil as a great sanding partner ensures a smoother sanding process. Gradually switch to finer grits, applying lighter pencil marks to ensure even surface preparation and preserve edge sharpness.
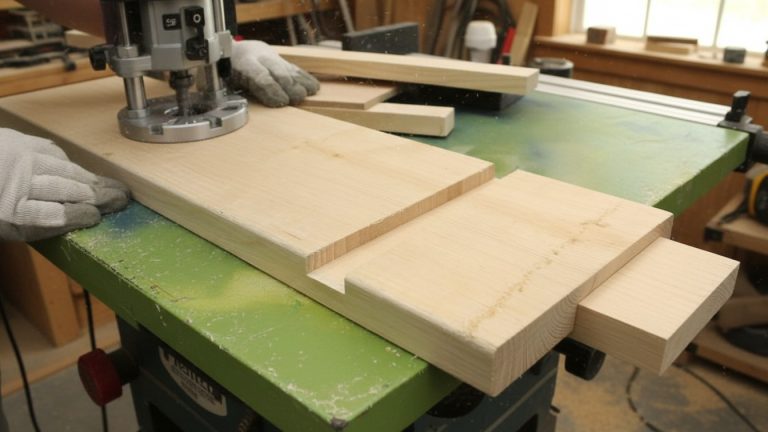
For planing, set your hand plane to remove ultra-thin shavings—around 1/1000th inch—targeting only visible marks. Avoid planing across edges or joinery details to maintain crisp lines. Planing suits end grain or surfaces where sanding may round edges.
Always test on scrap wood first, clean debris after mechanical removal, and maintain sharp blades and proper dust extraction to ensure efficiency and surface integrity.
Preparing Wood Surfaces Before Applying Finish
Before applying any finish, you need to thoroughly clean the wood surface to eliminate dust, dirt, grease, and other contaminants that can cause defects like bubbling or chipping.
Start by inspecting the wood for damage—cracks, splits, or old finishes may need repair or removal. It is important to use cleaners/degreasers to remove residues before sanding. Choosing the right sanding grit is essential for preparing the surface properly.
Next, smooth raised grain by sanding, progressing from medium (120-150 grit) to fine (180-220 grit) with the grain direction. Remove sanding dust completely using a tack cloth or vacuum with a brush attachment.
Finally, condition the wood with a compatible pre-stain conditioner to guarantee uniform stain absorption, especially on softwoods. Follow these steps precisely:
- Clean and inspect for defects requiring repair
- Sand progressively and remove all dust
- Apply a suitable wood conditioner before finishing
Handling Solvents: Safety Tips and Best Practices
Although solvents are essential for tasks like removing pencil marks from wood, handling them demands strict safety measures due to their chemical hazards. You should always wear chemical-resistant gloves, safety goggles, and respiratory protection in poorly ventilated areas. Solvents are flammable and explosive, so preventing ignition sources is critical to safety.
Handling solvents requires chemical-resistant gloves, goggles, and respiratory protection, especially in areas with poor ventilation.
Confirm your workspace has adequate ventilation, using fume hoods or exhaust systems to reduce VOC inhalation and flammable vapor buildup. It is also important to consider the noise levels in your workspace when operating power tools alongside solvent use to maintain a safe environment. Store solvents in original, labeled containers with tight lids in cool, fire-resistant, well-ventilated areas, segregating incompatible chemicals.
Avoid pouring solvents between containers unless necessary, and ground containers to prevent static discharge. Keep fire extinguishers and spill cleanup kits nearby, and train yourself in their use.
Dealing With Stubborn and Deep Pencil Marks
When pencil marks penetrate deeply into wood, standard erasing often falls short. You’ll need to apply solvent treatments like denatured alcohol or acetone carefully, using lint-free cloths to dissolve graphite without raising the grain.
Using appropriate abrasive cleaning sticks can also help restore sandpaper and remove surface residues during woodworking projects. For marks embedded beyond the surface, mechanical removal through light sanding or precise planing can restore a clean finish while preserving wood edges. Proper tool maintenance during sanding and planing ensures better results and prevents damage to the wood surface.
Solvent Treatment Techniques
Since stubborn or deeply embedded pencil marks resist simple erasing, you’ll need to apply solvent treatments carefully to dissolve graphite without harming the wood surface.
Begin by testing denatured alcohol, acetone, or isopropyl alcohol on an inconspicuous spot to prevent finish damage. It is important to select cleaning agents compatible with the wood’s finish and to consider blade material durability when working on surfaces previously cut or shaped.
Use a soft cloth or cotton pad lightly dampened with solvent, avoiding soaking the wood. It is important to test on scrap wood first to ensure the solvent does not cause damage. Gently rub in circular motions until marks lift, wiping residue promptly.
Follow these steps precisely:
- Apply minimal solvent to avoid grain raising or warping.
- Work solvent into marks with gentle, repeated wiping for deep graphite.
- Allow drying between applications to protect delicate finishes.
Always use solvents in ventilated areas with protective gear, and limit treatments to necessary touch-ups to preserve wood integrity.
Mechanical Removal Methods
If solvent treatments don’t fully remove deep or stubborn pencil marks, mechanical methods offer effective alternatives for restoring wood surfaces.
Begin with fine-grit sandpaper (220-320 grit), applying even pressure using sanding blocks along the wood grain to prevent scratches and maintain surface integrity. Using a softer lead (B or HB) for marking can reduce the depth of pencil marks, making subsequent mechanical removal easier softer lead.
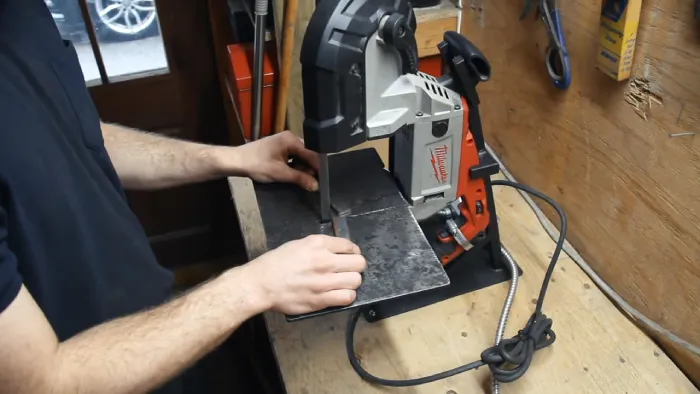
For edges or detailed profiles, use sanding sponges or needle files. Cabinet scrapers precisely shave thin wood layers, preserving smoothness—ensure scraper edges are sharp to avoid gouging. Hand planes remove marks on larger, flat areas; set blades for light cuts to protect edges.
Combine erasing with mechanical methods by lightening marks first using specialized or kneaded erasers, then sanding or scraping residual graphite. For tight spots, micro-abrasion tools with fine attachments provide controlled removal.
Alternative Products for Cleaning Pencil and Glue Residues
Although traditional erasers and solvents often handle pencil marks effectively, alternative products can enhance cleaning precision and address glue residues simultaneously.
You can reuse eraser crumbs from sandpaper cleaning sticks by rolling them into a ball, providing a frugal, gentle erasing option. Using erasers is a cost-effective way to remove pencil marks from wood, making this reuse method especially practical.
Alcohol-based solutions serve as secret tips among craftsmen for quick pencil mark removal and light glue residue softening. Specialized wood cleaning sticks, designed for sanding materials, efficiently tackle both pencil marks and glue residues without harming the wood surface.
- Reuse eraser crumbs from sanding sticks for delicate residue removal.
- Apply alcohol-based solutions sparingly with a cloth for precision cleaning.
- Use sanding-specific cleaning sticks to simultaneously remove pencil and glue marks.
Preventing Damage While Removing Marks on Veneered Wood
When removing pencil marks from veneered wood, you must choose solvents carefully to avoid damaging the delicate surface. Use denatured alcohol applied sparingly with a clean, dampened white cloth to dissolve pencil lead without raising the wood grain. This method was discovered when shellac sealer was found to react with pencil marks, causing them to disappear due to the denatured alcohol solvent.
Carefully use denatured alcohol with a damp cloth to remove pencil marks without damaging veneered wood surfaces.
Avoid acetone unless tested on a hidden area first, as it may discolor or harm the veneer. Never saturate the veneer with solvent; work in small patches using gentle, circular motions to minimize risk of peeling.
Refrain from sanding or abrasive erasers, which can wear through the thin veneer layer. Excessive sanding risks erasing thin veneer and damaging the surface, so it should be avoided whenever possible. After solvent treatment, lightly use very fine (220 grit or higher) sandpaper only if ghost marks remain.
Always test solvents on scrap veneer, wear gloves, ensure ventilation, and dispose of solvent-soaked rags safely to protect both veneer integrity and your health. Working in a well-ventilated area and wearing protective gloves and a respirator is recommended to avoid exposure to fumes during the cleaning process.
Frequently Asked Questions
Can Pencil Marks Be Removed From Finished Wood Surfaces Without Damage?
Yes, you can remove pencil marks from finished wood without damage by using gentle solvents like denatured alcohol or isopropyl alcohol. Apply them sparingly with a soft cloth to avoid finish harm.
Soft rubber erasers also work on light marks but avoid vigorous scrubbing. Always test solvents on an inconspicuous spot first.
Avoid sanding or planing since they risk damaging delicate finishes or edges. Let the surface dry fully before further handling.
How Long Should Solvents Be Left on Wood Before Wiping Off?
You should leave solvents on wood only briefly—just long enough for pencil marks to visibly dissolve, usually a few seconds. Alcohol-based or acetone solvents act rapidly and require immediate wiping to prevent grain swelling or finish damage.
Avoid extended contact, as it risks surface disruption. Always apply solvents sparingly and test on inconspicuous areas.
Prompt removal guarantees minimal wood absorption and allows safe finishing once dry.
Are There Eco-Friendly Alternatives to Chemical Solvents for Pencil Mark Removal?
You can rely on eco-friendly alternatives like natural rubber erasers, kneaded erasers, and cleaning sticks, which use physical abrasion without chemicals. Light sanding with fine sandpaper or gently scraping with plastic tools also removes pencil marks while preserving wood integrity.
Using soft brushes with eraser crumbs lifts graphite effectively. These methods minimize environmental impact and avoid VOCs, but always test on a hidden spot to prevent surface damage or discoloration before full application.
Does Pencil Hardness Affect How Easily Marks Can Be Removed From Wood?
Think of pencil hardness like the difference between a feather and a hammer tapping on wood. You’ll find harder pencils (H to 2H) leave lighter, shallow marks that you can erase more easily.
While softer pencils (3B to 6B) embed dense graphite deeply, making removal tougher. The softer the lead, the more pressure it applies and the deeper it sinks, so your choice directly impacts how stubborn those marks become on wood surfaces.
Can Repeated Solvent Use Discolor or Fade Wood Finishes Over Time?
Yes, repeated solvent use can discolor or fade wood finishes over time. Solvents like toluene or turpentine chemically break down resins and soften finishes such as lacquer, varnish, and shellac.
This degradation weakens structural integrity, leading to fading and uneven surfaces. You should limit solvent frequency, choose solvents suited for your finish type, and test on hidden areas to avoid cumulative damage and discoloration.
Bring Back the Natural Beauty of Your Woodwork Today
Now, imagine your wood surface restored to its original, pristine state—free of pencil marks, smooth to the touch, and ready for finishing. By carefully selecting solvents, employing gentle sanding, and respecting the wood’s grain and veneer, you’ll preserve its natural beauty without damage.
With precise techniques and safety in mind, you can confidently erase imperfections, leaving your woodwork as flawless as freshly polished timber gleaming under soft light.