How to Sharpen a Table Saw Blade: Different Methods [DIY Steps]
Sharpening your table saw blade is an essential maintenance task if you wish to keep it working at its best. A sharp table saw blade ensures clean, precise cuts and improves the overall efficiency of your woodworking projects.
There are a few different methods available for sharpening your table saw blade. You can opt for diamond blade sharpening, where a specialized diamond blade is used along with a jig to sharpen each tooth individually.
Alternatively, file sharpening provides greater accuracy but is a slower process. Put the blade in a vise or clamp, and then use a file to sharpen the teeth while keeping the original bevel angle.
Sandpaper sharpening offers another option, where you use high-quality sandpaper and a sanding stick to restore the sharpness of the blade. We will describe all the methods with proper steps, so please continue reading.
How to Sharpen a Table Saw Blade: Steps to Follow
You need to follow three steps when sharpening your table saw blade. Here’s a quick overview:
Step #1: Be Prepared and Clean the Blade
Step #2: Choose a sharpening method
1. Sharpening With a Diamond Blade
2. File sharpening
3. Sandpaper sharpening
Step #3: Clean and reassemble
Let’s get into the details.
Step #1: Be Prepared and Clean the Blade
To prepare for sharpening your table saw blade, start by getting your safety gear on and disconnecting the saw from power. You must wear goggles, gloves, earplugs, and a dust mask respirator to protect yourself from potential accidents or injuries.
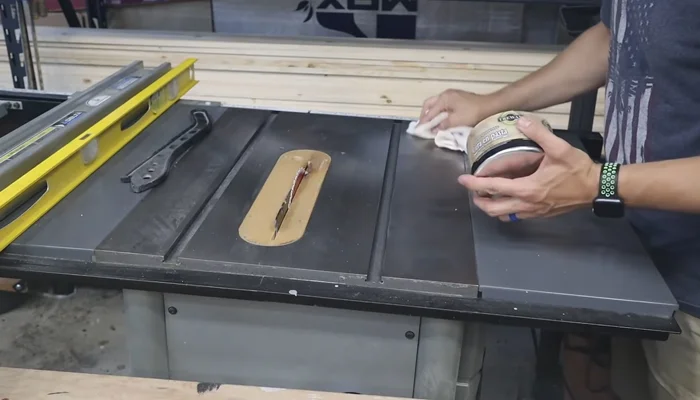
Once your safety gear is on, remove the blade from the saw and clean it thoroughly using a saw blade cleaning solution or a mixture of water and mild detergent. Here are three steps to follow when cleaning your table saw blade:
- Scrub the blade gently using a soft brush or cloth to remove any resins, burnt wood dust, or debris.
- Rinse the blade thoroughly to ensure all cleaning solution or detergent is removed.
- Let the blade dry completely before proceeding with the sharpening process.
Step #2: Choose a Sharpening Method
Now that you’ve determined your blade type and its condition, it’s time to choose a sharpening method. Below are the steps for each method.
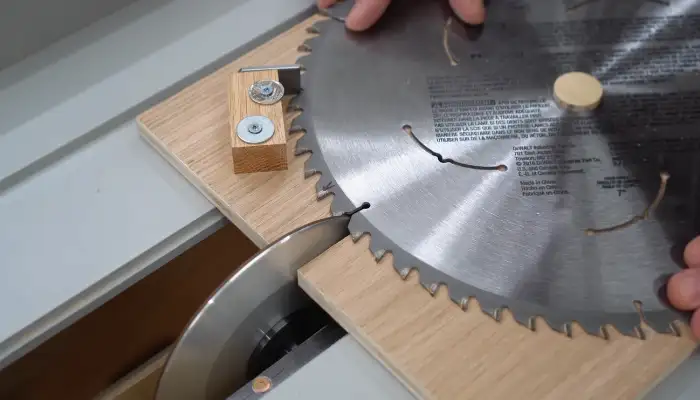
1. Sharpening With a Diamond Blade
Using a diamond blade designed for sharpening, you’ll need to sharpen each tooth of your table saw blade.
To do this, touch its face against the rotating diamond blade while wearing safety glasses and gloves for protection. Follow these four steps for success:
- Set up the jig to hold the saw blade at the correct angle.
- Attach the diamond blade to the table saw.
- Slowly bring the saw blade into contact with the diamond blade.
- Carefully sharpen each tooth by touching its surface against the rotating diamond blade. Be sure not to apply too much pressure or remove too much material.
Repeat the process for each tooth until the blade is sharp. Remember to wear protective gear and take your time to avoid accidents.
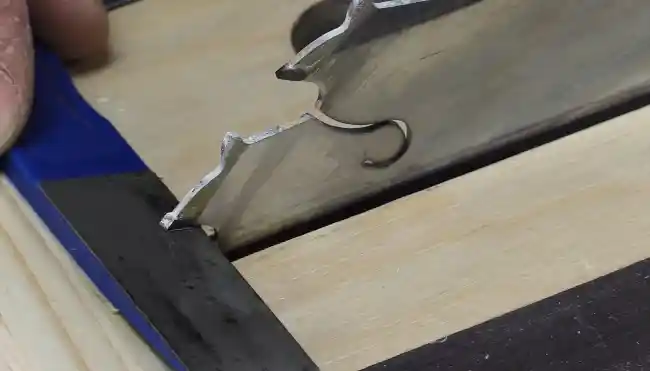
2. Sharpening With a File
You can also use a file to sharpen your table saw blade. Also, you’ll need a file that matches your blade type, clamps, safety gear, and your dull blade to improve the cutting ability of your saw carefully.
To begin, secure the blade under a vise or clamp, and use tape or a marker to mark the first tooth. Then, file each tooth individually while maintaining the original bevel angle and shape. Take your time and ensure consistent pressure and strokes along each tooth.
This method may be slower than diamond blade sharpening, but it allows for greater individual accuracy. Remember to wear safety glasses and gloves to protect yourself while sharpening.
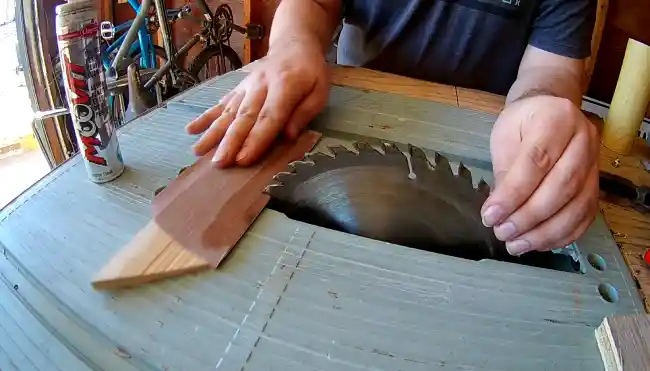
3. Sharpening Using a Sandpaper
If you’re looking for an alternative to filing or diamond blade sharpening, sandpaper can be a great option for honing the cutting edge of your saw.
To start, get some good sandpaper and a sanding stick made from a small piece of scrap wood. Lubrication with oil or wood lubricant is recommended.
Secure the blade with table clamps and mark the first tooth. Slide the sanding stick back and forth between the teeth, focusing on the face of each tooth.
The number of strokes needed for sharpening may vary. After sharpening, test the sharpness by cutting a piece of scrap wood.
Step #3: Clean and Reassemble
To make sure your table saw blade stays in great condition, remember to clean and reassemble it after sharpening.
Start by removing the diamond blade (if used) and thoroughly cleaning the table saw blade to remove any residual oil or debris.
Using a clean cloth or towel, wipe down the blade and get into the teeth and crevices to remove any buildup.
Next, following the manufacturer’s instructions, reassemble the blade onto the table saw. This may involve using specific tools or screws, so read the instructions carefully to avoid damaging the blade or the saw itself.
Then, run a test cut to ensure that the blade is properly installed and running smoothly.
What Signs Indicate a Table Saw Blade Needs Sharpening?
The following signs mean your table saw blade should be sharpened:
1. Increased Strain on the Motor
If your table saw motor works harder than usual, you should sharpen your blade. A dull blade creates more resistance, which requires the motor to work harder to maintain the same speed, putting unnecessary stress on the motor and reducing its lifespan.
2. More Chipping or Tear-Out
You’ll notice that your wood pieces are coming out rough and splintered, which means it’s time for some maintenance on your trusty saw.
The increased chipping or tear-out along the cut edges clearly indicates that the blade needs sharpening.
When the blade is dull, it tears the wood fibers rather than making clean cuts, resulting in rough or splintered cuts.
3. Burn Marks on the Wood
Burn marks on the wood surface indicate that your table saw blade is not cutting efficiently, which can lead to scorching and discoloration on wood.
The excessive heat generated by dull blades during cutting can cause these burn marks, indicating that your blade needs to be sharpened.
4. Cuts Moving off the Line
If you’ve noticed burn marks on the wood while cutting, that’s a sign that your table saw blade isn’t sharp enough. But if your cuts have started to move off the line, then it’s clear that the blade has become too dull to maintain a proper cutting line.
5. Longer Cutting Time
When your cuts take longer than usual, it may be a sign that your blade needs attention, as it’s not slicing through the wood as efficiently as it used to. This could be due to a dull blade that needs sharpening.
A dull blade will slow your cutting time and strain your saw’s motor unnecessarily, leading to potential damage.
How many times can you sharpen a table saw blade?
A high-quality carbide blade can be sharpened up to 3 or 4 times as long as it remains undamaged. You should know that each sharpening process reduces the thickness of the blade, shortening its lifespan.
Aside from that, not all blades are created equal. Some may have a shorter lifespan and may require more frequent sharpening. To maintain optimal performance, it’s best to keep the blade in good shape through regular cleaning and maintenance.
Is it possible to sharpen a damaged or chipped tooth on a table saw blade?
You can sharpen a table saw blade with a damaged or chipped tooth. But success depends on the damage’s severity and the blade’s overall condition.
Minor chips or damage to individual teeth can often be repaired through sharpening. But, you have to note that if the damage is extensive, the tooth may need to be replaced entirely if the damage is extensive.
What is the maximum lifespan of a table saw blade with regular sharpening?
A table saw blade’s maximum lifespan with regular sharpening can vary depending on the blade’s quality, the frequency of sharpening, and the nature of the cutting tasks.
On average, a high-quality blade that undergoes proper maintenance and consistent sharpening will last for six months to a year or even longer.
Please note that this estimate is subject to various factors and can vary in specific circumstances. For example, in heavy use or when exposed to harder materials, a table saw blade may wobble and last less time. Also, blades that receive less frequent sharpening may require replacement sooner.
Sharpen Your Table Saw Blade and Save Money
Now you know how to sharpen a table saw blade. By following the steps outlined above, you can ensure that your table saw blade is always in top condition, allowing you to make precise cuts easily.
But, some may argue that replacing a dull or damaged blade is easier and more cost-effective than sharpening it. While this may be true in some cases, you need to consider the environmental impact of constantly replacing blades.
By sharpening your table saw blade, you’re saving money in the long run, reducing waste, and contributing to a more sustainable future.