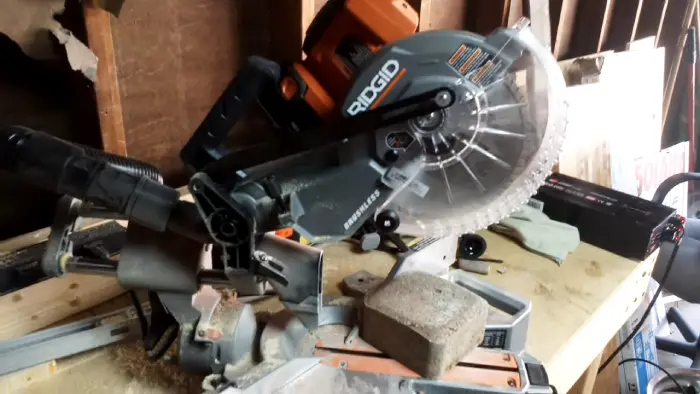
How to Cut Baseboard Corners Without Miter Saw? Easy Hacks
You can cut baseboard corners without a miter saw by using a coping saw or a hand saw with a miter box. Start by measuring and marking your pieces accurately. For inside corners, cope the joint by cutting the profile, using small motions to follow the shape.
For outside corners, cut at a 45-degree angle for a clean fit. Always secure your wood while cutting for control. There’s more on tools and techniques to guarantee a professional finish.
Key Takeaways
- Use a coping saw to create precise cuts for corners, ensuring a seamless fit between baseboard pieces.
- Measure and mark the back of the baseboard using the wall corner as a guide before cutting.
- For outside corners, cut baseboard pieces at a 45-degree angle using a miter box for accuracy.
- Sand edges after cutting to achieve a clean finish and ensure all cuts are precise.
- Secure baseboards with a nail gun and fill any holes with wood filler for a polished look.
Traditional Techniques for Baseboard Cutting
Cutting baseboard corners requires a blend of traditional techniques and precision tools to achieve clean, accurate results.
Start with a utility knife for scoring; this method allows you to create straight cuts without power tools. Next, use a dovetail or gentlemens’ saw for precise corner cuts, guaranteeing you measure carefully.
Tools like the angle-izer or sliding T-bevel help you mark accurate angles for seamless joints. Don’t forget to apply soap or wax on the blade to reduce friction while sawing. For softwood baseboards, score the wood and chisel layer by layer for a clean finish.
Additionally, consider using a Fein Multimaster for efficient and precise cutting, especially in intricate areas. Always remember to measure dimensions carefully to avoid costly mistakes and guarantee a professional look.
Mastering Coping Saw Methods
You need to master the coping saw technique to ensure a seamless fit for inside baseboard corners. Unlike straight cuts, coping allows you to cut along the profile of the trim for a tight, professional joint. Follow these steps:
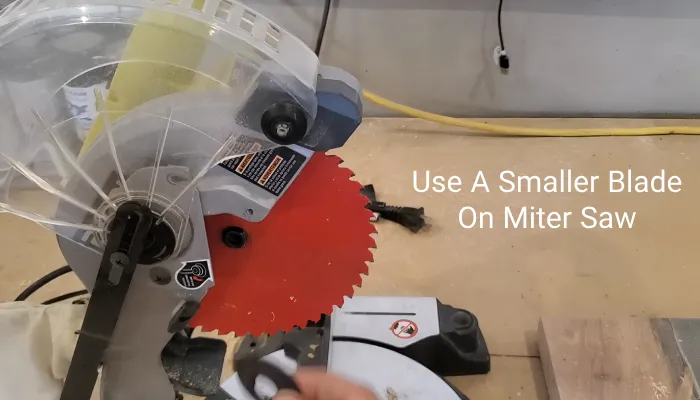
Choosing the Right Blade
To achieve precise and clean cuts while coping baseboard corners, selecting the right coping saw blade is essential. Focus on the blade type, material, size, and sharpness. A fine-toothed, high-carbon steel blade is ideal for durability and sharpness, while thinner blades excel at intricate cuts.
Proper coping technique ensures a snug fit between the molding pieces, enhancing the overall appearance of the installation.
| Feature | Recommendation |
|---|---|
| Blade Type | Fine-toothed |
| Blade Material | High-carbon steel |
| Blade Size | Thinner for intricate work |
| Blade Sharpness | Always use sharp blades |
Replacing dull blades regularly guarantees peak performance. Remember, a well-chosen blade contributes greatly to achieving the perfect fit when coping corners, saving you time and effort in the long run.
Proper Holding Techniques
Mastering proper holding techniques is essential for executing accurate cuts with a coping saw. First, secure your baseboard to a workbench using clamps to prevent any movement. Position the coping saw at a slight angle—about 30 degrees—to optimize wood removal from the back of the molding.
Understanding various cutting methods can also help you choose the most effective approach for your specific project. A crosscut sled provides exceptional accuracy for larger workpieces, which can be beneficial for similar cutting tasks.
As you begin cutting, hold the saw firmly, using a smooth, back-and-forth motion to follow the profile of the baseboard. Keep the saw blade just outside the marked line for precise cuts.
Maintain control by ensuring the saw is well-supported throughout the process. Remember to wear protective gloves and safety glasses for safety.
Finishing the Cut
Finishing the cut involves refining the edges of your coped baseboard for a seamless fit. Start by using sandpaper and files to smooth any rough areas. If your profile has complex curves, a jigsaw can help you achieve the desired shape.
Verify that no wood grain is visible on the face of the baseboard; this enhances the overall appearance. Additionally, using coping methods allows for a tight joint regardless of wall squareness, making the finishing process even more critical.
| Task | Tools Needed |
|---|---|
| Sand the edges | Sandpaper |
| Refine curves | Jigsaw |
| Check for smoothness | Quality control |
| Verify seamless joints | Inspect fit |
Finally, inspect your cope for smoothness and fit, verifying everything aligns perfectly before installation.
Utilizing Circular Saws Effectively
Utilizing a circular saw effectively requires careful setup and attention to detail. Start by donning safety glasses to protect your eyes from debris.
Use a Speed Square to guide your cuts and verify they’re accurate, especially when making 45-degree angles. Mark your board clearly with a pencil, and clamp a straight edge to minimize errors.
Align the saw’s base plate with your guide to achieve straight cuts, adjusting the Speed Square as needed for precision. For specific angles, set the saw’s bevel accordingly and apply masking tape over the cut line to prevent splintering.
Wet cutting can help to achieve smoother cuts and reduce dust production, improving your workspace cleanliness. Smooth right-angle bevel cuts can be made with the right technique, ensuring a professional finish. Finally, inspect your cut for accuracy and smooth any rough edges with sandpaper or a rasp for a clean finish.
Exploring Miter Box Alternatives
If you’re looking for cost-effective cutting solutions for your baseboards, several alternatives to a miter box can deliver precision with hand tools.
Options like coping saws and hand saws allow for accurate angled cuts without the need for expensive machinery. Additionally, it’s important to measure each baseboard piece twice for accuracy to ensure a perfect fit when using these alternatives.
Cost-effective Cutting Solutions
When cutting baseboard corners on a budget, exploring alternatives to traditional miter boxes can save you both money and hassle. A coping saw is excellent for creating coped joints, which handle non-perfect angles better than mitered joints.
For straight cuts, a circular saw can be effective before you tackle corners. If you need precision without hefty investments, consider a miter box and handsaw. Using a steel square or DIY miter guides can further enhance your cutting accuracy.
The Angle-IZER digital T-bevel is another great tool for achieving precise angles, ensuring your corners fit seamlessly. Additionally, proper corner cutting is essential to prevent chipping or cracking, further enhancing the professionalism of your finished work.
Precision With Hand Tools
While many rely on power tools for cutting baseboard corners, exploring hand tool alternatives can lead to equally precise results. A digital sliding T-bevel allows for accurate angle measurements, perfect for both interior and exterior corners.
Use a combination square to mark straight lines, ensuring your corners are perfectly squared. A tape measure is essential for accurate baseboard lengths before cutting.
For internal corners, a coping saw enables precise shaping, while hand saws require careful measurements and angle adjustments. Stabilize your materials with a modified board setup or use panel saws for initial cuts.
Cutting long and adjusting as necessary is a helpful technique that can improve accuracy when using hand tools. Finally, double-check your measurements and use a sharp pencil for clear markings. Sandpaper can refine edges, ensuring a professional finish.
Tips for Cutting Inside Corners
Cutting inside corners requires careful planning and the right tools to achieve a professional finish.
Start by measuring your baseboard pieces, ensuring they’re slightly longer than needed. Mark the back with a pencil, using the wall corner as your guide, and employ a square for precise cutting lines.
For the cut, clamp the baseboard securely and use a coping saw for the curves, making small, rapid motions. If necessary, a jigsaw can help smooth out any straight areas. Coping baseboards allows for better alignment with uneven walls, which is essential for a polished result.
After cutting, sand the edges for a clean finish. When installing, use wood filler to fill gaps, then nail the baseboard in place. Finally, sand and paint for a seamless look, ensuring all cuts are precise to avoid future issues.
Techniques for Outside Corner Cuts
Achieving clean and precise cuts for outside corners is essential for a polished baseboard installation. Start by measuring the lengths of the walls where your baseboards will go.
Mark the direction of your cuts clearly. If you don’t have a miter saw, use a miter box for accurate hand cuts, or a coping saw if needed. Cut each piece at a 45-degree angle to create a seamless joint. Profile tracing helps ensure that the corners fit together perfectly, even if they are not square.
After cutting, refine the edges with a chisel and scraper, and smooth any rough spots with sandpaper. Secure the baseboards using a nail gun with finishing nails. Finally, fill any holes with wood filler and sand once more before painting or staining to match your decor. Inspect for gaps before finishing.
Frequently Asked Questions
What Tools Do I Need for Cutting Baseboard Corners?
To cut baseboard corners effectively, you’ll need a few essential tools. Grab a coping saw for intricate cuts and a utility knife for trimming edges. A square will help you mark straight lines accurately, while sandpaper guarantees a smooth finish.
For more precision, consider a digital angle finder to measure angles, and a bullnose corner gauge for curved corners. Each tool plays an important role in achieving clean, professional-looking corners.
How Can I Ensure Accurate Measurements for Baseboard Cuts?
To guarantee accurate measurements for your baseboard cuts, start by measuring each length twice. Create a diagram of your layout to visualize where each piece will go. Use a square to mark cut lines, and clearly indicate where you’ll cut with a pencil.
Extend measurements past corners for precise bevel cuts and account for your baseboard’s thickness. Finally, plan for spare materials to cover any mistakes you might make.
Can I Use a Power Saw Instead of Hand Tools?
Yes, you can use a power saw instead of hand tools for cutting. These saws offer speed and efficiency, allowing you to make multiple cuts quickly. However, keep in mind that precision can be an issue. To enhance accuracy, consider using complementary tools like coping saws and squares.
Always make sure you’re following safety precautions, as power saws require careful handling to avoid accidents while achieving the desired results.
What Type of Baseboard Material Is Easiest to Cut?
When it comes to baseboard materials, think of MDF as your trusty sidekick—it’s affordable and easy to cut. PVC also shines, being lightweight and moisture-resistant.
On the flip side, solid wood can be a challenge due to its density and warping potential. For a quick DIY project, stick with MDF or PVC, as they’ll save you time and effort while delivering clean, professional results in your home improvement tasks.
How Do I Finish Baseboards After Cutting Them?
To finish your baseboards after cutting, start by filling any nail holes with wood filler and sanding smooth. Next, apply caulk along the top edge where the baseboard meets the wall for a seamless finish.
Then, stain or paint the baseboards, using painter’s tape to protect adjacent surfaces. Don’t forget to seal the cut edges if moisture is a concern. Finally, make certain everything’s clean and dry before moving on to installation.
Perfecting Baseboard Corners: A Skill Worth Achieving
In the world of baseboard installation, mastering corner cuts without a miter saw opens a door to creativity and skill. Whether you’re coping, using a circular saw, or trying out a miter box, each technique enhances your craftsmanship.
Remember, precision is key to achieving seamless joints that elevate your space. So, why not embrace these methods and transform your corners into flawless finishes? With practice, you’ll turn cutting into an art form, making every home project a masterpiece.