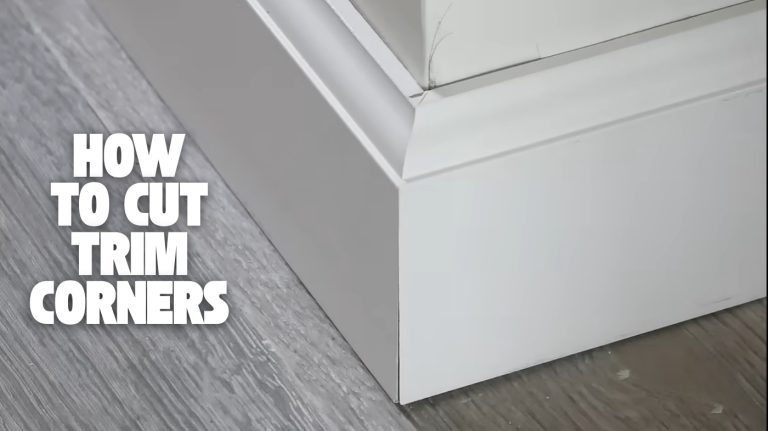
How to Cut Baseboard Corners With Circular Saw: 5 Steps to Follow
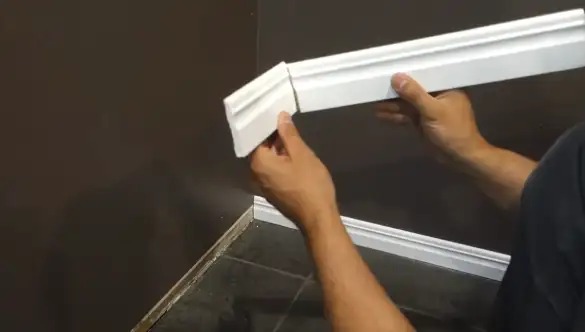
Cutting baseboard corners with a circular is really hard for new woodworkers, but it’s surprisingly simple. All you need is some preparation and the right approach to make a clean and precise cut.
To cut baseboard corners with a circular saw, start by carefully marking the four corners for precise measurements. Set up the circular saw with a fine-toothed blade and adjust the cutting depth to match the thickness of the baseboard. Holding the saw firmly with both hands and ensuring a steady and straight cut.
As part of this article, I’ll describe step-by-step procedures to cut baseboard corners precisely. Plus, I’ll answer the burning question of whether you can make miter cuts on a baseboard using a circular saw. Let’s dive in and master this essential skill.
How to Cut Baseboard Corners With Circular Saw: Step-by-Step Procedures
Following are five key steps to cutting baseboard corners with a circular saw:
- Measure and mark for accuracy
- Set up your circular saw
- Execute the cut with precision
- Refine edges with sandpaper
- Repeat for additional corners
Step 1: Measure and Mark for Accuracy
Begin by measuring the front edge of the baseboard to the desired length. For example, let’s use a standard measurement of 34 inches. Mark this point distinctly, creating a visible guide for your cut.
Use a speed square to mark a precise 45-degree angle at the 34-inch point. Ensure the angle is measured from the square to the long point for accuracy.
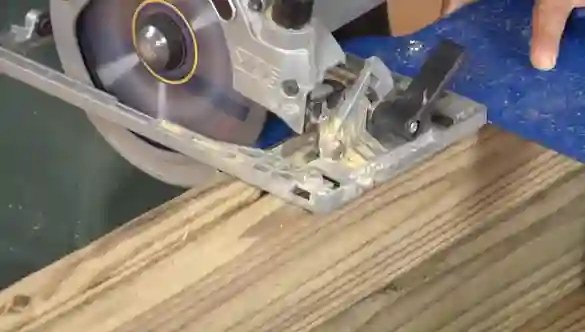
Step 2: Set Up Your Circular Saw
Before setting up your circular saw, ensure that the saw blade has been properly sharpened. Ensure that the blade depth is properly adjusted. You want the blade to cut through the baseboard without going too deep.
Next, check the squareness of the board’s end. This is crucial for a straight and accurate cut. Use a square tool to verify that the end of the board forms a perfect right angle.
Also, make sure your sawhorses are set up correctly. They should provide a stable base for the board and saw, ensuring safety and precision during cutting.
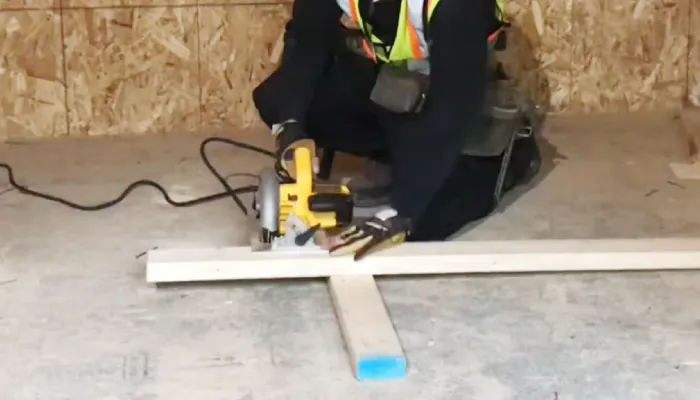
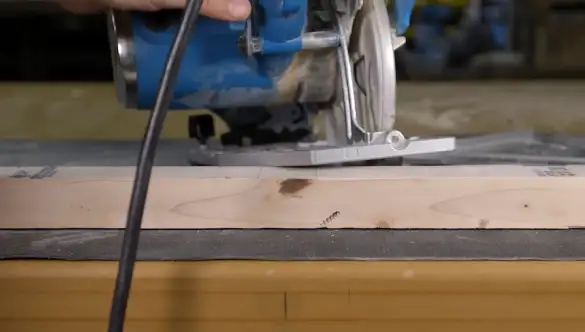
Step 3: Execute the Cut with Precision
Now, execute the cut with precision. Position yourself to minimize the risk of injury in case of a saw kickback. Stand firmly and maintain a stable stance. Aim to cut to the waste side of the marked line, leaving a little extra material for accuracy.
Guiding the circular saw from the square edge to the long point using a smooth cutting motion, creating a perfect 45-degree miter.
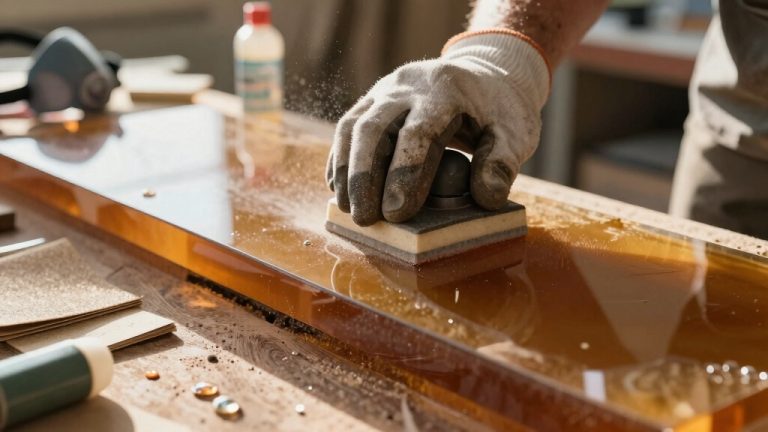
Step 4: Refine Edges with Sandpaper
After the cut, use sandpaper to refine the edges of the baseboard corners. This step will create a polished and professional look for your baseboard installation.
Begin by selecting a sandpaper with a medium grit, such as 120 or 150. Hold the sandpaper firmly and run it along the cut edges of the baseboard, applying even pressure. Make sure you sand along the wood grain to avoid causing any damage. You should continue to sand the edges until they are smooth.
To further enhance the finish, switch to a finer grit sandpaper, such as 220, and repeat the process. Finally, wipe away dust or debris with a clean cloth before installing.
Step 5: Repeat for Additional Corners
For each additional corner, repeat the process of cutting baseboard corners. Repeat these steps for each additional corner, ensuring consistency and precision for a professional-looking result.
What to Consider When Cutting Baseboard Corners With Circular Saw?
I’ve listed several important points when cutting baseboard corners by using a circular saw.
Measure for Accuracy
To ensure precise cuts when using a circular saw to trim baseboard corners, measuring and double-checking all dimensions carefully is essential. Measurement accuracy is crucial for a seamless and professional-looking finish.
When measuring the length of the baseboard, use a tape measure and ensure it’s straight and taut against the surface. Make any necessary deductions for corner angles and ensure the measurements are precise.
Marking the measurements on the baseboard can prevent confusion during cutting. I advise you to double-check the measurements before cutting can also help prevent mistakes and wasted materials.
Blade Depth
When cutting baseboard corners with a circular saw, adjust the blade depth to match the depth of the baseboard material. This ensures a clean and precise cut without any splintering or damage.
To determine the correct blade depth, measure the thickness of the baseboard and set the saw accordingly. Cutting too deep can cause the blade to hit the surface beneath the baseboard, damaging both the material and the saw.
Conversely, cutting too shallow may leave an incomplete cut, requiring additional passes and potentially compromising the quality of the finished corner.
Waste Side Consideration
When cutting baseboard edges with a circular saw, I strongly encourage you to consider the waste side. The waste side refers to the portion of the baseboard that will be discarded after the cut is made.
When cutting, position the baseboard so that the circular saw blade aligns with the waste side of the marked line. This ensures that the final piece matches the intended measurements.
Stability and Support
When using a circular saw to cut baseboard corners, have a stable and secure surface to support the material. Sawhorses or a workbench can be used for this.
These structures provide stability and support, ensuring the baseboard remains in place during cutting and reducing the risk of accidents and errors. Also, a solid foundation minimizes vibrations and wobbling, allowing for more precise and accurate cuts.
Post-Cut Finishing
Sanding the cut edges will remove any splinters or unevenness caused by the circular saw, resulting in a clean and professional finish. When sanding, use the appropriate grit sandpaper for the wood used.
Start with a coarse grit to remove any major imperfections, and then gradually move to a finer grit to achieve a smooth surface. Be sure to sand in the direction of the wood grain to avoid creating scratches.
After sanding, wipe away any dust with a cloth and inspect the corners for any remaining rough spots. Repeat the sanding process until the corners are smooth and polished.
How long does it take to cut the baseboard with a circular saw?
According to my findings, cutting the baseboard with a circular saw typically takes a few minutes. However, the actual time required can vary based on several factors.
Your experience level plays a significant role. Beginners may take longer to make precise cuts compared to experienced individuals. Also, the length and thickness of the baseboard will affect cutting time. Thicker and longer baseboards require more effort and time to cut through.
The complexity of the cuts also impacts the duration. Mitered corners, for example, may require more careful measurements and adjustments, increasing the overall time needed.
Whether you’re making straight or angled cuts will influence the cutting time. Angled cuts typically take longer due to the need for precise measurements and adjustments.
What Type of Circular Saw Blade Should I Use for Cutting Baseboard Corner?
Choosing the right type of saw blade is important when cutting baseboard corners with a circular saw. I recommend you choose a crosscutting blade for smooth cuts across the wood grain. Look for a blade labeled as a crosscutting or general-purpose blade.
A tooth count of 40 to 80 is often suitable, with higher tooth counts providing a smoother finish, especially when working with hardwoods. Consider a blade with an Alternate Top Bevel (ATB) tooth design, which features alternating beveled teeth. This design is versatile and works well for both cross-cutting and ripping.
Can you make miter cuts on a baseboard with a circular saw?
Making miter cuts on baseboards with a circular saw is definitely possible. Start by applying masking tape over the intended cut line. Then, use a speed square to mark the angle line accurately. Measure the offset from the blade to the base plate edge and clamp the speed square accordingly at this point.
There’s no need for angle adjustments on the circular saw for a miter cut. Set your blade depth for a complete cut through the wood and cut the speed square. Finalize the cut edge with a rasp or sandpaper for a smooth finish.
Create Perfect Corner Cuts for Baseboards with a Circular Saw

Cutting baseboard corners with a circular saw is a precise and efficient method. You can achieve accurate miter cuts by following the step-by-step procedures and considering important factors such as the type of circular saw blade.
With the right tools and technique, this task can be completed promptly, ensuring a professional finish for your baseboard installation. So, grab your circular saw and prepare to create a perfectly fitting corner for your baseboards.