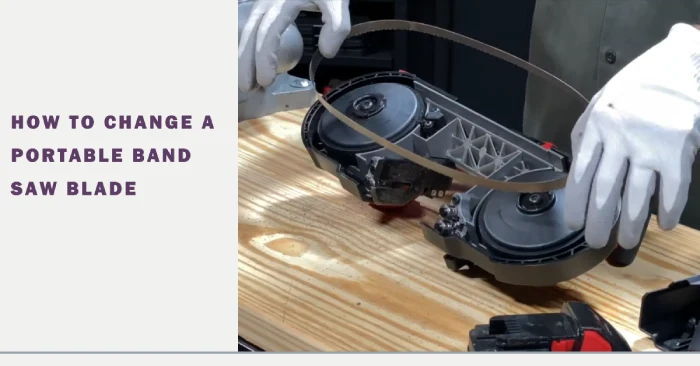
How to Change a Portable Band Saw Blade: 4 Detailed Steps
Changing the blade on a portable band saw is a fundamental aspect of its maintenance, ensuring continued precision and efficiency in various wood-cutting tasks. According to my knowledge, the process requires meticulous attention to safety and a step-by-step approach to ensure optimal results.
Gather all the necessary tools and materials for the job. Carefully remove the old blade, disconnect any power source and take precautions to avoid injury. Replace the blade with a new one, ensuring it’s properly installed and tensioned.
In this discussion, I will explain to you the step-by-step process of changing the blade on your portable woodworking band saw. It will ensure that you can continue crafting with confidence and precision.
How to Change a Portable Band Saw Blade: Follow the Steps
As per my research, woodworking bandsaw blades must be replaced frequently to ensure optimal results. Here I present a step-by-step guide to help you change the blade on your portable band saw.
- Preparation
- Blade removal
- Release tension
- Lift blade
- Remove from idler bearings
- Handle side covers
- Adjustable shoe position
- Blade replacement
- Prepare new blade
- Insert into idler bearings
- Route around drive wheels
- Tighten tension switch
- Replace side covers
- Reposition adjustable shoe
- Self-leveling feature (If applicable)
- Verification
Step 01: Preparation
To prepare for changing the blade on a portable woodworking band saw, ensure the tool is turned off and the battery removed to prevent accidental activation. Safety should always be a top priority when working with power tools.
In addition to turning off the tool and removing the battery, I recommended wearing safety glasses and gloves for extra protection. Safety glasses will shield your eyes from debris or splinters generated during the blade-changing process. Gloves will help protect your hands from any sharp edges or potential cuts.
These precautionary measures will help ensure a safe and successful blade change on your portable woodworking band saw.
Step 02: Blade Removal
2.1 Release Tension
Engage the tension release mechanism as instructed by the manufacturer to safely and efficiently remove the blade from your portable woodworking band saw.
This step is crucial in ensuring a smooth and hassle-free blade removal process. Locate the tension release lever or knob, typically located on the side or back of the band saw.
Follow the manufacturer’s instructions to disengage the tension and release any pressure on the blade. This will make removing the old blade easier and installing a new one.
2.2 Lift Blade
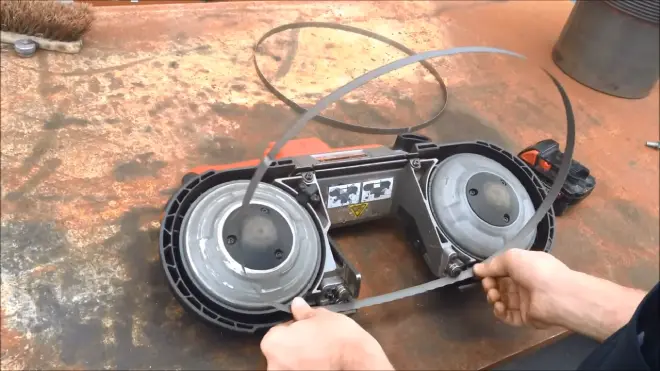
Once the tension is released, use a pair of pliers or gloves to carefully lift the blade off the wheels and out of the idler bearings.
Gently manipulate the blade out of the idler bearings, paying close attention to the wheel guides to ensure the blade comes out smoothly and correctly. Take your time and be careful not to damage the blade or the bearings during this step.
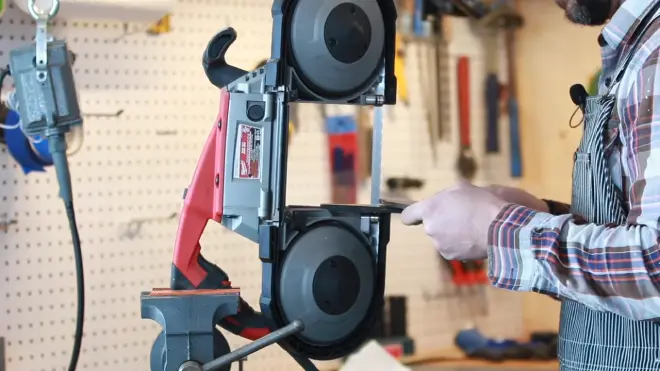
2.3 Handle Side Covers
To ensure proper access during the blade removal process, check if any side covers need to be addressed on your portable band saw model. Some models require these covers to be removed in order to reach the blade.
Locate the handle side covers and carefully remove them using the appropriate tools. Set them aside in a safe place for reinstallation later. This step allows for easier blade removal and replacement.
2.4 Adjustable Shoe Position
During blade removal, ensure the adjustable shoe is positioned as far away from the blade as possible to enhance safety and facilitate the following steps.
This is an important precaution to prevent accidental contact with the blade during removal. Positioning the adjustable shoe at its furthest point creates a safe distance between your hands and the sharp blade. This ensures a smooth and hassle-free blade removal experience.
Step 03: Blade Replacement
Now that you have successfully removed the old blade, it’s time to prepare the new one for replacement.
3.1 Prepare New Blade
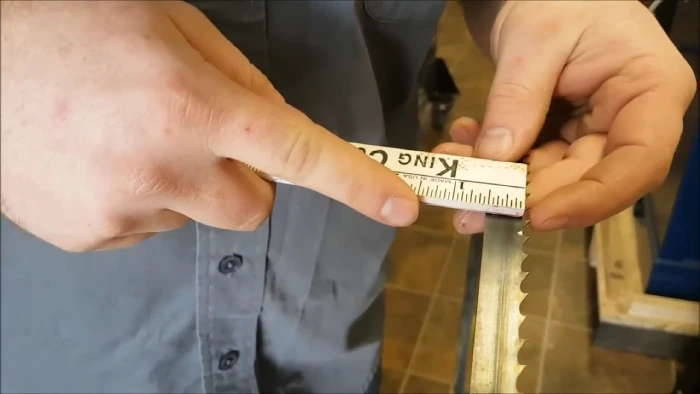
Be sure to choose a replacement bandsaw blade that fits your portable bandsaw and meets the manufacturer’s specifications. Check the new blade’s length, width, and tooth configuration to ensure a proper fit.
Verify that the blade material is appropriate for the wood cutting you’ll be doing. Inspect the blade for any defects or damage before installing it. Having a properly prepared replacement blade will ensure smooth and efficient cutting.
3.2 Insert into Idler Bearings
To properly insert the replacement blade into the idler bearings:
- Carefully guide it into position, ensuring a secure foundation for the upcoming routing and placement on the drive wheels.
- Take the new blade and slide it into the first half of the idler bearings.
- Make sure it’s aligned properly and securely seated.
3.3 Route Around Drive Wheels
Carefully guide the new blade around the drive wheels, ensuring proper alignment with the wheel guides for optimal blade positioning and functionality.
During this step, take your time to ensure the blade is correctly seated before tightening the tension switch. Proper seating is crucial for safety and efficient operation.
3.4 Tighten Tension Switch
Once you’ve aligned the new blade on the drive wheels, tighten the tension switch according to the manufacturer’s instructions. Typically, you’ll need to turn a knob or lever to increase the tension until it reaches the recommended level.
I recommend caution and not overtightening, as this can lead to premature blade wear or breakage.
3.5 Replace Side Covers
Securely replace the side covers to maintain the integrity of the portable band saw’s housing after installing the new blade.
Carefully align the covers with the corresponding slots on the saw’s body. Press firmly to ensure a snug fit and prevent dust or debris from entering the internal components.
Take the time to double-check that the covers are securely in place before operating the band saw to avoid any potential safety hazards.
3.6 Reposition Adjustable Shoe
After replacing the band saw blade, ensure the adjustable shoe is repositioned back to its standard position for stability and proper functionality.
- To do this, locate the adjustable shoe on the bottom of the band saw.
- Loosen the locking knob and slide the shoe to the desired position.
- Once in place, tighten the locking knob to secure the shoe.
- Double-check that the shoe is aligned correctly and securely before using the band saw again.
3.7 Self-Leveling Feature (if applicable)
After inserting the battery, observe the bandsaw plate for correct self-leveling to ensure your portable woodworking bandsaw is functioning properly.
For models with this feature, confirming that the bandsaw plate has properly self-leveled is important. This ensures that the blade will be aligned correctly and that you’ll achieve accurate cuts.
Step 04: Verification
Begin by checking that the blade is correctly seated on the wheels and inspecting for misalignments.
Next, run the portable band saw to ensure the blade is on track and properly aligned. If your model has dual switches, activate the rear switch first, followed by the front switch.
As the blade runs, carefully observe its movement along the guide bearings and on the tire. This will help you identify any areas where adjustments might be necessary. You can often use the tension release or other adjustment features to operate your bandsaw safely.
Can I skip removing the battery if my portable band saw has a cord?
Before changing the blade on your portable band saw, always disconnect the power source to ensure safety and prevent accidental activation. Even if your band saw is corded and doesn’t rely on a battery, it’s still necessary to remove the power source before attempting to change the blade.
If plugged into an outlet, the corded band saw can still pose a risk of accidental activation. Removing the power source eliminates the possibility of the band saw turning on unexpectedly while you’re working on the blade. This is important because a running band saw can cause serious injuries if handled improperly.
How often should I change the blade on my portable band saw?
Changing the blade on your portable band saw is crucial in maintaining optimal performance and ensuring clean, precise cuts. The frequency with which you should change the blade depends on a few factors.
I recommend changing the blade at least every two hours of operation. However, many experienced saw professionals change their blades even more frequently, often up to 6 times per day. By changing the blade regularly, you can avoid several issues arising from using a dull or worn-out blade.
Change Your Band Saw Blade for Precision and Longevity
Changing the blade on your portable woodworking band saw is like giving it a new set of teeth. It’s a simple maintenance task ensuring smooth and precise cuts. Whether your band saw is corded or battery-powered, replacing the blade regularly will keep your saw in top shape.
The detailed steps I provided, from releasing tension to verifying proper blade alignment, serve as a comprehensive guide for users at various skill levels. Safety precautions, meticulous handling, and adherence to manufacturer guidelines are paramount throughout the process.
As you become adept at this routine maintenance task, you contribute to the longevity of your portable band saw and a safer working environment. So don’t delay; grab your tools and get ready to give your band saw a fresh bite.