How Is Wood Cut When Crosscutting With a Table Saw?
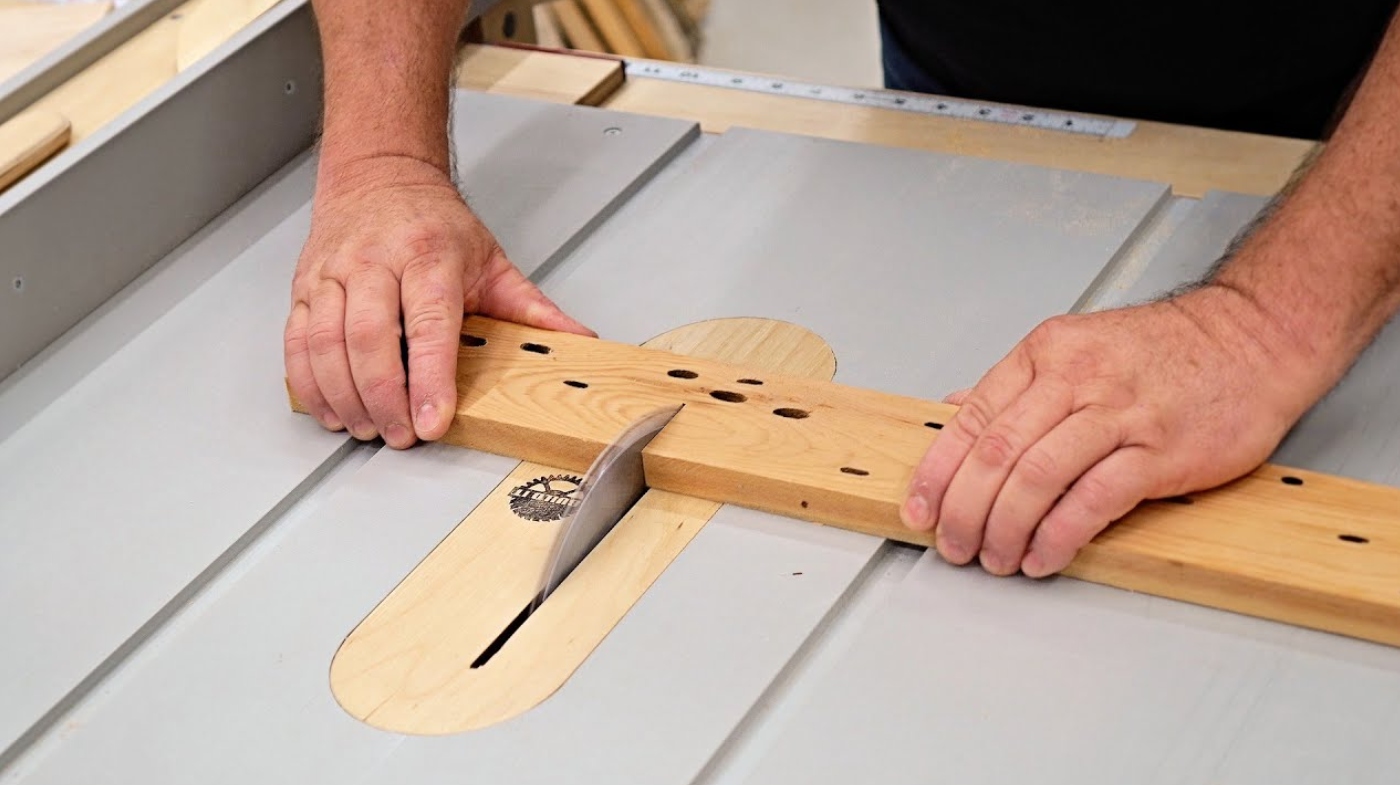
When you crosscut wood on a table saw, you cut perpendicular to the grain using a miter gauge or crosscut sled for control and accuracy.
Set up with a fine-toothed, carbide-tipped crosscut blade and adjust blade height just above the wood surface. Secure the workpiece against the gauge or sled fence, feed steadily, and avoid using the rip fence to prevent binding or kickback.
Following proper setup and technique guarantees clean, safe cuts—explore further for detailed methods and safety tips.
Key Takeaways
- Crosscutting cuts wood perpendicular to the grain for clean, precise joints and is performed using a miter gauge or crosscut sled for control.
- Use a fine-toothed crosscut blade with teeth angled for slicing fibers cleanly, and set blade height so teeth slightly extend above the wood.
- Align the miter gauge or sled square to the blade, securely hold the wood against the guide, and steadily feed the wood through the blade.
- Avoid using the rip fence for short crosscuts to prevent pinching and kickback; instead, use a miter gauge or sled for safety and accuracy.
- Support longer or larger pieces with featherboards, stop blocks, or outfeed supports to maintain stability and ensure smooth, consistent cuts.
Purpose and Definition of Crosscutting on a Table Saw
Why is crosscutting an essential skill when working with a table saw? Crosscutting lets you cut wood across the grain, which is critical for producing clean, precise joints and accurate lengths or angles.
Crosscutting across the grain is vital for clean, precise joints and accurate wood lengths or angles.
You’ll often use a table saw combined with a miter gauge or crosscut sled to guide the wood safely and accurately. This method improves the structural integrity and appearance of your projects, whether furniture or cabinetry.
The miter saw is typically the best tool for crosscutting, though table saws can be suitable in certain situations. Choosing the right blade material, such as carbide-tipped blades, enhances cutting performance and blade longevity.
You need to manage blade direction carefully to prevent kickback, as the blade spins toward you during crosscuts. Using tools like a riving knife and maintaining proper alignment ensures safety and precision.
Differences Between Crosscutting and Ripping
Crosscutting focuses on slicing wood perpendicular to the grain, enabling precise length adjustments and clean joints.
In contrast, ripping cuts are made parallel to the grain and are primarily used for resizing the board’s width. You’ll notice these differences in blade design, cutting technique, and saw setup.
- Crosscut blades have angled, fine teeth to slice fibers cleanly, while rip blades feature larger, chisel-like teeth for aggressive material removal.
- Crosscutting uses a miter gauge or crosscut sled for accuracy; ripping relies on a rip fence for straight cuts. The microscopic structure of wood explains why crosscut teeth are sharpened on the sides and top bevel to slice through cell walls, while ripping teeth are shaped like chisels to pull fibers out efficiently, reflecting their different tooth designs.
- Crosscuts require slower, more controlled feed rates to avoid splintering; ripping demands faster feed to efficiently clear material. Selecting the right saw with proper blade fences can significantly improve cutting accuracy and ease of use.
Essential Accessories for Effective Crosscutting
Although the table saw itself is critical, your accuracy and safety during crosscutting heavily depend on using the right accessories.
Push sticks and blocks keep your hands clear and control the wood. Crosscut sleds enhance precision and safety by stabilizing the workpiece. Featherboards maintain consistent pressure, reducing vibration and kickback.
Selecting a table saw with the appropriate blade tilt direction can further improve safety during bevel cuts. Miter gauges ensure exact angles for trim and molding.
Zero-clearance inserts minimize tear-out, improving edge quality. Additionally, a digital angle gauge can be used to precisely set blade angles for perfect crosscuts and miters, eliminating the guesswork involved with eyeballing adjustments.
| Accessory | Key Benefit |
|---|---|
| Push Sticks/Blocks | Safe guidance, kickback reduction |
| Crosscut Sleds | Stable, repeatable cuts |
| Featherboards | Consistent pressure, safety |
| Miter Gauges | Precise angled crosscuts |
| Zero-Clearance Inserts | Clean edges, reduced tear-out |
Use these tools to maximize control, accuracy, and safety every time you crosscut.
Preparing the Table Saw for Crosscutting Operations
Before you start crosscutting, you need to set up the miter gauge properly to guarantee accurate angle cuts. Using a blade with a thin kerf can help reduce material waste and improve cutting efficiency.
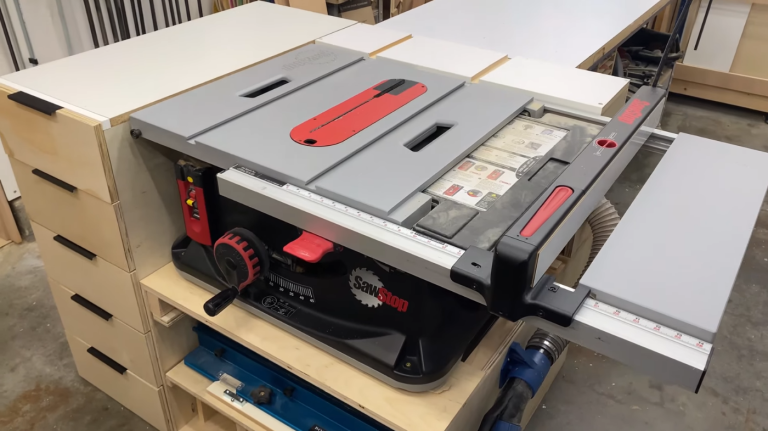
Installing a crosscut sled will provide stability and enhance precision, especially with smaller pieces. Using sleds (mini or precision miter) is the best method for trimming small amounts off panels due to their safety and accuracy.
Finally, adjust the fence alignment to be perfectly parallel to the blade to maintain consistent, clean cuts throughout your work. Ensuring the blade is compatible with your saw’s specifications will maximize performance and reduce vibration.
Setting Up Miter Gauge
When preparing your table saw for accurate crosscutting, setting up the miter gauge correctly is essential. Start by fitting the miter bar securely into the miter slot to minimize wobble and ensure smooth sliding.
Next, set the miter gauge to 0 degrees or square it precisely to the blade using a calibrated angle finder or reliable square.
Finally, lock the gauge firmly in place to avoid movement during cuts.
To optimize setup, focus on:
- Confirming the miter gauge is perfectly perpendicular to the blade for true 90-degree cuts
- Ensuring the miter gauge slides smoothly without play in the slot
- Supporting the stock firmly against the miter gauge fence for stability
Using an after-market miter gauge with features like positive stops and fine adjustments can significantly improve cut accuracy and repeatability.
This precise setup guarantees clean, accurate crosscuts and safer operation.
Installing Crosscut Sled
A well-installed crosscut sled transforms your table saw into a precise and safe cutting station for crosscutting tasks.
Start by selecting durable materials like plywood or MDF for the sled base and aluminum or hardwood for the runners. For best results, choose warp-resistant materials such as 3/4 inch plywood to ensure stability and durability.
Insert washers in the miter slots to raise the runners slightly above the table surface, then secure them with double-sided tape. Proper maintenance of the table saw is essential to ensure smooth sled operation and prevent issues such as overheating.
Attach front and back fences to the sled base, ensuring they’re square to the blade. Countersink screws to avoid splitting and interference. Cut a kerf in the sled for blade clearance. Adjust blade height just above the sled base for safety.
Finally, test your setup with trial cuts to verify alignment and smooth operation before proceeding with actual workpieces. Regular inspection of blade alignment and blade condition helps maintain cutting precision and safety.
Adjusting Fence Alignment
Since accurate crosscutting depends heavily on fence alignment, you’ll need to guarantee the fence runs perfectly parallel to the blade and miter track. Misalignment can cause binding, uneven cuts, and dangerous kickbacks, so precise adjustment is critical.
Begin by using a combination square placed in the miter track to verify parallelism. Adjust the fence carefully, checking at multiple points to avoid drift or side play.
For achieving the highest accuracy, using the 5-Cut Method is recommended to ensure the fence is square to the blade within 0.001 inches. Additionally, ensuring the table saw blade is sharp helps reduce the risk of kickback during cutting operations.
Key steps include:
- Use a combination square or calipers to measure parallelism precisely.
- Lock the fence gently, ensuring it doesn’t shift during tightening.
- Perform test cuts and measure results to confirm consistent alignment.
Step-by-Step Crosscutting Techniques
Although crosscutting might seem straightforward, mastering precise techniques is essential for clean, accurate cuts on a table saw. Begin by aligning the fence parallel to the blade for straight cuts or set the miter gauge if angled cuts are required. Never use a fence for cross cutting to prevent pinching and kickback risks. Using a miter gauge provides better control and precision when performing angled crosscuts.
Master precise crosscutting by aligning the fence or using the miter gauge for clean, accurate table saw cuts
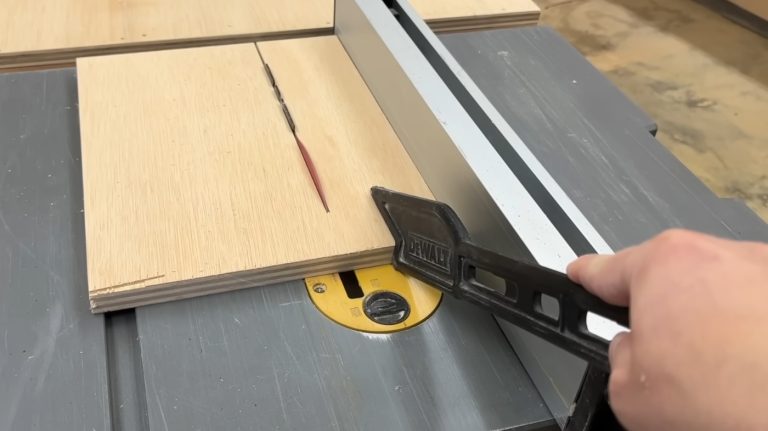
Position your wood firmly against the fence or miter gauge, ensuring the cut mark aligns with the blade kerf. Use a push stick to maintain control and safely push the workpiece steadily through the blade.
Avoid forcing the material; let the blade do the cutting. Keep your hands clear of the blade path throughout.
Once the cut is complete, allow the blade to stop fully before removing the wood. These steps ensure precision and safety in every crosscut operation.
Handling Short and Narrow Pieces Safely
When you handle short or narrow pieces on a table saw, prioritizing safety becomes crucial due to increased risks like kickback and loss of control. Small stock can easily bind, trap, or be ejected violently if not managed correctly. Applying lubricant to the blade can help reduce friction, making the cutting process smoother and safer.
Always use a push stick to keep your hands safely away from the blade, and never rely on the rip fence for crosscutting short pieces. Position your body to the side of the blade’s path to avoid injury from potential kickback. Using a miter gauge or crosscut sled helps maintain control and reduces the chance of the wood twisting against the blade, which is a common cause of kickback.
Key safety practices include:
- Using a miter gauge or crosscut sled instead of the rip fence to guide the workpiece.
- Setting blade height so teeth extend no more than 1/4 inch above the material.
- Wearing eye protection to guard against flying debris from short cutoffs.
Crosscutting Large Panels and Sheet Goods
When crosscutting large panels, you need solid support to prevent binding and guarantee a clean cut. A crosscut sled designed for oversized sheet goods provides both stability and accuracy, reducing the risk of kickback.
One effective method involves clamping a temporary fence at a measured distance from the blade and running it along the edge of the table to guide cuts that exceed typical saw capacity or support limitations, ensuring precise alignment with the blade temporary fence technique.
Using a sled with a torsion-box frame and zero-clearance fences lets you handle large panels safely and precisely. Additionally, maintaining the correct blade height adjustment is crucial to achieving clean cuts and preventing material damage.
Supporting Large Panels
Because large panels and sheet goods can easily sag or shift during crosscutting, providing proper support is essential to maintain accuracy and safety.
You need to stabilize the workpiece to prevent binding, kickback, and uneven cuts. Employ appropriate fixtures and handling techniques to keep panels level and secure. Always check the cutting surface for levelness before starting to ensure a flat cutting plane.
Consider these key support strategies:
- Use outfeed supports or roller stands to prevent sagging beyond the table saw surface.
- Clamp panels with stops or temporary fences to avoid lateral movement during the cut.
- Enlist assistance for lifting and positioning large panels to maintain control and reduce injury risk.
- Using a large capacity sled that accommodates panels up to 3 ft. wide can enhance support and accuracy during crosscuts.
Crosscut Sled Benefits
How can a crosscut sled improve your accuracy and safety when cutting large panels? It stabilizes your workpiece, preventing shifting and misalignment, while its zero-clearance design supports material precisely at the cut line, minimizing tear-out and chip-out. This results in cleaner, repeatable cuts, especially on delicate surfaces like plywood or veneered stock.
For safety, the sled’s large base reduces kickback risk by holding panels firmly and keeps your hands away from the blade. It also handles heavy or slippery materials without strain, reducing slippage hazards.
Additionally, it eliminates contact with the saw table during cuts, further enhancing operator safety. Versatile, it accommodates various panel sizes and supports angled cuts.
Maintaining Safety During Crosscutting Tasks
Although crosscutting with a table saw is a common woodworking task, maintaining strict safety protocols is essential to prevent accidents and injuries. Before starting, clear your workspace of debris and make certain adequate lighting. It is also important to ensure that appropriate guards are always in place before operating the saw.
Crosscutting with a table saw requires strict safety measures and a clean, well-lit workspace to prevent accidents.
Use appropriate equipment like a sharp crosscut blade, miter gauge, saw guard, and anti-kickback devices. Position the wood firmly against the miter gauge and maintain a safe distance, keeping your hands away from the blade path.
Key safety measures include:
- Always use guides; never attempt freehand cuts.
- Employ push sticks for narrow cuts to protect your hands.
- Shut off the saw and wait for the blade to stop fully before reaching near it.
Tips for Achieving Accurate and Clean Crosscuts
When aiming for accurate and clean crosscuts, meticulous preparation and proper technique are essential. Start by measuring precisely and marking cut lines with a sharp pencil.
Use a 60–80 tooth blade for clean cuts, setting blade height so teeth barely extend above the workpiece. Ensure your miter gauge is square and consider employing a crosscut sled or jig for enhanced accuracy.
Using a crosscut sled helps to safely and accurately cut wide or unsupported boards. Secure the wood firmly against the fence or sled, maintaining a consistent feed rate without hesitation. Use zero-clearance inserts and auxiliary fences to reduce tear-out.
For hardwoods, begin with a shallow scoring cut. After cutting, immediately check the edge for squareness and smoothness. Supporting longer pieces and using featherboards or stop blocks will improve control and repeatability, guaranteeing consistently precise, clean crosscuts.
Frequently Asked Questions
How Do Different Wood Species Affect Crosscutting Performance?
You’ll notice denser woods like oak demand more cutting power and higher feed force, which can wear your blade faster and strain your motor. Softer species, such as spruce, cut more easily and reduce blade stress.
Moisture content also plays a role—wetter wood increases friction and risks blade binding. To maintain precision and blade life, adjust your feed force and use blades with higher tooth counts and proper tooth configurations tailored to the wood’s density.
What Blade Types Are Best for Crosscutting Hardwoods?
You’ll want blades with a high tooth count—typically 80 teeth or more—for crosscutting hardwoods to guarantee smooth, precise cuts.
Look for alternate top bevel (ATB) grind blades, like the Freud LU80R010 or Ultra-Smooth 80 tooth blades, which reduce splintering and burning.
High ATB grind blades with a 40° bevel work well for extremely sharp cuts, making them ideal for hardwoods and veneered plywoods in furniture and cabinet work.
Can Crosscutting Be Done Without a Miter Gauge or Sled?
Think you can crosscut without a miter gauge or sled safely? Technically, yes, but it’s risky. Without proper alignment tools, you’ll struggle to make accurate cuts, increasing kickback danger and potential injury.
Freehand cutting is imprecise and can damage your saw or workpiece. Instead, consider alternatives like DIY sliding tables, which offer better control and precision. For safety and quality, always use some form of guided crosscutting accessory.
How Does Blade Height Impact Crosscut Quality?
You’ll find blade height vital in crosscut quality. Set it just enough to expose teeth slightly above the wood—about 1/4 inch—to minimize tear-out and splintering.
Too high, and you risk rough edges, burning, and kickback; too low, and the blade can bind. Proper blade height guarantees teeth engage wood cleanly, improves finish, reduces sanding, and helps chip ejection. This keeps the blade cooler and sharper longer for precise, safe cuts.
What Maintenance Keeps the Table Saw Optimal for Crosscutting?
To keep your table saw ideal for crosscutting, regularly clean dust and debris to guarantee smooth operation. Keep the blade sharp and properly aligned with the miter gauge and fence.
Calibrate the fence to maintain parallelism with the blade. Condition the table surface to prevent wood sticking. Check safety guards and use proper lubrication on moving parts. This precise maintenance ensures accurate, safe, and efficient crosscuts every time.
Cut with Confidence: Precision and Safety Combined
When crosscutting with your table saw, precision and safety go hand in hand. By setting up the saw correctly, using the right accessories, and following proper techniques, you’ll avoid cutting corners and achieve clean, accurate cuts every time.
Whether handling small pieces or large panels, keep safety your top priority and double-check your measurements. Mastering these steps guarantees your project runs smoothly and your cuts come out sharp and professional.

