How Does a Featherboard Work on a Table Saw: A Complete Overview
Using a table saw offers unparalleled precision and speed in woodworking. However, working with such powerful equipment also poses great risks to the operator’s safety.
One crucial tool that helps mitigate these risks and enhances both safety and accuracy is the featherboard. I researched how a featherboard works on a table saw, and it’s fascinating to see how this seemingly simple device can make such a big difference.
According to my research, a featherboard works by keeping your workpiece securely against the table saw’s fence and preventing it from lifting, shifting, or being pulled back during cutting.
But to get a more comprehensive understanding of how this tool operates, you need to explore its design, structure, and precise positioning. I will discuss in detail the purpose, design, and usage of a featherboard on a table saw to make sure you get the most out of it.
How Does a Featherboard Work on a Table Saw: Detail Explanation

To understand how a featherboard works on a table saw, you need to know these things:
- Purpose and function
- Design and structure
- Positioning and usage
Now, explore each aspect of a featherboard to gain a deep understanding of how this essential tool works on a table saw.
1. Purpose and Function
A featherboard prevents lifting, shifting, or pulling back during cutting by holding your piece securely against the fence.
Its purpose is to maintain consistent contact between the workpiece and the fence, ensuring accurate and controlled cuts. By applying pressure against the workpiece, the featherboard acts as a guide, keeping it in place and reducing the risk of kickback.
The fingers or feathers on the featherboard are flexible, allowing them to apply pressure while still allowing the workpiece to move forward smoothly. This helps to prevent binding and ensures a smooth cutting process.
Additionally, the featherboard can be adjusted to accommodate different workpiece sizes and thicknesses, further enhancing its versatility and functionality.
When choosing a featherboard for your table saw, try to select a high-quality one that offers secure attachment options and durability. High-quality table saw featherboards often come with great features like miter bars and magnets, making them last a long time and ensuring reliable safety and precision.
2. Design and Structure
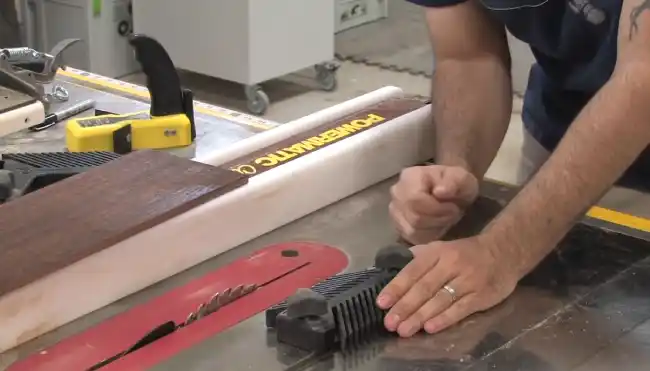
A typical featherboard is made from wood or other materials and consists of a flat, elongated board. One end of the wood is cut at a 45-degree angle, providing flexibility.
The featherboard has parallel cuts in the direction of the grain, creating flexible fingers or ‘feathers’ that resemble a comb. These feathers are positioned to face the workpiece and pressed against the fence or table.
By angling the feathers to flex in one direction (toward the blade) but resisting movement in the other direction, the featherboard securely holds the workpiece in place. The design and structure of the featherboard ensure that it applies the necessary pressure to keep the workpiece stable and prevent kickback.
3. Positioning and Usage
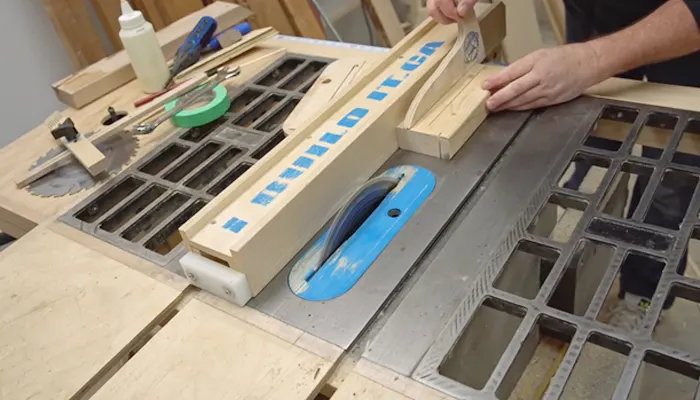
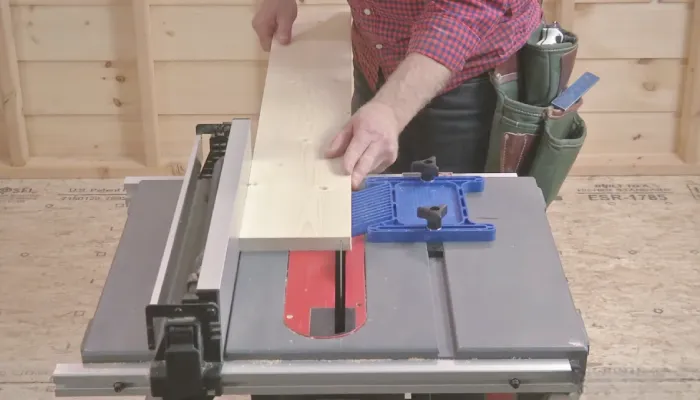
Placement and usage of the featherboard are critical to its effectiveness and safety. When ripping wood, the featherboard should be just ahead of the saw blade. This positioning retains the piece’s correct pressure and ensures an accurate cut.
In cases where the featherboard doesn’t feature a setup finger, bending all the fingers slightly ensures the right pressure. When cutting rabbet, the featherboard’s position is directly above the saw blade, and proper pressure adjustment ensures that the workpiece is securely held. Using two featherboards, one in front and one behind the blade, adds stability further, ensuring further control and safety.
How Do You Make a Featherboard for a Table Saw?
To make a featherboard for a table saw, you’ll need to follow these steps:
Step 1: Collect All the Materials and Tools You Will Need
Gather all the materials and tools you’ll need to make a featherboard for your table saw. You’ll need a piece of 18mm plywood or solid wood, with dimensions based on your specific needs. Additionally, you’ll require 1/4′ carriage bolts, 1/4′ T-nuts, and screws for assembly.
To secure the featherboard to your table saw, a drill with appropriate drill bits is necessary. You may also need a saw, such as a table saw, band saw, or jigsaw, to cut the plywood or solid wood to size. A miter gauge will be helpful for making angled cuts if necessary.
Other essential tools include a ruler or measuring tape, pencil, framing square, and sandpaper for finishing touches.
Step 2: Plan, Mark, and Cut
Now that you have gathered all the materials and tools, you can proceed to plan, mark, and cut the featherboard for your table saw.
Consider the nature of your woodworking project and the size of your table saw to arrive at the appropriately sized featherboard. Also, ensure that the grain of the wood runs along the length of the featherboard for added strength.
Then, use a framing square to mark 30-degree angles on both ends of the featherboard. Ensure that these angles are consistent and even to avoid any inconsistencies in the final product.
Next, mark the locations of the individual fingers, spacing them around 5mm apart. It’s easier to mark these fingers while the board ends are still square. Once you’ve marked all the fingers, proceed to cut the angled ends using a table saw with a miter gauge.
After that, cut the individual finger tabs using a band saw or jigsaw. Ensure that the fingers are evenly spaced along the length of the featherboard to promote balance and consistency.
Step 3: Bolt Slots
Now that the featherboard is taking shape, it’s time to consider the slots for the bolts that will secure the board to your table saw. Determine where you want to place the slots and mark their locations on the featherboard.
Once marked, drill pilot holes for the bolts using a drill press with a 5/16″ bit. Use a scroll saw to cut out the material between the holes, creating the slots. Ensure that the slots fit snugly around the carriage bolts to prevent any unnecessary movement.
Step 4: Prepare the Lock-Down Knobs and Carriage Bolts
To prepare the lock-down knobs, cut discs out of 18mm plywood using a hole saw. Ensure that the discs are large enough to grip comfortably. Next, drill a 5/16″ hole in the center of each knob to fit the T-nuts. Add a little epoxy to the counterbore and tap the T-nuts into place.
This will ensure that the lock-down knobs stay in place and can be easily fastened to the carriage bolts when securing the featherboard to the table saw.
Step 6: Finishing and Assembly
After securing the carriage bolts and lock-down knobs, you can proceed to the final step of finishing and assembling your featherboard for a table saw.
Start by sanding the featherboard to ensure any sharp edges are smoothed out, making it comfortable to handle. If desired, you can also spray paint the knobs for added visual appeal.
Next, insert the carriage bolts through the slots in the featherboard and secure them tightly with the lock-down knobs. Adjust the position of the featherboard on the table saw fence as needed to accommodate your woodworking tasks.
At last, use screws to securely attach the featherboard to the table saw fence, ensuring a stable and reliable fit.
Can a featherboard help prevent kickback on a table saw?
Using a featherboard on your table saw significantly reduces the risk of kickback. The teeth or ‘fingers’ of the featherboard apply pressure to the workpiece, ensuring it stays firmly against the table and fence. This pressure prevents the wood from being thrown back towards you, minimizing the chances of injury.
However, it’s important to note that while a featherboard is effective in reducing kickback, it may not entirely eliminate the possibility of it occurring. Proper setup and usage are crucial for achieving the best results. Make sure to securely clamp the featherboard in place to ensure it stays in position during the cutting process.
Additionally, it’s worth noting that a featherboard is particularly valuable when using a table saw without a fence, as it enhances safety and precision as it guides and stabilizes your workpiece.
Can you use a featherboard with a miter gauge on your table saw?
You can use your table saw with a featherboard and miter gauge to enhance safety and control during angled or crosscuts. In addition to being used with the saw’s fence for straight cuts, featherboards can also be adjusted to align with the miter gauge when making angled or crosscut cuts.
By attaching the featherboard to the miter gauge, you can secure the workpiece against the gauge and the saw’s table, preventing it from shifting or moving during the cut. This added support helps maintain better control and precision, reducing the risk of kickback and ensuring accurate cuts.
Use a Featherboard Correctly for Safe and Accurate Table Saw Operations
A featherboard is a valuable tool for maintaining safety and accuracy on a table saw. By applying pressure against the workpiece and the fence, the featherboard helps prevent kickback and ensures a consistent and controlled feed.
When you use a featherboard on a table saw, make sure to carefully follow the setup and positioning guidelines, secure it firmly in place, and adjust it as needed for different woodworking tasks.
You can also make your own custom featherboard that I shared with you based on my research, allowing for a personalized and effective safety accessory tailored to your woodworking needs. Utilizing a featherboard properly enhances both the safety and precision of your table saw operations.