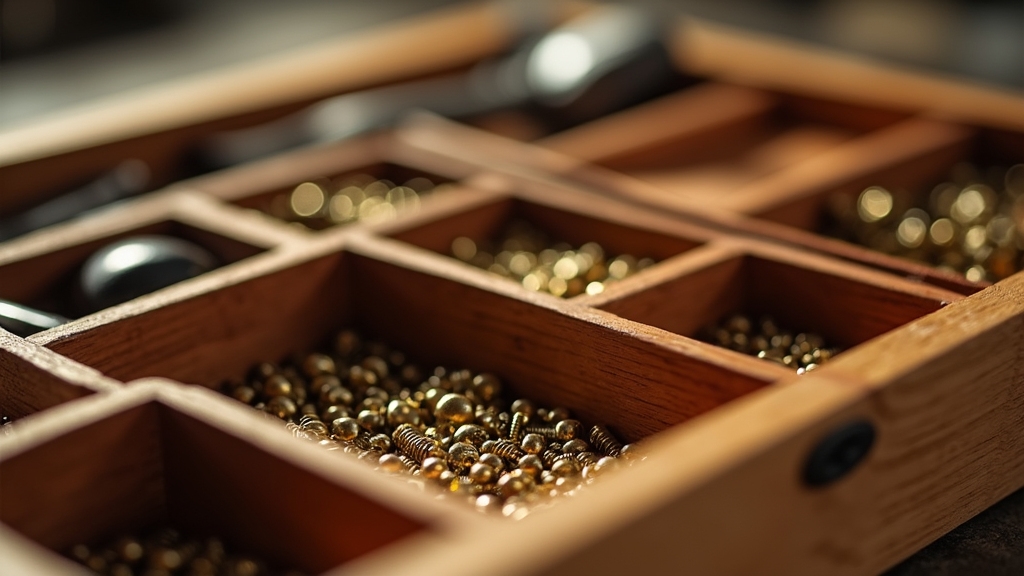
DIY Screw Storage Ideas: Clear Bins for Easy Visibility
You can build a sturdy wooden organizer with adjustable compartments using ½” plywood and pocket hole joinery to sort screws by size and length. Alternatively, use stackable, clear plastic bins or repurpose old drawers for flexible modular storage.
Label compartments clearly with gauge and length for quick access, and keep everything near your workspace for convenience. Regular maintenance will prevent rust and clutter. Keep exploring for more practical ways to optimize your screw storage efficiently.
Key Takeaways
- Build wooden organizer boxes with adjustable compartments using durable plywood and pocket hole joinery for sturdy, customizable screw storage.
- Repurpose old drawers or plastic bins with clear labels and stackable designs to maximize space and improve screw accessibility.
- Label compartments by screw gauge, length, and thread pitch for quick identification and efficient organization.
- Use modular, transparent containers or magnetic bins mounted on walls for space-saving, visible, and spill-proof screw storage.
- Maintain screw storage by regular cleaning, moisture control with sealed containers and desiccants, and pest prevention to preserve quality.
Building a Wooden Organizer Box With Compartments
Before you start cutting wood, plan your wooden organizer box carefully by measuring your available space and screw sizes to confirm maximum storage efficiency. The dimensions of your box should consider practical height and width to accommodate both small parts organizers and bins efficiently box dimensions.
Applying a paste wax finish after assembly can protect the wood surface and reduce friction. Design compartments with adjustable dividers to customize storage for various screw sizes and quantities. Balance the number of compartments with easy access.
Create adjustable compartments to fit different screw sizes while ensuring easy and quick access.
Sketch your plan to estimate materials and streamline construction. Choose durable ½” plywood or solid wood scraps for easy cutting and strength. Use pocket hole joinery with wood screws for clean, sturdy joints. Equip yourself with a mitre saw, drill with pocket hole jig, clamps, and sanders.
Create a jig for evenly spaced dividers to speed assembly. Consider ergonomic features like handles or angled fronts to ease access. This systematic approach guarantees a practical, efficient wooden organizer tailored to your screw storage needs.
Using Budget-Friendly Plastic Bin Storage Solutions
When you need an affordable and efficient way to organize screws, budget-friendly plastic bin storage solutions offer versatile options that fit various workshop needs.
Users must enable JavaScript in their browsers to access full features on many websites, which is a common browser setting and ensures smooth online shopping or research for these storage options. Choose stackable, nestable bins with ribbed walls to maximize vertical space safely.
Drawer-style bins with front handles and tabs prevent spills during access, while clear multi-compartment organizers let you identify screws quickly without opening lids. Opt for impact-resistant polypropylene bins that resist water, rust, and corrosion, ensuring durability.
Look for compartments sized to separate different screw types, plus gravity-feed designs to simplify picking. Magnetic bins can hold screws securely, and modular units mount easily on walls or shelves to optimize space.
These lightweight, easy-to-assemble bins save you money compared to metal options and require no extra tools, providing practical, long-lasting screw storage. For orders or inquiries about these storage solutions, direct communication via phone orders or email helps expedite the process.
Creating Flexible Compartment Systems for Versatility
Budget-friendly plastic bins offer straightforward screw storage. Clamps with adjustable pressure can help secure components during assembly of compartment systems. Creating flexible compartment systems takes organization further by adapting to your changing needs.
Use modular drawer units with adjustable dividers so you can customize compartment sizes to fit varied screw types and quantities. Removable dividers let you resize compartments quickly without buying new containers.
Incorporate adjustable shelf systems with pre-drilled side supports to rearrange shelf heights and accommodate different organizer boxes. The cabinet design includes slots for easy removal of boxes, which enhances accessibility in such flexible storage setups slots for easy removal.
Clamps and spreaders maintain shelf alignment, ensuring durability despite wood warping. Combine vertical racks for standardized bins with horizontal modular drawers to maximize space efficiency and accessibility.
This flexible setup lets you reconfigure storage as your screw collection evolves, improving access and inventory management without major overhauls.
Repurposing Cabinets and Drawers for Modular Storage
Although you might not initially consider old furniture for screw storage, repurposing cabinets and drawers offers modular, customizable solutions that save space and money. Building a sturdy tabletop on old drawers can enhance durability and provide a stable surface for organizing screws.
Use old drawers as shallow trays or stack them with doors to create compact cabinets. Adding pull-out shelves inside cabinets improves screw accessibility. Filing cabinets offer durable bulk storage with mobility if you add casters.
Kitchen cabinets also provide versatile modular cubes for organizing screws efficiently. Repurposed drawer cubbies can be customized to provide functional storage solutions tailored for different screw sizes and types, enhancing organization. Repurposed drawer cubbies
| Furniture Type | Storage Feature | Best Use |
|---|---|---|
| Old Drawers | Shallow trays, stackable | Sorting by screw size/type |
| Cabinets w/ Shelves | Pull-out shelves | Easy access, vertical space |
| Filing Cabinets | Deep drawers, mobile | Bulk storage, workshop use |
| Kitchen Cabinets | Modular cubes, customizable | Integrated workshop storage |
| Vintage Drawers | Painted, distinct modules | Visual sorting, aesthetics |
Designing Custom Wood Bin Organizer Cabinets
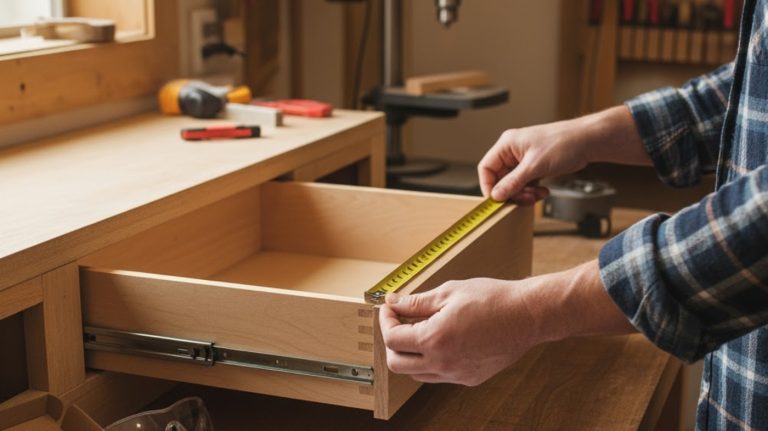
First things first, make sure you take some accurate measurements of your workspace. It’s super important to check those dimensions against your screw containers to ensure your wood bin organizer will fit just right. You definitely don’t want to get halfway through and realize it’s too big or too small!
Once you have your measurements sorted, it’s time to dive into the construction. You can customize your organizer by selecting from a wide range of sizes to perfectly match your space and needs. Expert recommend using durable joinery methods, like pocket hole screws combined with solid wood glue. This combo is a game changer for creating a sturdy, long-lasting cabinet.
Precise Measurement Techniques
When designing custom wood bin organizer cabinets, you’ll increase accuracy by selecting and calibrating high-quality measuring tools, such as tape measures capable of 1/16-inch increments and framing squares.
Use a carpenter’s level to verify squareness before cutting. Regular calibration prevents systematic errors, while digital laser distance meters speed up measurements in larger spaces.
Measure wood after it acclimates to workshop conditions, accounting for seasonal movement to avoid warping or jamming. It is important to understand wood movement to allow for expansion and contraction gaps in your design.
Always measure twice and mark parts immediately using fine pencils or marking knives to reduce errors. Mill face frame stock but cut lengths after carcass assembly, clamping and dry-fitting parts first. Record all dimensions carefully, including overlay gaps, and use consistent tools to maintain repeatability throughout your cabinet layout and assembly process.
Durable Joinery Methods
Since your custom wood bin organizer cabinets must withstand regular use and bear weight, choosing durable joinery methods is crucial. Mortise and tenon joints offer superior strength for frames. Pocket-hole joinery speeds assembly with decent durability.
Dovetail joints combine strength with aesthetic appeal, ideal for drawers. Tongue and groove joints guarantee stability and alignment, perfect for panels. Understanding joinery is crucial for achieving both the longevity and repairability of your cabinet materials, ensuring your organizers stand the test of time. Importance of Cabinet Joinery
| Joinery Method | Strength Level | Best Use |
|---|---|---|
| Mortise and Tenon | Exceptional | Frames, doors, internal dividers |
| Pocket-Hole | Moderate | Quick assembly, beginner projects |
| Dovetail | High | Drawers, visible craftsmanship |
| Tongue and Groove | Stable & Aligned | Panel assemblies, bin backs |
Choose joinery based on load, appearance, and skill to build lasting, functional organizers.
Tips for Labeling and Identifying Screw Sizes
Although screw sizes can seem complex, labeling them clearly is essential for efficient storage and retrieval. Always include the gauge number with the “#” sign for screws smaller than 1/4”, and use fractional inch diameters for larger ones.
Clear labeling with gauge numbers and fractional inches ensures efficient screw storage and easy retrieval.
Specify thread pitch or threads per inch (TPI) to distinguish coarseness, especially between metric (in millimeters) and imperial sizes. It is important to note that TPI measures the number of threads in a one-inch section of screw. Clearly mark length from under the head to the tip, noting exceptions like flat heads.
Group screws by gauge, then sort by length and thread pitch, labeling compartments accordingly. Use consistent abbreviations and avoid dropping measurement units to prevent confusion. Adding screw type (wood, sheet metal) and material details also helps identify the right screw quickly. Visual aids like charts or color codes improve clarity and speed up finding the correct size.
Methods for Ensuring Easy Access and Retrieval
When you’re setting up your storage, it’s super important to keep easy access in mind. You know, like using clear labels and compartments so you can spot screws quickly. It really saves time! Also, think about adding features like pull-out drawers and transparent containers. Trust me, it minimizes searching time and makes everything so much easier to find.
Plus, when you have clear, consistent labels and an ergonomic layout, retrieval becomes faster and more efficient. It’s all about making your life simpler! Utilizing a box with cubbie holes can help keep screws and nails organized in a practical and accessible way.
Access-friendly Design Features
When designing screw storage for easy access, focus on features that let you quickly identify, reach, and retrieve screws without hassle. Use modular, stackable bins with clear materials to see contents instantly. Incorporate small removable trays so you can carry screws to your workspace easily.
Arrange compartments in shallow rows or angled slots to improve visibility and prevent mixing. Integrate divided drawers beneath your workbench for quick, clutter-free access. Make sure bins have handles or finger cutouts for effortless lifting and sliding. Store frequently used screws closest to your primary work area to cut down retrieval time.
Optimize compartment sizes to fit common screw dimensions, preventing spillage and overfilling. This avoids the difficulty in finding appropriate-sized bins for all fasteners. Finally, position storage adjacent to your work surface, aligning with natural hand movements for smooth workflow.
Clear Labeling Systems
A clear labeling system guarantees you can quickly identify and retrieve the right screws without wasting time. Use standardized fonts and sizes on waterproof, laminated labels, including screw type and key specs like diameter and length.
Color-code labels to visually separate screw categories. Place labels at eye-level on container fronts or lids for instant recognition. Opt for adjustable bins with removable dividers and writable, erasable tags to adapt as inventory changes.
Employ strong adhesive labels suitable for your storage materials, ensuring durability against grease, dust, and moisture. Maintain consistent label orientation across your system to speed scanning.
For advanced organization, add QR codes linked to digital inventories, using compatible label printers. Integrate your labels with a bin categorization system to keep similar screws separated and avoid confusion. This systematic approach keeps your screw storage efficient and easy to navigate.
Organizing Bulk Hardware for Efficiency
Although organizing bulk hardware might seem intimidating, establishing clear categorization and sorting systems can dramatically boost your efficiency. Creating a modular storage system allows for easy adaptation as your collection expands.
Start by grouping fasteners by type, size, and material. Use color-coded labels to speed identification. Opt for stackable bins or wall-mounted open-front panels to maximize space and accessibility. Sorting trays help separate small parts within compartments, enhancing retrieval.
Implementing efficient storage solutions like high-quality shelving tailored to your inventory needs can further improve organization. Keep frequently used items within easy reach and use modular storage to adapt as your collection grows.
| Strategy | Benefit |
|---|---|
| Type & size grouping | Faster identification |
| Color-coded labels | Visual clarity, fewer errors |
| Stackable bins | Space maximization |
| Wall-mounted bins | Easy access to frequent items |
| Sorting trays | Organized small parts |
Maintaining and Rearranging Your Screw Storage System
Since your screw storage system undergoes frequent use, maintaining and rearranging it regularly guarantees peak function and accessibility.
Regular maintenance and organization of your screw storage ensure optimal performance and easy access.
Start by scheduling inspections to check for looseness, corrosion, or damage, tightening any unstable parts. Regular maintenance is vital for efficiency. Clean weekly with a damp cloth and deep clean monthly to remove dust and debris without harsh chemicals.
Reorganize compartments by screw size or type, leaving space for new inventory and removing duplicates. Monitor environmental conditions to prevent rust and pest issues, using sealed containers and desiccants as needed.
- Conduct routine inspections and document findings
- Perform regular cleaning to maintain hygiene
- Reassess layout to optimize storage and retrieval
- Control humidity and pests to extend system life
Frequently Asked Questions
How Do I Prevent Screws From Rusting in Storage?
To prevent your screws from rusting, store them in a dry, well-ventilated place and use desiccants or dehumidifiers to control humidity. Choose corrosion-resistant screws or those with protective coatings like zinc plating.
Apply rust-inhibiting sprays periodically and avoid mixing them with moisture-retentive materials. Regularly inspect your storage area for dampness and clean any rust immediately with abrasive tools before reapplying protective treatments.
What’s the Best Way to Store Specialty Screws Separately?
To keep specialty screws separate, don’t put all your eggs in one basket; use compartmentalized organizer boxes or stackable drawers with adjustable dividers. Label each section clearly by size, thread, and material to avoid mix-ups.
Opt for transparent containers or color-coded lids for quick identification. Position these storage units near your workspace for easy access, and regularly audit your inventory to maintain order and prevent any screw chaos.
Can I Use Magnetic Strips for Screw Storage?
Yes, you can use magnetic strips for screw storage effectively. They securely hold metal screws, keep them visible, and save space. Just make sure your screws are magnetic (ferrous metals) because some stainless steel won’t stick.
Mount strips near your workspace for quick access, and consider plastic-coated ones to prevent scratches. Use magnetic trays alongside strips for loose screws. This solution is affordable, easy to install, and helps you stay organized.
How to Safely Transport Screw Organizers Without Mixing Contents?
You’ll want to keep your screw organizers as cozy as possible during transport. Use multi-compartment containers with secure latches and clear, sealed lids to prevent surprises inside.
Add foam inserts or dividers to keep screws from playing musical chairs. Bundle screws tightly and place organizers in padded cases or sturdy boxes with partitions. Always label compartments clearly and check closures regularly to keep everything exactly where you left it.
What Tools Help Measure Screw Sizes Quickly at Storage?
You’ll want to use thread gauges, fastener gauges, and screw pitch gauges to measure screw sizes quickly. Thread gauges match teeth to screw threads for precise pitch identification. Fastener gauges measure diameter and length efficiently.
Screw pitch gauges let you compare thread spacing instantly. Portable tools like the Pro-Bolt Progauge speed up metric bolt sizing. Printable layover charts also help when printed accurately. These tools keep your measurements reliable and quick.
Keep Storage Close to Your Workspace for Convenience
By building, buying, or borrowing smart storage solutions, you’ll simplify screw sorting and save space. Keep compartments clearly labeled, consistently categorized, and conveniently accessible to cut clutter and confusion.
Whether you choose wooden wonders or plastic practicality, prioritize practicality and portability. Regularly review, rearrange, and refresh your system to maintain maximum efficiency. With these deliberate, doable steps, you’ll dominate your DIY projects with disciplined, dependable, and delightful screw storage.