Can You Turn a Circular Saw Into a Miter Saw: 7 Steps to Follow
Miter saws are versatile tools crucial for precise angle cuts in woodworking, but investing in one might not always be feasible for every DIY enthusiast. The question arises: can you turn your existing circular saw into a miter saw for a cost-effective alternative?
According to my research, it is possible to turn a circular saw into a makeshift miter saw with just a few basic materials and some careful calibration.
The process of turning your circular saw into a miter saw requires measuring and marking the center point on the board, aligning the saw, and marking the mounting holes. After that, you can attach the saw to the board.
Today, I’ll demonstrate the step-by-step process of transforming your circular saw into a miter saw for all your woodworking needs.
How Do You Turn a Circular Saw Into a Miter Saw: Step-By-Step Guide
Based on my findings, I noted the seven steps you need to follow to turn a circular saw into a miter saw.
- Step 1: Collect the materials and tools needed
- Step 2: Measure and mark
- Step 3: Align the saw and mark the mounting holes
- Step 4: Attach the circular saw
- Step 5: Create the cutting surface
- Step 6: Angle adjustment
- Step 7: Calibration and stabilize the setup
Now, check out each step in this comprehensive guide to transform your circular saw into a miter saw.
Step 1: Collect the Materials and Tools Needed
To turn your circular saw into a miter saw, you need a few essential materials and tools. You require a circular saw, which is the primary tool in this process. To mount the saw, you will need a plywood or MDF board.
You also require a straightedge, a measuring tape, and a carpenter’s square to ensure that your cuts are precise and accurate. Additionally, you need sawhorses or a workbench to provide a stable work surface and clamps to secure the saw in place.
A screwdriver or drill is also required to tighten the screws and a pencil is required to mark the cutting surface. Remember to wear safety equipment such as safety glasses and ear protection.
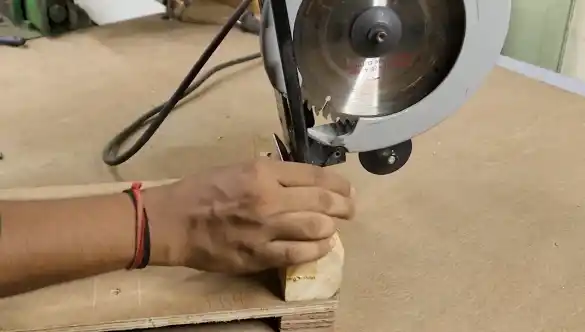
Step 2: Measure and Mark
Before you start modifying your circular saw, it is crucial to take proper safety precautions. Wear safety glasses and ear protection to safeguard yourself.
Then, measure and mark the center point on the plywood or MDF board you have prepared as the base. Using a measuring tape, find the length and width of the base of your circular saw. Once you have these measurements, divide each dimension in half to locate the center point.
Use a pencil or marker to make a clear and visible mark at this point on the board. It’s important to be precise and accurate when measuring and marking, as any deviation can affect the performance of your modified saw.
Take your time to double-check your measurements and marks before proceeding to the next step.
Step 3: Align the Saw and Mark the Mounting Holes
Once you have marked the central point, place the circular saw on the board and make sure the circular saw blade is centered on the marked point. Ensure that the front of the saw’s base is flush with the board’s front edge for stability.
After you are confident of your saw’s position, mark the mounting holes on the base of the saw onto the board to indicate where to attach the screws.
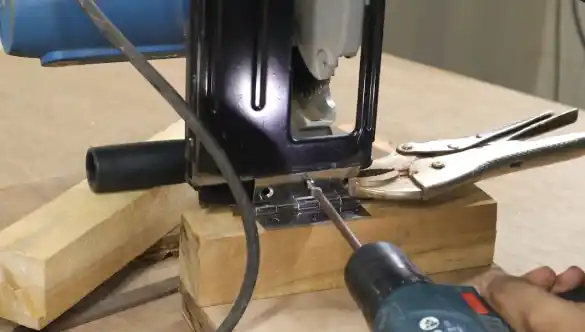
Step 4: Attach the Circular Saw
Now, attach the circular saw to the plywood or MDF board using screws, ensuring a secure fastening. Start by positioning the circular saw on the board and aligning it with the previously marked mounting holes. Make sure the blade is facing upwards and centered on the board.
Take the screws and insert them through the mounting holes, driving them into the board until they’re tight. Use a screwdriver or a drill with a screwdriver attachment to ensure a firm attachment. Be careful not to overtighten the screws, as this could damage the board or the saw.
Once all the screws are in place, double-check the saw’s stability by gently shaking it. If it feels loose, tighten the screws further until the saw is securely fastened to the board.
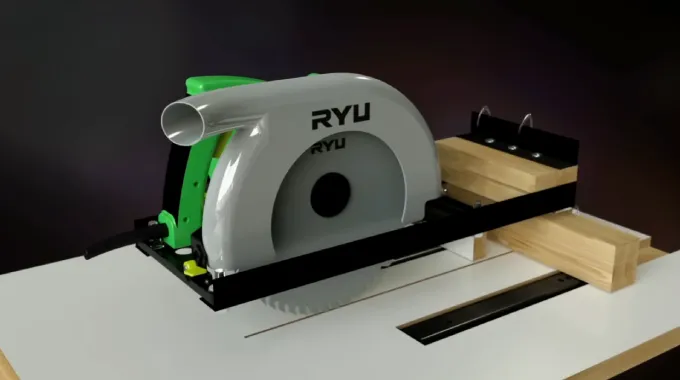
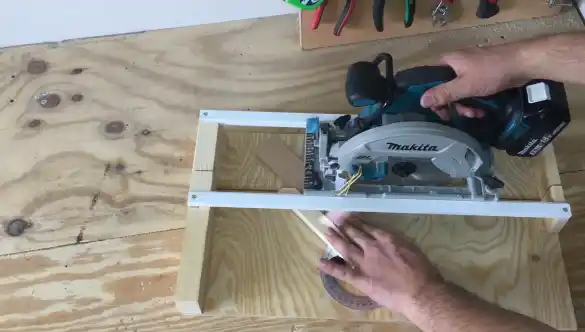
Step 5: Create the Cutting Surface
To create the cutting surface for turning a circular saw into a miter saw, secure a plywood or MDF board and attach additional pieces of wood as wings for support.
Start by choosing a sturdy and thick plywood or MDF board that’s large enough to accommodate your workpieces. Place the circular saw on one end of the board and align it with the edge. Use clamps or screws to secure the saw, ensuring it’s stable and won’t move during operation.
Next, attach additional pieces of wood on both sides of the circular saw, perpendicular to the board, to act as wings. These wings will support longer workpieces and prevent them from falling off the cutting surface. Make sure the wings are properly aligned and securely attached to the board.
Once everything is in place, you now have a cutting surface ready for use as a makeshift miter saw.
Step 6:Angle Adjustment
Adjusting the angle is crucial in transforming your circular saw into a miter saw. You’ll need to use the swiveling platform. Start by loosening the locking knob or lever that secures the platform in place.
Once loosened, you can tilt the platform to the desired angle. Most circular saws have markings or detents that allow for precise angle adjustments, making it easier to set the platform at common angles like 45 degrees.
After setting the angle, tighten the locking mechanism to secure the platform in place. It’s essential to ensure that the platform is securely locked to prevent any movement during the cutting process.
Step 7: Calibration and Stabilize the Setup
To ensure a precise and stable setup when converting your circular saw into a miter saw, securely fasten the modified saw to a stable work surface using clamps or fasteners.
Choose a workbench or sawhorse that provides a solid foundation and won’t wobble or shift during use. Ensure the clamps or fasteners are tightened securely, ensuring the saw doesn’t move or vibrate during cutting.
Additionally, using a carpenter’s square to check that the used blade is perpendicular to the cutting surface is essential. Adjust the settings of the saw if necessary to achieve the desired angle.
After completing these steps, your circular saw has now been transformed into a miter saw. Do a test cut before you tackle your project to ensure accuracy, double-check your measurements, and prioritize safety.
Can you achieve precise miter cuts by converting your circular saw into a miter saw?
Achieving precise miter cuts is possible by converting your old circular saw into a miter saw with careful attention to detail and proper alignment.
The key to achieving accuracy lies in aligning the adjustable rails with your circular saw and ensuring a secure attachment. Take the time to fine-tune the setup and conduct test cuts on scrap material to validate the precision.
However, it’s important to note that while this DIY approach can serve well for small projects, the level of precision may not match that of a dedicated miter saw, especially for intricate or frequent woodworking tasks.
Can you make bevel cuts with a circular saw converted to a miter saw?
You can potentially achieve bevel cuts by turning your circular saw into a miter saw with the right adjustments and attachments. To make bevel cuts, you’ll need an attachment that tilts the saw at the desired angles.
This attachment should be compatible with your circular saw and provide the necessary flexibility to adjust the rails. However, it’s important to note that the range and precision of bevel cuts may be limited compared to dedicated compound miter saws.
Regularly check the stability and alignment of your makeshift miter saw to ensure safety and optimal performance when attempting bevel cuts.
Transform Your Circular Saw into a Versatile Miter Saw and Elevate Your Woodworking Experience
When you want to turn your circular saw into a makeshift miter saw, follow the steps that I’ve explained in this comprehensive guide.
With a few basic materials, careful calibration, and attention to detail, you can enhance the versatility of your circular saw for precise angle cuts in woodworking. Always prioritize safety while operating this woodworking machine by wearing the necessary protective gear and conducting test cuts to validate the accuracy of your setup.
While this DIY approach provides a cost-effective alternative, be aware of its limitations, especially in comparison to dedicated miter saws for more intricate or frequent woodworking tasks. Now, unleash the potential of your circular saw with confidence.